Table of Contents
Advertisement
Quick Links
Advertisement
Table of Contents

Related Manuals for SUNSTONE SUNCHSZ30


Summary of Contents for SUNSTONE SUNCHSZ30
- Page 1 Read all instructions before you operate your grill. Save these instructions! Leave this manual To installer or person assembling grill: with grill for future reference. Keep this manual for future reference. To consumer: www.sunstonemetalproducts.com CERTIFIED ITEM NO. SUNCHSZ30...
- Page 2 Welcome & Congratulations Congratulations on your purchase of a new Sunstone Gas Hybrid Charcoal Wood Burning Grill! We are very proud of our product and we are completely committed to providing you with the best service possible. Your satisfaction is our #1 priority. Please read this manual carefully to understand all the instructions about how to install, operate and maintain for optimum performance and longevity.
- Page 3 INDEX DIRECTORY HAZARDS & WARNING SIGNS ATTENTION: Indicates a potentially hazardous situation which, if not avoided, may result in minor or moderate personal injury, or property damage. WARNING: Indicates an imminently hazardous situation which, if not avoided, will result in death or serious injury.
- Page 4 START-UP CHECKLIST ATTENTION: Never operate the grill unattended. EXPLOSION: When Igniting the Grill – Always keep the Hood Open. “FIRST TIME STARTUP CHECKLIST” Transformer Electrical Plug is properly installed. Installation of the proper gas type and regulator settings. ...
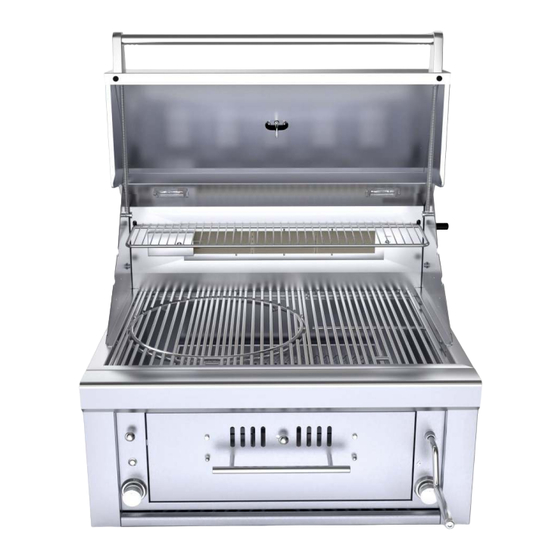
- Page 5 GRILL PARTS– PARTS INDEX PAGE 1...
- Page 6 PAGE 2 GRILL PARTS – PARTS DIAGRAM...
-
Page 7: Gas Line Connection
PAGE 3 GRILL INSTALLATION – STEP BY STEP GUIDE : Use only with a Ground-Fault Circuit Interrupter - GFCI protected Outlet LIVE CIRCUIT with this grill. : Use only extension cords approved for outdoor use marked with W-A and VOLTAGE rated for the power of this appliance. -
Page 8: Install The Battery
GRILL INSTALLATION – STEP BY STEP GUIDE PAGE 4 4. Slide Grill in Place The grill is specially designed with an internal built in hanger lip located at the Right, Left and Back sides. The grill lip allows it to hang by the three supported edges on the right, left and back. - Page 9 PAGE 5 GRILL INSTALLATION – PRODUCT DETAILS Technical Measurements – See measurement box next page If the cut-out is smaller than what ours is shown, or you are installing grill into cabinet structure you may need to refer to these engineer dimensions specifically the grill firebox dimensions. See next page for Dimension Table.
- Page 10 GRILL INSTALLATION – CUT-OUT DETAILS PAGE 6 : Never build an enclosure under the Grill or partition side walls, the Grill ATTENTION must be Free Hanging supported by the countertop only! Must have clear access to underside of Grill within reach of at least Two Vents. 1.
- Page 11 GRILL INSTALLATION – OVERHEAD STRUCTURE PAGE 7 Overhead Structure Definition: Structure built above Appliance that is sometimes attached to the home’s exterior outside wall or roof and there is a Minimum of “Two” adjacent sides which are open with outside exposure. ATTENTION: All Gas Grill Installations MUST HAVE MINIMUM TWO AIR-FLOW VENTS, either in ELEVATED POSITION for Natural Gas or LOWERED POSITION for Liquid Propane.
- Page 12 PAGE 8 GRILL INSTALLATION – ENCLOSED INSTALLATION Clearances to Combustible Construction: Minimum of 24” from the sides and rear of grill must be maintained to adjacent vertical combustible construction above the countertop level. You should take in account that there is a large volume of heat, and smoke will exhaust from the rear of the grill.
- Page 13 PAGE 9 GRILL INSTALLATION – ENCLOSED INSTALLATION Enclosed Installation Definition: Structure built above Appliance that is attached to the home’s exterior outside wall, roof or is inside a separate structure like outdoor room and there is a Minimum of “One” Side open with outside exposure. ATTENTION: All Gas Grill Installations MUST HAVE MINIMUM TWO AIR-FLOW VENTS, either in ELEVATED POSITION for Natural Gas or LOWERED POSITION for Liquid Propane.
- Page 14 GAS SETUP – INSTALLATION OVERVIEW PAGE 10 CAUTION: Gas conversion kits are available from Customer care by dialing 888-934-9449. When ordering gas conversion kits, have the model number, and the type of gas (natural or LP) ready. Use only the gas pressure regulator supplied with this appliance. This regulator is set for an outlet pressure of 11 inches water column.
- Page 15 GAS SETUP – LARGE CAPACITY LP TANKS PAGE 11 ATTENTION: If you have a Side Yard Propane Tank, you MUST have additional Medium Pressure Regulator located at the Grill. If you do not serious bodily harm may result or damage to the grill and island structure from HIGH Heat.
-
Page 16: Follow Instructions
GAS SETUP – MEDIUM CAPACITY LP TANKS PAGE 12 Medium Capacity LP Tank The Type 1 connection system has the following features: The system will not allow gas to flow until a positive connection has been made. NOTE: The cylinder control valve must be turned off before any connection is made or removed. - Page 17 GAS SETUP – NATURAL GAS INSTALLATION PAGE 13 NG Gas Hook-up The Natural Gas grill is designed to operate on Natural Gas ONLY, at a pressure regulated at 7”water column (W.C.) equipped with the correct natural gas orifices on the valves and a NG medium pressure regulator on the supply line located near the grill and regulated at the residential meter.
-
Page 18: Grill Start-Up - Lighting The Grill
PAGE 14 GRILL START-UP – LIGHTING THE GRILL OPEN HOOD! 1. Stack charcoal briquettes or wood into a pyramid-shaped pile on top of the charcoal grate or pan. We recommend using 2 pounds (approximately 30 briquettes) to start your fire, adding more as needed. - Page 19 PAGE 15 GRILL START-UP – ALTERNATIVE LIGHTING Optional Charcoal Starters are not included 1. Lighter Fluid (DO NOT USE IN CONJUNCTION WITH GAS BURNERS) Serious Injury or Fire will result! 2. Electric Charcoal Lighter Electric charcoal lighters look like an elongated outline of a Ping-Pong paddle.
- Page 20 GRILL START-UP – USING THE GRILL Zone Cooking The Sunstone 30” Hybrid Grill has a single massive cooking zone controlled specifically by how the top adjustable rack is positioned, and the front air intake slider is adjusted. Depending on how you independently configure these components, will give you control over diverse types of cooking, including Smoking, Indirect, Slow Cooking and Direct Cooking.
- Page 21 PAGE 17 GRILL START-UP – ROTISSERIE SETUP Rotisserie assembly can be purchased Name Qty. Part No. individually either by individual item, or in a 3 Burner Rotisserie set P-RK-3B complete set. The rotisserie assembly can also be used with or without an infra-red back burner.
- Page 22 GRILL START-UP – ROTISSERIE COOKING PAGE 18 WARNING: Never stand with your head directly over the Grill when preparing to light the Rotisserie burner, to prevent possible bodily injury. Never operate Rotisserie Burner with main (other) burner(s) “ON”. Warming Rack must be removed when Rotisserie Burner is ON. Rotisserie Cooking Tips Rotisserie is mostly used to cook large piece of meat and poultry to assure slow, even cooking.
- Page 23 GRILL START-UP – IR BURNER LIGHTING PAGE 19 Open Hood TIP: If IR-Burner does not stay lit, try running the bottom burners first for 10-15 minutes, this will heat the Thermocouple Ensure Burner Control and help the IR-Burner stay lit. Knobs are in the OFF position 4.
- Page 24 PAGE 20 GAS CONVERSION – REQUIRED TOOLS IMPORTANT! The Best time to perform this conversion is before grill has been installed into island enclosure. As you will need access Multiple parts of the Back Underside of Grill where Gas Line hooks up and two positions of Flare Adapters.
- Page 25 PAGE 21 GAS CONVERSION – REVEAL FIREBOX 1. Reveal Grill Firebox Remove from the Grill ALL Burn Trays, Cooking Grates, and clean out any residue. Turn the Burn Tray Crank so that the Burn Tray Rack is placed in the lowest position. Now look towards the back of each burner position Left and Right, you will notice a Flare Adapter coming in though the back wall panel.
- Page 26 PAGE 22 GAS CONVERSION – FLARE ADAPTER 2. Unscrew Brass Flare O-Ring 3. Stow-Away the O-Ring Using the recommended “Needle Nose Plyers” – Important! Be sure to slide the brass O-Ring, if unscrew the brass O-Ring which is securing the O-Ring falls below it may be very difficult to pull Flare Adapter tightly in place, with its nose end it back up as it is a very small area with limited...
- Page 27 PAGE 23 GAS CONVERSION – NG REGULATOR 6. Prep #50 Drill Bit & Power Drill 7. Drill the Adapter Orifice Secure the #50 size Drill-Bit and install it into the Aligning Drill to Flare Adapter, Push the Spinning Power Drill. While grasping the Elbow of the Drill into the center of Orifice Hole approx.
- Page 28 PAGE 24 GAS CONVERSION – IR BURNER IR BURNER GAS CONVERSION The following section is for converting the Sunstone 30” Hybrid Grill Back IR Burner for either LP to NG or NG to LP. 10. Locate Back Right Vent Panel Remove panel with 4 screws, locate Brass Flare Adapter mounted on the inside compartment.
-
Page 29: Troubleshooting
PAGE 25 TROUBLE SHOOTING Q. LED Light is not functioning while interior lights are ON Likely your LED Light has malfunctioned due to the grill being overheated, or there may be a loose wire on the internal control circuit board. You can access these components by sliding the grill out from your island approx. -
Page 30: Grill Warranty
6. The cost of service calls to diagnose trouble; or Removal or re-installation cost. This warranty applies to the original purchaser with invoice or proof of purchase and covers Sunstone products intended for personal, family or household usage only. It does not apply to surface rust, corrosion, oxidation or discoloration, which may occur due to moisture or overheating, unless the affected component becomes inoperable.
Need help?
Do you have a question about the SUNCHSZ30 and is the answer not in the manual?
Questions and answers