Table of Contents
Advertisement
Quick Links
Advertisement
Table of Contents

Related Manuals for Alpha ESS eSTORE-BAT-10.3


Summary of Contents for Alpha ESS eSTORE-BAT-10.3
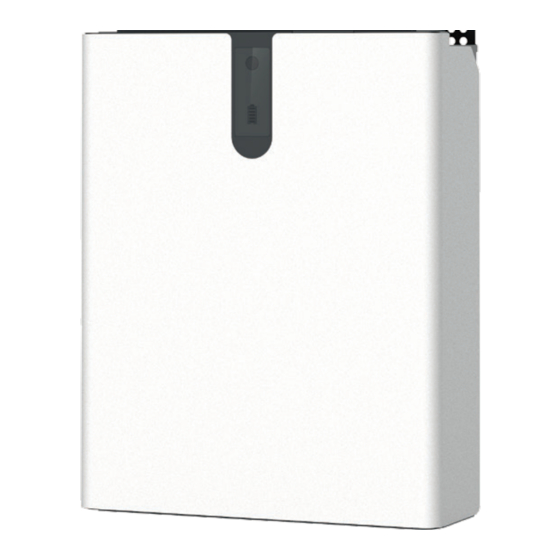
- Page 1 Installation Manual Battery Module eSTORE-BAT-10.3 (AU) V04...
-
Page 3: Imprint
Web: www.alpha-ess.com Add: JiuHua Road 888, High-Tech Industrial Development Zone 226300 Nantong City, Jiangsu Province Australia Alpha ESS Australia Pty. Ltd. Tel.: +61 1300 968 933 E-mail: australia@alpha-ess.com Web: www.alpha-ess.com.au Add: Suite 1, Level 1, 530 Botany Road, Alexandria, NSW, 2015 ______________________________________________________________________ Alpha ESS Co., Ltd. -
Page 4: Copyright Statement
Copyright Statement Copyright Statement This manual is under the copyright of Alpha ESS Co., Ltd, with all rights reserved. Please keep the manual properly and operate in strict accordance with all safety and operating instructions in this manual. Please do not operate the system before reading through the manual. -
Page 5: Table Of Contents
General ....................11 Restricted Locations ................11 Barrier to habitable rooms ............... 12 Installation ..................13 3. Switch On/Off and Display ..............23 Switch On/Off ................... 23 LED Display ..................23 ______________________________________________________________________ Alpha ESS Co., Ltd. Page 3 of 31... - Page 6 Limitation of Liability ..............27 7. Routine Maintenance ................28 Maintenance Plan ................28 Operating Environment ................28 Equipment Cleaning ................28 Cable, Terminal and Equipment Inspection ..........28 Notes ....................28 ______________________________________________________________________ Alpha ESS Co., Ltd. Page 4 of 31...
-
Page 7: Introduction
Introduction 1. Introduction Features The eSTORE-BAT-10.3 battery pack has the following features: Photovoltaic system: This battery pack is designed for household photovoltaic systems. Battery management system (BMS): The battery packs built-in BMS monitors its operation and prevents the battery from operating outside design limitations. -
Page 8: Protection Of Warning Sign
The installation and maintenance work should be handled with professional person/s, who is/are knowlegeable about batteries. Installation and maintenance reference to this installation and maintenance manual. Do not expose to sparks or flame ______________________________________________________________________ Alpha ESS Co., Ltd. Page 6 of 31... -
Page 9: Setting Of Warning Sign For Safety
DC side is disconnected. Therefore, touching the output of the battery is strictly prohibited. The Inverter maintains fatal voltage even both the DC or AC side are disconnected, so it must be tested by multimeter for safety before operation. Battery Safety Datasheet ______________________________________________________________________ Alpha ESS Co., Ltd. Page 7 of 31... -
Page 10: General Precautions
Do not put any heavy objects on top of the system. Ø Ø Do not damage the system with sharp objects. Ø Do not install or operate the system in potentially explosive atmospheres or areas of high humidity. ______________________________________________________________________ Alpha ESS Co., Ltd. Page 8 of 31... - Page 11 Ø Secure the system to prevent tipping with restraining straps in your vehicle. Ø The transportation of AlphaESS eSTORE-BAT-10.3 must be made by the manufacturer or an instructed personal. These instructions shall be recorded and repeated. Ø A certified ABC fire extinguisher with minimum capacity of 2kg must be carried along when transporting.
-
Page 12: Parts List
The maintenance procedures relating to the product have not been followed to an acceptable standard; • Force majeure (violent or stormy weather, lightning, overvoltage, fire etc.); • Damages caused by any external factors. ______________________________________________________________________ Alpha ESS Co., Ltd. Page 10 of 31... -
Page 13: Installation
This Manual introduces the basic steps how to install and operate AlphaESS eSTORE- BAT-10.3 eSTORE-BAT-10.3 is a sealed component with no access to battery terminals or cell components within module. eSTORE-BAT-10.3 contains a Bi-pole DC isolator, which conforms to IEC 60947. It has... -
Page 14: Restricted Locations
(ii) 1200 mm above the ESTORE-BAT-10.3; and (iii) to the extent of the bottom of the ESTORE-BAT-10.3 Where the top of the ESTORE-BAT-10.3 is within 1200 mm of the ceiling or structure above the ESTORE-BAT-10.3, the ceiling or structure surface shall be suitably non-combustible for an area of 600 mm past the extremities of the ESTORE-BAT-10.3. -
Page 15: Installation
Note: The box must be placed in the direction of the label and only remove the packaging in upwards direction. Removing the packaging in other directions is wrong. Step 2: Fixed the bracket on the battery with M5*10 screws. ______________________________________________________________________ Alpha ESS Co., Ltd. Page 13 of 31... - Page 16 Fixed the battery on the wall with M8*60 screws. If there are more than two batteries, please skip to Step 24. Step 4: Remove the Cable Box and remove the front panel. ______________________________________________________________________ Alpha ESS Co., Ltd. Page 14 of 31...
- Page 17 7 cm. Fixed cable box bracket on the wall with 4 x M8*60 and 4 x M6 gaskets. Step8. Remove the positioning screws. Step9. Fixed the cable box on cable box bracket and lock the cable box with screws. ______________________________________________________________________ Alpha ESS Co., Ltd. Page 15 of 31...
- Page 18 Step14. Install the Wi-Fi module and secure it with 2 x M5*10 screws. Note: Wi-Fi module should be installed on the left side of the inverter bracket. ______________________________________________________________________ Alpha ESS Co., Ltd. Page 16 of 31...
- Page 19 That is, for the farthest battery from the inverter, the DIP switch 2 and 3 of the battery is on, and the other numbered battery DIP switches are all downwards. ______________________________________________________________________ Alpha ESS Co., Ltd. Page 17 of 31...
- Page 20 Fixed with 4 x M3*8 screws. Step 20. Install the power plugs between the battery and the cable box. Note: Ensure that the color should be correct and the power plugs should be plugged correctly. ______________________________________________________________________ Alpha ESS Co., Ltd. Page 18 of 31...
- Page 21 Note: The gray wire interface is the Backup interface, and the cable is provided by the customer. The wiring is as shown in the figure. Step 22. Install the 2*MC4 terminals in a correct sequence and install them in the specified position of the inverter. ______________________________________________________________________ Alpha ESS Co., Ltd. Page 19 of 31...
- Page 22 Step 23. After the system configuration function is confirmed, install the battery, cable box, and inverter appearance parts in the direction shown. Note: The inverter appearance parts need to be fixed with 2 x M5*10 screws on both sides. ______________________________________________________________________ Alpha ESS Co., Ltd. Page 20 of 31...
- Page 23 Step 26: Open the front panel of the farthest battery from the inverter and remove DIP baffle. Set the DIP switch. 1. If there is only one BAT, DIP switch of BAT should be as below: ______________________________________________________________________ Alpha ESS Co., Ltd. Page 21 of 31...
- Page 24 Your Smart Energy Installation 2. If there are two or more than two BAT, DIP switch of BAT should be as below: ______________________________________________________________________ Alpha ESS Co., Ltd. Page 22 of 31...
-
Page 25: Switch On/Off And Display
Figure 3.1 LED Display LED Display In normal condition, LED display indicates the SOC as the figure below: LED Ring Description SOC<5% Standby: Green light flickering 1 s 5%=<SOC<25% Work: Green light flickering 10s 25%=<SOC<50% ______________________________________________________________________ Alpha ESS Co., Ltd. Page 23 of 31... -
Page 26: Error And Protection Code
Protection Code LED Ring Protection Code LED Display Description Temperature difference High temperature Low-temperature discharge Over-current charge Green light flickering every 3 seconds. Over-current discharge Cell overvoltage Cell under voltage Low-temperature charge ______________________________________________________________________ Alpha ESS Co., Ltd. Page 24 of 31... -
Page 27: Error Code
Error 11 version Call installation for repair. inconsistent Error 12 Multi master Restart all batteries over Power off the battery and turn on Error 13 temperature the battery after 30-40 minutes ______________________________________________________________________ Alpha ESS Co., Ltd. Page 25 of 31... -
Page 28: Emergency Situations
5. Emergency Situations AlphaESS cannot guarantee ESTORE-BAT-10.3 absolute safety. Fire In case of fires, make sure that the following equipment is available near the system. -
Page 29: Warranty
The maintenance procedures relating to the product have not been followed to an acceptable standard; Ø Force majeure (violent or stormy weather, lightning, overvoltage, fire etc.). Ø Damages caused by any external factors. ______________________________________________________________________ Alpha ESS Co., Ltd. Page 27 of 31... -
Page 30: Routine Maintenance
Check that the grounding of the equipment is good and the grounding resistance is less than 10 ohms. Notes After the equipment are out of operation, the following notes should be paid attention to ______________________________________________________________________ Alpha ESS Co., Ltd. Page 28 of 31... - Page 31 (that is, the batteries has not been charged for two weeks or longer) for a long time, in case of over discharge. Please contact us in time if there are any conditions that could not be explained in the manual. ______________________________________________________________________ Alpha ESS Co., Ltd. Page 29 of 31...
Need help?
Do you have a question about the eSTORE-BAT-10.3 and is the answer not in the manual?
Questions and answers