
Related Manuals for Siemens HB532AB.0


Summary of Contents for Siemens HB532AB.0
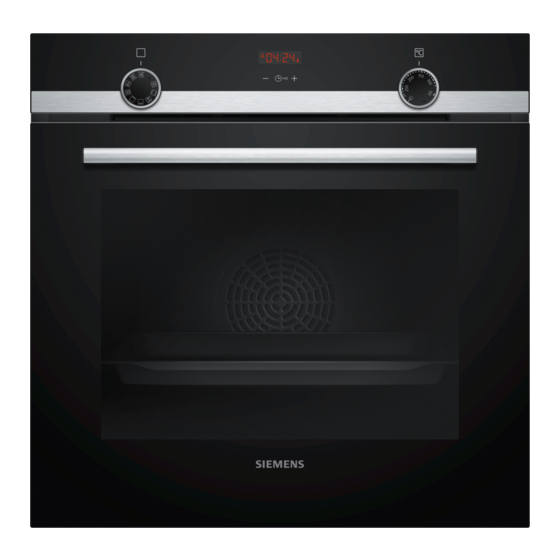
- Page 1 Oven HB532AB.0 User manual and installation instructions Register your product on My Siemens and discover exclusive services and offers. siemens-home.bsh-group.com/welcome The future moving in. Siemens Home Appliances...
-
Page 2: Table Of Contents
en Safety ¡ Check the appliance after unpacking it. Do Table of contents not connect the appliance if it has been damaged in transit. 1.2 Intended use USER MANUAL Read the information on intended use to en- Safety .............. 2 sure that you use the appliance correctly and Preventing material damage ......... - Page 3 Safety en ▶ Switch off the appliance and unplug it from ▶ Keep children at a safe distance. the mains or switch off the circuit breaker If there is water in the cooking compartment in the fuse box. when it is hot, this may create hot steam. Loose food remnants, fat and meat juices ▶...
-
Page 4: Preventing Material Damage
en Preventing material damage ▶ "Call Customer Service." → Page 19 1.5 Halogen bulb ▶ Repairs to the appliance should only be Follow these instructions for appliances with carried out by trained specialist staff. halogen lamps. WARNING ‒ Risk of burns! WARNING ‒ Danger: Magnetism! The bulbs in the cooking compartment get Permanent magnets are used in the control very hot. -
Page 5: Environmental Protection And Saving Energy
Environmental protection and saving energy en 3 Environmental protection and saving energy Help protect the environment by using your appliance Open the appliance door as little as possible during in a way that conserves resources and by disposing of operation. reusable materials properly. ¡... -
Page 6: Familiarising Yourself With Your Appliance
en Familiarising yourself with your appliance 4 Familiarising yourself with your appliance Familiarise yourself with the parts of your appliance. Buttons and display The buttons are touch-sensitive surfaces. To se- 4.1 Controls lect a function, simply press lightly on the relev- ant field. You can use the control panel to configure all functions The display shows symbols for active functions of your appliance and to obtain information about the... - Page 7 Familiarising yourself with your appliance en Symbol Type of heating What it's used for/how it works Hot air gentle Cook selected dishes gently on one level without preheating. The fan distributes the heat from the ring-shaped heating element in the back wall evenly around the cooking compartment.
-
Page 8: Accessories
en Accessories When the appliance is in operation, the self-cleaning 4.5 Cooking compartment surfaces absorb splashes from roasting or grilling and The functions in the cooking compartment make your break them down. appliance easier to use. If the self-cleaning surfaces no longer clean themselves adequately during operation, heat up the cooking com- Shelf supports partment specifically to the right temperature. -
Page 9: Before Using For The First Time
You will find a comprehensive range of products for your appliance in our brochures and online: www.siemens-home.bsh-group.com Accessories vary from one appliance to another. When Baking tray Slide the tray, e.g. the universal pan, purchasing accessories, always quote the exact E.g. -
Page 10: Basic Operation
en Basic operation Wait until the cooking compartment has cooled Type of heat- 3D hot air down. Clean the smooth surfaces with soapy water and a Temperature Maximum dish cloth. Cooking time 1 hour Clean the accessories using soapy water and a dish cloth or soft brush. -
Page 11: Time-Setting Options
Time-setting options en 9 Time-setting options Your appliance has different time-setting options, with Use the button to change the timer duration. ▶ which you can control its operation. a The appliance applies the change after a few seconds. 9.1 Overview of the time-setting options Cancelling the timer With the button, select the different time-setting op-... -
Page 12: Childproof Lock
en Childproof lock 10 Childproof lock You can secure your appliance to prevent children 10.1 Activating and deactivating the from accidentally switching it on or changing the set- childproof lock tings. Requirement: The function selector must be set to the Note: After a power cut, the childproof lock is deactiv- "Off"... - Page 13 Cleaning and servicing en Area Suitable cleaning agents Information Door handle ¡ Hot soapy water To avoid permanent stains, remove descaling agents from the door handle immediately. Door seal ¡ Hot soapy water Do not remove or scrub. Cooking compartment Area Suitable cleaning agents Information Enamel surfaces ¡...
-
Page 14: Cleaning Aid Humidclean
en Cleaning aid humidClean This prevents stains that cannot be removed. Once the appliance has cooled down, wipe the Remove any objects from the cooking compartment. cooking compartment with a damp cloth. The cooking compartment must be empty. Note: Reddish marks may appear on the self-clean- Use the function selector to set 3D hot air. -
Page 15: Appliance Door
Appliance door en Push the rail into the front socket until the rail 13.2 Attaching the shelf supports also rests against the cooking compartment wall, Notes and then press this downwards . ¡ The rails only fit on the right or left. ¡... - Page 16 en Appliance door Close the appliance door fully . Grab hold of the Open the locking levers on the left- and right-hand appliance door with both hands (on the left and hinges . right) and pull it upwards and out . a The locking levers are open.
- Page 17 Appliance door en If necessary, you can remove the condensate Slide the inner pane into the left- and right-hand trough for cleaning. retainers . Open the appliance door. ‒ Tilt the condensate trough upwards and remove ‒ Push the inner pane upwards until it is in the left- and right-hand retainers ...
-
Page 18: Troubleshooting
en Troubleshooting 15 Troubleshooting You can rectify minor faults on your appliance yourself. WARNING ‒ Risk of electric shock! Read the troubleshooting information before contacting Incorrect repairs are dangerous. after-sales service. This will avoid unnecessary costs. Repairs to the appliance should only be carried out ▶... -
Page 19: Disposal
Disposal en Pull out the halogen bulb without turning it . Insert the new halogen lamp and press it firmly into the socket. Make sure the pins are positioned correctly. Depending on the appliance model, the glass cover may have a sealing ring. Put the sealing ring in posi- tion. -
Page 20: How It Works
en How it works 18 How it works Here, you can find the ideal settings for various types ¡ Turn the poultry, meat or fish after approx. 1/2 to of food as well as the best accessories and cookware. 2/3 of the time listed. We have perfectly tailored these recommendations to ¡... - Page 21 How it works en 18.4 Food selection Food Accessories/cookware Shelf pos- Type of Temperature Cooking ition heating in °C/grill set- time in mins ting Sponge cake, delicate Loaf tin 150-170 60-80 Sponge cake, 2 levels Loaf tin 140-150 70-85 Fruit tart or cheesecake with shortcrust Springform cake tin, 170-190 55-80...
- Page 22 en How it works Yoghurt Food Accessories/cookware Shelf position Type of Temperature in Cooking heating °C time in mins Yoghurt Individual moulds Cooking compartment 1. 50 floor 2. Lamp 2. 8–9 hrs Preheat the appliance. ¡ Baking tins/dishes on the wire rack 18.6 Test dishes First wire rack: Level 3 These overviews have been produced for test institutes...
-
Page 23: Installation Instructions
Installation instructions en Food Accessories/cookware Shelf pos- Type of Temperature in Cook- ition heating °C ing time in mins Hot water sponge cake Springform cake tin, 160–170 30–35 diameter 26 cm Hot water sponge cake, 2 levels Springform cake tin, 3 + 1 150–160 35–50 diameter 26 cm... - Page 24 en Installation instructions ¡ If the tall unit has another back panel in addition to 19.2 Appliance dimensions the element back panels, this must be removed. You will find the dimensions of the appliance here ¡ Only fit the appliance up to a height which allows accessories to be easily removed.
- Page 25 Installation instructions en Screw the appliance into place. Electrically connecting an appliance without a protective contact plug Note: Only a licensed professional may connect the ap- pliance. Damage caused by incorrect connection is not covered under the warranty. An all-pole isolating switch must be integrated into the permanent electrical installation according to the install- ation regulations.
- Page 28 BSH Hausgeräte GmbH Carl-Wery-Straße 34 81739 München GERMANY www.siemens-home.bsh-group.com Manufactured by BSH Hausgeräte GmbH under the trademark licence of Siemens AG *9001583820* 9001583820 (000825)
Need help?
Do you have a question about the HB532AB.0 and is the answer not in the manual?
Questions and answers