
Related Manuals for SIIG CE-H26F11-S1


Summary of Contents for SIIG CE-H26F11-S1
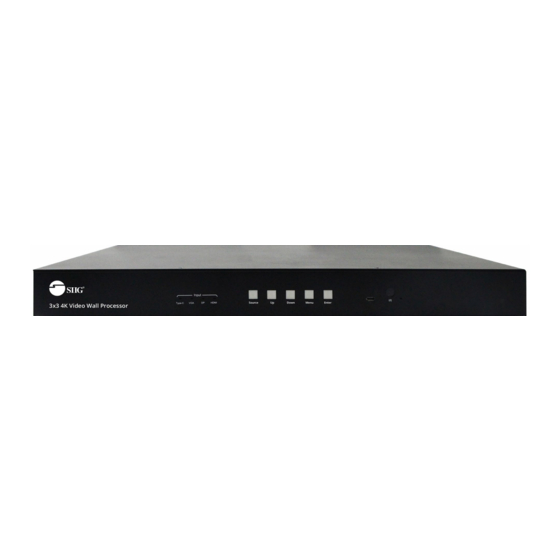
- Page 1 3x3 4K Video Wall Processor with USB-C / DP / VGA / HDMI User Manual 04-1297A P/N CE-H26F11-S1...
-
Page 2: Table Of Contents
Dear Customer Thank you for purchasing this product. For optimum performance and safety, please read these instructions carefully before connecting, operating or adjusting this product. Please keep this manual for future reference. Directory 1. FEATURES ........................... 3 2. NOTICE ............................3 3. -
Page 3: Features
7.5.7 EDID ..........................27 7.5.8 Audio output setting ....................... 27 7.5.9 Audio input setting ......................28 7.5.10 Network interface ......................28 7.5.11 Reset ........................... 29 7.5.12 Password ........................29 8. RS232 CONTROL ........................30 9 FIRMWARE UPDATE ........................ 30 9.1 MCU update ........................30 9.2 GUI Update ........................ -
Page 4: Specifications
3. SPECIFICATIONS Operating Temperature Range 0 to +40°C (32 to +104°F) Operating Humidity Range 5 to 90 % RH (no condensation) Input Video Signal 0.5-1.0 volts p-p Input DDC Signal 5 volts p-p (TTL) Video Format Supported Ultra HD TV/FHDTV: 4K@30Hz/1080P Audio Format Supported LPCM 16bit 24bit 44.1KHz,48KHz Input ports... -
Page 5: Panel Descriptions
5. PANEL DESCRIPTIONS Front Panel Input status light: the selected source has green light Source: Short press to select source from Type-C→VGA→DP→HDMI Input Up: Long press to choose device setting in the OSD menu Down: Long press to choose device setting in the OSD menu Menu/Left: Long Press to return to the main menu, short press to back to previous menu Enter/Right: Short press to enter the sub-menu, if there is no sub menu, short press it to confirm the setting selection... -
Page 6: Connecting And Operating
6. CONNECTING AND OPERATING 1) Connect the sources into the video wall controller and Press the button on the remote, then choose the input Signal (USB TYPE-C; VGA; DP; 2 HDMI in). 2) Connect HDMI OUT to display equipment. 3) Power on the Video Wall Controller. 4) Control the Video Wall Controller by Panel button / Remote /RS232 Command. - Page 7 6x4 Video Wall Displaying...
-
Page 8: Control Instruction
7. CONTROL INSTRUCTION 7.1 Remote Control 1. Power on/off 2. Mute 3. Source switching 4. Switch signal source of IN1 (TYPE C) 5. Switch signal source of IN2 (VGA) 6. Switch signal source of IN3 (DP) 7. Switch signal source of IN4 (HDMI) 8. -
Page 9: Video Switching Operation
7.2 Video switching operation Press the "Source" button to select the input from Type-C→VGA→DP→HDMI. Note: 1. The video switching OSD interface only shows nine output channels and the current input signal channels, and it can only switch one input source to all output channels when the input and output are both connected to the device. -
Page 10: Video Wall Setting
Video switching interface 7.2.2 Video Wall Setting Press the "Left/Menu" on the panel to enter the "Video Wall" menu, "Preset" : Including 17 kinds of common scenes such as 2x2, 1x4,4x1,4x2 and so on, The selected one has a "@" to mark. "Set Up": Press the "Right/Enter"... -
Page 11: Mirror
Preset video wall mode Video wall set up 7.2.3 Mirror Press the "Left/Menu" on the panel to enter the "Mirror" menu, Press the "Up" or "Down" on the panel to select, then press "Enter" to confirm, The selected one has a "@" to mark. "Normal"... -
Page 12: Rotate
Mirror interface 7.2.4 Rotate Press the "Left/Menu" on the panel to enter the "Rotate" menu, Each output image support 180degree rotation, select "Yes" or "No" to set up, The selected one has a "@" to mark. Rotate interface... -
Page 13: Edge
7.2.5 Edge Press the "Left/Menu" on the panel to enter the "Edge Set" menu, Press the "Up" or "Down" on the panel to select, then press "Enter" to confirm, The selected one has a "@" to mark. "X" represents the margin setting between the horizontal displays, each image is divided into 302 units. -
Page 14: Format
7.2.6 Format Press the "Left/Menu" on the panel to enter the "Format" menu, Format including 4K30; 1080P@60; 720P@60; 2560x1440; 1920x1200; 1366x768 and Auto for each output or all outputs to choose by pressing the "Up" or "Down" button, press "Enter" to confirm the selection, Default is Auto format, The selected one has a "@"... -
Page 15: Audio Setting
Default is "4k30hz" EDID interface 7.3. Audio Setting 7.3.1 Audio input setting Press the "Left/Menu" on the panel to enter the "Audio" menu, Press the "Up" or "Down" on the panel to select, press the "Enter" to confirm the selection, the selected one has a "@" to mark, For HDMI input, there is "CH2.0"... -
Page 16: Audio Output Setting
7.3.2 Audio output setting Press the "Left/Menu" on the panel to enter the "Audio" menu, Press the "Up" or "Down" on the panel to select,press the "Enter" to confirm the selection, the selected one has a "@" to mark. For each output or all outputs, there are "Mute" and "Delay" to choose, The default settings is Unmute and Delay 30ms. -
Page 17: Tcp/Ip Setting
7.4.2 TCP/IP setting Press the "Left/Menu" on the panel to enter the "TCP/IP" menu, Press the "Up" or "Down" on the panel to select, then press the "Enter " to confirm, The selected one has a "@" to mark. It contains set up for " DHCP ON/OFF "; "IP Address"; Mask"; "GW"; "DNS", Eg: IP address setting: 1. - Page 18 IP address Mask address Gateway address DNS Interface...
-
Page 19: Reboot
7.4.3 Reboot Press the "Left/Menu" on the panel to enter the "Reboot" menu, Press the "Up" or "Down" on the panel to select "Yes" or "No" , then press the "Enter " to confirm, the selected one has a "@" to mark. Reboot interface 7.4.4 Factory reset Press the "Left/Menu"... -
Page 20: Web Control
Info interface System information IP information 7.5. Web Control The host computer such as PC is connected to the control device through the TCP/IP network port. The control mode is divided into two types: connect with a computer without network for single device control or connected to the LAN to realize multi-machine control simultaneously Control without network:... - Page 21 Default IP address:192.168.1.168 Default MASK:255.255.255.0 Default GW:192.168.1.1 MAC:4658-4Exx-xxxx Connecting to LAN to realize multi-user remote control devices (such as mobile phone, other PC) in Ethernet environment, it is necessary to ensure that the IP segment of the host is consistent with that of the connected LAN, it also need to open the DHCP and enter the related IP address to control...
-
Page 22: Interface Introduction
7.5.1 Interface introduction Status display instructions: (1) Click the navigation bar above, then enter the corresponding operation interface. (2) Do not click continuously; Click again after the setting is successful. If the setting is invalid, please click the button again. Browser compatibility (1) Use the browser such as Google, Firefox, apple with the latest browser version for better compatibility, the other browsers may result in incompatible problems. -
Page 23: Video Wall Setting
Operating instructions Take the default IP address login as an example: (1) IP configuration: IP configuration is required, whether using single device control or LAN multi-device control. (2) After configuration, pls enter the default IP address into the browser, enter the web end login interface, enter account number: admin, password: admin click on the "Log in"... - Page 24 Operating instructions Eg1:Select DP port as input source to make a 3x3 video wall by 1pcs device. (1) In the Output section, select both the "Horizon" and "Vertical" as number 3, and the "Equipment Cascade " as number 1(There is only one device. The cascade position must be 1, otherwise the setting is invalid).
-
Page 25: Mirror
7.5.3 Mirror Interface introduction: Click the "Mirror" in the navigation bar on the left. The interface has only one section to adjust the Horizontal /Vertical/Both Horizontal and Vertical/ Default. Note: You can only choose one option at each time. Operating instructions Click on the corresponding button to send instructions. -
Page 26: Edge
7.5.5 Edge Interface introduction: The default edge of booth horizontal and vertical display screen is 3.5mm frame size, each image is divided into 302 units. Operating instructions Click on the "+/-" button on both Horizontal and Vertical to adjust. 7.5.6 Format Interface introduction: The interface is used to adjust the output format, the left output section including HDMI Output1 to HDMI Output9 and ALL (stands for all HDMI outputs), the right... -
Page 27: Edid
7.5.7 EDID Interface introduction: The interface is to set up the EDID for each input port or all the input at once. INPUT Section: the back content of the ">>" indicates the input source, and the front content of the ">>" indicates the current EDID information. It support set up the EDID separately for each input or select all input as the same EDID. -
Page 28: Audio Input Setting
means the audio is turned off, means the audio is turned on. The default audio is turned on, and the delay is 30ms. Operating instructions Click on the "-/+" button to adjust delay time; options from 0 to 250, per unit is 10ms; Click on the button to choose mute or unmute. -
Page 29: Reset
Operating instructions: MAC address: can only be displayed, cannot be modified. Static IP: Default DHCP OFF. Dynamic IP: click the "DHCP" button to open the DHCP. The following IP address and other information can not be modified, but current IP address information can be displayed. -
Page 30: Rs232 Control
8. RS232 CONTROL Function description: plug in the USB port to RS232 tool, double-click to open the RS-232 software. Baud rate: 115200. Instructions: 1. All instructions begin with "#". Instruction header c%: d---operation parameter, I---operation lock, 2. "_" means underline, indispensable. Primary parameter d%: 0---all outputs, 1-x---indicates outputs (1-9), secondary parameters are the same as the first. -
Page 31: Gui Update
9.2 GUI Update Open the software UART_ISP.exe on PC, select the correct port and baud rate 115200, enter F0_01 (_ represents space) in the port, then select the program (xxxx.bin) in the path, and click update to complete the upgrade. Note: Please reboot the device after GUI Update.
Need help?
Do you have a question about the CE-H26F11-S1 and is the answer not in the manual?
Questions and answers