Table of Contents
Advertisement
Quick Links
Advertisement
Table of Contents

Subscribe to Our Youtube Channel
Related Manuals for Bartscher 305/15L


Summary of Contents for Bartscher 305/15L
- Page 1 305/15L 300748 Original-Gebrauchsanleitung V2/0120...
-
Page 2: Table Of Contents
5.4.1 Functions of function buttons/ indicator diode ..........45 5.4.2 Vacuum packaging ..................47 6. Cleaning ........................54 7. Possible Malfunctions ..................... 55 8. Waste disposal ......................56 Bartscher GmbH phone: +49 5258 971-0 Franz-Kleine-Str. 28 fax: +49 5258 971-120... -
Page 3: Safety
Read this instruction manual before using and keep them available at all times! This instruction manual contains information about the installation, operation and maintenance of the device and should be consulted as an important source of information and reference guide. Awareness of the safety instructions and instructions for use in this manual will ensure the safe and correct use of the device. -
Page 4: Safety Instructions
WARNING of hand injury! This symbol highlights dangerous situations which could lead to serious hand injury. CAUTION! This symbol highlights dangerous situations which could lead to light injuries, or damage, malfunction, and/or destruction of the device. NOTE! This symbol highlights recommendations and information aimed for effective and trouble-free device operation. - Page 5 Prevent access of children to the package materials like plastic • bags and foamed polystyrene elements. Suffocation hazard! Only a qualified technician and using original spare parts and • accessories should carry out repairs and maintenance of the device. Do not attempt to repair the device yourself. Do not use any accessory or spare parts that have not been •...
- Page 6 Check the power cord regularly for damage. Do not use the • device if the power cord is damaged. If this cable is damaged, it must be replaced by customer service or a qualified electrician in order to avoid dangers. The supply cable must be disconnected from the socket •...
-
Page 7: Use As Intended
WARNING! Burn hazard! In order to avoid this risk, please observe the following safety instructions. During the operation and shortly after, the sealing strip and • sealing bar are hot. Do not touch these parts of the device. Operate the device only using the designated handles and •... -
Page 8: General Information
2. General information 2.1 Liability and Warrantees All the information and instructions in this manual take into account standard safety regulations, current levels of technical engineering as well as the expertise and experience we have developed over the years. The instruction manual was translated with all due care and attention. However, we do not accept liability for any translation errors. -
Page 9: Transport, Packaging And Storage
3. Transport, packaging and storage 3.1 Delivery check Please check the delivery upon completeness and transport damage immediately after receipt. In case of visible damage do not accept or accept the delivery with reservation only. Note the extent of damage on the carrier’s bill of delivery. Trigger off the complaint. Hidden damages should be reclaimed immediately after notice, as claims for damages can only be asserted within the effective period for complaints. -
Page 10: Technical Data
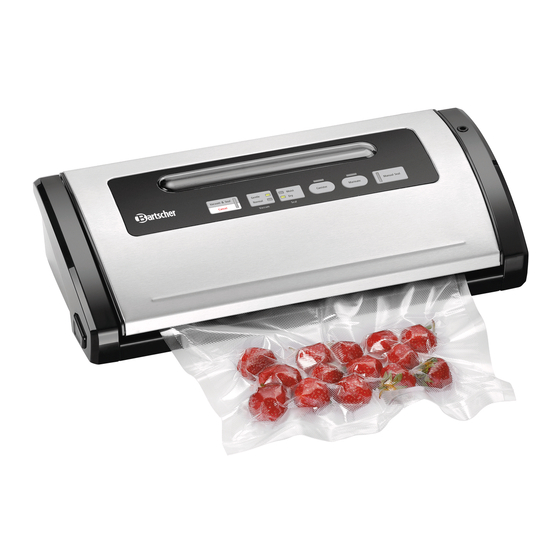
4. Technical data 4.1 Overview of parts Guard Connector hose coupling Release buttons (2x – right and left) Air intake opening Vacuum chamber Welding bar Bottom gasket Cutting mechanism Blade Upper seal Sealing strip - 37 -... -
Page 11: Technical Specification
4.2 Technical specification Description Vacuum packaging machine 305/15L 300748 Code-No.: Stainless steel, plastic Material: Silver, black Colour: Functions/ indicator diodes: • - Combined vacuuming and sealing - Vacuum packaging, gentle/ standard - Hot sealing, wet and dry - Manual sealing... -
Page 12: Accessories
4.3 Accessories (not included in the delivery!) Vacuum sealer roll set 220 Set consists of 2 foil rolls, each 22 cm wide, 5 m long Code-no. 300418 Vacuum sealer roll set 280 Set consists of 2 foil rolls, each 28 cm wide, 5 m long Code-no. -
Page 13: Installation And Operation
5. Installation and operation 5.1 Installation and connection Positioning Unpack the device and remove all package materials according to the valid • environment protection regulations. CAUTION! Never remove the nameplate and warning signs from the device. Place the device on a flat, dry, safe surface capable of supporting the device's weight. •... -
Page 14: The Benefits Of Vacuum Packing
5.2 The benefits of vacuum packing During vacuum packing, after air is removed, plastic bags and containers are sealed shut which stops or slows the process of foodstuffs spoilage. Owing to vacuum packing foodstuffs can be stored from three to five times longer than normally. The taste and vitamins are retained in the foodstuffs. -
Page 15: Guidelines For Vacuum Packaging
5.3 Guidelines for vacuum packaging CAUTION! Vacuum packing is not a substitute for freezing. Any foodstuffs which spoil easily and needed to be frozen prior to vacuum packing must be cooled and frozen after vacuum packing. Important hints 1. Prior to vacuum packing it is necessary to wash hands thoroughly, as well as all device and surfaces which will be used for the cutting and vacuum packing of foodstuffs. - Page 16 Vacuum packing for the freezer Through thoughtful packaging the device can help to extend the freshness of meals. • It is necessary to pack foodstuffs in as fresh a state as possible. Fragile or easily deforming foodstuffs may become damaged during the vacuum •...
- Page 17 Unfreezing of foodstuffs packed in the vacuum bags The vacuum packed foodstuffs like meat, fish, fruits and vegetables, or other fragile • products, may be slowly unfrozen on the lowest refrigerator shelf. Bread and tortilla should be unfrozen in the room temperature. •...
-
Page 18: Operation
5.4 Operation Before the first use o Before the first use always thoroughly clean the device and its surfaces which will come into contact with food (vacuum bags, lid, etc.), according to the instructions included in Section 6 “Cleaning “ 5.4.1 Functions of function buttons/ indicator diode A. - Page 19 D. Canister Container function: Only for vacuum packing in a suitable container. E. Marinate Marinating function: Important: This function may be used only with an appropriate container and connecting hose. F. Manual Seal Sealing only: Vacuum is generated for a short time to ensure that the sealing strip and sealing bar are clean and will lay on top of each other.
-
Page 20: Vacuum Packaging
5.4.2 Vacuum packaging Important advice and tips Do not leave too much air in the vacuum bag. Before sealing the vacuum bag, • squeeze out as much air as possible from the bag. With too much air in the vacuum bag, the load on the vacuum pump may increase so much that the motor will not have enough power to suck all air out of the bag. - Page 21 Making vacuum bags from foil rolls Select the foil roll of appropriate size to make a bag. • Set the device on an even surface. Connect the device to a single grounded outlet. • The indicator diodes for the „Normal“ and „Dry“ modes light up. In order to make a vacuum sealing bag from a roll of film, proceed as follows: •...
- Page 22 Move the blade from one end to Then, place the open end of the another in order to accurately and trimmed vacuum sealing bag on the cleanly cut off the vacuum bag. sealing strip of the unit, and not inside the vacuum chamber.
- Page 23 Vacuum packaging using vacuum bags Place the food product to be packed in the vacuum bag. • Clean the open end of the vacuum bag and make sure there is no food or liquid • residues on it. Set the device on an even surface. Connect the device to a single grounded outlet. •...
- Page 24 If the setting „Moist“ is selected, the sealing time is extended so as to ensure proper • hot sealing of the vacuum bag. Press the button „Vacuum & Seal / Cancel“. The indicator diode will light up, • vacuum packing begins. The air is automatically sucked out of the vacuum bag which is then sealed.
- Page 25 Vacuum packaging using vacuum containers Set the device on an even surface. Connect the device to a single grounded outlet. • The indicator diodes for the „Normal“ mode of the Vacuum button and the „Dry“ mode of the Seal button light up. Make sure the vacuum container and its lid are clean and dry.
- Page 26 Use only appropriate vacuum containers and observe manufacturer’s instructions • regarding opening and closing vacuum containers. The unit should pause for one minute after each vacuum sealing process to avoid • overheating. Marinating in the vacuum container Fill the vacuum container with selected food products and leave at least 3 cm free •...
-
Page 27: Cleaning
6. Cleaning WARNING! Before cleaning disconnect the device from the power supply (pull the plug!). The device is not suited for direct washing via water jets. Protect the device from the water penetration. o Do not use any sharp metallic tools (e.g. scissors, knives or scrapers) for removing contamination, as they may damage the surface. -
Page 28: Possible Malfunctions
7. Possible Malfunctions In case of malfunction, disconnect the device from its power source. Before contacting the service or sales agent, verify - based on the table below - whether it is possible to eliminate disruption in operation. Problem Possible cause and solution Check if the supply plug is correctly connected to the socket. -
Page 29: Waste Disposal
Electric devices should be used and disposed of properly to prevent the impact on the environment. Disconnect the device from the power supply and remove the power cord from • the device. Bartscher GmbH phone: +49 5258 971-0 Franz-Kleine-Str. 28 fax: +49 5258 971-120...
Need help?
Do you have a question about the 305/15L and is the answer not in the manual?
Questions and answers