Table of Contents
Advertisement
Quick Links
300435
Bedienungsanleitung
Vakuum-Verpackungsmaschine 400M
D/A/CH
Seiten 1 bis 29
Instruction manual
Vacuum packaging machine 400M
GB/UK
from page 31 to 59
Mode d'emploi
Conditionneuse sous vide 400M
F/B/CH
de page 61 à page 89
Manual de instrucciones
Envasadora al vacío 400M
E
de la página 91 a la 119
Gebruiksaanwijzing
Vacumeerapparaat 400M
NL/B
blz. 121 t/m 149
Instrukcja obsługi
Pakowarka próżniowa 400M
PL
strony od 151 do 179
V1/0113
Advertisement
Table of Contents

Subscribe to Our Youtube Channel
Related Manuals for Bartscher 300435


Summary of Contents for Bartscher 300435
-
Page 1: Manual De Instrucciones
300435 Bedienungsanleitung Vakuum-Verpackungsmaschine 400M D/A/CH Seiten 1 bis 29 Instruction manual Vacuum packaging machine 400M GB/UK from page 31 to 59 Mode d’emploi Conditionneuse sous vide 400M F/B/CH de page 61 à page 89 Manual de instrucciones Envasadora al vacío 400M de la página 91 a la 119... -
Page 2: Table Of Contents
6.1 Safety instructions for cleaning ................. 55 6.2 Cleaning ......................55 6.3 Safety instructions for maintenance ..............56 7. Troubleshooting ....................57 8. Waste ........................59 Bartscher GmbH Franz-Kleine-Str. 28 D-33154 Salzkotten Tel.: +49 (0) 5258 971-0 Germany Fax: +49 (0) 5258 971-120... -
Page 4: General Information
1. General information 1.1 Information on user manual This manual describes installation, operation and maintenance of the device and is an important source of information and reference. Knowledge of the instructions and safety precautions contained in this manual creates the conditions for safely and correctly using the device. Furthermore, local safety and accident-prevention standards in force must be complied with for application of the device. -
Page 5: Responsibility And Warranty
1.3 Responsibility and warranty All the information and notices contained in this manual have been drafted in compliance with relevant standards, based on the status of current development in technical engineering and on our knowledge and experience. The actual contents of the supply can differ for special applications, the addition of further options or recent technical modifications respect to the illustrations and explanations contained in the manual. -
Page 6: Safety
2. Safety This section provides an overall view of all important safety aspects. This chapter provides precise safety instructions to avoid the dangers highlighted with the symbols. All pictograms, horizontal and vertical signs must be respected and kept legible. Compliance with all the safety risks provides excellent protection and guarantees safe and regular operation of the appliance. -
Page 7: Intended Use
ATTENTION! o This device is not intended to be used by persons (including children) with impaired physical, sensorial or mental capacities or lacking experience and/or knowledge, unless they are monitored by a responsible person or they have received instructions on using the device. o Make sure that children do not play with the device. -
Page 8: Transportation, Packaging And Storage
3. Transportation, packaging and storage 3.1 Control of transportation As soon as the device is delivered, make sure it is complete or has not been damaged during shipping. In case of visible damage not acknowledged or on reserve, the delivery is considered accepted. -
Page 9: Technical Data
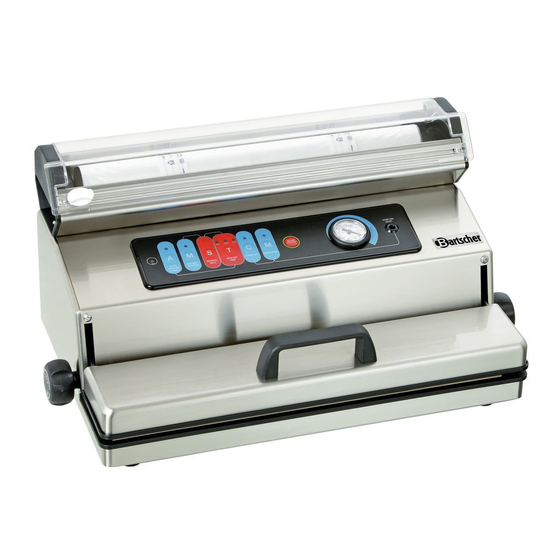
4. Technical data 4.1 Installation overview - 38 -... - Page 10 (1) ON/OFF (I/O) switch – Press the switch to (I) to turn the device on. Turn the device off by pressing (O) when not in use. Control panel – the various functions of the device can be adjusted by selecting the corresponding button.
- Page 11 Control panel/Functions of keys and display (2A) “ON” indicator light - when the switch (1) is at (I), the indicator light is green. (2B) “A” key (Auto Vacuum & Seal) - The start key for the automatic vacuum packing cycle for bags including sealing. (2C) “STOP/CANCEL”...
-
Page 12: Technical Specifications
4.2 Technical specifications Vacuum packaging machine 400M including Name roll holder 300.435 Serial number: Finish: Stainless steel 18/10 Energy consumption: 230 V 50 Hz 0.38 kW Vacuum pump: 1.9 m³/h Dimensions: L 550 x P 320 x H 288 mm 1 roll of film for vacuum packing (40 cm x 3 m), Accessories: 5 bags for vacuum packing (40 x 50 cm);... -
Page 13: Installation And Connection
• Do not move or tip over the device during operation. WARNING! Electrical shock hazard! The device can cause injuries if not installed correctly! Before installation of the local electric mains, compare the technical data of the device (shown on the identification plate). Only connect the device if they correspond! Respect the safety instructions! 5.2 Installation and connection... -
Page 14: Advantages Of Vacuum Packaging
5.3 Advantages of vacuum packaging With vacuum packaging, air is removed from the film bags or from containers and sealed hermetically in order to stop or slow down food spoiling. Vacuum packaging prolongs preservation of food which lasts 3 to 5 times longer. The taste and vitamin supply remain intact. - Page 15 for food "with and without" vacuum packaging: Preservation times Preservation time Preservation time not vacuum packed vacuum packed Refrigerated food (5+/-2° C) 8 - 9 days Red meat 3 - 4 days 6 - 9 days White meat 2 - 3 days 4 - 5 days Whole fish 1 - 3 days...
-
Page 16: Guidelines For Vacuum Packaging
5.4 Guidelines for vacuum packaging Vacuum packaging for freezer • A correct preservation will help the device to keep food fresh. Pack the food as fresh as possible. • Delicate foods or those which you desire to keep their shape and appearance could be damaged if packed as fresh products. - Page 17 Defrosting vacuum packed food • Food preserved vacuum packed such as meat, fish, fruit, vegetables and other foods can be defrosted on the bottom shelf of the refrigerator. • Let the bread and cakes defrost at room temperature. • For soups or other liquids, defrost the bag directly in warm water until the content is completely warm.
- Page 18 General safety instructions 1. Clean your hands, utensils and work surfaces used to cut and vacuum pack foods. 2. If possible, wear gloves to handle the food. 3. Use only fresh food for vacuum packaging. 4. Immediately preserve perishable foods vacuum packed in the refrigerator or freezer and do not leave them too long at room temperature.
- Page 19 Advice for preserving vacuum packed foods The vacuum packed preservation system is the way to preserve purchased and cooked food. Once you have used vacuum packing preservation, it will soon become essential in preparing food. Follow the instructions below concerning vacuum packaging and preservation to guarantee food quality: 1.
-
Page 20: Operation
11. If the refrigerator temperature is higher than 4˚C (especially for a long time), this favours the growth of harmful microorganisms. Therefore it is recommended to keep the temperature below 4˚C. 12. A freezer temperature of -17˚C or lower is suitable for food preservation. Even though freezing does not kill microorganisms, it inhibits their growth. -
Page 21: Making Bags From Rolls
STOP/CANCEL key – 2C • To stop the machine at any moment, press the "STOP/CANCEL" button (2C) Fig. A. Unlock the lid by turning one of the two knobs (7) of the "Lock & Unlock System" device. 5.5.4 Making bags from rolls Insert a roll of suitable film in the roll holder (15) of the device. - Page 22 c) Lower the lid (5) by pressing the handle downwards (6) (Fig. D1), then take it with the other hand and turn one of the two knobs (7) in the direction of the LOCK arrow (Fig. D2). The lid (5) must remain all the way down (Fig.
-
Page 23: Automatic Vacuum Packing Cycle With Bags
f) Make sure it is sealed properly. A correct sealing must be smooth, straight and without any creases, the seam must not show the pattern on the bottom layer (Fig. G). 5.5.5 Automatic vacuum packing cycle with bags (precut or see P. 5.5.4) To perform the automatic packaging cycle in bags including final sealing. - Page 24 d) If necessary, adjust the sealing time (see point 5.5.3 " Settings/Sealing time settings") (Fig. J). e) Press the "A" button (2B) for the automatic cycle. The device performs a vacuum packing cycle in automatic mode. Wait for the red indicator light of the “T”...
-
Page 25: Manual Vacuum Packing Cycle With Bags
5.5.6 Manual vacuum packing cycle with bags - Repeat the operations from point a) to d) of section 5.4.5. - Start the manual vacuum packing cycle by pressing the "M"key (2D). Then press the "S" key (2E) to seal the bag manually before crushing its fragile or sensitive contents. -
Page 26: Cleaning And Maintenance
d) Press the "C" button (2G). The device performs the vacuum packing cycle and switches off automatically when it is over. The pump switches off automatically after approximately 5 minutes. e) Disconnect the hose from the lid of the container and from the hose air inlet of the device. -
Page 27: Safety Instructions For Maintenance
o If any liquid falls accidentally into the device, unplug it and do not use it. Contact a service centre or your dealer. o Important: Do not use metal tools (such as scissors, knife, punch or scraper) to eliminate impurities as they could damage the steel surface, causing it to corrode. o Furthermore, improper use of chlorine-based detergents or hydrochloric acid, hydrofluoric acid or sulphuric acid (as are some decalcifying agents) can reduce the typical brightness of the stainless steel and affect its resistance. -
Page 28: Troubleshooting
7. Troubleshooting Possible cause and solution Problem Check the switches (1). Make sure the power cable is plugged into the device and The device does not into the wall. Check the socket by plugging in another device. work Make sure that the power cable or plug is not damaged. In that case, do not use the device. - Page 29 Problem Possible cause and solution Reconnect the suction hose to the container lid (or to the suction cap, if necessary) and the hose air inlet to the device. Leave at least 3 cm between the contents and the top of the container.
-
Page 30: Waste
To disconnect the device from the mains, remove the power cable from it. NOTICE! To dispose of the device, refer to national and local standards and regulations in force. Bartscher GmbH Franz-Kleine-Str. 28 D-33154 Salzkotten Tel.: +49 (0) 5258 971-0...
Need help?
Do you have a question about the 300435 and is the answer not in the manual?
Questions and answers