
Related Manuals for SIGLENT SDS1000CFL Series


Summary of Contents for SIGLENT SDS1000CFL Series
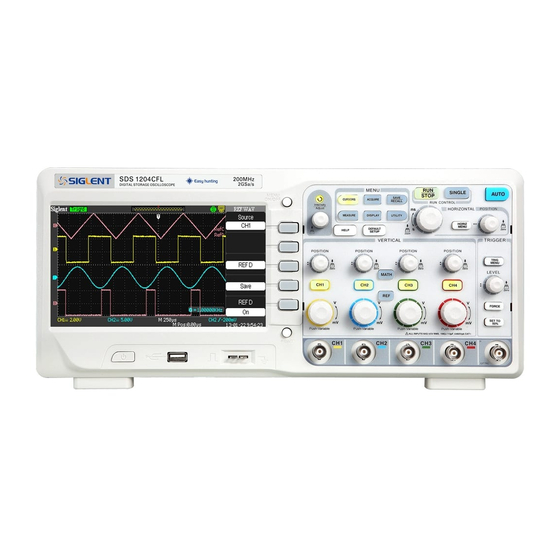
- Page 1 Quick Start SDS1000CFL Series Digital Oscilloscope QS01012-E02A 2013 SIGLENT TECHNOLOGIES CO., LTD...
-
Page 2: Guaranty And Declaration
CO., LTD Declaration SIGLENT products are protected by patent law in and outside of P.R.C. SIGLENT reserves the right to modify or change parts of or all the specifications or pricing policies at company’s sole decision. Information this... -
Page 3: Safety Requirement
SIGLENT Safety Requirement General Safety Summary Carefully read the following safety precautions to avoid person injury and prevent damage to the instrument and any products connected to it. To avoid potential hazards, please use the instrument as specified. Only qualified technician should perform service procedures... -
Page 4: Safety Terms And Symbols
SIGLENT Do not Operate with Suspected Failures If you suspect that there is a damage of the instrument, please let a qualified service personnel check it. Avoid Circuit or Components Exposed Do not touch exposed contacts or components when the power is... -
Page 5: General Care And Cleaning
SIGLENT General Care and Cleaning Care: Do not store or leave the instrument in direct sunshine for long periods of time. Notice: To avoid damages to the instrument or probe, please do not leave them in fog, liquid, or solvent. -
Page 6: Table Of Contents
Function Introduction of Front Panel............12 Vertical Control ..................12 Horizontal Control................14 Trigger Control...................15 RUN/STOP ..................16 SINGLE .....................16 AUTO ....................16 Universal Knob ..................17 Function Menus.................18 DEFAULT SETUP................19 HELP Information ................19 PRINT....................19 User Interface ..................20 Using Security Lock.................23 Troubleshooting .....................24 Contact SIGLENT ..................26 SDS1000CFL Quick Start V... -
Page 7: Quick Start
The consigner or carrier will be responsible for damages to the instrument resulting from shipment. SIGLENT would not provide free maintenance or replacement. 2. Inspect the instrument. If there are instruments found damaged, defective or failure in electrical and mechanical tests, please contact SIGLENT. -
Page 8: Appearance And Dimension
SIGLENT Appearance and Dimension 336 mm Figure 1 Front View Figure 2 Side View 2 SDS1000CFL Quick Start... -
Page 9: Adjust The Supporting Legs
SIGLENT Adjust the Supporting Legs Adjust the supporting legs properly to use them as stands to tilt the oscilloscope upwards for stable placement as well as easier operation and observation of the instrument. Figure 3 Adjust the Supporting Legs SDS1000CFL Quick Start 3... -
Page 10: Connect To Ac Power Supply
Note: In want of replacing the fuse, please return the instrument to the factory that produced it to have it repaired by qualified service personnel authorized by SIGLENT. 4 SDS1000CFL Quick Start... -
Page 11: Power-On Inspection
SIGLENT Power-on Inspection When the scope is energized, turn on the power switch at the rear panel first, and then press the power button on the front panel to boot up the scope. During the start-up progress, the instrument performs a series of self-test items and you can hear the sound of relay switching. -
Page 12: Connect The Probe
SIGLENT Connect the Probe SIGLENT provides passive probes for the SDS1000CFL series oscilloscope. Please refer to corresponding Probe User Manual for detailed technical information. The following are the probes specified for this oscilloscope. Type Description PB470 70 MHz, passive probe... -
Page 13: Function Inspection
SIGLENT Function Inspection DEFAULT 1. Press to restore the oscilloscope to its default SETUP setup. 2. Connect the ground alligator clip of the probe to the Ground Terminal on the front panel. 3. Use the probe to connect the CH1 Input Terminal and the Compensation Signal Output Terminal on the front panel. -
Page 14: Probe Compensation
SIGLENT Probe Compensation You should properly compensate the probe at first use of it. Non-compensated or inadequate compensated probe may cause inaccurate measurement. The following steps are about probe compensation: 1. Perform step 1, 2 , 3 and 4 of “Function Inspection”... - Page 15 SIGLENT The Front Panel 16 15 12 11 Description Description Menus On/Off Trigger Control Area Universal Knob EXT TRIG Terminal Help Vertical Control Area Function Menus Channel Input Terminal Run/Stop Print Key Single Menu Select keys AUTO Probe Compensation Horizontal Control Area...
-
Page 16: The Rear Panel
SIGLENT The Rear Panel 1. Handle Pull up the handle vertically for easy carrying; press it down if you do not need the handle. 2. AC Power Input Terminal The power available of the oscilloscope is 100~240V, 45~440Hz. Please use the power cord provided as accessories to connect the instrument to AC power. - Page 17 SIGLENT 6. Pass/Fail Output Terminal The pass/Fail testing pulse are put out via this terminal. 7. Lock hole You could lock the instrument in a fixed location using a security lock (please buy it yourself) via the lock hole. SDS1000CFL Quick Start 11...
-
Page 18: Function Introduction Of Front Panel
SIGLENT Function Introduction of Front Panel Vertical Control : Input channels. These four channels are marked with different colors to distinguish different input channels and their waveforms. Press the channel button will turn on the corresponding channel as well as its menu, and press it twice continuously will turn off the channel. - Page 19 SIGLENT Modify the vertical scale of the current channel. Turn clockwise to decrease the scale while turn counterclockwise to increase. The amplitude of the waveform will enlarge or reduce and the scale message at the lower-left corner of the screen will also change as the scale changes.
-
Page 20: Horizontal Control
SIGLENT Horizontal Control HORIZ MENU : Press the button to open horizontal control menu under which you can turn on/off the delay sweep function. : Modify the trigger position. The trigger point will move left or right relative to the center of the screen when you revolve the knob. -
Page 21: Trigger Control
SIGLENT Trigger Control TRIG MENU : Press the button to open trigger menu under which five trigger modes are supported. SET TO : Press the button to set trigger level to the middle of the maximal voltage and the minimal voltage to quickly stabilize the current waveform. -
Page 22: Run/Stop
SIGLENT RUN/STOP : Press the button to set the state of the instrument to STOP “RUN” or “STOP”. When in “RUN”, the indicator light displays yellow; When in “STOP”, it displays red. SINGLE SINGLE : Press the button to turn the trigger mode to “Single”. -
Page 23: Universal Knob
SIGLENT Universal Knob Adjust waveform brightness: While the light above the knob is dark, revolving the knob will adjust the brightness of the waveform, which ranges from 30% to 100%. Turning clockwise means increase while counterclockwise means decrease. You can also select “intensity”... -
Page 24: Function Menus
SIGLENT Function Menus CURSORS : Press the button to enter the cursor measurement function menu. The instrument provides three measure modes: Manual measurement, Track measurement and Auto measure ment. ACQUIRE : Press the button to enter the acquire function menu under which you could set the acquisition mode, sampling mode and dot inserting mode. -
Page 25: Default Setup
SIGLENT UTILITY : Press the button to enter the utility function menu under which you could set the corresponding function of the system and some parameters like Sound, Language, Interface and so on. In addition, some advanced functions are also supported such as Self Calibration, Firmware Update, Pass/Fail test and so on. -
Page 26: User Interface
SIGLENT User Interface 1. Product logo SIGLENT is the registered trademark of our company. 2. Working state Available working states include Ready、Auto、Trig’d、Scan and Stop. 3. Waveform memory Display the position of the current waveform in the memory of the oscilloscope. - Page 27 SIGLENT 6. Back USB Device “Back USB” supports two types of interface: USBTMC and Printer. 7. Frequency Counter Display the firmware frequency of current waveform. To display it, you should turn on the “Counter” in menu of “UTILITY”. 8. Trigger Setting ...
- Page 28 SIGLENT 14. Coupling Mode The oscilloscope supports three coupling mode: DC, AC and GND, each of them has unique mark displaying on the screen. 15. Current Channel Display the current working channel. All channels can display at the same time.
-
Page 29: Using Security Lock
SIGLENT Using Security Lock If needed, you could use the security lock (please buy it yourself) to lock the instrument in a fixed location. The method: align the clock with the clock hole and plug it into the lock hole vertically, turn the key clockwise to lock the instrument and then pull the key out. -
Page 30: Troubleshooting
SIGLENT. (3) Restart the instrument after completing inspections above. (4) If it still does not work normally, please contact SIGLENT. 2. After the signal is sampled, there is no corresponding waveform displaying: (1) Check if the probe is correctly connected to the signal connecting cord. - Page 31 SIGLENT 4. There is waveform displaying but not stable: (1) Check the trigger source: check whether the “Source” in menu of “TRIG” is the actual operating channel. (2) Check if the waveform is wrong: it is easy for us to regard the wrong waveform as the real when a high frequency signal is connected to the instrument.
-
Page 32: Contact Siglent
SIGLENT the oscilloscope is no larger than 4 G. (4) Restart the instrument and then insert the USB to check it. (5) If it is still in abnormal use, please contact with SIGLENT. Contact SIGLENT SIGLENT TECHNOLOGIES CO.,LTD Address:3/F, building NO.4, Antongda Industrial Zone, 3rd Liuxian Road, Bao’an District, Shenzhen, P.R.China...
Need help?
Do you have a question about the SDS1000CFL Series and is the answer not in the manual?
Questions and answers