Table of Contents
Advertisement
Quick Links
Advertisement
Table of Contents

Related Manuals for Bosch EX30-IP


Summary of Contents for Bosch EX30-IP
- Page 1 EX30‑IP Infrared Imager EX30-IP Installation Manual...
-
Page 3: Important Safety Instructions
- the power supply cord or plug is damaged; - liquid has been spilled in or on the equipment; - an object has fallen into the unit; Bosch Security Systems Quick Install MAN30IPB Rev.0... - Page 4 Attachments, changes, or modifications - Only use attachments/accessories specified by the manufacturer. Any change or modification of the equipment, not expressly approved by Bosch, could void the warranty or, in the case of an authorization agreement, authority to operate the equipment.
- Page 5 The full version Installation Manual is available on the enclosed CD-ROM and can be viewed and printed out with Acrobat Reader, which is also on the enclosed CD-ROM. This user guide is the intellectual property of BOSCH Security Systems and is protected by copyright CAUTION! –...
-
Page 6: Initial Preparations
3.) All cameras have been tested and pre-focused with telephoto setting as factory default prior to shipment. If any adjustment needed, it is advisable to check the camera’s operation before installation 4.) Install IP Camera Software on PC. Bosch Security Systems Quick Install MAN30IPB Rev.0... -
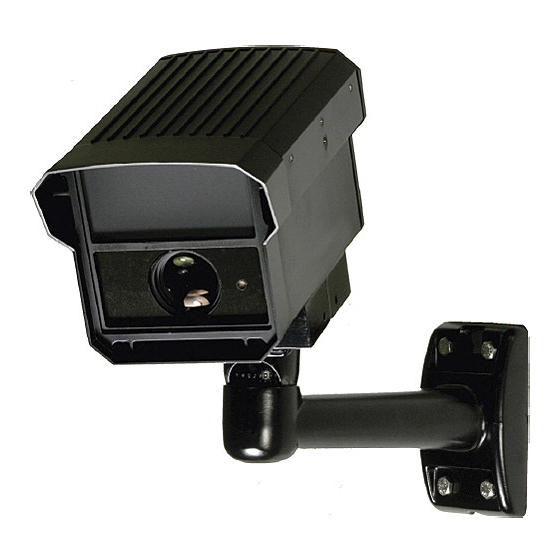
Page 7: Mounting The Unit
Cable / Bracket insertion 1.) Carefully feed the Power and Ethernet cables through both sections of the mounting bracket. 2.) Make sure the cables are not kinked, chafed, or split during this procedure Bosch Security Systems Quick Install MAN30IPB Rev.0... -
Page 8: Mounting Bracket Attachment
The surface must also be capable of supporting the combined weight of the camera and mounting hardware under all expected conditions of vibration and temperature. Camera performs best mounted 3-6m off the ground. 3.) Secure all cabling. Bosch Security Systems Quick Install MAN30IPB Rev.0... - Page 9 1.) Loosen the four bolts from the extrusion 2.) Remove the faceplate, window and the lens foam, set aside. Make sure the photocell is not dislodged. 3.) Perform the proper lens adjustments as per section 2.6 Loosen four bolts Bosch Security Systems Quick Install MAN30IPB Rev.0...
- Page 10 2.) The setscrew marked N ←→ ∞ is used for image focus 3.) The setscrew marked T←→ W is used for telephoto or wide-angle settings. 4.) Re-tighten the setscrews after focus adjustments have been completed. Bosch Security Systems Quick Install MAN30IPB Rev.0...
-
Page 11: Window Selection
Wider than 18ft / 8m LED array- power adjustments If adjustment is needed, the following procedure must be followed: 1) Remove the rear cover of the camera. Set cover aside. Photocell IR Adjustment Adjustment Pot Bosch Security Systems Quick Install MAN30IPB Rev.0... -
Page 12: Camera Re-Assembly
3.) Attach the window, faceplate, and the rear cover to the camera housing. Tighten the four bolts. 4.) Tighten the camera’s adjustable mounting bracket after the desired viewing angle has been determined. 5.) Power-up the camera and check its operation. Bosch Security Systems Quick Install MAN30IPB Rev.0... - Page 14 Phone: +65 6319 3450 Telephone +1 888-289-0096 Phone: + 31 40 2577 284 Fax: +65 6319 3499 +1 585-223-9180 Fax: +31 40 2577 330 apr.securitysystems@bosch.com Email: security.sales@us.bosch.com emea.securitysystems@bosch.com www.boschsecurity.com www.boschsecurity.us www.boschsecurity.com © Bosch Security Systems, Inc. 2009; Data subject to change without notice.
Need help?
Do you have a question about the EX30-IP and is the answer not in the manual?
Questions and answers