Table of Contents
Advertisement
Advertisement
Table of Contents

Related Manuals for Respironics BiPAP Focus


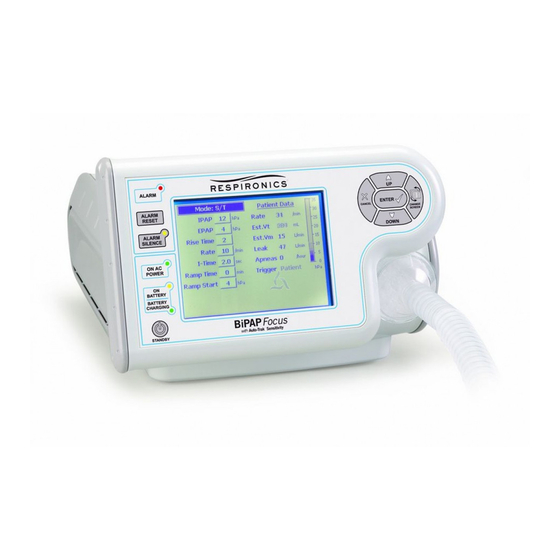
Summary of Contents for Respironics BiPAP Focus
- Page 1 BiPAP Focus Ventilator ™ ® S E R V I C E M A N U A L REF 1029568 Rev A...
- Page 2 ALL RIGHTS RESERVED. This work is protected under Title 17 of the United States copyright code and is the sole property of Respironics. No part of this document may be copied or otherwise reproduced, or stored in any electronic information retrieval system, except as specifically permitted under United States copyright law, without the prior written consent of Respironics.
-
Page 3: Table Of Contents
Storing the BiPAP Focus ........ - Page 4 Starting the BiPAP Focus Wizard ........
- Page 5 Interconnect Diagrams ......... 8-17 BiPAP Focus Replacement Parts List ..... . . 9-1 Complete Parts List .
- Page 6 Table of Contents BiPAP® Focus™ Ventilator Service Manual © Respironics, Inc. REF 1029568 Rev A...
-
Page 7: Introduction And Intended Use
The BiPAP Focus is appropriate for acute, sub-acute, and intra-hospital transport settings. The BiPAP Focus System is intended for use with nasal and full face masks. The BiPAP Focus is not intended to be a life-support device. -
Page 8: Recommended Tools And Test Equipment
Introduction and Intended Use Recommended Tools Table 1-1 lists the recommended tools, test equipment, and materials required and Test Equipment to service and maintain the BiPAP Focus Ventilator. Description Manufacturer and Model Test Equipment Digital multimeter (DMM) accurate to three decimal... -
Page 9: Where To Go For Help
Where to Go for Help For Customer Service and Product Support contact: Respironics, Inc. USA telephone: 1-800-345-6443 USA: 1-800-886-0245 International telephone: 724-387-4000 International fax: 724-387-5012 service@respironics.com. clinical@respironics.com. www.respironics.com. REF 1029568 Rev A BiPAP® Focus™ Ventilator Service Manual © Respironics, Inc. - Page 10 Chapter 1 Introduction and Intended Use (This page is intentionally blank.) BiPAP® Focus™ Ventilator Service Manual © Respironics, Inc. REF 1029568 Rev A...
-
Page 11: Warnings And Cautions
Warnings • To assure the safety of the service technician and the specified performance of the device, Respironics recommends that only technicians having prior training or experience servicing ventilatory devices perform any repairs or adjustment to the BiPAP Focus. -
Page 12: Cautions
Explosion hazard. Do not operate the ventilator in the presence of flammable anesthetic agents. • To avoid the risk of fire, use only Respironics-approved batteries. All battery connections are keyed to ensure proper connection. Do not attempt to connect a battery incorrectly. Only qualified technicians should install the battery. -
Page 13: Notes
Chapter 2 Warnings and Cautions • Care should be taken to avoid exposure of the BiPAP Focus to temperatures at or near the extremes of those specified in Chapter 3. If exposure to such temperatures has occurred, the device should be allowed to return to room temperature before being turned on. - Page 14 Chapter 2 Warnings and Cautions (This page is intentionally blank.) BiPAP® Focus™ Ventilator Service Manual © Respironics, Inc. REF 1029568 Rev A...
-
Page 15: Theory Of Operation
(one during inspiration and one during exhalation), and delivers timed breaths if the patient does not initiate a breath. The BiPAP Focus System alarms annunciate when high or low pressure regulation, apnea, patient disconnect, low power, or loss of mains power conditions occur. - Page 16 See Section 4 for periodic maintenance information. The BiPAP Focus has a reusable dust filter that is gray in color. An optional pollen filter, white in color is also available.
- Page 17 The ventilator uses this measurement to provide closed loop control of the flow valve and to compute the flow and volume delivered to the patient. Table 3-1: Air Delivery System Components REF 1029568 Rev A BiPAP® Focus™ Ventilator Service Manual © Respironics, Inc.
- Page 18 • Backup alarm driver VGA PCB • STN Blue Mode Transmissive Viewing • One-Quarter VGA (320 x 240) • Dot Pitch 0.36mm x 0.36mm Table 3-2: Electronic System Components BiPAP® Focus™ Ventilator Service Manual © Respironics, Inc. REF 1029568 Rev A...
- Page 19 • In-line thermal fuse • Built-in thermistor for temperature monitoring • Nominal charge time under 5 hours • Nominal run time 45 minutes Table 3-2: Electronic System Components REF 1029568 Rev A BiPAP® Focus™ Ventilator Service Manual © Respironics, Inc.
-
Page 20: Back Panel
O (5 hPa) Ramp Time Range: 0-45 min. Period over which the ventilator Resolution: 5 min. increases inspiratory pressure Accuracy: ±10% of setting from Ramp Start setting to CPAP setting. BiPAP® Focus™ Ventilator Service Manual © Respironics, Inc. REF 1029568 Rev A... -
Page 21: Settings: S/T Mode
Resolution: 5 min Accuracy: ±10% of setting Ramp Start Range: 4 cmH O to EPAP (4 hPa to EPAP) Initial inspiratory pressure Resolution: 1 cmH O (1 hPa) REF 1029568 Rev A BiPAP® Focus™ Ventilator Service Manual © Respironics, Inc. -
Page 22: Measured Data
Breath trigger NOTE: Est. Vt and Est. MV estimates are at ambient temperature and pressure, dry (ATPD). Pressure signals are filtered using a 50-Hz low pass Butterworth filter. BiPAP® Focus™ Ventilator Service Manual © Respironics, Inc. REF 1029568 Rev A... -
Page 23: Alarm Settings
Range: 20% to 100% Screen contrast Brightness Range: 10% to 100% Screen brightness Reverse Video Range: ON or OFF Toggles reverse video Screen Lock Timer Range: ON or OFF REF 1029568 Rev A BiPAP® Focus™ Ventilator Service Manual © Respironics, Inc. -
Page 24: Nurse Call Station/Serial Communications Connector Pinout
• When pins 1 and 9 are used, the relay is closed during normal operation, and open during an alarm condition including loss of power. • Female DB9 connector pin configuration: WARNING: Use only Respironics-supplied cables with the nurse call station/serial communications connector. Physical BiPAP Focus 355-mm H x 290-mm W x 140-mm D (14.0-in. -
Page 25: Power
Operating: +5 to +35°C at 10 to 95% relative humidity Storage: -20 to 60°C at 95% relative humidity Atmospheric pressure Operating: 83 to 102 kPa (830 to 1020 mBar) 3-11 REF 1029568 Rev A BiPAP® Focus™ Ventilator Service Manual © Respironics, Inc. -
Page 26: Bacteria Filter
Chapter 3 Theory of Operation Storage When the BiPAP Focus is not in use for periods of 2 weeks or longer, it is recommended that the unit be stored in a clean, sanitized plastic bag. Bacteria Filter Dead space 68 mL Bacteria/viral filter >99.99%... -
Page 27: Pneumatics
Blower Control Muffler (motor) valve Air inlet port Tubing (elbow) Oxygen adapter (if using oxygen) Pressure sensor Oxygen valve (if using oxygen) Outlet port and pressure sensor 3-13 REF 1029568 Rev A BiPAP® Focus™ Ventilator Service Manual © Respironics, Inc. - Page 28 Chapter 3 Theory of Operation (This page is intentionally blank.) 3-14 BiPAP® Focus™ Ventilator Service Manual © Respironics, Inc. REF 1029568 Rev A...
-
Page 29: Periodic Maintenance
Chapter 4. Periodic Maintenance This chapter provides guidelines and illustrates the cleaning and maintenance procedures for the BiPAP Focus system. Table summarizes maintenance procedures for the BiPAP Focus System. To ensure correct operation, perform all maintenance at the recommended intervals. -
Page 30: Storing The Bipap Focus
Chapter 4 Periodic Maintenance Storing the BiPAP When the BiPAP Focus is not in use for periods of 2 weeks or longer, it is recommended that the unit be stored in a clean, sanitized plastic bag. Focus While the unit is being stored, ensure that the power switch on the back of the unit is in the OFF (O) position. -
Page 31: Replacing The Air Inlet Filter(S)
Replacing the Battery WARNING: To avoid the risk of fire, use only Respironics-approved batteries. All battery connections are keyed to ensure proper connection. Do not attempt to connect a battery incorrectly. Only qualified technicians should install the battery. - Page 32 2. Remove the two screws that secure the battery compartment door. 3. Unplug the battery cable and remove the old battery from its compartment. 4. Insert a new Respironics-approved battery (see “BiPAP Focus Replacement Parts List” on page 9-1) into the compartment and plug the battery cable into its connector.
-
Page 33: Diagnostic Mode And Troubleshooting
Chapter 5. Diagnostic Mode and Troubleshooting This section describes the BiPAP Focus diagnostic mode and other troubleshooting procedures. Diagnostic mode allows: • View product information, including serial numbers and versions of software and hardware. • View and adjust system settings, including Language, time since last service, date and time. -
Page 34: Product Information
To view the product information screen, use the arrow keys to highlight PRODUCT INFORMATION on the diagnostic mode main menu, then press Enter. Press Menu to return to the main menu. Figure 5-2: Diagnostic Mode: Product Information Screen BiPAP® Focus™ Ventilator Service Manual © Respironics, Inc. REF 1029568 Rev A... -
Page 35: System Settings
The preferences screen (Figure 5-13) allows: • Adjust display units. • Adjust alarm volume. • Adjust display contrast. • Adjust display brightness. • Select reverse or normal video. • Adjust screen lock timer. REF 1029568 Rev A BiPAP® Focus™ Ventilator Service Manual © Respironics, Inc. - Page 36 Screen Lock Timer, the screen displays on/off lock setting. Use the arrow keys to select, the press Enter. 3. Press the Menu key to return to the main menu. BiPAP® Focus™ Ventilator Service Manual © Respironics, Inc. REF 1029568 Rev A...
-
Page 37: Significant Event Log
(DRPT): Interface for DRPT 1. Connect BiPAP Focus Communications Cable (P/N 1030010) between the PC and BiPAP Focus ventilator. Connect the male end labeled Diagnostics to the back of the ventilator and the female end to the service PC. - Page 38 Chapter 5 Diagnostic Mode and Troubleshooting Figure 5-6: Entering a Name for the Connection to the BiPAP Focus Ventilator 5. Select the appropriate serial port (Figure 5-7 shows Com1 selected), then click OK. Figure 5-7: Selecting the Serial Port 6. Enter these settings for the serial port (Figure 5-8): Figure 5-8: Serial Port Settings BiPAP®...
- Page 39 11. Click the Terminal Setup button. 12. Select underline and blink for cursor settings then click OK. Figure 5-10: Terminal Settings 13. Click the ASCII Setup button (Figure 5-9). REF 1029568 Rev A BiPAP® Focus™ Ventilator Service Manual © Respironics, Inc.
- Page 40 Figure 5-11: ASCII Setup Screen 15. Save this configuration. Select File > Save As and save to the desktop if you want to create an icon for BiPAP Focus Communications on the Windows desktop. BiPAP® Focus™ Ventilator Service Manual © Respironics, Inc.
- Page 41 Chapter 5 Diagnostic Mode and Troubleshooting Generating a 1. With the BiPAP Focus ventilator in diagnostic mode and the serial communcations cable, the end labeled Diagnostics connected to the Diagnostic Report ventilator, start HyperTerminal, open the BiPAP Focus (DRPT) Communications file, or click on the BiPAP Focus Communications icon on the PC (if created).
- Page 42 6/19/06 - Date stamp of most recent diagnostic code occurrence Battery Voltage Failed - description 437 - Diagnostic Code Figure 5-12: Interpreting the DRPT Report 5-10 BiPAP® Focus™ Ventilator Service Manual © Respironics, Inc. REF 1029568 Rev A...
-
Page 43: Sensor Readings
View sensor readings: view these readings to see the real-time effect of changes to voltages, temperature and control signals. Figure 5-13: Diagnostic Mode: Sensors Screen Table 5-1 defines sensor readings for the BiPAP Focus. NOTE: Hi = 1 and Lo = 0... - Page 44 Signal for detection if the incoming mains voltage is above a certain threshold (15.64V typically). Hi: Above threshold Lo: Below threshold Table 5-1: Sensor Readings Defined (Sheet 2 of 4) 5-12 BiPAP® Focus™ Ventilator Service Manual © Respironics, Inc. REF 1029568 Rev A...
- Page 45 Hi: Loss of +3.3V supply caused last reset Lo: Last reset not caused by loss of +3.3V supply. Probably caused by watchdog (software reset) Table 5-1: Sensor Readings Defined (Sheet 3 of 4) 5-13 REF 1029568 Rev A BiPAP® Focus™ Ventilator Service Manual © Respironics, Inc.
- Page 46 System Test screen. Hi: Standby key has NOT been pressed. Lo: Standby key has been pressed. Table 5-1: Sensor Readings Defined (Sheet 4 of 4) 5-14 BiPAP® Focus™ Ventilator Service Manual © Respironics, Inc. REF 1029568 Rev A...
-
Page 47: System Test
Selects ADC measurement of battery voltage or battery temperature Hi: Battery voltage measured by ADC Lo: Battery temperature measured by ADC Table 5-2: System Test Defined (Sheet 1 of 2) 5-15 REF 1029568 Rev A BiPAP® Focus™ Ventilator Service Manual © Respironics, Inc. -
Page 48: Significant Event Codes
Table 5-2: System Test Defined (Sheet 2 of 2) Significant Event The BiPAP Focus Ventilator generates a log of system events, including settings changes, alarms, and codes that can be used for troubleshooting. If a Codes ventilator inoperative condition or unexpected reset occurs, the significant event log includes the ventilator settings, patient data, and alarm conditions that were in effect. - Page 49 24 hours, replace the controller PCB. Table 5-3: Significant Event Log: Event IDs (Sheet 1 of 22) 5-17 REF 1029568 Rev A BiPAP® Focus™ Ventilator Service Manual © Respironics, Inc.
- Page 50 24 hours, replace the controller PCB. Table 5-3: Significant Event Log: Event IDs (Sheet 2 of 22) 5-18 BiPAP® Focus™ Ventilator Service Manual © Respironics, Inc. REF 1029568 Rev A...
- Page 51 1. Attempt to re-calibrate the system. 2. If this fails, replace the controller PCB. Table 5-3: Significant Event Log: Event IDs (Sheet 3 of 22) 5-19 REF 1029568 Rev A BiPAP® Focus™ Ventilator Service Manual © Respironics, Inc.
- Page 52 EEPROM device. 1. Attempt to re-calibrate the system. 2. If this fails,replace the controller PCB. Table 5-3: Significant Event Log: Event IDs (Sheet 4 of 22) 5-20 BiPAP® Focus™ Ventilator Service Manual © Respironics, Inc. REF 1029568 Rev A...
- Page 53 24 hours, replace the controller PCB. Table 5-3: Significant Event Log: Event IDs (Sheet 5 of 22) 5-21 REF 1029568 Rev A BiPAP® Focus™ Ventilator Service Manual © Respironics, Inc.
- Page 54 1. Replace the controller PCB. 2. If this persists replace the pneumatics subassembly (blower and valve) Table 5-3: Significant Event Log: Event IDs (Sheet 6 of 22) 5-22 BiPAP® Focus™ Ventilator Service Manual © Respironics, Inc. REF 1029568 Rev A...
- Page 55 24 hours, replace the controller PCB. Table 5-3: Significant Event Log: Event IDs (Sheet 7 of 22) 5-23 REF 1029568 Rev A BiPAP® Focus™ Ventilator Service Manual © Respironics, Inc.
- Page 56 24 hours, replace the controller PCB. Table 5-3: Significant Event Log: Event IDs (Sheet 8 of 22) 5-24 BiPAP® Focus™ Ventilator Service Manual © Respironics, Inc. REF 1029568 Rev A...
- Page 57 24 hours, replace the controller PCB. Table 5-3: Significant Event Log: Event IDs (Sheet 9 of 22) 5-25 REF 1029568 Rev A BiPAP® Focus™ Ventilator Service Manual © Respironics, Inc.
- Page 58 24 hours, replace the controller PCB. Table 5-3: Significant Event Log: Event IDs (Sheet 10 of 22) 5-26 BiPAP® Focus™ Ventilator Service Manual © Respironics, Inc. REF 1029568 Rev A...
- Page 59 24 hours, replace the controller PCB. Table 5-3: Significant Event Log: Event IDs (Sheet 11 of 22) 5-27 REF 1029568 Rev A BiPAP® Focus™ Ventilator Service Manual © Respironics, Inc.
- Page 60 24 hours, replace the controller PCB. Table 5-3: Significant Event Log: Event IDs (Sheet 12 of 22) 5-28 BiPAP® Focus™ Ventilator Service Manual © Respironics, Inc. REF 1029568 Rev A...
- Page 61 2. If this persists replace the controller PCB. 3. If replacing the Controller PCB doesn't fix the issue, replace the UI PCB. Table 5-3: Significant Event Log: Event IDs (Sheet 13 of 22) 5-29 REF 1029568 Rev A BiPAP® Focus™ Ventilator Service Manual © Respironics, Inc.
- Page 62 24 hours, replace the UI PCB. Table 5-3: Significant Event Log: Event IDs (Sheet 14 of 22) 5-30 BiPAP® Focus™ Ventilator Service Manual © Respironics, Inc. REF 1029568 Rev A...
- Page 63 24 hours, replace the UI PCB. Table 5-3: Significant Event Log: Event IDs (Sheet 15 of 22) 5-31 REF 1029568 Rev A BiPAP® Focus™ Ventilator Service Manual © Respironics, Inc.
- Page 64 24 hours, replace the UI PCB. Table 5-3: Significant Event Log: Event IDs (Sheet 16 of 22) 5-32 BiPAP® Focus™ Ventilator Service Manual © Respironics, Inc. REF 1029568 Rev A...
- Page 65 24 hours, replacethe battery. 3. If this persists replace the UI PCB Table 5-3: Significant Event Log: Event IDs (Sheet 17 of 22) 5-33 REF 1029568 Rev A BiPAP® Focus™ Ventilator Service Manual © Respironics, Inc.
- Page 66 24 hours, replace the UI PCB. Table 5-3: Significant Event Log: Event IDs (Sheet 18 of 22) 5-34 BiPAP® Focus™ Ventilator Service Manual © Respironics, Inc. REF 1029568 Rev A...
- Page 67 24 hours, replace the UI PCB. Table 5-3: Significant Event Log: Event IDs (Sheet 19 of 22) 5-35 REF 1029568 Rev A BiPAP® Focus™ Ventilator Service Manual © Respironics, Inc.
- Page 68 24 hours, replace the UI PCB. Table 5-3: Significant Event Log: Event IDs (Sheet 20 of 22) 5-36 BiPAP® Focus™ Ventilator Service Manual © Respironics, Inc. REF 1029568 Rev A...
- Page 69 24 hours, replace the UI PCB. Table 5-3: Significant Event Log: Event IDs (Sheet 21 of 22) 5-37 REF 1029568 Rev A BiPAP® Focus™ Ventilator Service Manual © Respironics, Inc.
- Page 70 24 hours, replace the controller PCB. Table 5-3: Significant Event Log: Event IDs (Sheet 22 of 22) 5-38 BiPAP® Focus™ Ventilator Service Manual © Respironics, Inc. REF 1029568 Rev A...
-
Page 71: Ventilator Communications
This is to prevent possible power loss. CAUTION: The ventilator must be recalibrated following a software download. Download Service The most current revisions of the Service Center Tools Suite and BiPAP Focus operational software should be downloaded from the Respironics Service Software to the website. -
Page 72: Installing Communications Software On The Service Pc
Chapter 6 Ventilator Communications Installing Communications software allows the ventilator to communicate with the service PC. Follow these steps to install BiPAP Focus communications software Communications onto a service PC: Software on the Service PC 1. Connect the universal serial bus (USB) cable between the service PC and ventilator. - Page 73 Figure 6-3: New Hardware Wizard - Windows XP Warning 6. When the software completes the software installation the Completing the Found New Hardware Wizard dialog box appears. Click Finish. Refer to Figure 6-4. REF 1029568 Rev A BiPAP® Focus™ Ventilator Service Manual © Respironics, Inc.
-
Page 74: Starting The Bipap Focus Wizard
7. Once the drivers for software downloads are complete the process for loading the BiPAP Focus can begin. Starting the BiPAP The BiPAP Focus Wizard is comprised of two phases: Focus Wizard • Phase 1 - Downloading controller board software to the ventilator. - Page 75 Chapter 6 Ventilator Communications Figure 6-5: Phase 1 Start Screen 2. Select the desired option from the list and click Next. Figure 6-6: BiPAP Focus Controller Software Selection Screen REF 1029568 Rev A BiPAP® Focus™ Ventilator Service Manual © Respironics, Inc.
- Page 76 PC. The male end, labeled Software/Rasp, should be connected to the ventilator. Figure 6-7: Communications Cable Connection Screen 4. The screen shows the controller board software installation process. BiPAP® Focus™ Ventilator Service Manual © Respironics, Inc. REF 1029568 Rev A...
- Page 77 Figure 6-8: Software Installation Progress Screen 5. Once the controller board software installation is complete, a completion screen (Figure 6-9) is displayed. Click Finish. Figure 6-9: BiPAP Focus Controller Board Software Installation Finished REF 1029568 Rev A BiPAP® Focus™ Ventilator Service Manual © Respironics, Inc.
-
Page 78: Downloading Ui Software To The Ventilator
NOTE: The female end of the serial communications cable should be connected to the service PC. The male end, labeled Software/Rasp, should be connected to the ventilator. BiPAP® Focus™ Ventilator Service Manual © Respironics, Inc. REF 1029568 Rev A... - Page 79 4. The software connection process dialog box appears identifying the steps including, Searching for the ventilator, retrieving ventilator configuration information, and installing the communications software (Figure 6-13). Click Next. REF 1029568 Rev A BiPAP® Focus™ Ventilator Service Manual © Respironics, Inc.
- Page 80 Figure 6-14: Ventilator Configuration 6. Click Next, the Ventilator Management dialog box appears (Figure 6-15), which allows loading new software into the ventilator configuration or selecting Advanced configuration operations. 6-10 BiPAP® Focus™ Ventilator Service Manual © Respironics, Inc. REF 1029568 Rev A...
- Page 81 Figure 6-15: Ventilator Management Screen 7. Check one of the ventilator options then click Next. 8. The BiPAP Focus Software Selection screen appears. Select the software version from the list and click Next. Figure 6-16: BiPAP Focus UI Software Selection Screen 9.
- Page 82 (Figure 6-18). Click Next. Figure 6-18: New Software Installation 11. Once the user interface software installation is complete, a completion screen (Figure 6-19) is displayed. Click Finish. 6-12 BiPAP® Focus™ Ventilator Service Manual © Respironics, Inc. REF 1029568 Rev A...
- Page 83 16. The ventilator must now be recalibrated. Proceed to Chapter 7: Performance Verification. Reprogramming the The serial number of each BiPAP Focus ventilator is stored in nonvolatile memory on its UI PCB, and must be reprogrammed if you replace the UI PCB. BiPAP Focus Serial Number 1.
- Page 84 NOTE: The female end of the serial communications cable should be connected to the service PC. The male end, labeled Software/Rasp, should be connected to the ventilator. 6-14 BiPAP® Focus™ Ventilator Service Manual © Respironics, Inc. REF 1029568 Rev A...
- Page 85 3. Once the ventilator and PC are connected, power up the ventilator while holding down the Up and Down arrow buttons until the ventilator displays the message Waiting to detect the BiPAP Focus Ventilator (Figure 6-22). Click Next. Figure 6-22: Powering Up the Ventilator 4.
- Page 86 6. Fill the “I want to perform advanced configuration operations.” check box then click Next, or click Cancel to exit. Figure 6-24: Ventilator Management Screen 7. The BiPAP Focus Update Ventilator Configuration screen appears. Fill the Ventilator Serial Number check box then enter the serial number in the text box.
- Page 87 11. Once the download is complete the ventilator will reset. 12. Disconnect the communication cables. 13. The ventilator must now be recalibrated. Proceed to Chapter 7: Performance Verification. 6-17 REF 1029568 Rev A BiPAP® Focus™ Ventilator Service Manual © Respironics, Inc.
- Page 88 Chapter 6 Ventilator Communications (This page is intentionally blank.) 6-18 BiPAP® Focus™ Ventilator Service Manual © Respironics, Inc. REF 1029568 Rev A...
-
Page 89: Performance Verification
Electical Safety, Alarm/keypad/LED, power transition. LCD assembly All. keypad Electical Safety, Alarm/keypad/LED. main alarm, backup alarm, or remote Electical Safety, Alarm/keypad/LED, power alarm connector transition. Table 7-2: Performance Verification: Required Tests REF 1029568 Rev A BiPAP® Focus™ Ventilator Service Manual © Respironics, Inc. -
Page 90: Required Test Equipment
(cmH2O), flow rate (LPM), volume (Liters BTPS), and respiratory rate Utility Software Log on to Calibration and testing of the BiPAP Focus requires http:// servicesoftware.respironics.com the use of Respironics Utility Software and download the Utility Software onto your PC. -
Page 91: Preliminary Cleaning, Inspection, And Setup
Remove humidifier connections from the ventilator, if applicable. • Visually inspect the exterior of the ventilator for damage. Replace damaged parts as needed. • Clean the ventilator exterior as described in the BiPAP Focus Clinical Manual. • Clean the ventilator interior using an ESD-safe vacuum. •... -
Page 92: Alarm/Led Test
• When pins 1 and 9 are used, the relay is closed during normal operation, and open during an alarm condition including loss of power. BiPAP® Focus™ Ventilator Service Manual © Respironics, Inc. REF 1029568 Rev A... -
Page 93: Bipap Focus System Run-In
14. Use the Up/Down keys to highlight the ON Battery LED then press the Enter key to test ON Battery LED. BiPAP Focus System Before the BiPAP Focus can be calibrated, the device must be run-in for at least 35 minutes to avoid possible calibration failures. Run-in Equipment Required 0.25"... -
Page 94: Real-Time Clock Calibration
To do this in a logical manner and for a technician or therapist to know exactly when a certain event has occurred, the BiPAP Focus runs and records events in real-time. This time is checked and compared to your computers time when running the calibration software. - Page 95 The program will set the appropriate date and time on the BiPAP Focus. 10. When the program has finished, a green "PASS" indicator will appear at the bottom. Figure 7-3: CALIBRATION COMPLETE REF 1029568 Rev A BiPAP® Focus™ Ventilator Service Manual © Respironics, Inc.
-
Page 96: If Real-Time Clock Calibration Fails
Performance Verification If Real-Time Clock Calibration Fails If calibration fails, confirm that the BiPAP Focus Time and Date are set to within 5 minutes of the service PC. Re-run the calibration. If the calibration fails again, replace the controller PCB and retest. -
Page 97: Mfts Software Setup
2. Skip the Name and Password dialog box by clicking OK. Figure 7-5: MFTS Name and Password 3. Click the Open button in the top left-hand corner. 4. Select file name BiPAP Focus Production Post Test and press the Enter key. REF 1029568 Rev A... -
Page 98: Unit Under Test Setup
3. Connect the power and RS232 cables to the back of the unit. 4. Start the BiPAP Focus in diagnostic mode. Power on the unit and press the Standby key, then immediately press both the Alarm Silence and Alarm Reset keys simultaneously until the unit enters diagnostic mode then press Continue. -
Page 99: Calibration
NOTE: Retrieve and WRITE down the BLOWER SUBSYSTEM SERIAL NUMBER from the BiPAP Focus Product Information screen. It may be necessary to input the blower subsystem serial number if the memory is cleared because it failed calibration. - Page 100 Figure 7-10: Entering Calibrator’s Name 6. When asked to verify that the private label is Bi-PAP Focus check and click PASS if correct or Fail if incorrect. 7-12 BiPAP® Focus™ Ventilator Service Manual © Respironics, Inc. REF 1029568 Rev A...
- Page 101 7. When prompted to test the Audible Alarm, click Yes. Figure 7-12: Audible Alarm Test 8. When prompted to verify if Audible Alarm sounded, click PASS if correct or Fail if incorrect. 7-13 REF 1029568 Rev A BiPAP® Focus™ Ventilator Service Manual © Respironics, Inc.
- Page 102 ON/OFF switch to the OFF position. Then restart the unit in diagnostic mode as per step ‘4.’ on page 7-10. When the unit powers back up click OK on the PC screen. 7-14 BiPAP® Focus™ Ventilator Service Manual © Respironics, Inc. REF 1029568 Rev A...
- Page 103 Figure 7-16: Verifying the Flow Sensor Calibration 10. The calibration of this device is finished when the Pass Test Banner appears. Click OK on the PC screen. 7-15 REF 1029568 Rev A BiPAP® Focus™ Ventilator Service Manual © Respironics, Inc.
- Page 104 11. Print a copy of the results, sign the sheet. 12. Power off the ventilator and remove the power cord and RS232 cable from the back of the device. 7-16 BiPAP® Focus™ Ventilator Service Manual © Respironics, Inc. REF 1029568 Rev A...
-
Page 105: Field Calibration
Performance Verification Field Calibration This procedure provides remote instructions for the calibration of the BiPAP Focus. The results of this calibration can be printed to a local printer and used as a final test data sheet. NOTE: Make sure real time clock calibration is complete before attempting the system calibration procedure. -
Page 106: Procedure
3. Download this utility to the service PC. 4. Extract the file Service-Center-Tools.exe and launch the installation wizard. 5. Navigate the start menu Start \ Programs \ Respironics \ Tools \ Service Center Tools. 6. Select Read Serial Number and Model Number from the drop down list ‘Please Select A Tool To Execute...’... - Page 107 PC. Then connect the male end labeled Software/Rasp to the ventilator. 2. Connect the external power supply to the BiPAP Focus. 3. Remove the bacteria filter from the ventilator if it is connected. 4. Connect the oxygen enrichment adapter to the outlet of the BiPAP Focus and occlude the adapter.
- Page 108 9. The program prompts to enter the UUT MODEL NUMBER. Click OK after entering the UUT Model Number. 10. Enter the OPERATOR NAME and click OK. 11. Verify that the label is: BiPAP Focus. Click PASS. 12. The program will then run through an alarm test. Follow the on screen instructions.
- Page 109 4.00 cmH O is achieved, click DONE on the screen. NOTE: Let the pressures stabilize for at least one minute before making any adjustments during the calibration. 7-21 REF 1029568 Rev A BiPAP® Focus™ Ventilator Service Manual © Respironics, Inc.
- Page 110 17. After the last pressure calibration is performed, the following prompt will appear, indicating the program is about to start the flow element calibration. The program will first calibrate positive flow. 7-22 BiPAP® Focus™ Ventilator Service Manual © Respironics, Inc. REF 1029568 Rev A...
- Page 111 (completely open the flow valve). 19. Click the green OK button on the program window. Figure 7-25: Calibration Circuit 7-23 REF 1029568 Rev A BiPAP® Focus™ Ventilator Service Manual © Respironics, Inc.
- Page 112 20. Observe the flow meter. If the flow is greater than 160 lpm, click on the red button to decrease the flow. If the flow is less than 150 lpm, click on the green button to increase the flow. When the BiPAP Focus is delivering between 150-160 lpm, click on the DONE button.
- Page 113 24. The program will now calibrate the negative portion of the flow table. Although the flow meter may not display a negative flow, pressure against the normal direction of flow of the device is considered a 7-25 REF 1029568 Rev A BiPAP® Focus™ Ventilator Service Manual © Respironics, Inc.
- Page 114 Once these values are set then click OK. 27. On the next screen prompt, type the value observed on the TSI then click OK. 7-26 BiPAP® Focus™ Ventilator Service Manual © Respironics, Inc. REF 1029568 Rev A...
- Page 115 33. A green PASS prompt will appear on the computer screen. Click the OK button to view the test data sheet. Click OK on the print results button to print the test data sheet. Figure 7-31: BiPAP Focus Test Results print out 7-27 REF 1029568 Rev A...
-
Page 116: Performance Verification
Set the BiPAP Focus to 20 cmH O. Verify the pressure reading and record it on the test data sheet. d. Set the BiPAP Focus to the S/T mode and set the IPAP pressure to 10 cmH O, EPAP pressure to 5 cmH O, BPM to 10 and the Ti I-time to 2.0. -
Page 117: Performance Verification Data Form
PASS FAIL Bkup Audible Alarm PASS FAIL Remote Alarm PASS FAIL Alarm LED PASS FAIL Silence LED PASS FAIL On Battery LED PASS FAIL Technician’s Signature Date 7-29 REF 1029568 Rev A BiPAP® Focus™ Ventilator Service Manual © Respironics, Inc. - Page 118 Chapter 7 Performance Verification 7-30 BiPAP® Focus™ Ventilator Service Manual © Respironics, Inc. REF 1029568 Rev A...
-
Page 119: Component Removal/Installation
Chapter 8. Component Removal/Installation This chapter illustrates the names and locations of the replaceable components in the BiPAP Focus system. This chapter provides a quick reference and overview of the unit. Within each replacement section, more detailed support information is provided to illustrate the exact component location and replacement procedure(s). - Page 120 Power & Battery Filter Cover Enclosure Filters Assembly UI Board Controller Valve Assembly Blower Assembly Secondary Alarm Primary Alarm Main Body Assembly Bottom Enclosure with foam Figure 8-1: Disassembly Flowchart BiPAP® Focus™ Ventilator Service Manual © Respironics, Inc. REF 1029568 Rev A...
- Page 121 Main Body Assembly Primary Alarm Secondary Alarm Blower Assembly Valve Assembly Controller UI Board Filter Cover Assembly Filters Enclosure Reconnect Power & Battery Figure 8-2: Assembly Flowchart REF 1029568 Rev A BiPAP® Focus™ Ventilator Service Manual © Respironics, Inc.
-
Page 122: Disconnecting Power
(Install with 5 in/lb. of torque) 3. Remove the four screws that hold the VGA assembly to the ventilator. (Install with 8 in/lb. of torque) BiPAP® Focus™ Ventilator Service Manual © Respironics, Inc. REF 1029568 Rev A... - Page 123 VGA Assembly Screws Side Panel Screws (8 in/lb.) (5 in/lb.) VGA Assembly Screws (8 in/lb.) Side Panel Screws (5 in/lb.) Figure 8-4: Bottom enclosure Figure 8-5: Remove side panels REF 1029568 Rev A BiPAP® Focus™ Ventilator Service Manual © Respironics, Inc.
-
Page 124: Vga Assembly
1. Remove top enclosure (“Top Enclosure” on page 8-4). 2. Disconnect the Parlex cable from the UI board. 3. Disconnect the ground strap clip from the UI board. BiPAP® Focus™ Ventilator Service Manual © Respironics, Inc. REF 1029568 Rev A... - Page 125 Ground Strap UI board Ground Strap to VGA connection Figure 8-7: VGA Assembly cables attached to UI board 4. Place the VGA assembly face down on protected work surface. REF 1029568 Rev A BiPAP® Focus™ Ventilator Service Manual © Respironics, Inc.
- Page 126 11. Remove the four screws that secure the VGA screen and interface board. (Install with 5 in/lb. of torque) 12. Disconnect the cables from the interface board. BiPAP® Focus™ Ventilator Service Manual © Respironics, Inc. REF 1029568 Rev A...
- Page 127 VGA screen or cables as necessary and reverse these instructions to install. NOTE: Tuck ribbon cables under interface board before securing screws. Do not twist or pinch cables between panels. REF 1029568 Rev A BiPAP® Focus™ Ventilator Service Manual © Respironics, Inc.
-
Page 128: User Interface Board
6-pin switch control cable • 2-pin primary alarm connector • Battery cable harness from battery housing • Interpower cable from Controller PCB • 8-pin interconnect comms harness 8-10 BiPAP® Focus™ Ventilator Service Manual © Respironics, Inc. REF 1029568 Rev A... -
Page 129: Controller Pcb
4. Using a #2 phillips screwdriver remove the three stand off nuts. Standoff nut positions interpower cable Figure 8-12: Controller PCB 5. Lift the board to expose the remaining harnesses cables and tubing. 8-11 REF 1029568 Rev A BiPAP® Focus™ Ventilator Service Manual © Respironics, Inc. - Page 130 When reconnecting the tubing to the sensors or Controller PCB always clip the end of the tubing leaving only 2mm of the flanged tubing. This will promote a tight fit with the newly clipped tubing 8-12 BiPAP® Focus™ Ventilator Service Manual © Respironics, Inc. REF 1029568 Rev A...
-
Page 131: Valve Assembly
P1 port P2 port sensor diffuser transducer tubing port Figure 8-14: Valve Assembly and base layer components 4. Disconnect the rubber elbow from the blower outlet. 8-13 REF 1029568 Rev A BiPAP® Focus™ Ventilator Service Manual © Respironics, Inc. -
Page 132: Blower
3. Remove the user Controller PCB (“Controller PCB” on page 8-11). blower screws (5 in/lb.) secondary secondary alarm screws diffuser (3 in/lb.) Figure 8-15: Blower and Secondary Alarm 8-14 BiPAP® Focus™ Ventilator Service Manual © Respironics, Inc. REF 1029568 Rev A... -
Page 133: Secondary Alarm
Move them out of the way. Refer to Figure 8-14. 5. Remove the two screws from both sides of the secondary alarm. (Install with 3 in/lb. of torque). 6. Remove the secondary alarm and foam. 8-15 REF 1029568 Rev A BiPAP® Focus™ Ventilator Service Manual © Respironics, Inc. -
Page 134: Primary Alarm
5. Remove the four screws from the main body assembly that anchor the assembly to the bottom enclosure. (Install with 8in/lb. of torque). 6. Pull really hard to get the foam adhesive loose. 8-16 BiPAP® Focus™ Ventilator Service Manual © Respironics, Inc. REF 1029568 Rev A... -
Page 135: Interconnect Diagrams
To promote conductivity between connectors, ensure that Nyogel 7606 lubricant is applied to all connections except gold-gold cable connections. The Power to the TCB and the UI are described as follows. Figure 8-18: Power Interconnection 8-17 REF 1029568 Rev A BiPAP® Focus™ Ventilator Service Manual © Respironics, Inc. - Page 136 Chapter 8 Component Removal/Installation BiPAP Focus has the following communications requirements: • IPC between the TCB and the UI. • Serial port for calibration and TCB software upgrade • USB port for UI section software upgrade Figure 8-19: Communications Interconnection 8-18 BiPAP®...
-
Page 137: Bipap Focus Replacement Parts List
Chapter 9 BiPAP Focus Replacement Parts List Chapter 9. BiPAP Focus Replacement Parts List This section lists and illustrates the major components of the BiPAP Focus portable ventilator, including: • Exterior • Front panel/user interface • Ventilator interior • Electronic parts Complete Parts List Table 9-1 lists the complete list of all BiPAP Focus repair parts. - Page 138 Service, Washer, #4 TYPE B NARROW FLAT 1030151 Service, Washer, M3 Split Lock 1030149 Kit, BiPAP Focus Communications Cable 1030010 Table 9-1: Recommended BiPAP Focus Service Parts (Sheet 2 of 2) BiPAP® Focus™ Ventilator Service Manual © Respironics, Inc. REF 1029568 Rev A...
- Page 139 P/N 1025771 P/N 1025765 Side panel P/N 1025770 VGA Side panel P/N 1025767 Rubber Back foot (x4) P/N 1031227 M3 x 8 side panel screws P/N 1030148 (5 in/lb.) REF 1029568 Rev A BiPAP® Focus™ Ventilator Service Manual © Respironics, Inc.
- Page 140 Keypad assembly, English P/N 1025774 Keypad assembly, Global P/N 1025773 VGA front panel P/N 1025768 VGA interface board VGA LCD VGA Rear panel P/N 1010858 P/N 1008125 P/N 1010858 BiPAP® Focus™ Ventilator Service Manual © Respironics, Inc. REF 1029568 Rev A...
-
Page 141: Ventilator Interior
P/N 1012279 Blower Assembly Kit P/N 1018169 includes: damper strap, blower cap, blower gasket, screws Valve assembly P/N 1017912 valve strap blower gasket, silicone P/N 1031236 P/N 1012279 REF 1029568 Rev A BiPAP® Focus™ Ventilator Service Manual © Respironics, Inc. -
Page 142: Communications Cables
(2 in/lb.) Communications Cables BiPAP Focus Communications Cable Kit P/N 1030010 female Type A connector Type B connector DB9 male DB9 male (modified) (modified) Software/RASP Diagnostics connection connection BiPAP® Focus™ Ventilator Service Manual © Respironics, Inc. REF 1029568 Rev A... -
Page 143: Electronic Parts
Controller PCB P/N 1025750 P/N 1035076 AC/DC power supply assembly Battery P/N 1025775 P/N 1028006 power cord US P/N 1029989 UK/Ireland P/N 1029982 Denmark P/N 1029991 Europe P/N 1029985 REF 1029568 Rev A BiPAP® Focus™ Ventilator Service Manual © Respironics, Inc. - Page 144 Interconnect power cable P/N 1025764 Battery Cable harness P/N 1025776 switch control cable P/N 1031159 UI to VGA parlex cable P/N 1031239 screen to UI board ground cable P/N 1031161 BiPAP® Focus™ Ventilator Service Manual © Respironics, Inc. REF 1029568 Rev A...
- Page 145 9-8 Downloading Software removal/installation, 8-10 See Communications Software blower DRPT (diagnostic report) description, 3-2 Generating, 5-9–?? gasket, silicone (gummy) Serial port setup, 5-5–5-8 part number, 9-5 REF 1029568 Rev A BiPAP® Focus™ Ventilator Service Manual © Respironics, Inc.
- Page 146 Screen to UI board ground cable English part number, 9-4 part number, 9-8 Global serial communications port , 3-6 part number, 9-4 side panels removal/installation, 8-6–8-9 part number, 9-3 removal/installation, 8-4 BiPAP® Focus™ Ventilator Service Manual © Respironics, Inc. REF 1029568 Rev A...
- Page 147 USB port , 3-6 User Interface Board description, 3-4 part number, 9-7 removal/installation, 8-10 valve assembly description, 3-2 part number, 9-5 removal/installation, 8-13 valve strap part number, 9-5 REF 1029568 Rev A BiPAP® Focus™ Ventilator Service Manual © Respironics, Inc.
- Page 148 Index (This page is intentionally blank.) BiPAP® Focus™ Ventilator Service Manual © Respironics, Inc. REF 1029568 Rev A...
Need help?
Do you have a question about the BiPAP Focus and is the answer not in the manual?
Questions and answers