Table of Contents
Advertisement
Quick Links
Advertisement
Table of Contents

Related Manuals for Respironics BiPAP Synchrony


Summary of Contents for Respironics BiPAP Synchrony
- Page 1 Provider Manual...
- Page 2 BiPAP systems are the subject of one or more of U.S. Patents #5148802, #5239995, #531937, #5433193, Canadian Patent #2, 024, 477, European Patent #EP0425092, German Patent #69021681.5-08, and other pending U.S. and foreign patents. BiPAP is a registered trademark of Respironics, Inc. © 2002 Respironics, Inc. All Rights Reserved...
-
Page 3: Table Of Contents
Table of Contents Chapter 1: Warnings and Cautions ............... 1-1 Warnings ..........................1-1 Cautions ..........................1-3 Intended Use ......................... 1-4 Contraindications ........................ 1-4 Patient Precautions ......................1-4 Communication Statements for Optional Modem ............1-5 ................................1-5 YPES OF ERVICE ..........................1-5 ELEPHONE OMPANY ROCEDURES... - Page 4 Chapter 4: Setting up and Starting the Synchrony ..........4-1 Preparing the Synchrony ....................4-1 4.1.1 S .......................... 4-1 UMMARY OF ETUP PERATIONS 4.1.2 I ..........................4-2 NSTALLING THE ILTERS 4.1.3 A ........................4-3 SSEMBLING THE ATIENT IRCUIT 4.1.4 S ........................
- Page 5 Chapter 8: Alarms ....................8-1 Alarm Introduction ......................8-1 Setting Alarm Parameters....................8-2 8.2.1 A ......................8-2 LARM ARAMETER PERATION UMMARY 8.2.2 C ........................8-3 HANGING THE LARM ARAMETERS Summary of Alarm Behavior ..................... 8-6 8.3.1 A ........................... 8-6 LARM OUNDS EHAVIOR 8.3.2 A...
- Page 6 Provider Manual...
-
Page 7: Package Contents
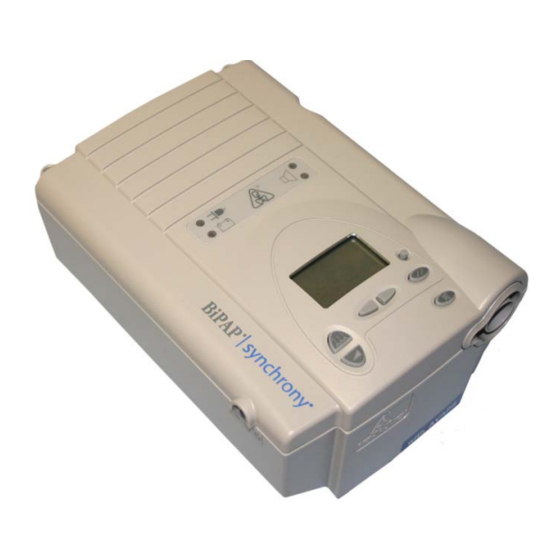
Package Contents • BiPAP Synchrony • power cord • flexible tubing (1.8 m x 2 mm I.D.) • filter cap • pollen filters • ultra-fine filter • optional modem cable (4.27 m) • User Guide* BiPAP Synchrony Power Cord Filter Cap... - Page 8 Provider Manual...
-
Page 9: Chapter 1: Warnings And Cautions
• The Synchrony should be used only with masks and connectors recommended by Respironics or with those recommended by the health care professional or respiratory therapist. See Chapter 12 for approved patient circuits. A mask should not be used unless the Synchrony is turned on and operating properly. - Page 10 Respironics or an authorized service center. • Repairs and adjustments must be performed by Respironics or an authorized service center. Service done by inexperienced or unqualified personnel, or installation of unauthorized parts could cause injury, invalidate the warranty, or result in costly damage.
-
Page 11: Cautions
Warnings (continued) • Verify that the Patient Disconnect alarm is active if required for medical reasons. 1.2 Cautions • The Synchrony may only be operated at temperatures between 5°C and 35°C. • Do not immerse the Synchrony or allow any liquid to enter the enclosure or the inlet filter. -
Page 12: Intended Use
The Synchrony is intended for use with nasal masks and full-face masks as recommended by Respironics. WARNING! Do not connect any equipment to the Synchrony unless recommended by Respironics or the health care professional. Verify that an exhalation port is present to exhaust CO from the circuit. -
Page 13: Communication Statements For Optional Modem
FCC. Contact your telephone company if you have questions about your phone line. In the event repairs are ever needed on the Synchrony, they should be performed by Respironics or an authorized representative of Respironics. For information contact Respironics. (See page 2-9.) -
Page 14: Industry Canada Notice
1.7 Industry Canada Notice NOTICE: The Industry Canada Label identifies certified equipment. This certification means that the equipment meets telecommunications network protective, operational, and safety requirements as prescribed in the appropriate Terminal Equipment Technical Requirements documents. The Department does not guarantee the equipment will operate to the user’s satisfaction. -
Page 15: Chapter 2: Introduction
The Synchrony is available in two models. The BiPAP Synchrony Lab System is for use by clinicians in a sleep lab setting. The BiPAP Synchrony Ventilatory Support System is for use in a hospital or home setting. Throughout this manual, references to “Synchrony” will apply to both the Lab System and the Ventilatory Support System unless otherwise noted. -
Page 16: Modes Of Operation
2.2 Modes of Operation 2.2.1 CPAP M In the Continuous Positive Airway Pressure (CPAP) mode, the Synchrony delivers a continuous pressure support ventilation at one pressure level. 2.2.2 The Spontaneous (S) mode of the Synchrony delivers bi-level pressure support. The unit triggers to Inspiratory Positive Airway Pressure (IPAP) in response to spontaneous inspiratory effort and cycles to Expiratory Positive Airway Pressure (EPAP) during exhalation. -
Page 17: S/T Mode
2.2.3 S/T M The Spontaneous/Timed (S/T) mode of the Synchrony is similar to the S mode, except that it also can deliver a machine-triggered breath if the patient does not spontaneously breath within a set time. The S/T mode ensures that patients will receive a minimum number of breaths per minute based on the Rate setting. -
Page 18: Mode Summary
2.2.6 Table 2-1 summarizes the initiation of triggers and cycles for each bi-level UMMARY mode. Mode Trigger Limit Cycle Patient Pressure Patient or Device Patient or Machine Pressure Patient or Device Patient or Machine Pressure Device Machine Pressure Device Table 2-1 Initiation of Triggers and Cycles for Synchrony Modes 2.3 Digital Auto-Trak An important characteristic of the Synchrony is its ability to recognize and compensate for unintentional leaks in the system and to automatically adjust its... - Page 19 Volume Trigger The volume trigger is one method used to trigger IPAP during spontaneous breathing in the S, S/T, and PC modes. The volume trigger threshold is 6 cc of (EPAP to IPAP) accumulated patient inspiratory volume. When patient effort generates inspiratory flow causing 6 cc of volume, IPAP is triggered.
- Page 20 Spontaneous Expiratory A second method used to cycle off IPAP during spontaneous breathing in the S, S/T, and PC modes is called Spontaneous Expiratory Threshold (SET). The Threshold SET rises in proportion to the inspiratory flow rate on each breath. When the (IPAP to EPAP) Spontaneous Expiratory Threshold (SET) and actual patient flow value are equal, the unit cycles to EPAP.
-
Page 21: Access Levels
2.4 Access Levels The Synchrony can be set to a Lockout mode so that certain settings and displays cannot be accessed. In the Lockout mode, the IPAP Rise Time can be adjusted if Bi-Flex is not enabled. If Bi-Flex is enabled, then it is adjustable in Lockout Mode. -
Page 22: Symbol Key
The following symbols are used on the Synchrony: 2.5 Symbol Key Symbol Meaning AC Power Indicator DC Power Indicator Alarm Indicator Type BF Applied Part Class II for Protection Against Electric Shock Attention, consult accompanying documents Standby Key (Start/Stop) Up Key Down Key Enter Key Ramp Start/Alarm Silence Key... -
Page 23: Definitions, Acronyms, And Abbreviations
IPAP prescription pressure is reached. RR—Respiratory Rate Trigger—The transition from expiration to inspiration 2.7 Service If you need product support, call Respironics’ Customer Service Department: 1-800-345-6443 (USA or Canada only) or 1-724-387-4000. Provider Manual... - Page 24 2-10 Provider Manual...
-
Page 25: Chapter 3: Controls And Displays
Chapter 3: Controls and Displays This chapter describes the control panel and displays, the patient circuit connections, and the rear panel connections. 3.1 Control Panel Display Screen AC Power Alarm Indicator Indicator Yellow Alarm Indicator DC Power Indicator Down Enter Standby Ramp/ Alarm Silence... -
Page 26: Control Keys
3.1.2 The Synchrony control panel has five membrane-type switches that perform ONTROL different functions depending on the screen selected, alarm status, and access level: Standby Key Starts and stops the Synchrony. The key must be pressed and released. Up Key Navigates between screens or increases the value of a selected parameter by one increment. - Page 27 Red Alarm Indicator • When flashing indicates a new high priority alarm has occurred. • When on continuously indicates a loss of power or silenced high priority alarm. Yellow Alarm Indicator • When flashing indicates a new medium priority alarm. •...
- Page 28 Selection Indicator ( ) appears next to the item that can be selected with the ENTER key, as shown in Figure 3-8. The indicator is moved by pressing the UP or DOWN key. S PARAMETERS: IPAP cm H2O EPAP cm H2O Rise Time 3 Figure 3-8 Selection Indicator;...
-
Page 29: Navigating The Screens
Progress Indicator ( ) consists of seven segments that empty from top to bottom to indicate the progress of certain operations. See Figure 3-12. The four indicators work simultaneously. SYSTEM SELF TEST VER:X.XX XXXXX.X HRS XXX XXX XXX XXX XXX XXX XXX XXX XXX XXX Figure 3-12 Progress Indicators appears in the Monitoring screen if any of the patient alarms (Patient... -
Page 30: Display Data
3.3 Display Data The display screen is used to display measured parameters in the Monitoring screens. The data changes depending on the access level and the mode of operation. The Synchrony is capable of displaying: • CPAP, IPAP, and EPAP - These displays are estimates of measure- ments at the patient connection. -
Page 31: Patient Circuit Connection
3.4 Patient Circuit The patient circuit is connected to the patient interface port shown in Figure 3-15. The patient interface port accepts a bacteria filter or a tubing Connection connector for reusable or disposable tubing. Patient Interface Port Oxygen Valve (Optional) Figure 3-15 Synchrony Patient Interface Port and Optional Oxygen Valve... -
Page 32: Rear Panel
DC inlet that accepts the DC power cord • the filter cap that is removed to inspect the inlet air filters (see Chapter • the RS-232 communications connector that accepts the Respironics Communications Cable for computer and external modem communi- cation •... -
Page 33: Chapter 4: Setting Up And Starting The Synchrony
Chapter 4: Setting up and Starting the Synchrony 4.1 Preparing the Synchrony 4.1.1 UMMARY OF ETUP PERATIONS Step 1 Install the inlet air filters. See Section 4.1.2. Step 2 Assemble and attach the patient circuit. See Section 4.1.3 Step 3 Provide power and set up the patient. -
Page 34: Installing The Air Filters
4.1.2 The Synchrony uses one or two removable filters at the air inlet. You must NSTALLING THE install the gray foam filter before operating the Synchrony. The gray foam filter ILTERS is washable and reusable. The disposable white ultra-fine filter is optional. CAUTION: A properly installed, undamaged gray foam inlet filter is required for proper operation. -
Page 35: Assembling The Patient Circuit
A completed assembly is shown in Figure 4-3. Patient Interface (Typical) Exhalation Port (Typical) Circuit Tubing Oxygen Valve (Optional) Bacteria Patient Filter Interface (Optional) Port Figure 4-3 An example of a Respironics-approved circuit Provider Manual... -
Page 36: Supplying Power To The Synchrony
DC cord retainer. Connect the DC cord to the appropriate DC source. Refer to the DC cord instruction sheet for recommended DC power sources. CAUTION: Only use a Respironics- supplied DC cord. DC Cord Retainer Figure 4-5 Plugging in the DC Cord... -
Page 37: Optional Internal Modem
The start-up screen is displayed, then the Synchrony initiates a self- MR. SMITH test. Both alarm LED indicators light momentarily, the audible (C)2002 Respironics alarm beeps twice to verify that the audible alarm is functioning. The start-up screen is then displayed, followed by the self-test NOTE: If your device is a system screen. -
Page 38: Operating The System
4.4 Operating the System During operation, the screen shows Monitoring Screen 1 (see Section 3.3). To change patient controls, go to the Patient Controls screen. To change parameters, go to the Caregiver Menu screen. The display returns to Monitoring Screen 1 if no keys are pressed for one minute. Full Access Lockout MODE: S... -
Page 39: Patient Operating Instructions
4.5 Patient Operating Instructions With the Synchrony in Lockout, the patient is restricted to viewing only the pressure levels and the respiratory rate. The patient may change the Rise Time, dial the provider with the modem, and initiate the ventilation ramp. 4.5.1 The Rise Time parameter is adjustable so that the patient can find the most ETTING THE... -
Page 40: Dialing The Provider
4.5.2 When instructed to do so, the patient can upload data from the Synchrony with IALING THE the modem. The instructions to program the modem are in Section 7.2.4. The ROVIDER Synchrony can be in use by the patient while downloading data. PATIENT ACTION RESULT If you are using an external modem, attach the... -
Page 41: Data Transmission Errors
To send a report before therapy is started: RESULT PATIENT ACTION With the Synchrony not running, press the The start-up screen is displayed, followed by the self-test STANDBY key. screen. When the self-test screen appears, press the The Dial Provider screen is displayed. UP key. -
Page 42: Using The Ramp Function
4-10 4.5.4 The Synchrony is equipped with a ramp function that starts the IPAP pressure SING at the EPAP level. The IPAP pressure is increased at each breath until the full UNCTION prescription level is reached. You set the increment per breath and enable or disable the ramp as shown in Section 5.2. -
Page 43: Chapter 5: Changing Parameters
Chapter 5: Changing Parameters 5.1 Summary of Change Parameters Operations Full Access Only M O D E : S 1 / 4 I P A P 1 5 c m H 2 O NOTE: The “X” shown in the hand E P A P 6 c m H 2 O 2 0 B P M... -
Page 44: Change Parameters Screens
5.2 Change Parameters Screens 5.2.1 CPAP M CPAP PARAMETERS: CPAP 10 cm H2O VentRamp OFF EXIT Increment Parameter Range of Change CPAP 4 to 20 cm H 1 cm H Ventilation Ramp Disabled, 0.5, 1.0, 2.0, 3.0 cm H O per breath Discrete values as listed 5.2.2 PARAMETERS:... - Page 45 5.2.3 T, PC, S/T M ODES P A R A M E T E R S : 2 / 3 PARA M ETERS: P ARAM ETE RS: 3 /3 T i m e d I n s p 1 . 0 s e c IP AP 19 cm H2O V ent Ramp OF F...
-
Page 46: Changing Synchrony Parameters
5.3 Changing Synchrony Parameters This section details the steps required to change parameters while in a given operating mode. For this example, the Synchrony is operating in the S mode. YOUR ACTION RESULT From the Monitoring screen, press the DOWN key until the Setup screen is displayed. - Page 47 YOUR ACTION RESULT PARAMETERS: Scroll to page 2 of the S Parameters screens. VentRamp OFF Select the EXIT command and press the Bi-Flex ENTER key to return to the Setup screen. EXIT SETUP Parameters Alarms Mode Options Provider Manual...
- Page 48 Provider Manual...
-
Page 49: Chapter 6: Changing Modes
Chapter 6: Changing Modes 6.1 Summary of Change Mode Operations Full Access Only M O D E : S 1 / 4 M O D E : S I P A P c m H 2 O E P A P c m H 2 O N e w M o d e : S / T X X X... - Page 50 6.2 Change Mode Setup Screens 6.2.1 CPAP M ETUP CREEN SETUP MODE: CPAP CPAP 10 cm H2O VentRamp OFF START ABORT See Section 5.2.1 for parameter ranges and increments. 6.2.2 ETUP CREENS SETUP MODE: S S E T U P M O D E : S 2 / 2 IPAP 12 cm H2O...
-
Page 51: Changing The Synchrony Mode
6.3 Changing the Synchrony Mode This section details the steps required to change the operating mode. For this example, the Synchrony is operating in the CPAP mode and will be changed to the S mode. YOUR ACTION RESULT From the CPAP monitoring screen, press the DOWN key until the Mode command is selected in the Setup screen. - Page 52 YOUR ACTION RESULT a. Press the ENTER key to activate the IPAP SETUP MODE: S parameter for change IPAP 12 cm H2O EPAP 6 cm H2O b. Press the UP or DOWN key to change the Rise Time IPAP value. Each key press changes the value by one increment (see Section 5.3).
-
Page 53: Chapter 7: Options
Chapter 7: Options 7.1 Summary of Options Operations M O D E : S 1 / 4 I P A P 1 5 c m H 2 O E P A P 6 c m H 2 O 2 0 B P M NOTE: The “X”... -
Page 54: Synchrony Options Menu
7.2 Synchrony Options Menu The Options menu allows you to: • view and reset the Time at P (Time at Pressure) • view and clear the System Codes and the Pt Alarm History (Patient Alarm History) • view and change the Modem settings •... -
Page 55: System Codes
7.2.2 The Synchrony stores the system error codes in the system alarm log. These YSTEM ODES codes can be used by authorized service representatives to troubleshoot the ventilator. The Synchrony can store five pages of 10 codes per page. Appendix B lists the error codes. -
Page 56: Patient Alarm History
The Synchrony stores the patient alarms such that the most recent alarm 7.2.3 ATIENT LARM appears first in the patient alarm log. The Synchrony can store 20 pages with ISTORY two alarm messages per page. YOUR ACTION RESULT From the Options menu, press the DOWN key until the Patient Alarm History command is selected, then press the ENTER key to activate. -
Page 57: Modem Settings
7.2.4 The Modem Settings screens display and allow you to change the modem type ODEM ETTINGS (external or internal), modem speed, phone number to be dialed, and the modem initialization string. (See Appendix A for external modem considerations.) YOUR ACTION RESULT From the Options menu, press the DOWN key until the Modem command is selected, then... - Page 58 ↵ ↵ ↵ ↵ ↵ NOTE: In the remainder of the modem setup steps, you can select a character in the text string selections. If you ↵ ↵ ↵ ↵ ↵ ↵ ↵ ↵ ↵ ↵ press the ENTER key when the is displayed, all characters to the right of the are deleted;...
- Page 59 YOUR ACTION RESULT If you have the internal modem installed, the modem initialization strings are automatically entered, and cannot be changed. Press the DOWN key twice and skip to Step 11. For external modems, see Appendix A for recommended initialization strings. Press the ENTER key to activate the Initialization String 1 for change.
- Page 60 YOUR ACTION RESULT The maximum number of characters is 20. When you have M O D E M S E T T I N G S : 5 / 6 entered the desired initialization string, move one character to the right, scroll to the ↵ symbol, and press the ENTER P r o v i d e r : H E A L T H C A R E key.
-
Page 61: Pev Setting
The PEV parameter is provided to compensate for the different leak ETTING characteristics when using a Respironics Plateau Exhalation Valve (PEV). The PEV setting is stored in memory and must be changed if you are changing from or to a PEV after restarting the Synchrony. -
Page 62: Changing The Access Level
7-10 7.2.6 HANGING THE CCESS EVEL YOUR ACTION RESULT From the Options menu, press the DOWN key until the Lockout command is selected, then press the ENTER key. O P T I O N S : 2 / 3 M o d e m P E V : Y E S O P T I O N S :... -
Page 63: Changing The Language
7-11 7.2.8 HANGING THE ANGUAGE YOUR ACTION RESULT From the Options menu, press the DOWN key until the Language command is selected, then press the ENTER key. OPTIONS: Language: ENGLISH Alarm: LOUD EXIT O P T I O N S : 1 / 3 T i m e a t P 2 5 h r s... -
Page 64: Changing The Alarm Volume
7-12 7.2.9 HANGING THE LARM OLUME YOUR ACTION RESULT From the Options menu, press the DOWN key until the Alarm command is selected, then press the ENTER key. O P T I O N S : 3 / 3 L a n g u a g e : E N G L I S H A l a r m : L O U D O P T I O N S : 1 / 3... -
Page 65: Chapter 8: Alarms
Chapter 8: Alarms This chapter describes the Synchrony alarms, describes how to set them, and lists corrective actions for the alarm conditions. 8.1 Alarm Introduction The Synchrony provides three alarm levels: high, medium, and low priority. High priority alarms require immediate operator response. The alarm signal consists of a red LED and a high priority sound. -
Page 66: Setting Alarm Parameters
8.2 Setting Alarm Parameters 8.2.1 LARM ARAMETER PERATION UMMARY NOTE: The “X” shown in the hand means that multiple presses MODE: S IPAP 15 cm H2O are required to attain the EPAP 6 cm H2O 20 BPM next screen shown. NOTE: If the backlight is off, the first press of the... -
Page 67: Changing The Alarm Parameters
8.2.2 The Patient Disconnect Alarm Delay, the Apnea Alarm, and the Low Minute HANGING THE Ventilation Alarm are adjustable on the Synchrony. When any of these alarms LARM ARAMETERS are enabled, an inverse “A” appears at the top of the Monitoring screen. See Chapter 3 for details. - Page 68 HANGING THE PNEA LARM NOTE: If you disable the apnea alarm, the system will not produce an audible alarm. A record of the apnea will not appear in the Synchrony alarm log. However a record will appear in the Encore/ Encore Pro alarm log.
- Page 69 HANGING THE INUTE ENTILATION LARM YOUR ACTION RESULT From the Monitoring screen, press the DOWN key until the Alarms command is selected. M O D E : S 1 / 4 I P A P 1 5 c m H 2 O E P A P 6 c m H 2 O 2 0 B P M...
-
Page 70: Summary Of Alarm Behavior
8.3 Summary of Alarm Behavior Alarm conditions are signaled by the Synchrony in three ways: a sound, an LED, and a display message. Each signal type behaves differently depending on the type of alarm. 8.3.1 High Priority Sounds: LARM OUNDS EHAVIOR High Priority: The sound repeats a pattern of three beeps followed by two beeps until the RAMP/SILENCE key is pressed. -
Page 71: Alarm Led Behavior
8.3.2 Red LED LARM EHAVIOR • Flashing red LED indicates a new high priority alarm. The LED changes to continuous when the alarm sound is silenced or the alarm condition is corrected. The LED will resume flashing during the silence period if a new alarm occurs. The LED goes off when the alarm message is cleared. -
Page 72: Summary Of User Actions During Alarm
8.4 Summary of User Actions During Alarm The following steps apply to most alarm conditions. The patient or operator should follow this sequence unless otherwise directed by the alarm table in Section 8.5. Look at the alarm indicators and listen to the alarm sound. (Note color and whether LED is flashing or solid) -
Page 73: Alarm Tables
8.5 Alarm Tables Sections 8.5.1 to 8.5.3 detail the alarms, display messages, Synchrony actions, possible causes, and patient and provider actions. The tables are arranged alphabetically, by priority. Note that the LED and Audible columns represent the conditions when the alarm is activated; all LEDs will be on and the audible will be silenced after you press the RAMP/ SILENCE key. -
Page 74: Medium Priority Alarms
8-10 Possible Patient Provider Synchrony Display Audible Cause Action Action Action Message Red Flash Device Call your home Replace the Low Pressure Operates is malfunctioning. care provider. device. Support Report alarm Verify patient Low Minute Device sensed minute Red Flash Operates ventilation below to your home care... -
Page 75: Ow Riority Larms
8-11 8.5.3 RIORITY LARMS Synchrony Patient Provider Possible Display Audible Action Action Action Cause Message Battery in Use Operates On start-up, None. Press to confirm Yellow information that you wish to Solid message that battery operate on battery is being used to power. -
Page 76: Alarm Definitions
8-12 8.5.4 LARM EFINITIONS The following table lists each patient alarm with its purpose, detection parameters, and termination parameters. Alarm Purpose Detection Termination Apnea The apnea alarm detects the Alarm is detected when the The alarm is terminated cessation of spontaneous time between spontaneous when two consecutive breathing. -
Page 77: Chapter 9: Communications
9.2 Communicating With Encore or Encore Pro Data Management Software NOTE: Respironics Encore or Encore Pro software is required to extract compliance data. The Encore or Encore Pro software can extract compliance data from the Synchrony. Use the Respironics-supplied RS-232 cable to connect the Synchrony to an IEC950, EN60950, or UL1950 approved device or computer with the Encore or Encore Pro software loaded. - Page 78 Provider Manual...
-
Page 79: Chapter 10: Adding Supplemental Oxygen
10-1 Chapter 10: Adding Supplemental Oxygen You may add oxygen to the patient circuit using the optional oxygen valve. This chapter describes the method of oxygen delivery and shows the oxygen concentrations attained at various IPAP and EPAP settings and oxygen flow rates. WARNING: Oxygen should be administered only on the order of a physician. - Page 80 10-2 Step 1 As shown in Figure 10-1, attach oxygen tubing from the oxygen source to the “In” port on the oxygen valve. Step 2 Connect a section of oxygen tubing to the “Out” valve port, then to one of the ports on the mask (if so equipped) or to an O enrichment adaptor positioned in the patient circuit.
-
Page 81: Supplemental Oxygen Concentrations
10-3 10.2 Supplemental Oxygen Concentrations Figures 10-2 and 10-3 illustrate the potential range of oxygen concentration available to the patient at a given tidal volume, supplemental oxygen flow, and pressure setting. These figures represent bench test results without inadvertent mask leaks when oxygen is administered at the mask. Substantial leaks around the mask may reduce the expected oxygen concentration to below the levels shown in Figures 10-2 and 10-3. - Page 82 10-4 Provider Manual...
-
Page 83: Chapter 11: Cleaning And Maintenance
Rinse thoroughly to remove all detergent residue. Allow Reusable Pollen the filter to completely dry before reinstalling it. If the foam filter is Filter torn, replace it. (Only Respironics supplied filters should be used as replacement filters.) Disposable Ultra-fine Filter... -
Page 84: Maintenance
11-2 If the ultra-fine filter is dirty or torn, replace it. Reinstall the filters, with the ultra-fine filter on the bottom. Slide the filters into the air inlet at the rear of the Synchrony and push them down into the recess. CAUTION: Never install a wet filter into the Synchrony. -
Page 85: Chapter 12: Circuits And Accessories
The Synchrony should be turned on and the intentional leak port should be checked before using the Synchrony. The Synchrony is intended for use with Respironics-approved patient circuits. Typical components are: •... -
Page 86: Circuits And Accessories
filter —Synchrony Accessories: oxygen valve DC power cord 12.3 Masks, Exhalation Ports, and Related Accessories —Masks: Respironics mask with built-in exhalation port or Respironics mask with separate exhalation device. —Accessories: disposable headgear reusable headgear chin strap ®... -
Page 87: Chapter 13: Operational Verification
Chapter 13: Operational Verification WARNING: If the Synchrony system fails to perform within the stated specifications of Chapter 14, have the system serviced by a qualified Respironics-approved service facility. NOTE: If the backlight is off, the first press of the , or key will only turn the backlight on;... -
Page 88: S/T Mode Verification
13-2 13.2 S/T Mode Connect the patient circuit to the Synchrony as described in Chapter 4 of this manual. Verification Connect a water column or digital manometer to a mask port. Connect the AC inlet to the Synchrony and connect the AC line to the appropriate power source. -
Page 89: Alarm Verification
13-3 13.3 Alarm Verification Keep the patient circuit and parameter setups as used in the S or S/T verification. Set the Patient Disconnect Alarm Delay to 15 sec. Exit to the Monitoring screen. Open the patient circuit to atmosphere. • Verify that the Patient Disconnect Alarm occurs in 15 seconds. Press the RAMP key to silence the alarm. - Page 90 13-4 Provider Manual...
-
Page 91: Chapter 14: Specifications
Ordinary Equipment, IPX0 Modes of Operation: Continuous Electromagnetic Compatibility: The BiPAP Synchrony Ventilatory Support System meets the requirements of EN 60601-1-2. Fuses: There are no user-replaceable fuses. RESSURE Output: 4 to 30 cm H Provider Manual... - Page 92 14-2 Specifications ONTROL CCURACY Parameter Range Accuracy ± 2 cm H IPAP 4 to 30 cm H ± 2 cm H EPAP 4 to 25 cm H ± 2 cm H CPAP 4 to 20 cm H Greater of 1 BPM or ± 10% of setting when Breath Rate 0 to 30 BPM (PA and S/T);...
- Page 93 The Synchrony automatically compensates for pressure drops associated with a 6-foot smooth bore tube. Additional pressure drop will occur when restrictive elements are added to the patient circuit. The following graph shows the additional pressure drop when adding: 1. a bacteria filter; 2. a bacteria filter and a Respironics pass-over humidifier.
- Page 94 14-4 Provider Manual...
-
Page 95: Appendix A: External Modem Requirements
Appendix A: External Modem Requirements This chapter explains requirements for using an external modem with the Synchrony. A.1 Serial Cable The Synchrony is equipped with a 9-pin RS-232 port. The serial cable for connecting the external modem to the Synchrony must be a DTE-to-DCE cable (i.e., “straight-through”... -
Page 96: Example Initialization Strings
The Synchrony software handles both numerical (short-form) and verbose (long-form) result codes. However, it will only recognize the verbose result codes that contain the following words in English: OK, ERROR, CONNECT, RING, NO CARRIER, NO DIALTONE, NO DIAL TONE, BUSY, NO ANSWER. -
Page 97: Appendix B: Error Codes
Appendix B: Error Codes This appendix lists the definitions for the displayed error codes (see Section 7.2.2) ERROR DEFINITION ERROR DEFINITION CODE CODE BATTERY_FAILURE_ALARM ERR_SOFTWARE HIGH_BATTERY_ALARM CPU_FAILURE LOW_MIN_VENT_ALARM STACK_OVERFLOW_FAILURE EXHALATION_PORT_ALARM STACK_UNDERFLOW_FAILURE APNEA_ALARM STACK_RESERVE_FAILURE PATIENT_DISCONNECT_ALARM RAM_FAILURE HIGH_PRESSURE_ALARM STUCK_KEY_FAILURE LOW_PRESSURE_ALARM CORRUPT_RX_MODE_FAILURE PROX_LINE_ALARM CORRUPT_RX_PARM_IN_MODE_FAILURE WAIT_FOR_TRIG_ERR1 CORRUPT_RX_PARM_OUT_MODE_FAILURE... - Page 98 ERROR DEFINITION CODE PATM_STUCK_SENSOR PP_STUCK_SENSOR PV1_STUCK_SENSOR PV2_STUCK_SENSOR ERASE_SECTOR_FAIL WRITE_FLASH_FAIL UNRECOGNIZED_ACCESS_KEY_VERSION PV1_PV2_SENSOR_FAILURE DATA_LOGGING_ERR1 SCAN_EVENTS_ERR LOG_INITIAL_VALUES_ERR1 LOG_EVENT_ERR1 DATA_FLASH_ERR SYS_PT_ALARM_LOG_CHECKSUM_ERR CORRUPT_SYS_ALARM_LOG_DATA_FAILURE CORRUPT_PT_ALARM_LOG_DATA_FAILURE BLOWER_DEFAULT_ERR1 BLOWER_OFF_CURRENT_HIGH UNRECOGNIZED_CAL_VERSION_BY_SW UNIT_TYPE_FAILURE TLOG_WRITE_QUEUE_BAD_DATA UNEXPECTED_WATCHDOG_RESET VALVE_DEFAULT_ERR1 DRIFT_DEFAULT_ERR1 UI_HIGH_PRIORITY_ALARM_TEST UI_2_HIGH_PRIORITY_ALARM_TEST UI_MEDIUM_PRIORITY_ALARM_TEST UI_2_MEDIUM_PRIORITY_ALARM_TEST UI_LOW_PRIORITY_ALARM_TEST UI_2_LOW_PRIORITY_ALARM_TEST LOW_PRESSURE_SUPPORT_ALARM INVALID_DRIFT_INDEX_AT_CAL INVALID_TCAL_AT_CAL INVALID_MODE_IN_CURRENT_MODEL UNSUPPORTED_FEATURE_SET LOW_TIDAL_VOLUME_ALARM VTE_TARGET_SETPOINT_ZERO ERR_BRMODEL_MAX_AMPLITUDE ERR_RAMP_DEFAULT1 INVALID_ALARM_CODE...
-
Page 99: Index
Index Change Parameters Screens 5-2 Changing Abbreviations 2-10 Access Level 7-10 AC Inlet 3-8 Alarm Volume 7-12 AC Operation 4-4 Language 7-11 AC Power Indicator 3-2 Mode 6-3 Access Levels 2-8 Parameters 5-4 Changing 7-10 Circuit Configurations Unlocking 7-10 Patient 12-1 Accessories 12-2 Cleaning Accuracy Specifications 14-2... - Page 100 Selection Indicator 3-4 Errors Standby Key 3-2 Data Transmission 4-9 Up Key 3-2 Estimated Exhaled Minute Ventilation 3-6 Ventilation Ramp Indicator 3-4 Estimated Exhaled Tidal Volume 3-6 CPAP Example Initialization Strings Defined 2-10 Modem A-2 Mode 2-2 Expiratory Flow Rate Adjustment 2-4 Mode Parameter Screen 5-2 External Modem Requirements A-1 Mode Setup Screen 6-2...
- Page 101 Medium Priority Alarms Setup Screens 6-2 Actions 8-10 PEV Setting 7-9 Defined 2-10 Physical Specifications 14-1 Menu Pressure Control Mode 2-3 Options 7-2 Pressure Specifications 14-1 Minute Ventilation 3-6 Principles of Operation Mode Flow Analysis 2-8 Changing 6-3 Flow Reversal 2-7 Modem Leak Tolerance 2-4 Commands A-1...
- Page 102 Modem Initialization Strings 7-7 Trigger Sensitivity 14-2 Modem Type 7-5 Triggering PEV Option 7-9 Auto-Trak Sensitivity 2-4 Provider Name 7-8 Leak Tolerance 2-4 Setting Alarm Parameters 8-2 Setting the Rise Time 4-7 Setting Up 4-1 Unlocking the Access Level 7-10 Setting up the Modem 7-5 Up Key 3-2 Setup Operations 4-1...
-
Page 103: Limited Warranty
(2) years from the date of sale by Respironics, Inc. to the dealer. If the product fails to perform in accordance with the product specifications, Respironics, Inc. will repair or replace – at its option –... - Page 104 1010709 LG 5/3/02 Provider Manual...
Need help?
Do you have a question about the BiPAP Synchrony and is the answer not in the manual?
Questions and answers