Advertisement
What's In The Box
Please inspect the contents of your shipped package to ensure you have received everything that
is listed below.
Wave-2 jib Crane
100 mm Bowl
Flat Base Plate
Speed Controller
No part of this document may be reproduced, stored in a retrieval system, or transmitted by any form or by any means,
electronic, mechanical, photo-copying, recording, or otherwise, except as may be expressly permitted by the applicable copyright
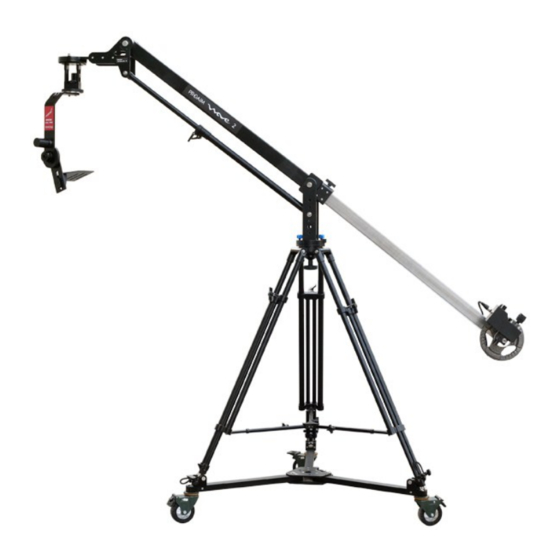
7' Wave-2 Camera Jib Crane, Pan Tilt, Dolly
Stand Gimbal Compatible
A s s e m b l y M a n u a l
Telescopic Knob
75mm Conversion
Ring
Jr Pan-Tilt
Weight Bar
Head
and Closer
All rights reserved.
statutes or in writing by the Publisher.
(P-WV-2PP)
Portable Dolly with
CST-100mm Bowl
Tripod stand
Allen key
Proaim Lanc Zoom Controller
1
Aluminum Spreader
Advertisement
Table of Contents

Related Manuals for PROAIM P-WV-2PP


Summary of Contents for PROAIM P-WV-2PP
- Page 1 Allen key Jr Pan-Tilt Weight Bar Speed Controller Proaim Lanc Zoom Controller Head and Closer All rights reserved. No part of this document may be reproduced, stored in a retrieval system, or transmitted by any form or by any means, electronic, mechanical, photo-copying, recording, or otherwise, except as may be expressly permitted by the applicable copyright statutes or in writing by the Publisher.
- Page 2 Storage Bags Camera Jib Crane Setup ASSEMBLING YOUR PROAIM 7' WAVE -2 JIB WITH CST-100STAND, PORTABLE DOLLY & JR. PAN TILT HEAD Take out the bolt from the center of dolly and spread it on floor. Then put the bolt back through the center of dolly again.
- Page 3 Now mount the Tripod Stand on Spreader, lock it in place with the rubber grips MOUNTING THE JIB Unscrew the locking lever from the Central Post of the jib. Place the Central Post in the bowl of Tripod Stand and re-tighten the locking mechanism for a secure fit.
- Page 4 Attach the weight shanks at the rear end of the jib section by screwing it in and then add weights to it. NOTE: Make sure the opposite end of the jib arm is secured so that the addition of the weights does not cause the arm to rise violently.
- Page 5 For an over slung setup, attach the flat base • plate on the top and mount the camera setup and secure the camera properly. For 100mm fluid head setup mounting, • attach the 100mm bowl on the top, mount the camera setup and secure it properly. ...
- Page 6 YOUR 7' WAVE-2 CAMERA JIB CRANE, PAN TILT, DOLLY STAND GIMBLE COMPATIBLE ALL DRESSED UP AND READY TO GO! (SHOWN WITH OPTIONAL ACCESSORIES) Warranty: We offer one year warranty for our products from date of purchase. Within this period of time, we will repair it without charge for labor or parts.
Need help?
Do you have a question about the P-WV-2PP and is the answer not in the manual?
Questions and answers