Table of Contents
Advertisement
Quick Links
Advertisement
Table of Contents
Troubleshooting

Related Manuals for Taurus IT10.5PRO


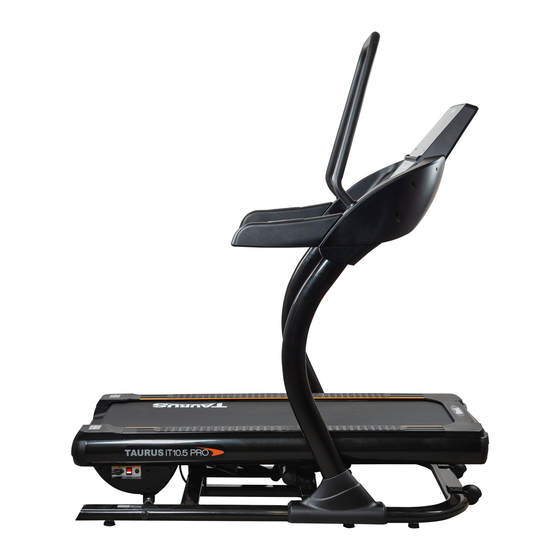
Summary of Contents for Taurus IT10.5PRO
- Page 1 Assembly and Operating Instructions TFIT10.05.03 Treadmill IT10.5PRO TF-IT10.5...
- Page 2 IT10.5PRO...
-
Page 3: Table Of Contents
Content GENERAL INFORMATION Technical Data Personal Safety Electrical Safety Set-Up Place ASSEMBLY General Instructions Scope of Delivery Assembly OPERATING INSTRUCTIONS Console Display Button Functions Programs 3.3.1 Quick-Start Program 3.3.2 Pre-Set Profile Programs (P1–P18) 3.3.3 Target Programs (H1 - H3) 3.3.4 User-Defined Programs (U01 - U03) Body Fat Test (FAT) Additional Information 3.5.1 Changing Metric/Imperial Units... - Page 4 DISPOSAL RECOMMENDED ACCESSORIES ORDERING SPARE PARTS Serial Number and Model Name Parts List Exploded Drawing WARRANTY CONTACT IT10.5PRO...
- Page 5 With Taurus® fitness equipment, the focus is on what sport is all about: maximum performance! Therefore, the equipment is developed in close consultation with athletes and sports scientists.
- Page 6 This notice indicates potentially hazardous situations which, if not avoided, will result in death or serious injuries! NOTICE This notice indicates further useful information. Retain these instructions in a safe place for future reference, maintenance or when ordering replacement parts. IT10.5PRO...
-
Page 7: General Information
GENERAL INFORMATION Technical Data LCD Display: Training time in min. Training distance in km Speed in km/h Incline in % Calories burned in kcal Heart rate (while using the hand pulse sensors) Motor type: AC motor (3 HP) Speed: 1 – 20 km/h Incline: -5 –... -
Page 8: Personal Safety
Make sure that nobody is within the range of motion of the equipment during training so as not to endanger you or other persons. ࣑ ATTENTION Do not insert any objects of any kind into the openings of the device. IT10.5PRO... -
Page 9: Electrical Safety
Electrical Safety DANGER ⚠ In order to reduce the risk of an electric shock, always unplug the equipment from the mains socket immediately after your workout, before assembly or dismantling, and before maintenance or cleaning. Do not pull on the cable. ⚠... -
Page 10: Set-Up Place
(over 70%) like swimming pools. A floor protective mat/equipment underlay can help to protect high-quality floor coverings (parquet, laminate, cork, carpets) from dents and sweat and can help to level out slight unevenness. IT10.5PRO... -
Page 11: Assembly
ASSEMBLY General Instructions ⚠ DANGER Do not leave any tools, packaging materials such as foils or small parts lying around, as otherwise there is a danger of suffocation for children. Keep children away from the equipment during assembly. ⚠ WARNING The treadmill is equipped with high-pressure shock absorbers that can cause the treadmill to suddenly open if handled incorrectly. -
Page 12: Scope Of Delivery
1 x (For each side) Upper 1 x (For each side) #7 Front handlebar 1PC 1 x Handlebar (7) #25a/b upright cover 1p.r #26a/b Right upright cover 1p.r #99 Safety key 1PC right cover (26a/b) Upper left cover (25a/b) IT10.5PRO... - Page 13 4 x Allen key screws M10*120 4 x Allen key screws M10*65 (61) 2 x Allen key screws M8*30 (69) #61 Hex socket screw M10*65 4PCS #57 Hex socket screw M10*120 4PCS #69 Hex socket screw M8*30 2PCS (57) 6 x Safety washers Ø 8*1.2 #67 Hex socket screw M10*20 4PCS #90 Lock washer Φ8*1.2 6PCS 4 x Allen key screws M10*20 (67) 4 x Allen key screws M8*15 (68)
-
Page 14: Assembly
Fasten the left and right console masts (2L/R) onto the support frame (6) with a total of eight safety washers (89), four screws (61) and four screws (57). Slide the lower covers (29L/R) over the console masts (2L/R) IT10.5PRO... - Page 15 Step 2: Mounting the console unit Connect the console cable (96) with the upper extension cable (97). ࣑ ATTENTION In the following step please pay attention that you don't clamp the cables between the frames. Fasten the console unit (3) onto the left and right console masts (2L/R) with a total of four safety washers (89), four screws (67), four safety washers (90) and four screws (68).
- Page 16 Fasten the handlebar (7) onto the console unit (3) with a total of two safety washers (90) and two screws (69). Fasten the upper right covers (26a/b) placing the points A onto point B under the console unit (3) with two screws (78). Use the same proceedure for upper left covers (25a/b). Tighten all screws. IT10.5PRO...
- Page 17 Step 4: Alignment of the feet If the floor is uneven, you can stabilize the treadmill by turning the two setting screws under the main frame. Lift the treadmill on the desired side and rotate the setting screws under the main frame. Rotate the screws clockwise in order to remove them and to raise the running surface.
-
Page 18: Operating Instructions
To enable the safety key to detach from the contact point of the cockpit in the event of a fall, the safety key clip must be firmly attached to your clothing! Make sure that the safety key is not accessible to children. Console Display IT10.5PRO... - Page 19 Display of the current speed in km/h Display range: 1.0 – 20.0km/h Setting range: 1.0 – 20.0km/h NOTICE SPEED The maximum setting range of the speed is also dependant on the incline setting: -5 – 15% →1 – 20km/h 16 – 25% → 1 – 12km/h 26 –...
-
Page 20: Button Functions
A quick press to change back the song MUSIC - Holding the button reduces the volume A quick press to skip the current song + Holding the button increases the volume Turning the fan on or off IT10.5PRO... -
Page 21: Programs
Programs There are a total of 25 programs available to choose from: Quick start programs: Pre-set profile programs: Target programs: User defined programs: 3.3.1 Quick-Start Program To directly start your training, press the START button. The time, distance and calorie values will start counting upwards. NOTICE During training you can adjust the speed and incline with their respective buttons. - Page 22 IT10.5PRO...
-
Page 23: Target Programs (H1 - H3)
3.3.3 Target Programs (H1 - H3) The target program can be set by the training time (H1), training distance (H2) or calories burned (H3). In order to choose from one of the profile programs, press the MODE button. Set the desired training value. To start the program, press the START button. -
Page 24: Body Fat Test (Fat)
The display will now show F5. Hold onto the hand pulse sensors for 5 - 6 seconds. The display shows FAT and your value. ≤ 19 Underweight 20 – 25 Normal weight 26 – 29 Slightly overweight ≥ 30 Overweight IT10.5PRO... -
Page 25: Additional Information
Additional Information 3.5.1 Changing Metric/Imperial Units In order to change the unit of measurement used, remove the safety key then press and hold the PROG- button and MODE button simultaneously for three seconds. A signal will be played. A speed value will be displayed (1 = kilometers, 0.6 = miles) 3.5.2 Calibrating the Inclince In case of an error with the incline, a calibration can help remedy the problem. -
Page 26: Storage And Transport
As shown, place both hands at point C and lift the machine up until the transport wheel (52) is able to move on the ground the equipment should be disassembled and safely packed. Select the new location by following the instructions in the section 1.4 of this manual. IT10.5PRO... -
Page 27: Troubleshooting, Care And Maintenance
TROUBLESHOOTING, CARE AND MAINTENANCE General Instructions ⚠ WARNING Do not make any improper changes to the equipment. CAUTION ⚠ Damaged or worn components may affect your safety and the life of the equipment. Therefore, immediately replace damaged or worn components. In such a case, contact the contract partner. -
Page 28: Error Codes And Troubleshooting
Safety key isn't properly connected or the switch is defective. Check if the safety key is properly attached. Check the cable connection to the safety key unit. If necessary, an exchange of the switch is required. Please contact Sport-Tiedje for technical support. Please contact Sport-Tiedje for technical support. IT10.5PRO... -
Page 29: Care And Maintenance
Care and Maintenance The most important maintenance measure is the care of the running mat. This includes adjustment, re tensioning and lubrication of the running mat. Damage resulting from insufficient or neglected care is not covered by the warranty. You should therefore carry out maintenance checks at regular intervals. -
Page 30: Re-Tensioning The Running Mat
Continue turning the belt by hand so that the entire surface between the endless belt and the running plate is lubricated. Wipe off the excess lubricating oil or silicone spray. NOTICE This maintenance must also be carried out after prolonged non-use of the equipment. IT10.5PRO... -
Page 31: Maintenance And Inspection Calendar
Maintenance and Inspection Calendar To avoid damage from body sweat, the equipment must be cleaned with a damp towel (no solvents!) after each training session. The following routine tasks must be performed at the specified intervals: Part Weekly Monthly Quarterly Half-yearly Yearly Display console... -
Page 32: Recommended Accessories
Of course, you can also contact our customer service: by telephone, e-mail, in one of our branches or via our social media channels. We will be happy to advise you! chest strap floor mat chest strap contact gel silicone spray towels IT10.5PRO... -
Page 33: Ordering Spare Parts
The exact position of this sticker is shown in the following illustration. Enter the serial number in the appropriate field. Serial number: Brand / Category: Taurus / treadmill Model Name: Incline Treadmill Article Number: TF-IT10.5PRO... -
Page 34: Parts List
Hex socket screw M10*120 Front cover Hex socket screw M10*80 Front cover 2 Hex socket screw M10*75 29L/R Support tube cover 1p.r. Hex socket screw M10*60 30L/R Rear end cap 1p.r. Hex socket screw M10*65 Connection end cap Hex socket screw M10*20 IT10.5PRO... - Page 35 Hex bolt M10*65 Spring nut Hex bolt M10*30 Big washer Hex bolt M10*47 upper extension wire Hex bolt M10*45 controller wire Hex socket screw M10*20 lower extension wire Hex socket screw M8*15 Safety key Hex socket screw M8*30 Brake resistor Hex socket screw M6*20 Hex nut M6*35 AC motor...
-
Page 36: Exploded Drawing
Exploded Diagram IT10.5PRO... -
Page 37: Warranty
WARRANTY Training equipment from Taurus® is subject to strict quality control. However, if a fitness equipment purchased from us does not work perfectly, we take it very seriously and ask you to contact our customer service as indicated. We are happy to help you by phone via our service hotline. - Page 38 For that reason, we also want to resolve your queries quickly and in a straightforward manner. Thus, please always keep your customer number and the serial number of the faulty equipment handy. IT10.5PRO...
-
Page 39: Contact
CONTACT TECHNICAL SUPPORT TECHNICAL SUPPORT & SERVICE TECHNICAL SUPPORT & SERVICE �� �� �� +49 4621 4210-900 80 90 16 50 +33 (0) 172 770033 +49 4621 4210-945 +49 4621 4210-933 �� +49 4621 4210-698 �� �� info@fitshop.dk service-france@fitshop.fr �� technik@sport-tiedje.de ��... - Page 40 The company employs numerous sports scientists, fitness trainers and competitive athletes. Visit us also on our social media platforms or our blog! IT10.5PRO...
- Page 41 Notes...
- Page 42 Notes IT10.5PRO...
- Page 44 Treadmill IT10.5PRO...
Need help?
Do you have a question about the IT10.5PRO and is the answer not in the manual?
Questions and answers