Table of Contents
Advertisement
Available languages
Available languages
Quick Links
ITEM #0616010, 31885108
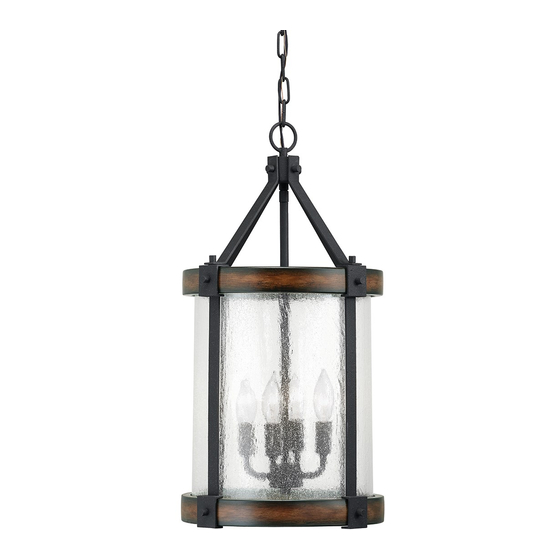
PENDANT
MODEL #34689
Français p. 9
Español p. 17
ATTACH YOUR RECEIPT HERE
Serial Number
Purchase Date
Questions, problems, missing parts? Before returning to your retailer, call our customer
service department at 1-800-554-6504, 8 a.m. - 4:30 p.m, EST, Monday - Friday.
kichler.com/customer-care/contact-us
1
Advertisement
Table of Contents

Related Manuals for Kichler Lighting PENDANT 34689


Summary of Contents for Kichler Lighting PENDANT 34689
- Page 1 ITEM #0616010, 31885108 PENDANT MODEL #34689 Français p. 9 Español p. 17 ATTACH YOUR RECEIPT HERE Serial Number Purchase Date Questions, problems, missing parts? Before returning to your retailer, call our customer service department at 1-800-554-6504, 8 a.m. - 4:30 p.m, EST, Monday - Friday. kichler.com/customer-care/contact-us...
-
Page 2: Package Contents
PACKAGE CONTENTS PART DESCRIPTION PART DESCRIPTION Canopy Lower Coupling Mounting Bracket Chain Threaded Nipple Fixture Loop Hex Nut Cage Socket Assembly Threaded Pipe Upper Coupling Center Column Side Panel Screw Collar Ring Threaded Chain Link Screw Collar Loop... -
Page 3: Hardware Contents
HARDWARE CONTENTS Thumbscrew Wire Qty: 8 Short Connector Machine Qty: 3 Screw Qty: 2 SAFETY INFORMATION Please read and understand this entire manual before attempting to assemble, operate or install the product. WARNING • CAUTION – RISK OF SHOCK – Disconnect Power at the main circuit breaker panel or main fusebox before starting and during the installation. - Page 4 ASSEMBLY INSTRUCTIONS 1. Screw threaded pipe (N) onto lower coupling (J) on the socket assembly (E). Screw threaded pipe (N) onto the upper coupling (F). 2. Secure arms (G) to center column (O) with thumbscrews (CC). Hardware Used Thumbscrew 3. Slide side panels (P) down each side of the cage (M) and into the side panel holder.
- Page 5 ASSEMBLY INSTRUCTIONS 4. Raise cage (M) to arms (G). Screw thumbscrews (CC) through arms (G) and into cage (M). Hardware Used Thumbscrew 5. Position threaded nipple (C) in mounting bracket (B) so that, when mounted: ¼ Inch • The threaded nipple (C) will protrude a minimum of ¼...
- Page 6 ASSEMBLY INSTRUCTIONS 7. Connect mounting bracket (B) to the outlet box Outlet Box with short machine screws (BB). Hardware Used Short Machine Screw 8. Using the threaded chain links (Q) on chain (K), attach one end to screw collar loop (I) and the other end to fixture loop (L).
- Page 7 ASSEMBLY INSTRUCTIONS 9. Wire connection guide: BARE COPPER, Ground wire: OR GREEN • For installation in the United States: Wrap GROUND BARE COPPER, FIXTURE OR GREEN ground wire from outlet box around ground WIRE GROUND screw on mounting bracket (B) no less than 2 SUPPLY WIRE in.
-
Page 8: Care And Maintenance
1. Check wiring. Fixture does not light. 1. Fixture may be wired incorrectly. 1. Check wiring. 2. Worn or broken bulb. 2. Replace bulb. Distributed by: Kichler Lighting LLC 7711 E. Pleasant Valley Rd. Cleveland, OH 44131 Printed in China REV 29-SEP-2021... - Page 9 ARTICLE #0616010, 31885108 LUMINAIRE SUSPENDU MODÈLE #34689 JOIGNEZ VOTRE REÇU ICI Numéro de série Date d’achat Des questions, des problèmes, des pièces manquantes? Avant de retourner le produit à votre détaillant, appelez notre service à la clientèle au 1-800-554-6504, entre 8 h et 16 h 30 (HNE) du lundi au vendredi.
-
Page 10: Contenu De L'emballage
CONTENU DE L’EMBALLAGE PIÈCE DESCRIPTION QTÈ PIÈCE DESCRIPTION QTÈ Pavillon Raccord inférieur Support de fixation Chaîne Raccord fileté Anneau de suspension du luminaire Écrou hexagonal Cage Ensemble de douilles Tube fileté Raccord supérieur Colonne centrale Bras Panneau latéral Maillons de chaîne fileté Bague de l'anneau du pavillon Anneau de suspension du pavillon... -
Page 11: Quincaillerie Incluse
QUINCAILLERIE INCLUSE Vis manuelle Capuchon Qté : 8 Vis à de connexion métaux Qté : 3 courte Qté : 2 CONSIGNES DE SÉCURITÉ Veuillez vous assurer de lire et de comprendre l’intégralité du présent guide avant d’assembler, d’utiliser ou d’installer ce produit. AVERTISSEMENT •... -
Page 12: Instructions Pour L'assemblage
INSTRUCTIONS POUR L'ASSEMBLAGE 1. Vissez le tube fileté (N) dans le raccord inférieur (J) sur l'ensemble de douilles (E). Vissez le tube fileté (N) dans le raccord supérieur (F). 2. Fixez les bras (G) sur la colonne centrale (O) à l'aide des vis manuelles (CC). - Page 13 INSTRUCTIONS POUR L'ASSEMBLAGE 4. Soulevez la cage (M) vers les bras (G). Vissez les vis manuelles (CC) à travers les bras (G) et dans la cage (M). Quincaillerie utilisée Vis manuelle 5. Positionnez le raccord fileté (C) dans le support de fixation (B) de sorte que, une fois le montage ¼...
- Page 14 INSTRUCTIONS POUR L'ASSEMBLAGE 7. Fixez le support de fixation (B) à la boîte de Boîte de sortie sortie à l'aide des vis à métaux courtes (BB). Quincaillerie utilisée Vis à métaux courte 8. À l'aide des maillons de chaîne fileté (Q) et la chaîne (K), attachez une extrémité...
- Page 15 INSTRUCTIONS POUR L'ASSEMBLAGE 9.Guide de raccordement électrique CUIVRE NU, OU FIL VERT DE MISE À LA TERRE DU Fil de mise à la terre : CUIVRE NU, OU LUMINAIRE FIL VERT DE MISE À LA TERRE • Pour une installation aux États-Unis : DE LA RÉSIDENCE enroulez le fil de mise à...
-
Page 16: Entretien
Le luminaire 1. Le luminaire est mal branché. est bien branché. ne s’allume pas. 2. L’ampoule est usée ou brisée. 2. Remplacez l’ampoule. Distribué par: Kichler Lighting LLC 7711 E. Pleasant Valley Rd Cleveland, OH 44131 Imprimé en Chine REV 29-SEP-2021... - Page 17 ARTÍCULO #0616010, 31885108 LÁMPARA COLGANTE MODELO #34689 ADJUNTE SU RECIBO AQUÍ Número de serie Fecha de compra ¿Preguntas, problemas, piezas faltantes? Antes de devolverlo a la tienda, llame a nuestro departamento de servicio al cliente al 1-800-554-6504, de 8:00 a.m. a 4:30 p.m. hora del Este (EST), de lunes a viernes.
-
Page 18: Contenido Del Paquete
CONTENIDO DEL PAQUETE PIEZA DESCRIPCIÓN CANT PIEZA DESCRIPCIÓN CANT Cubierta Acoplamiento inferior Soporte de montaje Cadena Manguito roscado Bucle para colgar la lámpara Tuerca hexagonal Jaula Conjunto de portalámparas Tubo roscado Acoplamiento superior Columna central Brazo Panel lateral Anillo de cuello roscado Eslabone roscado Bucle de cuello roscado... -
Page 19: Información De Seguridad
ADITAMENTOS Tornillo de Conector apriete Tornillo de cables manual corto Cant.: 3 para Cant.: 8 metales Cant.: 2 INFORMACIÓN DE SEGURIDAD Lea y comprenda completamente este manual antes de intentar ensamblar, usar o instalar el producto. ADVERTENCIA • PRECAUCIÓN – RIESGO DE DESCARGA ELÉCTRICA – Desconecte la electricidad en el panel principal del interruptor automático o caja principal de fusibles antes de comenzar y durante la instalación. -
Page 20: Instrucciones De Ensamblaje
INSTRUCCIONES DE ENSAMBLAJE 1. Atornille el tubo roscado (N) al acoplamiento inferior (J) sobre el conjunto de portalámparas (E). Atornille el tubo roscado (N) al acoplamiento superior (F). 2. Asegure los brazos (G) a la columna central (O) con los tornillos de apriete manual (CC). Aditamentos utilizados Tornillo de apriete manual 3. - Page 21 INSTRUCCIONES DE ENSAMBLAJE 4. Levante la jaula (M) a los brazos (G). Atornille los tornillos de apriete manual (CC) a través de los brazos (G) en la jaula (M). Aditamentos utilizados Tornillo de apriete manual 5. Coloque el manguito roscado (C) en el soporte de montaje (B), de manera que al quedar ¼...
- Page 22 INSTRUCCIONES DE ENSAMBLAJE 7. Conecte el soporte de montaje (B) a la caja Caja de salida eléctrica con tornillos cortos para metal (BB). Aditamentos utilizados Tornillo corto para metales 8. Usando los eslabones roscados (Q) e la cadena (K), fije un extremo al bucle de cuello roscado (I) y el otro extremo al bucle de la lámpara (L).
- Page 23 INSTRUCCIONES DE ENSAMBLAJE 9.Guía de conexión de cables: CABLE DE A TIERRA DE LA LÁMPARA DE COBRE Cable a tierra: CABLE DE DESNUDO ALIMENTACIÓN • Para la instalación en los Estados Unidos: O VERDE A TIERRA DE COBRE Enrolle el cable a tierra de la caja eléctrica DESNUDO O VERDE alrededor del tornillo a tierra en la abrazadera de montaje (B), a no menos de...
-
Page 24: Cuidado Y Mantenimiento
1. Inspeccione el cableado. La lámpara no se incorrectamente cableada. enciende. 2. La bombilla está quemada o rota. 2. Reemplace la bombilla. Distribuido por: Kichler Lighting LLC 7711 E. Pleasant Valley Rd Cleveland, OH 44131 Impreso en China REV 29-SEP-2021...
Need help?
Do you have a question about the PENDANT 34689 and is the answer not in the manual?
Questions and answers