Table of Contents
Advertisement
Quick Links
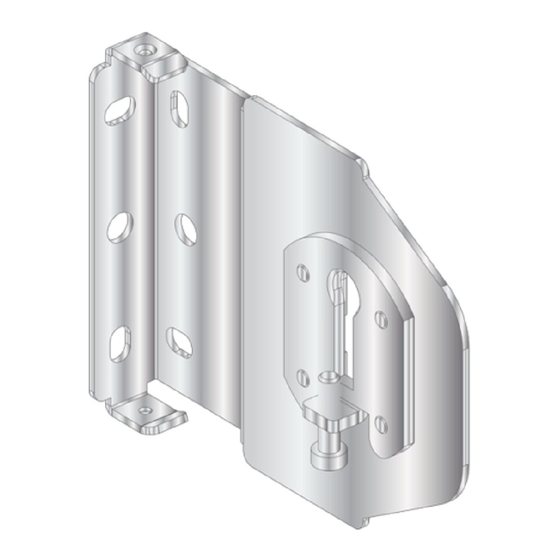
CSA-DECOR5 Series
Shade Motor Bracket Installation and Motor Programming
The Crestron® CSA-DECOR5-BRKT Series shade brackets allow Crestron
shades to be mounted on a wall, ceiling, pocket, or window jamb. The
mounting brackets are adjustable to fine-tune the installation without
removing the mounting brackets from the wall.
Shade Mounting
The CSA-DECOR5-BRKT Series shade brackets are mounted to the wall
or window jamb using the two supplied brackets. The end caps (optional)
and roller shade assembly then attach to the brackets.
CAUTIONS:
There is risk of personal injury and equipment damage if the shade or
l
associated parts fall during mounting. Use care when mounting. Use
proper mounting hardware for the mounting surface (for example,
screws or bolts) when securing the brackets to the surface.
Two or more people are required to properly mount the shades. Three
l
or more people are required to properly mount large shades and
medium-sized coupled shades.
NOTES:
The screws provided with the mounting brackets are intended for use
l
on walls (or jambs) with wood or metal blocking. These screws should
not be used for hollow drywall or masonry installations. It is the
responsibility of the installer to make sure that the mounting method
used is secure.
Ensure that all mounting brackets are level and on the same plane.
l
All shades must be aligned along a single axis (no off-angle
l
positioning).
Mount the Brackets
1. Check for a proper fit by holding the roller shade assembly in the
approximate mounting location. If using a fascia, use the fascia to
measure the proper distance between mounting brackets. The
brackets should be mounted flush with the end of the fascia.
2. Mark the locations of the brackets and make sure that the mounting
points are level and on the same plane. Use a laser level or snap a chalk
line to mark the locations of the brackets. The brackets should be
spaced according to the specifications on the order form.
NOTE:
End caps are used only when the shade is outside mounted
and fascia is used. If inside mounted, end caps are not required unless
the shade brackets protrude from the window opening. Adding end
caps for an inside mount increases the light gap.
3. If using end caps, attach them to the mounting brackets according to
their stamped directions. The end caps snap into place.
Quick Start
1
Advertisement
Table of Contents

Subscribe to Our Youtube Channel
Related Manuals for Crestron CSA-DECOR5-BRKT Series


Summary of Contents for Crestron CSA-DECOR5-BRKT Series
- Page 1 The brackets should be Shade Mounting spaced according to the specifications on the order form. The CSA-DECOR5-BRKT Series shade brackets are mounted to the wall NOTE: End caps are used only when the shade is outside mounted or window jamb using the two supplied brackets.
- Page 2 Quick Start CSA-DECOR5 Series Shade Motor Bracket Installation and Motor Programming Inside Mount 4. Mount the brackets to the outside of the window frame (outside mount) or the inside of the window frame (inside mount). Use hardware that is appropriate for the mounting surface. Make sure the brackets are level and mounted to a flat surface.
- Page 3 Quick Start CSA-DECOR5 Series Shade Motor Bracket Installation and Motor Programming Inside Mount 5. If mounting an in-line shade coupler, place the bracket exactly centered on the band-to-band dimension that is indicated on the order form, and secure it using the supplied mounting screws. Outside Mount...
- Page 4 Quick Start CSA-DECOR5 Series Shade Motor Bracket Installation and Motor Programming Mount the Roller Shade Assembly Mount the Quick-Release Latch to the Motor CAUTIONS: There is risk of personal injury and equipment damage if the shade or associated parts fall during installation. Use care when mounting. Use proper mounting hardware (e.g., screws or bolts) for the mounting surface when securing the brackets to the surface.
- Page 5 Quick Start CSA-DECOR5 Series Shade Motor Bracket Installation and Motor Programming Mount the Roller Shade Assembly (With an In-Line Coupler) 4. Push the roller shade assembly toward the idler bracket to compress the spring on the idler pin and align the latch on the motor to the posts A coupled roller shade assembly consists of two or more roller shade on the bracket.
- Page 6 Crestron Design Tool (CDT). 5. Raise the idler or intermediate band and align it with the coupler. During the installation of coupled shades, the fabric does not need to 6.
- Page 7 Quick Start CSA-DECOR5 Series Shade Motor Bracket Installation and Motor Programming Level the Shade Fabric 3. Use the spanner wrench to lower the fabric until it is lower than the adjacent fabric. The shades are leveled by rotating the ring on the idler or intermediate Lower the Fabric so that it is Lower than the Adjacent Fabric band.
- Page 8 Quick Start CSA-DECOR5 Series Shade Motor Bracket Installation and Motor Programming Adjust the Roller Shade Assembly 4. Use the spanner wrench to raise the fabric until it is level with the adjacent fabric. Once the roller shade assembly is mounted, make adjustments to level the Raise the Fabric until it is Level with the Adjacent Fabric shade and center it in the opening.
- Page 9 Quick Start CSA-DECOR5 Series Shade Motor Bracket Installation and Motor Programming Swap the Idler and Motor Ends Make sure that no obstructions exist near the window area that the shade could bump into while traveling (for example, latches and The roller shade assembly can be mounted so that the idler and motor cranks).
- Page 10 Quick Start CSA-DECOR5 Series Shade Motor Bracket Installation and Motor Programming Rotate the keyhole Rotate Keyhole: Right-Side Wall Mount to Left Side Wall Mount 1. Using a Phillips screwdriver, remove the four screws holding the idler mount in the left-hand bracket and then remove the idler mount. Keep all hardware for reassembly.
-
Page 11: Motor Wiring
Quick Start CSA-DECOR5 Series Shade Motor Bracket Installation and Motor Programming Swap the Roller Shade Idler and Motor If the idler and motor brackets have been swapped, remove the motor Motor Wiring and idler from the tube and remount in the opposite ends, allowing the fabric to roll off of the tube in its intended manner Routing the Cables Swap the idler and motor ends of the roller shade. -
Page 12: Controls And Indicators
Motor Programming The Crestron® digital CSM(I)-QMTDC shade motors are programmed locally using the buttons on the motor. The information in this guide serves as a detailed programming overview of the Crestron CSM (I)-QMTDC shade motors. NOTE: The procedures described in this document can also be performed remotely using a control system. - Page 13 After either the upper or lower limit is set, the motor automatically enters Limit Setup mode for the opposite limit. Follow the procedure in NOTE: For Crestron Horizontal Sheers, the lower limit is defined as the Set the Shade Limits to reassign limits.
- Page 14 1. Put the infiNET EX gateway into Acquire mode from the unit itself or For Crestron Horizontal Sheers, the lower limit is defined as the point from Crestron Toolbox, as described in its manual at before the hem bar tilts.
-
Page 15: Led Diagnostics
Quick Start CSA-DECOR5 Series Shade Motor Bracket Installation and Motor Programming LED Diagnostics 3. Once all devices have been acquired, take the gateway out of Acquire mode. Refer to the gateway’s manual for details. The LED flashes to provide a visual reference that the motor is operating normally or if it is in an error state. -
Page 16: Troubleshooting
Shade Motor Bracket Installation and Motor Programming Error State Troubleshooting Crestron CSM(I)-QMTDC motors display error codes using the red LED The following table provides corrective action for possible trouble on the interface. The LED flashes a pattern to indicate the error. - Page 17 Development Tools License Agreement. Crestron product operating system software is licensed to Crestron dealers, CSPs, and end-users under a separate End-User License Agreement. Both of these Agreements can be found on the Crestron website at www.crestron.com/legal/software_license_agreement. The product warranty can be found at www.crestron.com/warranty.
Need help?
Do you have a question about the CSA-DECOR5-BRKT Series and is the answer not in the manual?
Questions and answers