Table of Contents
Advertisement
Quick Links
g
GE Multilin
215 Anderson Avenue
L6E 1B3 Markham, ON -CANADA
Tel: (905) 294 6222 Fax: (905) 294 8512
E-mail: gemultilin@ge.com
Internet: www.GEMultilin.com
GE Consumer & Industrial
Multilin
DFF
Digital Frequency Relay
Instruction manual
GEK-106166E
Copyright © 2004 GE Multilin
GE Multilin
Avda. Pinoa, 10
48170 Zamudio SPAIN
Tel: +34 94 485 88 00 Fax: +34 94 485 88 45
E-mail: gemultilin.euro@ge.com
Advertisement
Table of Contents

Subscribe to Our Youtube Channel
Related Manuals for GE Multilin DFF


Summary of Contents for GE Multilin DFF
- Page 1 GE Consumer & Industrial Multilin Digital Frequency Relay Instruction manual GEK-106166E Copyright © 2004 GE Multilin GE Multilin GE Multilin Avda. Pinoa, 10 215 Anderson Avenue 48170 Zamudio SPAIN L6E 1B3 Markham, ON -CANADA Tel: +34 94 485 88 00 Fax: +34 94 485 88 45 Tel: (905) 294 6222 Fax: (905) 294 8512 E-mail: gemultilin.euro@ge.com...
- Page 2 TABLE OF CONTENTS GENERAL DESCRIPTION AND APPLICATION OPERATING PRINCIPLES AND SETTINGS PROTECTION FUNCTIONS 2.1.1 FREQUENCY UNITS 2.1.2 VOLTAGE UNITS STATUS AND ACTUAL VALUES 2.2.1 MEASUREMENT 2.2.2 TARGET LEDS 2.2.3 SELF-CHECKING AND DIAGNOSIS ANALYSIS FUNCTIONS 2.3.1 EVENT LOGS 2.3.2 OSCILLOGRAPHY SETTING TABLES INPUTS AND OUTPUTS 2.5.1 DIGITAL INPUTS 2.5.2 OUTPUTS...
- Page 3 TABLE OF CONTENTS VOLTAGE MEASUREMENT FREQUENCY MEASUREMENT. DIGITAL INPUT CHECKS. OUTPUT CHECKS. COMMUNICATIONS PORTS CHECKS. 7.10 KEYPAD, DISPLAY AND LED CHECKS. 7.11 CONTROL OPERATIONS. 7.12 INHIBIT VOLTAGE CHECK. 7.13 VOLTAGE FUNCTION CHECKS. 7.14 FREQUENCY UNITS CHECKS. INSTALLATION AND MAINTENANCE RECEPTION, OPERATION AND STORAGE. INSTALLATION GROUND CONNECTION FOR SAFETY AND PERTURBATION REMOVAL.
- Page 4 TABLE OF CONTENTS TABLE LIST Table I: Communication internal states......................... 10 Table II: Protection internal states ........................11 Table III: Common settings to all tables........................ 20 Table IV: Independent settings to each table ....................... 21 FIGURE LIST Fig. 1: External connections for DFF1000 model ....................56 Fig.
- Page 5 TABLE OF CONTENTS DFF Digital Feeder Relay GEK-106166E...
-
Page 6: General Description And Application
GENERAL DESCRIPTION AND APPLICATION 1. GENERAL DESCRIPTION AND APPLICATION New technology has allowed a significant advance in the concept of integration between different components of the electrical system. The reasons for such integration are several: • Reduce the investment in new equipment. •... - Page 7 • Oscillography software GE-OSC (view and analyze waveform captured data.) The oscillography is stored in a file in COMTRADE format (IEEE C37.111-1991 Standard). These software packages are integral part of GE-NESIS software (General Electric NEtwork Substation Integration System). DFF Digital Feeder Relay...
- Page 8 GE INTRO software must be used to change the factory default configuration of output contacts or LEDs. The following functional block diagram shows the operation of the relay, as described above, and shows the PICKUP and TRIP signals for each unit.
-
Page 9: Protection Functions
OPERATING PRINCIPLES 2.1 PROTECTION FUNCTIONS 2.1.1 FREQUENCY UNITS The DFF relay incorporates 8 underfrequency units. All frequency units are supervised by a voltage unit that inhibits the frequency units in case the voltage decreases below the threshold. The main settings for the frequency elements are: GENERAL SETTINGS GROUP (Common to all Protection Functions of the relay) Name Limits... - Page 10 OPERATING PRINCIPLES GENERAL SETTINGS DESCRIPTION • RELAY STATUS: The relay can be switched in or out of service (NO SERV / IN SERV) • FREQUENCY: Defines the nominal frequency of the network ( 50 Hz / 60 Hz ) • NOMINAL VOLTAGE: Defines the secondary phase-phase Vac nominal voltage applied to the relay.
-
Page 11: Voltage Units
OPERATING PRINCIPLES 2.1.2 VOLTAGE UNITS The DFF has 3 voltage units. Inhibit voltage unit : This unit supervises the phase voltage used for frequency calculation (phase B, of ABC). This unit is adjusted in the GENERAL SETTINGS menu as described above. It is set as a percentage of the nominal voltage. The range goes from 40 to 110 % of the nominal voltage (also adjustable). - Page 12 OPERATING PRINCIPLES STATUS AND ACTUAL VALUES 2.2.1 MEASUREMENT The DFF provides measurement values for: • Three phase voltages • One ground voltage • Frequency • Rate of change of frequency The DFF calculates the fundamental frequency RMS voltage phasor for each phase and for ground. Measurement can be accessed through the local front display and from the GE_LOCAL or DFFPC communications software.
-
Page 13: Analysis Functions
OPERATING PRINCIPLES 2.2.3 SELF-CHECKING AND DIAGNOSIS The DFF includes self-checking and auto-diagnosis. These tests are performed during the power-up process of the relay and during normal operation. They check the status of the power supply, ROM memory, RAM memory, oscillography memory and the EEPROM memory. In case of an internal failure these functions detect the failure, disable the operation of the protection functions and warn the user by operating the ALARM contact (terminals C9-D9). -
Page 14: Setting Tables
The waveforms are stored in a file in COMTRADE format (IEEE C37.111-1991 Standard).The oscillography record must be retrieved from the DFF relay by using GE-LOCAL or DFFPC communications software. They can be viewed through GE-OSC software or any program that can read COMTRADE files. They can also be imported from Microsoft EXCEL. -
Page 15: Inputs And Outputs
OPERATING PRINCIPLES 2.5 INPUTS AND OUTPUTS 2.5.1 DIGITAL INPUTS The DFF family of relays can have a variety of digital inputs. For details see ordering code in section 5 - MODEL LIST. The minimum number of inputs is 7 and the maximum is 14 (two groups of 7 Inputs each with a common terminal for each group). - Page 16 SETTINGS 3. SETTINGS Setting can be viewed and modified in different ways: through the keypad and display or through a computer connected to a serial port. In order to modify settings manually please refer to section 9 “KEYPAD AND DISPLAY”. The DFF relay has three independent setting tables, TABLE 1, TABLE 2, TABLE 3, stored in non-volatile EEPROM memory.
- Page 17 SETTINGS Table III . Common settings for all tables Setting type DESCRIPTION RANGE Factory Default Step GENERAL SETTINGS RELAY STATUS Put the relay IN or OUT NO SERV / IN SERV NO SERV of service FREQUENCY Nominal frequency 50 / 60 Hz 50 Hz IDENTIFICATION (can Alphanumeric string of...
- Page 18 SETTINGS Setting type DESCRIPTION RANGE Factory Default Step PREFAULT CYCLES Number of prefault 2- 10 (NORMAL) cycles 2-80 (FREQ) 81N1 PICKUP 81N1 PU triggers YES/NO oscillography 81N2 PICKUP 81N2 PU triggers YES/NO oscillography 81N3 PICKUP 81N3 PU triggers YES/NO oscillography 81N4 PICKUP 81N4 PU triggers YES/NO...
- Page 19 SETTINGS Table IV. INDEPENDENT SETTINGS FOR EACH TABLE (TABLE 1, TABLE 2, TABLE 3) Setting type DESCRIPTION RANGE Factory Default Step UNDERVOLTAGE 27P FUNCTION 27P PICKUP 27P Pickup 20 to 110 Vac 1 Vac TIME DELAY 27P Operating time 0 to 30 s 0.01 s RESET TIME 27P Reset time after...
-
Page 20: Equipment Configuration
EQUIPMENT CONFIGURATION 4. EQUIPMENT CONFIGURATION The DFF is a microprocessor-based relay that samples analog inputs, processes them by means of internal algorithms and activates outputs accordingly. Most of the relay information may be accessed by the user in order to create special configurations of inputs, outputs and LEDs, using AND, OR and NOT logical gates. - Page 21 EQUIPMENT CONFIGURATION TABLE I. PROTECTION INTERNAL STATES Internal States Internal Internal States Internal States States 0 Program Initiation 40 F1 Trip 80 Output 13 1 Settings change 41 F2 Trip 81 Output 14 42 F3 Trip 82 Output 15 3 Configuration change 43 F4 Trip 83 Output 16 4 External trigger...
- Page 22 EQUIPMENT CONFIGURATION TABLE II. COMMUNICATIONS INTERNAL STATES Internal States Internal Internal States Internal States States 0 Mode: Remote (1) Local (0) 1 Rear Connection 2 Front Connection 24 Protection link 44 64 LED 1 25 Control link 65 LED 2 66 LED 3 67 LED 4 68 LED 5...
-
Page 23: Inputs Configuration
EQUIPMENT CONFIGURATION 4.1 INPUTS CONFIGURATION Each of the 14 or 7 configurable Inputs (depending on the model) can have any of the following options: • Input non-active • External Trigger ( Pulse ) • Table 0 selection ( Level ) •... -
Page 24: Leds Configuration
EQUIPMENT CONFIGURATION 4.3 LEDS CONFIGURATION The DFF system includes 16 user configurable LEDs. Those LEDs can be associated to internal protection events and also to internal communication events. One LED, once activated, may blink or remain steady depending on how it has been configured. - Page 25 EQUIPMENT CONFIGURATION DFF Digital Feeder Relay GEK-106166E...
-
Page 26: Technical Characteristics
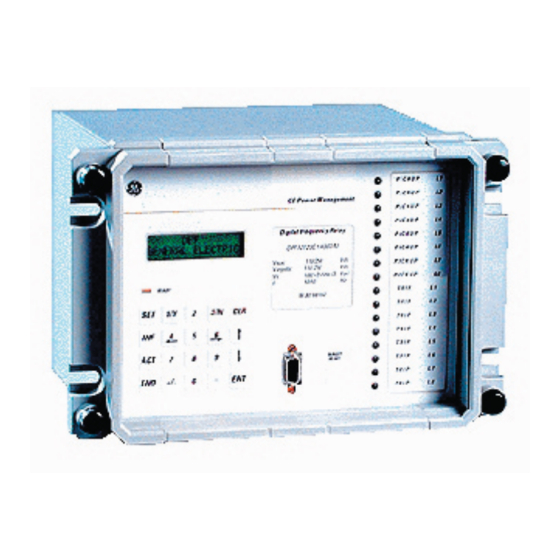
TECHNICAL CHARACTERISTICS 5. TECHNICAL CHARACTERISTICS 5.1 MODEL LIST / ORDERING CODE POSITION DESCRIPTION Comm. Protocols P1, P2: Mlink P1: Mlink ; P2: ModBus Type of system 19’’ rack ½ 19’’ rack Inputs/Outputs 14 inputs / 33 outputs (not available for ½ rack model) 7 inputs / 25 outputs 7 inputs / 13 outputs... - Page 27 TECHNICAL CHARACTERISTICS 5.2 TECHNICAL CHARACTERISTICS MECHANICAL • Protection IP51 (according to IEC 529). • Local MMI with LCD display (2 rows of 16 characters each) and 20-button keypad. • 19 “ rack – 4U high version • Up to 10 Rear terminal blocks with 12 terminals each. •...
- Page 28 - RS485 ( port 2 optional, see ordering code/model list) STANDARDS The DFF complies with the IEC relay standards, including also GE dielectric strength test and the European directive of Electromagnetic Compatibility (89/336) for CE marking. It also fulfills low voltage European directives and standards ANSI C37.90, IEC 255-5, IEC 255-6 e IEC 68.
- Page 29 TECHNICAL CHARACTERISTICS DFF Digital Feeder Relay GEK-106166E...
-
Page 30: Hardware Description
HARDWARE DESCRIPTION 6. HARDWARE DESCRIPTION The DFF incorporates electronic components that might be affected by electrostatic discharge currents flowing through certain component terminals. The main source of electrostatic discharges is the human body, especially under low humidity conditions with carpet floors or isolating shoes. If such conditions are present special care should be taken while manipulating DFF´s modules and boards. - Page 31 HARDWARE DESCRIPTION The following boards are mounted behind and in parallel to the front plate. - Internal bus board. Interconnects all the modules through their front DIN connectors. - Front display board. This PCB includes the display, the 16 LEDs, the communication port connector and the two-color LED. The front display board is mechanically and solidly connected to the keypad board with the electrical connections made through a flexible 12-way flat cable.
- Page 32 HARDWARE DESCRIPTION 6.1.4 IDENTIFICATION. The identification label of the model is located at the right of the keypad. This label includes the model number, serial number and the most important nominal values. Terminal blocks placed at the rear plate are identified by black lettering. Each of the terminals blocks are identified by a letter printed at the top, close to the connector.
-
Page 33: Input Module
HARDWARE DESCRIPTION 6.1.7 COMMUNICATIONS CPU MODULE. The main functions of the communications CPU module are as follows: • Communicate internally with the protection CPU module. • Communicate locally with a PC by the front communications port. • Communicate remotely by the rear communication ports. •... -
Page 34: Acceptance Tests
ACCEPTANCE TESTS 7. ACCEPTANCE TESTS 7.1 VISUAL CHECK Unpack the relay and make sure that there are no broken parts and no signs that the relay has been damaged during transportation. Make sure that all the screws are well tightened and the terminal blocks are not damaged. Make sure that the device model number shown on the front plate matches with the ordered model. -
Page 35: Insulation Tests
ACCEPTANCE TESTS 7.3 INSULATION TESTS. Interconnect the terminals as shown in the table below. Each set of terminals defines a group. Gradually apply 2000Vac between each group and ground, during one second. Gradually apply 2000Vac between groups, during one second. Isolated groups are as follows: MODEL DFF1x00 GROUP... -
Page 36: Power Supply
ACCEPTANCE TESTS MODEL DFF1x12 (half rack) GROUP RELAY TERMINALS TYPE A7..A10, B7..B10 Voltage C5..C9, D5..D9 Trips C11, D11 Power Supply E1.. E4, F1..F4 Inputs E5..E12, F5..F12 Outputs 7.4 POWER SUPPLY For safety reasons, A12 terminal must be grounded during functional tests. -
Page 37: Frequency Measurement
ACCEPTANCE TESTS 7.6 FREQUENCY MEASUREMENT. Note: Frequency measurements are done by applying voltage to phase B Input terminals A9-A10. Using the LCD and keypad check that the frequency measurement error is not higher than 0.01 Hz for the following frequency and voltage values: •... - Page 38 Simulate an underfrequency condition so the relay closes the corresponding output. • Configure outputs to close when one particular input is energized. Energize the corresponding input and check if outputs close. (GE INTRO software must be used to change the configuration of inputs and outputs) 7.9 COMMUNICATIONS PORTS CHECKS.
- Page 39 ACCEPTANCE TESTS 7.10 KEYPAD, DISPLAY AND LED CHECKS. Press Target Reset button and verify that all the LEDs are lit. Press the appropriate keys and verify that the following messages are displayed: Start from the main screen: GENERAL ELECTRIC KEYS LCD MESSAGES VIEW PROTECTION <...
-
Page 40: Control Operations
ACCEPTANCE TESTS 7.11 CONTROL OPERATIONS. 1. Time setting. Set date and time of the relay and verify the proper operation. To set date and time use the SET DATE/TIME menu in the ACTions menu. To enter into this menu press ACT key from the main display showing DFF - GENERAL ELECTRIC. - Page 41 ACCEPTANCE TESTS 7.13 VOLTAGE FUNCTION CHECKS. NOTES: Voltage functions operate on phase B voltage. For undervoltage tests, initial voltage must be 10% higher than trip voltage setting, and for overvoltage tests initial voltage must be 10% lower. 1. 27P UNDERVOLTAGE FUNCTION CHECKS Set 27 function as follows: 27P PICKUP : 20 Vac TIME DELAY 27P : 0 s.
- Page 42 ACCEPTANCE TESTS 7.14 FREQUENCY UNITS CHECKS. 1. Absolute threshold checks Configure the frequency units as "FREQ" with the following settings: Unit 1 : 49 Hz Unit 2 : 48 Hz Unit 3 : 47 Hz Unit 4 : 46 Hz Unit 5 : 45 Hz Unit 6 : 44 Hz Unit 7 : 43 Hz...
- Page 43 ACCEPTANCE TESTS DFF Digital Feeder Relay GEK-106166E...
-
Page 44: Installation And Maintenance
INSTALLATION AND MAINTENANCE 8. INSTALLATION AND MAINTENANCE 8.1 RECEPTION, OPERATION AND STORAGE. DFF relays are supplied to the customer in a special package, which adequately protects it during transportation, as long as this is performed in normal conditions. Immediately after receiving the relay, the customer should check whether it shows any signs of transportation damage. - Page 45 KEYPAD AND DISPLAY DFF Digital Feeder Relay GEK-106166E...
-
Page 46: Keypad And Display
KEYPAD AND DISPLAY 9. KEYPAD AND DISPLAY DFF relay has a 20-key keypad and a 32-character LCD (Liquid Crystal Display), which are distributed in two rows of 16 characters each. The layout of the keypad is displayed in the following figure: ↑... - Page 47 KEYPAD AND DISPLAY 9.1 TREE MENUS. The DFF relay has different menus organized in levels. Level 0 is the standby screen. To access to level 1, a group key must be pressed (SET, INF, ACT). To move along a level ↑/↓ keys must be pressed. To go down to levels 2 and 3 ENT key must be pressed.
- Page 48 KEYPAD AND DISPLAY 9.2 SETTINGS MENU GROUP. The DFF relay has some settings groups common to all tables but other groups are particular for each settings table. The common settings are the following ones: • GENERAL SETTINGS • ACTIVE TABLE •...
- Page 49 KEYPAD AND DISPLAY Level 1 Level 2 Level 3 CLR ← VIEW PROTECTION GENERAL SETTINGS RELAY STATUS ENT → SETTINGS CLR ← ↑ key / ↓ key ↑ key / ↓ key ENT → CHANGE PROTECT FREQUENCY SETTINGS ↑ key / ↓ key NOMINAL VOLTAGE ↑...
- Page 50 KEYPAD AND DISPLAY Level 1 Level 2 Level 3 CLR ← ACTIVE TABLE ACTIVE TABLE ENT → SETTINGS ↑ key / ↓ key CLR ← OSCILLOGRAPHY OSCILLOS TYPE ENT → MASK ↑ key / ↓ key PREFAULT CYCLES ↑ key / ↓ key 81N1 PICKUP ↑...
- Page 51 KEYPAD AND DISPLAY Level 1 Level 2 Level 3 CLR ← FUNCTION PERMIT 27P FUNCTION ENT → ↑ key / ↓ key 59P FUNCTION ↑ key / ↓ key 81N1 FUNCTION ↑ key / ↓ key 81N2 FUNCTION ↑ key / ↓ key .
- Page 52 KEYPAD AND DISPLAY Level 1 Level 2 Level 3 CLR ← 27P FUNCTION 27P PICKUP ENT → ↑ key / ↓ key ( T1 = Table 1) TIME DELAY 27P ↑ key / ↓ key ↑ key / ↓ key RESET TIME 27P CLR ←...
- Page 53 KEYPAD AND DISPLAY Level 1 Level 2 Level 3 CLR ← 59P FUNCTION 59P PICKUP ENT → ↑ key / ↓ key (T1 = Table 1) TIME DELAY 59P ↑ key / ↓ key ↑ key / ↓ key RESET TIME 59P CLR ←...
- Page 54 KEYPAD AND DISPLAY Level 1 Level 2 Level 3 CLR ← 81 N1 FUNCTION FUNCTION TYPE ENT → ↑ key / ↓ key (T1 = Table 1) 81 PICKUP ↑ key / ↓ key TIME DELAY ↑ key / ↓ key ↑...
- Page 55 KEYPAD AND DISPLAY 9.2.1 ENTERING SETTINGS MANUALLY In order to modify a setting, the following steps must be followed: 1. Press the SET key. 2. Select MODIFY PROTECTION SETTINGS option. 3. Select the desired setting in the menu (see menu tree). 4.
- Page 56 KEYPAD AND DISPLAY By pressing the ENT key the status menu is accessed. With the ↑ and ↓ keys the following states are shown: State Description MODEL Model type PROT VERSION Protection program version COM VERSION Communications program version Phase A voltage Phase B voltage Phase C voltage Ground voltage...
- Page 57 KEYPAD AND DISPLAY 9.4 CONTROL OPERATIONS GROUP. This group allows to set the date and the time of the relay as well as to produce an oscillography trigger. To access to control operations group, the ACT key must be pressed (from the standby screen). These are the available control operations: - Set date and time.
-
Page 58: Communications Menu
The code is “7” “1” “6” “9”, which was selected because it is the corresponding ASCII code for the initials GE (“G”=”71”, “E”=”69”). This is the step by step sequence of displays to access the communications menu from the standby screen: GENERAL ELECTRIC →... - Page 59 KEYPAD AND DISPLAY • REMOTE SETTINGS: Setting which enables/disables the settings change via remote communication. • LOCAL CONTROL: Setting which enables/disables local control operations. • REMOTE CONTROL: Setting which enables/disables remote control operations. • UNIT NUMBER: When there are several devices connected to the same communication network each DFF is identified by a unit number that serves to identify the messages directed to it.
- Page 60 FIGURES 10. FIGURES GEK-106166E DFF Digital Feeder Relay...
- Page 61 FIGURES Figure 1: External Connections for DFF1000 model DFF Digital Feeder Relay GEK-106166E...
- Page 62 FIGURES Figure 2: External Connections for DFF1001 model GEK-106166E DFF Digital Feeder Relay...
- Page 63 FIGURES Figure 3: External Connections for DFF1002 model DFF Digital Feeder Relay GEK-106166E...
- Page 64 FIGURES Figure 4: External Connections for DFF1003 model GEK-106166E DFF Digital Feeder Relay...
- Page 65 FIGURES Figure 5: External Connections for DFF 1012 model DFF Digital Feeder Relay GEK-106166E...
- Page 66 FIGURES Figure 6: External Connections for DFF 1011 model GEK-106166E DFF Digital Feeder Relay...
- Page 67 FIGURES Figure 7: Panel Mounting for 19” rack models DFF Digital Feeder Relay GEK-106166E...
- Page 68 FIGURES Relay to Modem connection. Direct/through cable, no crossing. DB-9 DB-9 MALE MALE DO NOT CONNECT THE NOTE : SHIELD Relay to computer connection (standard null modem) It is recommended to use a direct cable with an standard Null Modem connector at one end. DB-9 DB-9 MALE...
- Page 69 FIGURES Figure 9: Dimensions diagram for 19 rack models DFF Digital Feeder Relay GEK-106166E...
- Page 70 FIGURES Figure 10 : Dimensions Diagram for ½ rack models GEK-106166E DFF Digital Feeder Relay...
- Page 71 FIGURES Figure 11: Front View for 19” rack models DFF Digital Feeder Relay GEK-106166E...
- Page 72 FIGURES Figure 12: Rear View for 19” rack model GEK-106166E DFF Digital Feeder Relay...
- Page 73 FIGURES Figure 13: Front View for ½ rack models (B2213F3) DFF Digital Feeder Relay GEK-106166E...
- Page 74 FIGURES Figure 14: Rear View for ½ rack models (B2213F2) GEK-106166E DFF Digital Feeder Relay...
Need help?
Do you have a question about the Multilin DFF and is the answer not in the manual?
Questions and answers