Table of Contents
Advertisement
Quick Links
Digital Energy
Multilin
Software Revision: 5.0x
Manual P/N: 1601-0153-A5
Manual Order Code: GEK-106493D
Copyright © 2009 GE Multilin
GE Multilin
215 Anderson Avenue, Markham, Ontario
Canada L6E 1B3
Tel: (905) 294-6222 Fax: (905) 201-2098
Internet: http://www.GEmultilin.com
*1601-0153-A5*
469 Motor Management
Relay
QUICK REFERENCE GUIDE
I I SO9001:2000
GE Multilin's Quality
Management System is
registered to
ISO9001:2000
QMI # 005094
UL # A3775
Advertisement
Table of Contents

Related Manuals for GE Multilin 469


Summary of Contents for GE Multilin 469
- Page 1 469 Motor Management Relay QUICK REFERENCE GUIDE Software Revision: 5.0x Manual P/N: 1601-0153-A5 Manual Order Code: GEK-106493D Copyright © 2009 GE Multilin I I SO9001:2000 GE Multilin 215 Anderson Avenue, Markham, Ontario Canada L6E 1B3 GE Multilin's Quality Management System is...
-
Page 3: Table Of Contents
TABLE OF CONTENTS Table of Contents DESCRIPTION ..................... 2 MECHANICAL INSTALLATION ..............4 ........................4 RAWOUT CASE ........................... 4 OUNTING ......................6 NIT WITHDRAWAL ........................7 NIT INSERTION ELECTRICAL INSTALLATION ................. 8 : ....................9 ATINGS AND POLARITIES : ........................9 IGITAL INPUTS .................. - Page 4 TABLE OF CONTENTS ..................... 47 OTOR PERATING URVES ................... 48 ONTROL YSTEM EQUIREMENTS ......................48 ONTACT UTPUTS ............................. 48 ................... 48 NSTRUMENT RANSFORMER Voltage Transformers: .....................48 Phase CTs: ........................48 Ground CT: ........................49 Motor FLC: ........................49 ......................49 OTOR ROTECTION Overload Pickup: ......................49 Overload Curve: ......................49 Short Circuit Trip: ......................49 Ground Fault: .......................49...
- Page 5 Quick Reference Guide Quick Reference Guide This Quick Reference Guide takes you through the installation and setup of your GE Multilin 469 Motor Management Relay, and helps you get setup and running as quickly as possible. The following topics are covered: •...
-
Page 6: Description
A second overload curve is provided for two-speed motors. Ground faults or earth leakage as low as 0.25 A may be detected using the GE Multilin 50:0.025 ground CT. CT inputs for phase differential protection are also provided. The 12 RTD inputs provided may be individually field programmed for different RTD types. - Page 7 QUICK REFERENCE GUIDE Table 1: Summary of Protection, Control & Monitoring Functions ANSI DESCRIPTION Overload Overload lockout Starts/hour and Time between starts Restart block (Anti-backspin timer) Short circuit and Short circuit backup Mechanical jam Undercurrent/Underpower Reverse power Current unbalance 50G/51G Ground fault and Ground fault backup Differential Acceleration...
-
Page 8: Mechanical Installation
QUICK REFERENCE GUIDE Mechanical installation Drawout case The 469 is packaged in the standard SR-series arrangement, which consists of a drawout relay and a companion case. The case provides mechanical protection for the drawout portion and is used to make permanent electrical connections to external equipment. Where required, case connectors are fitted with mechanisms, such as automatic CT shorting, to allow the safe removal of the relay from an energized panel. - Page 9 QUICK REFERENCE GUIDE FIGURE 3: Single and double unit panel cutouts Before mounting the 469 in the supporting panel, remove the unit from the case. From the front of the panel, slide the empty case into the cutout. To ensure the front bezel sits flush with the panel, apply pressure to the bezel front while bending the retaining tabs 90°.
-
Page 10: Unit Withdrawal
QUICK REFERENCE GUIDE Unit withdrawal Turn off control power before drawing out or reinserting the relay to prevent maloperation! If an attempt is made to install a relay into a non-matching case, the case's configuration pin will prevent full insertion. Applying a strong force in this instance will result in damage to the relay and case. -
Page 11: Unit Insertion
QUICK REFERENCE GUIDE Unit insertion To insert the unit into the case: Ensure that the model number on the left side of the relay matches the requirements of the installation. Raise the locking handle to the highest position. Hold the unit immediately in front of the case and align the rolling guide pins (near the hinges of the relay's handle) with the case's guide slots. -
Page 12: Electrical Installation
QUICK REFERENCE GUIDE Electrical installation FIGURE 8: Typical wiring diagram Get familiarized with the Installation Section of this manual. Make sure that the relay is properly connected, paying special attention to the following: 469 MOTOR MANAGEMENT RELAY – QUICK REFERENCE GUIDE... -
Page 13: Ratings And Polarities
QUICK REFERENCE GUIDE Ratings and polarities: • Control voltage matches the ratings and polarities of the relay power supply. Control power supplied to the relay must match the installed power supply range. All grounds must be connected for normal operation regardless of control power supply type. The label found on the left side of the relay specifies its order code or model number. - Page 14 QUICK REFERENCE GUIDE FIGURE 10: Analog outputs connection • Analog inputs are connected as indicated in Figure 8: on page 8. Also refer to the figure below. Note that the shield of the cable shall be grounded at one point only, usually at the 469 end only.
-
Page 15: Accessing Setpoints Via The Front Panel
QUICK REFERENCE GUIDE Accessing setpoints via the front panel Refer to the Changing setpoints section in Chapter 1 of the 469 Instruction Manual. Note that to have access to the relay setpoints, you must install a hardware jumper across terminals C1 and C2 at the back of the relay case. Attempts to enter a new setpoint without this electrical connection will result in an error message. -
Page 16: Typical Application Setup
QUICK REFERENCE GUIDE Typical application setup The relay leaves the factory with setpoints programmed to default values, and it is these values that are shown in all the setpoint message illustrations. Many of these factory default values can be left unchanged. At a minimum, the setpoints must be entered for the system to function S2 SYSTEM SETUP... -
Page 17: Digital Input Setpoints
QUICK REFERENCE GUIDE Digital input setpoints • Digital input identification • Digital input asserted logic • Digital input functionality To set Digital Inputs by means of the EnerVista 469 setup software, select the Setpoints > Digital Inputs menu item. The setpoints can be found as sub-pages of the following tree: Protection setpoints Refer to the “Application Example”... -
Page 18: Communicating With The Relay
QUICK REFERENCE GUIDE Communicating with the relay via the front panel RS232 port To speed up the process of changing or loading relay setpoints, the use of a computer is strongly recommended. Refer to the 469 Instruction Manual for additional information on the serial communication cable to be used to communicate with the relay via the front port. -
Page 19: Connecting Enervista 469 Setup Software With The 469
(for RS232 communications) or to the RS485 terminals on the back of the device (for RS485 communications). This example demonstrates an RS232 connection. For RS485 communications, the GE Multilin F485 converter will be required. Refer to the F485 manual for additional details. To configure the relay for Ethernet communications, refer to “Configuring Ethernet... -
Page 20: Using The Quick Connect Feature
QUICK REFERENCE GUIDE Enter the physical communications parameters (baud rate and parity) in their respective fields. Note that when communicating to the 469 from the front port, the default communications settings are: baud rate = 9600, slave address = 1, parity = none, bits = 8, and stop bits = 1. -
Page 21: Configuring Ethernet Communications
Install and start the latest version of the EnerVista 469 Setup software (available from the GE enerVista CD). See the previous section for the installation procedure. Click on the Device Setup button to open the Device Setup window and click the Add Site button to define a new site. -
Page 22: Connecting To The Relay
QUICK REFERENCE GUIDE Click OK when the relay order code has been received. The new device will be added to the Site List window (or Online window) located in the top left corner of the main EnerVista 469 Setup window. The 469 Site Device has now been configured for Ethernet communications. - Page 23 QUICK REFERENCE GUIDE If the status indicator is red, verify that the serial cable is properly connected to the relay, and that the relay has been properly configured for communications (steps described earlier). The front panel setpoints can now be edited, printed, or changed according to user specifications.
-
Page 24: Working With Setpoints
QUICK REFERENCE GUIDE Working with setpoints Engaging a device The EnerVista 469 Setup software may be used in on-line mode (relay connected) to directly communicate with a 469 relay. Communicating relays are organized and grouped by communication interfaces and into sites. Sites may contain any number of relays selected from the SR or UR product series. - Page 25 QUICK REFERENCE GUIDE For setpoints requiring non-numerical pre-set values (e.g. VT CONNECTION TYPE above, in the Voltage Sensing Tab), clicking anywhere within the setpoint value box displays a drop down selection menu arrow. Click on the arrow to select the desired setpoint.
-
Page 26: Working With Setpoint Files
QUICK REFERENCE GUIDE Working with setpoint files File support Opening any EnerVista 469 Setup file will automatically launch the application or provide focus to the already opened application. If the file was a setpoints file (that is, it has a '469' extension), which had been removed from the settings list tree menu, it will be added back to the settings list tree menu. -
Page 27: Downloading And Saving Setpoints Files
QUICK REFERENCE GUIDE Downloading and saving setpoints files Setpoints must be saved to a file on the local PC before performing any firmware upgrades. Saving setpoints is also highly recommended before making any setpoint changes or creating new setpoint files. Within the EnerVista 469 Setup window, setpoint files are accessed in the settings List control bar window or the file window. -
Page 28: Creating A New Setpoint File
QUICK REFERENCE GUIDE Creating a new setpoint file The EnerVista 469 Setup software allows the user to create new setpoint files independent of a connected device. These can be uploaded to a relay at a later date. The following procedure illustrates how to create new setpoint files. In the File pane, right click on ‘File’... -
Page 29: Printing Setpoints And Actual Values
QUICK REFERENCE GUIDE Load the setpoint file to be upgraded into the EnerVista 469 Setup environment as described in “Adding setpoints files to the environment” on page 23. In the File pane, select the saved setpoint file. From the main window menu bar, select the File > Properties menu item and note the version code of the setpoint file. -
Page 30: Loading Setpoints From A File
QUICK REFERENCE GUIDE The Print/Export Options dialog box will appear. Select Settings in the upper section and select either Include All Features (for a complete list) or Include Only Enabled Features (for a list of only those features which are currently used) in the filtering section and click OK. - Page 31 QUICK REFERENCE GUIDE Select the File > Properties menu item and verify that the corresponding file is fully compatible with the hardware and firmware version of the target relay. If the versions are not identical, see “Upgrading setpoint files to a new revision” on page 24 for details on changing the setpoints file version.
-
Page 32: Upgrading Relay Firmware
To upgrade the 469 firmware, follow the procedures listed in this section. Upon successful completion of this procedure, the 469 will have new firmware installed with the original setpoints. Firmware files are available from the GE Multilin website at http://www.GEmultilin.com. 10.2 Saving setpoints to a file Before upgrading firmware, it is very important to save the current 469 settings to a file on your PC. - Page 33 QUICK REFERENCE GUIDE The EnerVista 469 Setup software automatically lists all filenames beginning with ‘30’. Select the appropriate file and click OK to continue. The software will prompt with another Upload Firmware Warning window. This will be the final chance to cancel the firmware upgrade before the flash memory is erased. Click Yes to continue or No to cancel the upgrade.
- Page 34 QUICK REFERENCE GUIDE The addresses are rearranged when new features are added or existing features are enhanced or modified. The message displayed after upgrading/ EEPROM DATA ERROR downgrading the firmware is a resettable, self-test message intended to inform users that the Modbus addresses have changed with the upgraded firmware.
-
Page 35: Advanced Enervista 469 Setup Features
QUICK REFERENCE GUIDE Advanced EnerVista 469 Setup features 11.1 Triggered events While the interface is in either on-line or off-line mode, data generated by triggered specified parameters can be viewed and analyzed via one of the following: • Event Recorder: The event recorder captures contextual data associated with the last 256 events, listed in chronological order from most recent to the oldest. - Page 36 QUICK REFERENCE GUIDE Click on the Save to File button to save the selected waveform to the local PC. A new window will appear requesting for file name and path. The file is saved as a CSV (comma delimited values) file, which can be viewed and manipulated with compatible third-party software.
-
Page 37: Phasors
QUICK REFERENCE GUIDE From the window main menu bar, press the Preference button to change the graph attributes. Preference button The following window will appear: Change the color of each graph as desired, and select other options as required, by checking the appropriate boxes. - Page 38 QUICK REFERENCE GUIDE The EnerVista 469 Setup software will display the following window: Press the “View” button to display the following window: VOLTAGE LEVEL CURRENT LEVEL Displays the value Displays the value and the angle of and angle of the the voltage phasors current phasor CURRENT VECTORS...
-
Page 39: Trending (Data Logger)
QUICK REFERENCE GUIDE When the currents and voltages measured by the relay are zero, the angles displayed by the relay and those shown by the EnerVista 469 Setup software are not fixed values. 11.4 Trending (data logger) The trending or data logger feature is used to sample and record up to eight actual values at an interval defined by the user. - Page 40 QUICK REFERENCE GUIDE With EnerVista 469 Setup running and communications established, select the Actual Values > Trending menu item to open the trending window. The following window will appear. To prepare for new trending, select Stop to stop the data logger and Reset to clear the screen.
-
Page 41: Event Recorder
QUICK REFERENCE GUIDE Press “Run” to start the data logger. If the Log Samples to File item is selected, the EnerVista 469 Setup software will begin collecting data at the selected sampling rate and will display it on the screen. The data log will continue until the Stop button is pressed or until the selected number of samples is reached, whichever occurs first. -
Page 42: Modbus User Map
Modbus user map The EnerVista 469 Setup software provides a means to program the 469 User Map (Modbus addresses 0180h to 01F7h). Refer to GE Publication GEK-106491: 469 Communications Guide for additional information on the User Map. Select a connected device in EnerVista 469 Setup. -
Page 43: Viewing Actual Values
QUICK REFERENCE GUIDE Select the Setpoint > User Map menu item to open the following window. This window allows the desired addresses to be written to User Map locations. The User Map values that correspond to these addresses are then displayed. 11.7 Viewing actual values You can view real-time relay data such as input/output status and measured parameters. - Page 44 QUICK REFERENCE GUIDE • Relay date and time. • Present blocking conditions. • General system status indication including the status of output relays, active pickup, alarm and trip conditions. Metering Data: • Instantaneous current measurements including phase, differential, unbalance, ground, average, motor load, and differential currents. •...
- Page 45 QUICK REFERENCE GUIDE To view a separate window for each group of actual values, select the desired item from the tree, and double click with the left mouse button. Each group will be opened on a separate tab. The windows can be re-arranged to maximize data viewing as shown in the following figure (showing actual current, voltage, and motor status values tiled in the same window): FIGURE 18: Actual Values Display...
-
Page 46: Application Example
QUICK REFERENCE GUIDE Application Example 12.1 Description The 469 Motor Management Relay contains many features designed to accommodate a wide range of motor management applications. This chapter is provided to guide you, the first time user, through a real-world application. The following is typical example of how to determine the relay setpoints for a specific motor that has been applied conservatively. - Page 47 QUICK REFERENCE GUIDE • System frequency • System phase sequence • Define the Protection Elements that will be enabled. Prepare a list of protection functions including the following information. By default, all the protection functions must be assumed Disabled: Pick-Up parameter Operating curve, if applicable Time dial or multiplier Any additional intentional time delay...
- Page 48 QUICK REFERENCE GUIDE FIGURE 19: Typical Three Line Diagram 469 MOTOR MANAGEMENT RELAY – QUICK REFERENCE GUIDE...
- Page 49 QUICK REFERENCE GUIDE 806551A1.CDR FIGURE 20: Typical Breaker Control Diagram 469 MOTOR MANAGEMENT RELAY – QUICK REFERENCE GUIDE...
-
Page 50: Power System Data
SYSTEM DATA QUICK REFERENCE GUIDE 806555A1.CDR FIGURE 21: Typical Relay Control Diagram 12.2Power System Data 0.1 System Data • System: 3Φ, 4 wire • Frequency: 60 Hz • Line Voltage: 600 V 469 MOTOR MANAGEMENT RELAY – QUICK REFERENCE GUIDE... -
Page 51: Motor Data
QUICK REFERENCE GUIDE SYSTEM DATA 12.3 Motor Data As per the following motor data sheet information: 12.4 Motor Operating Curves As follows: 469 MOTOR MANAGEMENT RELAY – QUICK REFERENCE GUIDE... -
Page 52: Control System Requirements
RTU. Similar information could be exchanged between the RTU and the relay via an RS485 or RS422 Serial Link using Modbus RTU protocol. Refer to GE Publication GEK-106491: 469 Communications Guide for additional information. -
Page 53: Ground Ct
QUICK REFERENCE GUIDE SYSTEM DATA Ground CT: For high resistive grounded systems, sensitive ground detection is possible with the 50:0.025 CT. On solidly grounded or low resistive grounded systems where the fault current is much higher, a 1A or 5A secondary CT should be used. If residual connection is used, pickup levels and timers must be set with respect to the acceleration time. -
Page 54: Unbalance Alarm And Trip
SYSTEM DATA QUICK REFERENCE GUIDE Unbalance Alarm and Trip: The unbalance settings are determined by examining the motor application and motor design. The heating effect of unbalance will be protected by enabling unbalance input to thermal memory; described in details in Chapter 5, Thermal Model. A setting of 10% for the Unbalance Alarm with a delay of 10 seconds would be appropriate and the trip can be set to 20% with a delay of 5 seconds. -
Page 55: Bearing Rtds
QUICK REFERENCE GUIDE SYSTEM DATA Bearing RTDs: The Bearing RTD alarm and trip settings will be determined by evaluating the temperature specification from the bearing manufacturer. Unbalance Bias Of Thermal Capacity: Enable the Unbalance Bias of Thermal Capacity so that the heating effect of unbalance currents is added to the Thermal Capacity Used. -
Page 56: Rtd Bias Maximum
SYSTEM DATA QUICK REFERENCE GUIDE RTD Bias Maximum: This setpoint is set to the rating of the insulation or slightly less. A class F insulation is used in this motor that is rated at 155°C, so setting should be 155. 806550A1.CDR You should now be familiar with maneuvering through and editing setpoint messages. - Page 57 A contactor sealing contact would be used to maintain the circuit. For details on issuing a start or stop command via communications, refer to the GE Publication GEK-106491: 469 Communications Guide. Make the following changes to the communications settings in the S2 SYSTEM SETUP page.
-
Page 58: 12.11 Digital Inputs Setpoints
SYSTEM DATA QUICK REFERENCE GUIDE 12.11 Digital Inputs Setpoints The S3 setpoints page is for entering the characteristics of the digital inputs. In our example, these characteristics are specified under the Control System Requirements heading. Program the S3 setpoints as indicated. Some of the functions assigned to the digital inputs of the 469 Motor Management Relay are pre-defined functions, which can be selected from a list. -
Page 59: 12.12 Thermal Model Setpoints
QUICK REFERENCE GUIDE SYSTEM DATA 12.12 Thermal Model Setpoints The S5 Thermal Model setpoints page contains setpoints for entering set- tings related to protection of the motor during the starting process as well as during normal operation. As per the information provided above, the settings for the Thermal Model are entered as follows in the : “Standard”... - Page 60 SYSTEM DATA QUICK REFERENCE GUIDE bus shot down; in most cases, the second trip command energizes a lock out relay (86) which is used to trip the upstream breakers : “Auxiliary3” ASSIGN BACKUP RELAYS : “200 ms” - this time must be greater than the SHORT CIRCUIT TRIP BACKUP DELAY total time required to trip the main breaker plus a margin Since the specifications do not indicate values for the following features, they must be left...
-
Page 61: 12.14 Motor Starting Setpoints
QUICK REFERENCE GUIDE SYSTEM DATA 12.14 Motor Starting Setpoints The S7 Motor Starting setpoints page contains additional setpoints used to complement the Thermal Model. In our example, these characteristics are specified under Motor Protection heading. For the Acceleration Timer element, enter the following values in the S7 MOTOR STARTING page. -
Page 62: 12.16 Undervoltage Protection
SYSTEM DATA QUICK REFERENCE GUIDE : “135°C” RTD #1 ALARM TEMPERATURE : “Off” RTD #1 HIGH ALARM : “Alarm” - default value HIGH ALARM RELAYS : “135°C” - default value RTD #1 HIGH ALARM TEMPERATURE : “On” RTD #1 ALARM EVENTS : “Latched”... -
Page 63: 12.17 Installation
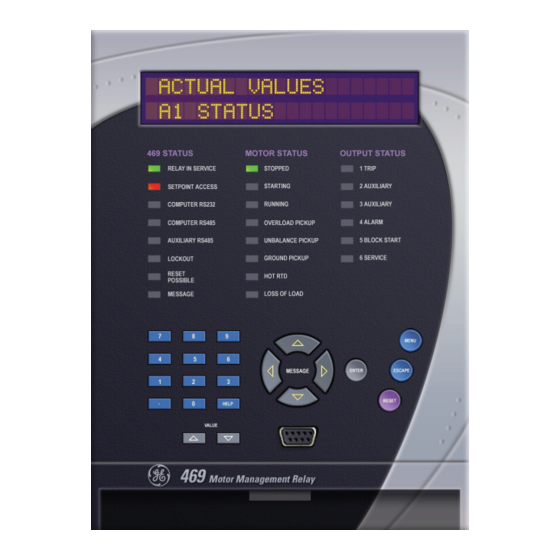
The Relay In Service LED Indicator will be on. By now, once you have completed all the steps illustrated on this typical example, you should be able to set the GE Multilin 469 Motor Management relay for a typical feeder application. - Page 64 SYSTEM DATA QUICK REFERENCE GUIDE 469 MOTOR MANAGEMENT RELAY – QUICK REFERENCE GUIDE...
Need help?
Do you have a question about the Multilin 469 and is the answer not in the manual?
Questions and answers