Table of Contents
Advertisement
g
GE Multilin
215 Anderson Avenue
L6E 1B3 Markham, ON -CANADA
T (905) 294 6222 F (905) 294 8512
E gemultilin@ge.com
Internet: www.GEMultilin.com
GE Consumer & Industrial
Multilin
HID
High Impedance Differential
Module
Instruction manual
GEK-113064
Copyright © 2005 GE Multilin
GE Multilin
Avda. Pinoa, 10
48170 Zamudio SPAIN
T +34 94 485 88 00 F +34 94 485 88 45
E gemultilin.euro@ge.com
Advertisement
Table of Contents

Subscribe to Our Youtube Channel
Related Manuals for GE Multilin HID


Summary of Contents for GE Multilin HID
- Page 1 GE Consumer & Industrial Multilin High Impedance Differential Module Instruction manual GEK-113064 Copyright © 2005 GE Multilin GE Multilin GE Multilin Avda. Pinoa, 10 215 Anderson Avenue 48170 Zamudio SPAIN L6E 1B3 Markham, ON -CANADA T +34 94 485 88 00 F +34 94 485 88 45 T (905) 294 6222 F (905) 294 8512 E gemultilin.euro@ge.com...
-
Page 2: Table Of Contents
TABLE OF CONTENTS GETTING STARTED IMPORTANT PROCEDURES 1.1.1. CAUTIONS AND WARNINGS ......................... 1-1 INSPECTION CHECKLIST SAFETY INSTRUCTIONS HID OVERVIEW 1.4.1. MOUNTING & WIRING ........................... 1-6 1.4.2. FRONT PLATE BUTTON ........................1-6 PRODUCT DESCRIPTION INTRODUCTION 2.1.1. GENERAL OVERVIEW ........................... 2-1 ORDERING CODE TECHNICAL SPECIFICATIONS. - Page 3 TABLE OF CONTENTS HID High Impedance Differential Module GEK-113064...
-
Page 4: Getting Started
GETTING STARTED GETTING STARTED IMPORTANT PROCEDURES To help ensure years of trouble free operation, please read through the following chapter for information to help guide you through the initial installation procedures of your new device. Before attempting to install or use the device, it is imperative that all warnings and cautions in this manual are reviewed to help prevent personal injury, equipment damage, and/or downtime. -
Page 5: Inspection Checklist
Wiring diagram Certificate of compliance For product information, instruction manual updates, please visit the GE Multilin Home Page (www.GEMultilin.com). Note: If there is any physical damage noticed on the device, or if any of the contents listed are missing, please contact GE Multilin immediately. - Page 6 Should you wish to receive additional information, or for any particular problem that cannot be solved by referring to the information contained herein, please contact GE MULTILIN. GEK-113064 HID High Impedance Differential Module...
-
Page 7: Safety Instructions
The ground screw shown in the following figure must be correctly grounded. Grounding screw FIGURE 1-3 GROUNDING SCREW LOCATION GE Multilin will not be responsible for any damage in the device or connected equipment whenever this elemental safety rule is not followed. HID High Impedance Differential Module GEK-113064... -
Page 8: Hid Overview
GETTING STARTED HID OVERVIEW High Impedance Differential protection is a well-known principle where stabilizing resistors provide immunity against external faults. HID modules provide resistors together with voltage limiters (MOV) to be used with a high-speed overcurrent relay in order to obtain a high impedance differential protection scheme. External CT's are differentially connected exactly as for traditional high impedance differential protection relaying. -
Page 9: Mounting & Wiring
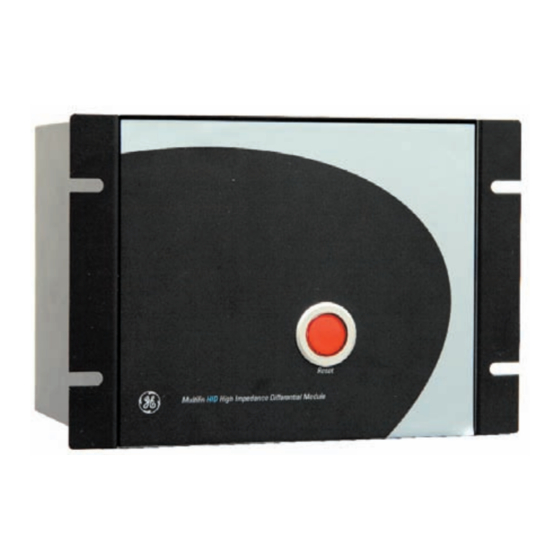
GETTING STARTED 1.4.1. MOUNTING & WIRING Please refer to the HARDWARE chapter for detailed device mounting and wiring instructions. Review all WARNINGS and CAUTIONS. 1.4.2. FRONT PLATE BUTTON The HID front plate incorporates a reset pushbutton to reset the latching relay once the fault has been cleared, in order to eliminate the resistors short-circuit. -
Page 10: Product Description
PRODUCT DESCRIPTION 2. PRODUCT DESCRIPTION INTRODUCTION 2.1.1. GENERAL OVERVIEW HID modules provide resistors together with voltage limiters (MOV) to be used with high-speed overcurrent relay in order to get a high impedance differential protection scheme. The overcurrent relay unit connected in series with the resistors provides high-speed operation for busbar faults involving high-magnitude currents. -
Page 11: Ordering Code
PRODUCT DESCRIPTION ORDERING CODE The information required to completely specify the relay is provided in the following table: APPLICATION 1 Winding Transformer REF – 1 resistor + 1 MOV 2 Winding Transformer REF – 2 resistors + 2 MOV Busbar Application. High Impedance Differential Element LATCHING RELAY / POWER SUPPLY Without latching relay 48 Vdc Latching relay... -
Page 12: Latching Relay
PRODUCT DESCRIPTION 2.3.3. LATCHING RELAY RATED VOLTAGE Latching relay option 1 48 VDC Latching relay option 2 125 VDC Latching relay option 3 220 VDC OPERATION RANGES Operation range 80 % to 150 % of rated voltage Consumption 8 W at rated voltage Pickup value 60% of rated voltage OPERATING TIME (at rated voltage) -
Page 13: Type Tests & Certifications
PRODUCT DESCRIPTION 2.3.5. TYPE TESTS & CERTIFICATIONS The HID system complies with the following standards, which include the standards required by Community Directive 89/336 for the CE marking, in line with European standards. It also complies with the European directive requirements for low voltage, and the environmental and operating requirements established in ANSI standards C37.90, IEC 255-5, IEC 255-6 and IEC 68. -
Page 14: Hardware
HARDWARE 3. HARDWARE WARNING The HID system incorporates components that might be affected by electrostatic discharge currents flowing through certain component terminals. The main source of electrostatic discharges is human body, especially under low humidity conditions, with carpet floors or isolating shoes. If such conditions are present special care should be taken while manipulating HID modules. -
Page 15: Mounting
HARDWARE 3.1.1. MOUNTING The HID module is composed of a black metallic stainless steel case. The case contains a metallic panel to which the MOV (Metal Oxide Varistors) and the stabilizing resistors are hooked, as well as the connections base for the latching relay and internal connections among the stabilizing resistors, MOV, and latching relay contacts. -
Page 16: Control Power
HARDWARE 3.1.3. CONTROL POWER CAUTION Control power supplied to the relay must match the rated voltage of the device. If the voltage is applied to the wrong terminals, damage may occur. TABLE 3-1: CONTROL POWER VOLTAGE RANGE Option RATED VOLTAGE OPERATION RANGE 48 Vdc 38.4~57.6 Vdc... -
Page 17: Rear Description
HARDWARE 3.1.6. REAR DESCRIPTION The module is wired through the terminal blocks located at the rear of the unit. The maximum recommended cable section for this terminal board, with the appropriate terminal, is 6 mm2 (AWG 10). FIGURE 3-3 REAR TERMINALS DIAGRAM 3.1.7. - Page 18 HARDWARE HIDs with latching relay use 2 K 75W resistors, while HIDs without latching relay use 1 K 100 W resistors. FIGURE 3-4 INPUT CONNECTIONS Current flows through stabilizing resistors into current input of the overcurrent module. Once high-speed overcurrent module trips, latching relay contacts short-circuit stabilizing resistor plus current input.
- Page 19 HARDWARE This module can be mounted together with a high-speed overcurrent module or it can be mounted alone. FIGURE 3-5 shows the drilling panel for this situation. FIGURE 3-5 DIMENSIONS AND DRILLING FOR HID MODULE HID High Impedance Differential Module GEK-113064...
-
Page 20: Acceptance Tests
ACCEPTANCE TESTS 4. ACCEPTANCE TESTS Acceptance tests include tests for both HID module and the latching relay 86. For the latching relay, this manual proposes to test the open and close coils operation, and the correct contact activation. WIRING AND NECESSARY EQUIPMENT Necessary equipment: 1 AC voltage source. -
Page 21: Isolation Test
ACCEPTANCE TESTS ISOLATION TEST IMPORTANT: During all tests, the screw located on the rear of the relay must be grounded. For verifying isolation, independent groups will be created, and voltage will be applied as follows: 2500 RMS volts will be applied progressively among all terminals in a group, short-circuited between them and the case, during one second. -
Page 22: Measures
ACCEPTANCE TESTS MEASURES Latching relay coil resistor (only for latching relay option) : Latching relay Terminals A1 – A3 Terminals B10 – B12 option 1 (48 Vdc) 340 Ohm 340 Ohm 2 (125 Vdc) 2K15 2K15 3 (220 Vdc) NOTE: An error of 20% will be admitted Resistors Measure: Check that the resistor value between terminals is: •... -
Page 23: Latching Relay Verification
ACCEPTANCE TESTS LATCHING RELAY VERIFICATION Contact test: Check with the external wiring diagram that all the auxiliary contacts of the latching relay are open and, therefore, there is no continuity between them. Apply voltage to terminals +A1 y –A4 and verify that latching relay contacts operation time is below 25 ms. Verify that all auxiliary contacts have changed their position to closed and that there is continuity between each pair of them.
Need help?
Do you have a question about the Multilin HID and is the answer not in the manual?
Questions and answers
Wiring diagram for HID30 (w/o latching relays) is missing. Only for HID32 is available. Please provide it. Thank you!
The wiring diagram for the GE Multilin HID30 without latching relays can be found in the external wiring diagram section of the manual. It is advised to check the corresponding external wiring diagram specific to the HID model being used.
This answer is automatically generated