
Related Manuals for Thermo Scientific Barnstead EASYpure RODI 1332 Series


Summary of Contents for Thermo Scientific Barnstead EASYpure RODI 1332 Series
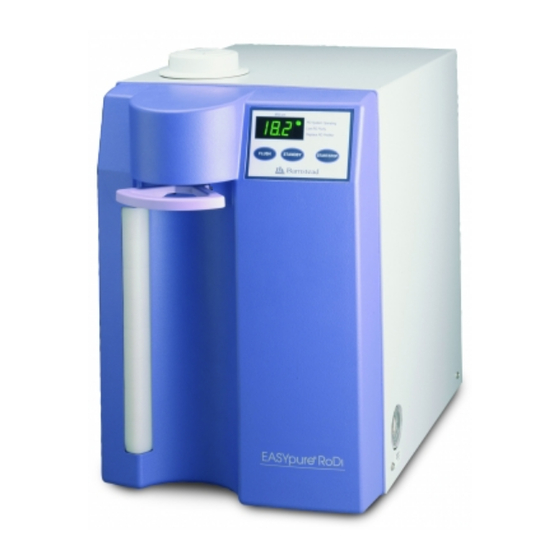
- Page 1 Barnstead EASYpure ™ ® OPERATION MANUAL AND PARTS LIST Series 1332 Model D13321 100-240 Volts LT1332X1 • 7/3/08...
-
Page 2: Table Of Contents
Table of Contents Safety Information ..............................4 Alert Signals..............................4 Warnings ..............................4 Introduction ................................6 Product Overview ............................6 General Specifications ............................7 Dimensions and Clearance Requirements ....................7 Electrical Requirements..........................7 Feedwater Requirements ..........................7 DI Product Water ............................7 RO System ..............................8 RO Membrane Performance ........................8 Environmental Conditions ..........................9 Declaration of Conformity ..........................9 Unpacking ..............................10... - Page 3 ABLE OF ONTENTS Cleaning the Resistivity Cell ........................30 General Cleaning Instructions ......................32 Component Replacement ..........................33 RO Carbon Prefilter Replacement......................33 DI Cartridge Replacement and Rinse-Up ....................34 UV Lamp Replacement ........................35 Membrane Replacement ..........................37 0.2 Micron Final Filter Replacement ....................39 Ventgard Cap Replacement ........................39 Fuse Replacement ..........................39 Unit Shutdown ............................40 Troubleshooting ..............................41...
-
Page 4: Safety Information
Safety Information Alert Signals Your Thermo Scientific Barnstead EASYpure ® been designed with function, reliability, and safety in mind. It is your responsibility to install it in conformance with local electrical codes. Warning This manual contains important operating and safety Warnings alert you to a possibility of information. - Page 5 AFETY NFORMATION To avoid personal injury: Do not use in the presence of flammable or combustible materials; fire or explosion may result. This device contains components which may ignite such materials. Do not use in the presence of highly corrosive substances such as bleach or acid baths;...
-
Page 6: Introduction
Introduction Product Overview The Barnstead EASYpure R is a tap-fed water purification system designed to be simple to use and to provide reagent grade water that exceeds ASTM, Type I, and NCCLS/CAP Type I standards. It uses a thin film composite reverse osmo- sis membrane with one stage of pretreatment to produce RO water that is then polished using a two-stage deionization process combined with UV oxidation and a 0.2 micron final fil-... -
Page 7: General Specifications
General Specifications Dimensions and Clearance Requirements EASYpure R dimensions - 12" W X 19" D X 18 1/8" H (30.5 cm X 48.3 cm X 46.0 cm). Clearances: Sides - 4" (10.1 cm) minimum to allow air flow Above - 12" (30.5 cm) minimum for UV lamp replacement Cartridge replacement requires that you be able to access the back of the unit to open the cartridge access door (total depth, unit + open door, = 34") (86.4 cm). -
Page 8: Ro System
ENERAL PECIFICATIONS RO System Flow Rate : 3.8 lph ±15% (1 gph) @ 10-20% recovery, 65 psig [4.5 bar] and 25°C RO Membrane Performance Rejection Inorganic (minimum) >90% Inorganic (typical) >96% Particles >99% Bacteria >99% Organics (>100 MW) >99% Feedwater suitability must be determined by a water analysis 500 ppm NaCl feedwater solution @ 25°C (77°F), @ 4.5 bar (65 psig), 15% recovery. -
Page 9: Environmental Conditions
ENERAL PECIFICATIONS Environmental Conditions Operating: 4°C - 49°C; 20% - 80% relative humidity, non-condensing. Installation Category II (overvoltage) in accordance with IEC 664. Pollution Degree 2 in accordance with IEC 664. Altitude limit: 3,500 meters. Storage: -25°C - 65°C; 10% to 85% relative humidity. Declaration of Conformity We hereby declare under our sole responsibility that this product conforms with the technical requirements of the following standards:... -
Page 10: Unpacking
Unpacking Unpacking Remove the unit from its shipping container and ensure that the following items are removed from the packaging materials before discarding: EASYpure R unit Approximately 6ʼ (2 m) of 1/4” O.D. drain tubing (TU1190X12) with a 1/4” NPT fitting at one end. -
Page 11: Installation
Installation Water Connection Details Figure 1 Tubing Installation Push-to-Connect Fitting Tubing Installation COLLET The following instructions will apply when you need to attach a piece of tubing to your EASYpure R during TYPICAL installation, unless otherwise noted in the installation FITTING instructions. -
Page 12: Tubing Adapter Fittings
NSTALLATION Tubing Adapter Fittings Completely disassemble the fitting. Refer to Figure 3 to familiarize yourself with the names of the component parts. Make sure the tubing is cut off reasonably square and that no plastic burrs or ridges are present. Place the grab ring and backup ring in the hex nut in the order and orientation shown in Figure 3. -
Page 13: Quick Disconnect Fittings
NSTALLATION Quick Disconnect Fittings Note These fittings are found on the water inlet. (See Fig. 4) The quick disconnect fittings contain To insert the inlet tubing: valves and if not properly inserted Press on the metal thumbpad on the unit to water will not flow. -
Page 14: Component Installation
NSTALLATION Caution Do not rotate the metal cover as this will loosen the water tight seal and Component Installation thus damage the UV lamp. Note If UV lamp is not installed properly UV Lamp Installation (See Fig. 5) an “Er3” message will appear for 15 Before you mount the EASYpure R , install the UV seconds of every minute. -
Page 15: Ro Membrane Installation
NSTALLATION Carefully insert and hold the UV lamp par- tially into the UV chamber. Connect the UV lamp to the receptacle in the black plastic cover. Slide the lamp com- pletely into chamber and replace the black plastic cover on the UV chamber. If an RO membrane is not also being installed or replaced, reinstall the EASYpure Product... -
Page 16: Initial Cartridge Installation
NSTALLATION Note Initial Cartridge Installation (See Fig. 7) The EASYpure R ʼs cartridges must be installed in the proper position. Open cartridge access door in the rear of the unit by pushing the door latch back. The upper end cap is the one with the right angle turn and two flanges. -
Page 17: To Reset Carbon Prefilter Timer
NSTALLATION Plug other end of power cord into facility power. To Reset Carbon Prefilter Timer The carbon prefilter timer records service time to ensure the reliability of the RO membrane. It must be reset prior to initial operation and after cartridge replacement. Turn power OFF using switch on the back of the unit. -
Page 18: Locating Unit
NSTALLATION Locating Unit Bench Mounting Place the EASYpure R on a bench top that is accessible to water, electricity and an atmo- spherically vented drain, and that is convenient to your work area, noting the Clearance Re- quirements. Wall Mounting (Optional) D13324 Install the optional wall bracket on the wall in a location that is accessible to water, electricity and an atmospheri- cally vented drain, and that is convenient to use. -
Page 19: Atmospheric Drain
NSTALLATION Ventgard Cap Airborne Filter Atmospheric Drain The RO reject and flush water is sent to drain through this Fill Port connection. Display Locate the drain water tubing. This is the 1/4” O.D. tubing that is approximately 6 ft. long with Draw-off Valve Lever a 1/4”... -
Page 20: Controls And Normal Operation
Controls and Normal Operation Warning Do not use in the presence of flam- Power Switch mable or combustible materials; fire or explosion may result. This device The power switch on the EASYpure R is located on contains components which may the back right side of the unit directly above the power ignite such materials. -
Page 21: Display
ONTROLS AND ORMAL PERATION FLUSH: Manual Flush: Pressing the Flush switch once will initiate a one minute flush of the RO membrane and the display will show FL1. Pressing the Flush switch twice will initiate a five minute flush of the RO membrane. During this five minute flush, the display will count down FL5, FL4, FL3, etc. -
Page 22: Pressure Gauge
ONTROLS AND ORMAL PERATION Pressure Gauge This unit includes a pressure gauge to monitor the RO membrane pressure. The pressure gauge is located on the lower right side of the unit. A pressure of 65 psi (4.5 bar) is ideal for operation of the membrane; lower pres- sures produce less RO product water quantities (slower filling of reservoir) and higher pressures produces more RO product water quantities (quicker filling of reservoir.) -
Page 23: Flush Mode
ONTROLS AND ORMAL PERATION unit to produce high quality water quickly upon being placed in the Run Mode and prolong the life of the UV lamp. It is recommended that the EASYpure R placed in the Standby Mode during non-work hours. At the end of the work day, press the STANDBY switch to place the unit in Standby Mode. -
Page 24: Dispensing Water From Unit
ONTROLS AND ORMAL PERATION Dispensing Water from Unit Note Remove the protective cap from the filter bell. For critical applications, draw 50 to 100 ml of water from system and dis- Place a container under the draw-off valve. card prior to drawing water for each use. -
Page 25: Initial Operation
Initial Operation Storage Reservoir Filling and Note Cartridge/Membrane Rinse Up Cartridge rinse up procedure must be followed after each cartridge and/or fil- ter replacement. RO Membrane Rinse-Up: During initial operation be sure the reservoir Drain Plug (bottom rear of unit) is removed and that the unit is placed such that the reservoir Warning drain is over a sink to allow for proper rinsing... - Page 26 NITIAL PERATION Again apply power to the system and press the ʻStart/Stopʼ switch to start operation. Let the reservoir fill completely (may take up to six hours). During the filling process the unit pump may turn on/off and the unit display may alternate between “Add”...
-
Page 27: Normal Operation
Normal Operation Operation Check feedwater and drain connections as Note described in “Water Service Connections” in If “Add” is displayed, the water level the Installation section of this manual. in the reservoir is below the low float. To prevent air from getting into Turn main power on at power entry module. -
Page 28: Maintenance And Servicing
Maintenance and Servicing System Cleaning Warning Frequency of cleaning will vary, depending on quality of Disconnect from the power supply prior feedwater and usage. Cleaning is necessary in any of the to maintenance and servicing. following occur: If residual deposits are evident inside feedwater reservoir, or if a new 0.2 micron final filter clogs Do not disassemble water lines or re- rapidly. - Page 29 AINTENANCE AND ERVICING Turn the unit around to provide access to the drain plug on the lower edge of the back panel. Place the drain plug over a bucket or other suit- able large container. Remove the drain plug by turning it while pulling until it comes out.
-
Page 30: Cleaning The Resistivity Cell
AINTENANCE AND ERVICING Cleaning the Resistivity Cell (See Fig. 13) Warning Turn off the EASYpure R and disconnect it Depressurize system prior to opening from the power supply. Remove the power cartridge access door. cord. Depressurize the system by opening the unit dispenser draw-off valve, allowing water to Note drain until no more flows from the valve. - Page 31 AINTENANCE AND ERVICING Remove the cover by lifting it straight up. Caution Remove the 0.2 micron final filter. Carefully The cell electrodes are etched to remove the front cover screws and pull the improve wetting characteristics. Do not cover off. Disconnect membrane key leads mechanically abrade or damage this from the display board.
-
Page 32: General Cleaning Instructions
AINTENANCE AND ERVICING latch cartridge access door closed. 16. Reinstall the Ventgard cap and 0.2 micron final filter. 17. Reattach the power cord and reconnect the unit to the power supply and feedwater. 18. Allow the reservoir to refill and operate normally. Warning Disconnect from the power supply General Cleaning Instructions... -
Page 33: Component Replacement
AINTENANCE AND ERVICING Warning Refer servicing to qualified personnel. ing mild soap solution. Do not disassemble water lines or re- Component Replacement move cartridges where spilled water could contact equipment that requires electrical service. Electrical shock hazard could result. RO Carbon Prefilter Replacement Warning Chlorine and particulates will damage your RO mem- Depressurize system prior to opening... -
Page 34: Di Cartridge Replacement And Rinse-Up
AINTENANCE AND ERVICING LED may turn on and off as air is purged out of the cartridge. Once the RO Prefilter has been wetted, the LED should remain off. DI Cartridge Replacement and Rinse Up Note Remember, used cartridges can be The frequency with which you will need to replace car- recycled;... -
Page 35: Uv Lamp Replacement
AINTENANCE AND ERVICING 10. Close the cartridge access door. 11. Install the hose barb into the fitting in the draw- off valve. 12. Turn unit on and from “IdL” press the START/STOP button to begin unit operation. 13. Rinse approximately 3 liters (1/2 reservoir vol- ume) of water through the draw-off valve to drain. - Page 36 AINTENANCE AND ERVICING Remove the screws securing the EASYpure top cover. Remove the top cover by lifting straight up. Note Locate the UV oxidation chamber and pull the The UV lamp contains mercury. If top black plastic cover off. Do not pull on the broken or no longer needed, do not cable.
-
Page 37: Membrane Replacement
AINTENANCE AND ERVICING RO Membrane Replacement (See Fig. 6) If applicable, reset the carbon prefilter timer (it is Warning recommended to replace RO carbon prefilter when Discard the RO membrane product replacing the RO membrane.) (See “To Reset water for at least two hours during Carbon Prefilter Timer.”) the initial operation. - Page 38 AINTENANCE AND ERVICING 13. Note the orientation of the membrane housing and install the unconnected tubes into the correspon- ding connectors on the membrane housing. To do so, first wet the tube end with water and push the tube end firmly into the connector until it bottoms out.
-
Page 39: 0.2 Micron Final Filter Replacement
AINTENANCE AND ERVICING 0.2 Micron Final Filter Replacement Replace the 0.2 micron final filter whenever any of the fol- lowing conditions occur: the product water flow rate is reduced or you experience bacteria break through, when cartridges are replaced, or when system is cleaned. The 0.2 micron final filter is shipped assembled with a bell. -
Page 40: Unit Shutdown
AINTENANCE AND ERVICING Reattach the power cord and reconnect the unit to the power supply. Operate normally. Unit Shutdown If the EASYpure R will be inactive for a period up to a month, place the unit in Standby. For periods of time Note greater than a month, disconnect water and power When in Standby, the unit will per-... -
Page 41: Troubleshooting
Troubleshooting Problem Possible Causes Action EASYpure completely inactive. No electrical power to Ensure that the EASYpure (Pump not operating, display not lit, etc.) EASYpure power cord is connected to a live power source and completely plugged into electrical outlet. Note: When unit is powered and not Membrane key switch leads not Disconnect unit from power. - Page 42 ROUBLESHOOTING Problem (cont.) Possible Causes (cont.) Action (cont.) 0.2 micron final filter clogs Possible feedwater contamination. Check that the service life of the RO rapidly after replacement. membrane or RO carbon filter has not been exceeded. If not exceeded, call Technical Service for possible feedwater testing.
- Page 43 ROUBLESHOOTING Problem (cont.) Possible Causes (cont.) Action (cont.) Tank not filling (low pressure indicated by Feedwater supply valve closed. Open feedwater supply valve. gauge.) RO prefilter plugged. Replace RO prefilter. Solenoid valve not open. Call Technical Service. Feed pressure below specification. Increase pressure.
-
Page 44: Error Conditions
ROUBLESHOOTING Error Conditions Problem Possible Causes Action Display reads “Er1” Air in system. Purge air from system by (Purity measurement error) drawing off water according to the instructions in the Operation section. Resistivity cell not connected to Check resistivity cell lead PCX70 meter board connection (P1). - Page 45 ROUBLESHOOTING Problem (cont.) Possible Causes (cont.) Action (cont.) High Float -- J8 on daughter board Display reads “Er6” One or more of the float connections (Reservoir float error) to the PC boards are unplugged. (PC1332X1 PC5 Medium Float -- J9 on daughter board (PC1332X1, PC5 Low Float -- Position 3-4 of WH1305X1 (WH3...
-
Page 46: Replacement Parts
Replacement Parts Consumables Consumable parts are those required to support the day-to-day operation of this equipment. We established two types of consumables; those items that must periodically be replaced to maintain performance (filters, resin cartridges, etc.) and other items of limited life (fuses, etc.) that you can expect to replace on a more or less random basis. -
Page 47: General Maintenance
EPLACEMENT ARTS General Maintenance General maintenance parts are defined as laboratory level repair parts which do not require great expertise or special tools for installation. We recommend that you stock the general maintenance parts as an aid to ensur- ing the continued operation of this equipment. Description Catalog No. -
Page 48: Accessories
Accessories Optional Accessory Ordering Information External Boost Pump Assembly AY1332X1 External Filter Assembly with Gauges AY1332X2 External Filter Assembly Particulate/Antiscalant Cartridge FLX35 Hot/Cold Mixing Valve D7427 Wall Mount Bracket D13324 AY1332X1 Boost Pump Accessory This accessory should be used when customer site has low or widely fluctuating feedwater pressure. -
Page 49: Ay1332X2 External Filter Accessory
CCESSORIES Carefully and cleanly cut the EASYpure R feed- water tubing such that one piece will connect the EASYpure R to the external accessory pump. The other piece will be used to connect the facility water supply to the “inlet” of the accessory pump. Use 90-degree fittings as necessary to help route tubing to and from the external pump accessory. -
Page 50: Filter/Antiscalant Cartridge Exchange
CCESSORIES Completely and securely assemble AY1332X2 com- ponents. See drawing on page 53. (Note orientation of Filter/Antiscalant assembly). The use of PTFE tape on NPT treads is recommended to aid in a secure leak proof assembly. Using 2 customer-supplied fasteners, install the assembly on a wall in a location convenient for filter exchange. - Page 51 CCESSORIES Insert new Filter/Antiscalant cartridge. IMPORTANT – be sure the end with the Antiscalant insert (which includes a gasket) is installed down into the housing so that it will NOT compress against the upper housing cover when the housing is reat- tached.
-
Page 52: Boost Pump Connection
CCESSORIES... -
Page 53: Filter Connection
CCESSORIES... -
Page 54: Technical Information
Technical Information Water Process Flow Diagram... -
Page 55: Wiring Diagram
ECHNICAL NFORMATION Wiring Diagram (DIV) -
Page 56: User Interface Diagram
ECHNICAL NFORMATION... -
Page 57: Ordering Procedures
Ordering Procedures Please refer to the Specification Plate for the complete model number, serial number, and series number when requesting service, replacement parts or in any corre- spondence concerning this unit. All parts listed herein may be ordered from the Thermo Scientific dealer from whom you purchased this unit or can be obtained promptly from the factory. -
Page 60: One Year Limited Warranty
(ii) misuse (including use inconsistent with written operating instructions for the product), mishandling, contamination, overheating, modification or alteration of the product by any customer or third party or (iii) use of replacement parts that are obtained from a party who is not an authorized dealer of Thermo Scientific prod- ucts.
Need help?
Do you have a question about the Barnstead EASYpure RODI 1332 Series and is the answer not in the manual?
Questions and answers