Table of Contents
Advertisement
Quick Links
Advertisement
Table of Contents

Related Manuals for HIKVISION iDS-2CD7046G0-AP


Summary of Contents for HIKVISION iDS-2CD7046G0-AP
- Page 1 Network Box Camera Quick Start Guide...
- Page 2 BREACH OF CONTRACT, TORT (INCLUDING NEGLIGENCE), PRODUCT LIABILITY, OR OTHERWISE, IN CONNECTION WITH THE USE OF THE PRODUCT, EVEN IF HIKVISION HAS BEEN ADVISED OF THE POSSIBILITY OF SUCH DAMAGES OR LOSS. YOU ACKNOWLEDGE THAT THE NATURE OF INTERNET PROVIDES FOR INHERENT SECURITY RISKS, AND HIKVISION SHALL NOT TAKE ANY RESPONSIBILITIES FOR ABNORMAL OPERATION, PRIVACY LEAKAGE OR OTHER DAMAGES RESULTING FROM CYBER-ATTACK, HACKER ATTACK, VIRUS INSPECTION, OR OTHER INTERNET SECURITY RISKS;...
- Page 3 Network Box Camera Quick Start Guide against harmful interference in a residential installation. This equipment generates, uses and can radiate radio frequency energy and, if not installed and used in accordance with the instructions, may cause harmful interference to radio communications. However, there is no guarantee that interference will not occur in a particular installation.
- Page 4 Network Box Camera Quick Start Guide Warnings: Serious injury or death may occur if any of the warnings are neglected. Cautions: Injury or equipment damage may occur if any of the cautions are neglected. Warnings Cautions Warnings Follow these safeguards to prevent Cautions Follow these precautions to prevent serious injury or death.
- Page 5 Network Box Camera Quick Start Guide The sensor may be burned out by a laser beam, so when any laser equipment is in use, make sure that • the sensor surface will not be exposed to the laser beam.
-
Page 6: Table Of Contents
Network Box Camera Quick Start Guide Table of Contents 1 Appearance Description ..........................7 2 Installation ..............................8 2.1 Memory Card Installation ........................... 8 2.2 Lens Installation ............................9 2.3 Camera Mounting ............................9 2.3.1 Pendent Mounting ........................... 9 2.3.2 Wall Mounting .......................... -
Page 7: Appearance Description
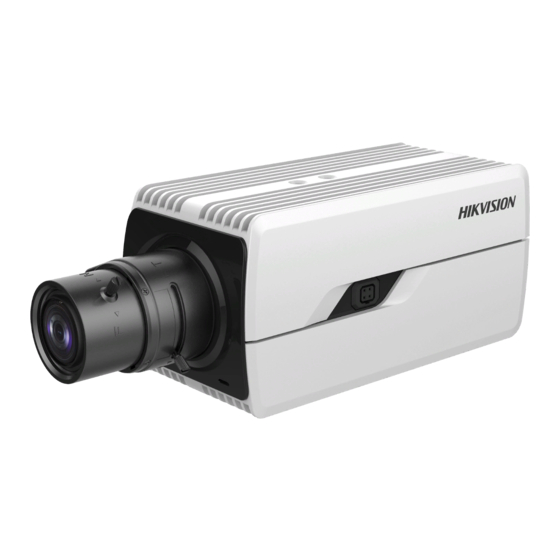
Network Box Camera Quick Start Guide 1 Appearance Description The box camera overview is shown below: Figure 1, Overview Description No. Description No. Description Lens mount Auto-iris interface Power indicator 4 ¼-20 UNC screw hole The interfaces on the real panel are described as follows. The actual interfaces may vary by model. -
Page 8: Installation
Network Box Camera Quick Start Guide NOTE: Power indicator: red stands for starting and blue for working. To reset the camera default parameters, press and hold the RESET button and power on the camera. After the camera powers on, continue to press and hold the Reset button for 10 seconds. -
Page 9: Lens Installation
Network Box Camera Quick Start Guide 2.2 Lens Installation The actual device appearance may vary by model. The following takes a model as an example to illustrate the installation steps. Before You Start The lens shown below is for example only. - Page 10 Network Box Camera Quick Start Guide Steps 1. Install the pendent mount to the ceiling with the supplied screws. Figure 4, Install the Mount 2. Screw the camera to the pendent mount and tighten the nut. 3. Adjust surveillance angle...
-
Page 11: Wall Mounting
Network Box Camera Quick Start Guide 2) Hold the camera body to adjust panning and tilting position. 3) Tighten the knob after adjustment. 4. Adjust zoom and focus level. Refer to Section 2.5. 2.3.2 Wall Mounting Before You Start Wall mount is not included in package. -
Page 12: Mounting With Housing
Network Box Camera Quick Start Guide Figure 8, Install Camera to Wall Mount 5. Adjust the surveillance angle. 1) Loosen tilt adjusting screw. Tighten the screw after adjusting. 2) Loosen pan adjusting screw. Tighten the screw after adjusting. Tilt Adjusting... -
Page 13: Mounting Type I Housing
Network Box Camera Quick Start Guide 2.3.3 Mounting Type I Housing Steps 1. Screw the camera to housing mounting plate. Figure 10, Install Camera to Mounting Plate Screw the mounting plate together with the camera back to the housing. - Page 14 Network Box Camera Quick Start Guide Figure 12, Wiring Board in Housing 4. Buckle the housing. 5. Install the housing to surveillance scene. Using brackets, the housing supports wall mounting, pole mounting, and pendent mounting. The brackets are shown in the figures below:...
- Page 15 Network Box Camera Quick Start Guide 3) Install the bracket onto the wall/ceiling/pole. The wall mounting bracket, pole mounting bracket, and the pendent bracket are shown in the figures below. Figure 13, Install the Bracket to Mounting Place (1) Figure 14, Install the Bracket to Mounting Place (2) 4) Fix the housing (with camera) onto the bracket with the supplied screws.
-
Page 16: Mounting Type Ii Housing
Network Box Camera Quick Start Guide Figure 16, Fix the Housing to Brackets (2) 6. Adjust zoom and focus. Refer to Section 2.5. 2.3.4 Mounting Type II Housing Steps 1. Connect and route cables through the cable outlet of the housing. - Page 17 Network Box Camera Quick Start Guide 1) Install the bracket onto the wall/ceiling/pole/ground. The wall mounting bracket, pole mounting bracket, pendent bracket, column mounting bracket, integrated mounting bracket, and junction box are shown in the figures below. QSG iDS-2CD7046G0-AP 022321NA...
- Page 18 Network Box Camera Quick Start Guide Figure 18, Install the Bracket to Mounting Place 2) Fix the housing (with camera) onto the bracket with the supplied screws. 3) Loosen the adjusting screw to adjust the surveillance angle of the camera. Tighten the screw after adjustment.
- Page 19 Network Box Camera Quick Start Guide Figure 19, Fix the Housing to Brackets (1) Figure 20, Fix the Housing to Brackets (2) Figure 21, Fix the Housing to Brackets (3) Figure 22, Fix the Housing to Brackets (4) QSG iDS-2CD7046G0-AP 022321NA...
-
Page 20: Zoom And Focus Adjustment
Network Box Camera Quick Start Guide Section 2.5 4. Adjust zoom and focus. Refer to 2.5 Zoom and Focus Adjustment Steps 1. Power on the camera. 2. Connect the video out interface of the camera to the installation display device. - Page 21 Network Box Camera Quick Start Guide QSG iDS-2CD7046G0-AP 022321NA...
Need help?
Do you have a question about the iDS-2CD7046G0-AP and is the answer not in the manual?
Questions and answers