Fire Sense 60368 Manual

Fire Sense 60368 Manual

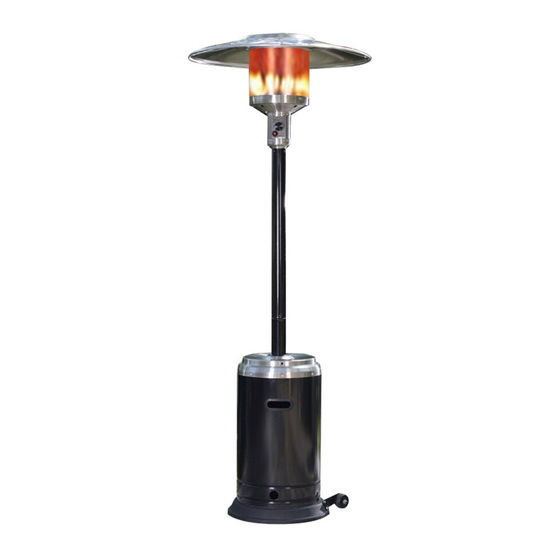
Outdoor commercial patio heater
Hide thumbs Also See for 60368:

Advertisement

Comfort, Quality & Style Since 1998
Outdoor
Patio Heater
Item#:
DANGER
FOR YOUR SAFETY: If you smell gas:
1. Shut off gas to the appliance.
If odor continues, keep away from the
appliance and immediately call your gas
DANGER
DANGER indicates an imminently hazardous
situation which, if not avoided, will result in
death or serious injury.
DANGER
Failure to comply with the precautions and
instructions provided with this heater can
result in death, serious bodily injury and
property loss or damage from hazards
monoxide poisoning. Only persons who can
understand and follow the instructions should
use or service this heater.
WARNING
60368, 60485,
61185, 61444, 61726, 61727, 61728,
61736, 61737, 61738, 61739, 61740, 61741, 61742, 61743
Do not store or use gasoline or other
other appliance. An LP ylinder not connected for
use shall not be stored in the vicinity of this or
any other appliance.
Improper installation, adjustment, alteration,
service or maintenance can cause property
damage, injury or death. Read the installation,
operation and maintenance instructions
thoroughly before installing or servicing this
equipment.
and/or carbon
WARNING
vicinity of this or any
WARNING
WARNING
ATTACH YOUR RECEIPT
Keep a copy of your proof of
which will be
if you need
to contact us about warranty
coverage.
Serial No.
Purchase Date
0813

Advertisement

Table of Contents
loading

Summary of Contents for Fire Sense 60368

  • Page 1 Comfort, Quality & Style Since 1998 Outdoor Patio Heater Item#: 60368, 60485, 61185, 61444, 61726, 61727, 61728, 61736, 61737, 61738, 61739, 61740, 61741, 61742, 61743 DANGER WARNING FOR YOUR SAFETY: If you smell gas: Do not store or use gasoline or other 1.
  • Page 2: Table Of Contents

    BEFORE YOU BEGIN TABLE OF CONTENTS Before You Begin Page 2 Safety Information Page 3 Package Contents Page 4 Hardware Contents Page 4 Assembly Page 5-8 Operating Instructions Page 9-12 Care and Maintenance Page 13 Troubleshooting Page 14 Replacement Parts List Page 15 Warranty Information Page 16...
  • Page 3: Safety Information

    SAFETY INFORMATION DANGER WARNING indicates an imminently This product is fueled by propane gas. CARBON MONOXIDE HAZARD hazardous situation which, if not avoided, Propane gas is invisible, odorless, and This heater is a combustion appliance. will death or serious injury. All combustion appliances produce carbon help detect leaks and can be described as monoxide (CO) during the combustion...
  • Page 4: Package Contents

    PACKAGE CONTENTS PART DESCRIPTION QUANTITY 4 packed in inner carton 1 packed under Base Head Assembly 1 packed in 1 inner carton Tank Housing Gas Hose 1 attached to Head Assembly Upper Post Lower Post Regulator 1 packed in inner carton Post Supports 3 packed in 1 inner carton Base...
  • Page 5: Assembly

    ASSEMBLY PREPARATION Before beginning assembly of this appliance, make sure all parts are present. Compare all parts with package contents list and hardware contents as listed on page 4 of this manual. If any part is missing or damaged, do not attempt to assemble this product.
  • Page 6 ASSEMBLY Attach the Lower Post to the Post Supports . Once you have tightened the bolts holding the Post Supports to the Base , align the holes in the Lower Post with the holes on the tops of the Post Supports and insert a Large Bolt through the hole in the Post Support.
  • Page 7 ASSEMBLY Attach Head Assembly to Upper Post Hardware Used: 4x Small Bolt w/Lock Washer NOTE: MAKE SURE TO REMOVE PROTECTIVE PLASTIC COVER ON REFLECTOR PIECES PRIOR TO ASSEMBLY! sections, loosen each screw prior to further assembly and retighten after sections are aligned. Slide two together.
  • Page 8 ASSEMBLY While supporting heater, tilt the Head Assembly and slide 3 Large Flat Washers over the Place the onto the slide 3 Large Flat Washers over the onto the . Secure with 3 Wing Nuts. Once you have tightened the Wing Nuts, return the heater to an upright position.
  • Page 9: Operating Instructions

    OPERATING INSTRUCTIONS adjustment of propane gas. Storage of an appliance indoors is permissible only if the cylinder is disconnected and removed from the appliance. A cylinder cylinder under or near this must be stored outdoors in a well-ventilated area out of the reach of children. appliance.
  • Page 10 OPERATING INSTRUCTIONS LEAK TEST BEFORE TURNING GAS SUPPLY ON: WARNING 1. Make 2-3 oz. of leak test solution 1. Your heater was designed and Perform all leak tests outdoors. approved for OUTDOOR use only. Do NOT use it inside a detergent and three parts water).
  • Page 11 OPERATING INSTRUCTIONS LIGHTING WARNING NOTE: For initial start or after any cylinder FOR YOUR SAFETY change, hold the control knob in for 2 Be careful when attempting to manually minutes to purge air from all gas lines PUSH IN ignite this heater. Holding in the control knob for more than 10 seconds before before proceeding.
  • Page 12 OPERATING INSTRUCTIONS OPERATION CHECKLIST: WARNING For a safe and heating experience, perform this check before each use: FOR YOUR SAFETY Heater will be hot after use. Handle with extreme care. BEFORE OPERATING: I am familiar with entire owner’s manual and understand all precautions noted.
  • Page 13: Care And Maintenance

    CARE AND MAINTENANCE To enjoy years of outstanding performance from your heater, make sure you WARNING perform the following maintenance activities on a regular basis: FOR YOUR SAFETY Do NOT touch or move heater for at least KEEP EXTERIOR SURFACES CLEAN. 45 minutes after use.
  • Page 14: Troubleshooting

    TROUBLESHOOTING PROBLEM POSSIBLE CAUSE CORRECTIVE ACTION Gas valve may be off Turn gas valve ON Fuel tank may be empty Purge air from lines pen gas lines and depress control knob Air in supply system for 2-3 minutes. Loose connection Main burner will Igniter fails Use stick lighter to manually light...
  • Page 15: Replacement Parts List

    PACKAGE CONTENTS PACKAGE CONTENTS PART DESCRIPTION QUANTITY 4 packed in inner carton 1 packed under Base Head Assembly 1 packed in 1 inner carton Tank Housing Gas Hose 1 attached to Head Assembly Upper Post Lower Post Regulator 1 packed in inner carton Post Supports 3 packed in 1 inner carton Base*...
  • Page 16: Warranty Information

    an additional year...

Table of Contents