Advertisement
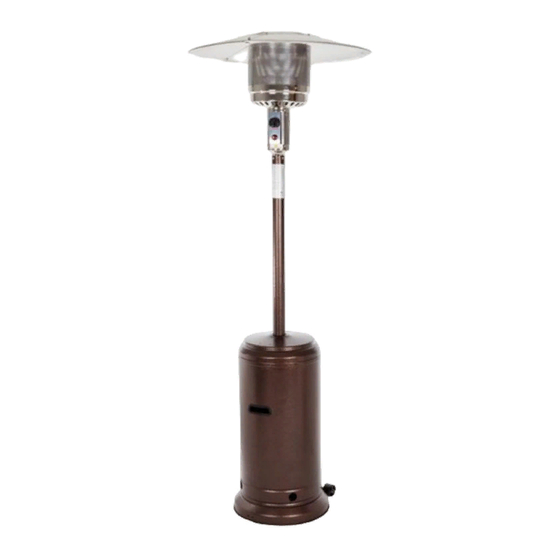
Outdoor Patio Heater
Model # 61279,61301,61304,61281,61283,61285,61307
61287,61299,61312,61731,61732,61733,61734
ATTACH YOUR RECEIPT HERE
Serial Number ___________
Manufacturer: Changzhou Wellife Furnace Co., Ltd
Questions, problems, missing parts? Before returning to your
retailer, call our customer service hotline at 1-866-985-7877,
9 a.m. – 6 p.m., EST, Monday – Friday or email at
cservice@welltraveled.net.
-
Purchase Date ______
.
1 -
Advertisement

Related Manuals for Fire Sense 61279


Summary of Contents for Fire Sense 61279
- Page 1 Outdoor Patio Heater Model # 61279,61301,61304,61281,61283,61285,61307 61287,61299,61312,61731,61732,61733,61734 ATTACH YOUR RECEIPT HERE Serial Number ___________ Purchase Date ______ Manufacturer: Changzhou Wellife Furnace Co., Ltd Questions, problems, missing parts? Before returning to your retailer, call our customer service hotline at 1-866-985-7877, 9 a.m. – 6 p.m., EST, Monday – Friday or email at...
-
Page 2: Table Of Contents
TABLE OF CONTENTS ASSEMBLY Package Contents.......................Page 3 Hardware ........................Page 4 Safety Information......................Page 4-6 Assembly........................Page 6-10 Operating Instructions....................Page 11-13 Care and Maintenance....................Page 14 Troubleshooting......................Page 15 Warranty........................Page 16... -
Page 3: Package Contents
PACKAGE CONTENTS Wheel Assembly... -
Page 4: Hardware
HARDWARE ASSEMBLY SAFETY INFORMATION SAFETY INFORMATION Please read and understand this entire manual before attempting to assemble, operate or install this appliance. If you have any questions regarding the product, please call customer service at 1-866-985-7877, 9 a.m. – 6 p.m., EST, Monday – Friday. This manual contains important information about the assembly, operation and maintenance of this patio heater. - Page 5 SAFETY INFORMATION...
-
Page 6: Assembly
SAFETY INFORMATION ASSEMBLY PREPARATION Before beginning assembly of this appliance, make sure all parts are present. Compare all parts with package contents list and hardware as listed on pages 3 and 4 of this manual. If any part is missing or damaged, do not attempt to assemble this product. - Page 7 ASSEMBLY 1. Attach Wheel Assembly to Base. Line up holes in Wheel Assembly with corresponding holes in Base and insert 2 - Medium Bolts through holes. Finger tighten bolts. Be sure that Wheel Assembly is parallel to the Base and fully tighten the bolts. Note: For best stability, fill the sand box with sand.
- Page 8 ASSEMBLY Place Cylinder Housing onto Post. Slide Cylinder Housing down over Support Brackets and Post and rest on Base. 5. Attach Reflector Studs to Screen Cover. Insert 3 Reflector Studs through washers and into holes on screen cover. Tighten studs securely. Hardware Used: 3 Reflector Studs 3 Large Flat Washers...
- Page 9 ASSEMBLY 7. Install Reflector. NOTE: MAKE SURE TO REMOVE PROTECTIVE PLASTIC COVER ON REFLECTOR PIECES PRIOR TO ASSEMBLY! Assembly Tip: If necessary for proper alignment of reflector sections, loosen each screw prior to further assembly and retighten after sections are aligned. Slide two Reflector Panels together.
- Page 10 ASSEMBLY Connect the Hose and Regulator to the LP cylinder. The LP cylinder is sold separately. Use a standard 20 lb. propane cylinder only. Lift the Cylinder Housing up and rest it on the top of the assembled Support Brackets. Screw Regulator onto Gas Hose. Do not cross thread. Hand tighten securely.
-
Page 11: Operating Instructions
OPERATING INSTRUCTIONS Leak Test 1. Make 2-3 oz. of leak test solution (one part liquid dishwashing detergent and three parts water). 2. Apply several drops of solution where hose attaches to regulator. 3. Apply several drops of solution where regulator connects to cylinder. 4. - Page 12 OPERATING INSTRUCTIONS Lighting: NOTE: This heater is equipped with a Pilot Light that allows for safer startups and shutdowns. Pilot MUST be lit before Main Burner can be started. For initial start or after any cylinder change, hold the control knob in for 2 minutes to purge air from all gas lines before proceeding.
- Page 13 OPERATING INSTRUCTIONS Shut Down: 1. Turn Control Knob clockwise to Pilot while depressing the knob (normally, burner will make a slight popping noise when extinguished.) Burner will extinguish but Pilot will remain lit. 2. To extinguish Pilot, press in Control Knob and continue to turn clockwise to OFF. 2.
-
Page 14: Care And Maintenance
CARE AND MAINTENANCE To enjoy years of outstanding performance from your heater, make sure you perform the following maintenance activities on a regular basis: Keep exterior surfaces clean. 1. Use soapy water for cleaning. Never use flammable or corrosive cleaning agents. 2. -
Page 15: Troubleshooting
TROUBLESHOOTING If you have any questions regarding this product, please call our customer service hotline at 1-866-985-7877, 9a.m. – 6 p.m. (EST), Monday – Friday, or email us at cservice@welltraveled.net. 15 -... -
Page 16: Warranty
Customer Service Hours: Mon. – Fri. 9:00 a.m. – 6:00 p.m. (EST) Fire Sense®, Mojave Sun ®, and Well Traveled Living® are registered trademarks of Well Traveled Imports, Inc®. All assembly instruction presentations are the property of Well Traveled Imports, Inc.® and are protected by U.S. copyrights and trademarks.
Need help?
Do you have a question about the 61279 and is the answer not in the manual?
Questions and answers