Table of Contents
Advertisement
Quick Links
Advertisement
Table of Contents

Related Manuals for Zeiss ZX1


Summary of Contents for Zeiss ZX1
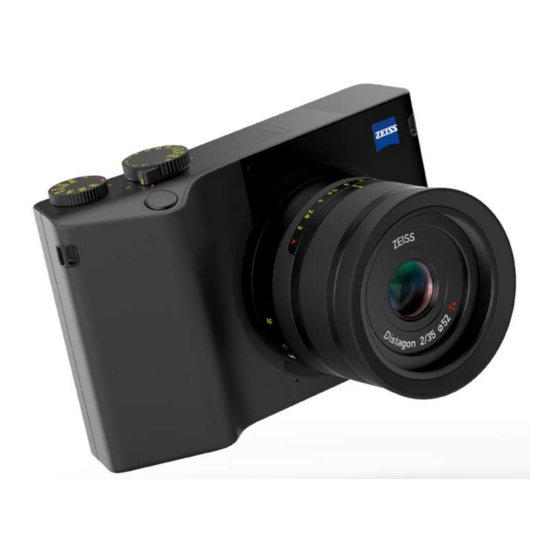
- Page 1 ZEISS ZX1 USER GUIDE...
- Page 2 ZEISS ZX1 Digital Camera Congratulations on your purchase of the ZEISS ZX1™. We are confident that you will find your new camera easy and fun to use, ensuring you take stunning photos and stay in your flow. Designing and manufacturing exceptionally good cameras is an enormously demanding process.
-
Page 3: Table Of Contents
Table of Content 1 Safety Instructions 2 Hardware 2.1 | Box Content 2.2 | Handling Basics 2.2.1 Camera 2.2.2 Lens Cap, Lens Ring & Lens Shade 2.2.3 Power Supply & Charging 2.2.4 Strap & Accessories 3 Getting Started 3.1 | Levels of Control 3.2 | ON/OFF Switch 3.3 | Touch Gestures 3.4 | Modes &... - Page 4 4.1.3 Shutter Speed Adjustments Basic //ISO Speed 4.1.4 ISO Speed Adjustments Basic //Focus 4.1.5 Focus Adjustments Basic // White Balance 4.1.6 White Balance Adjustments 4.2 | Drive Modes 4.2.1 Single 4.2.2 Continuous 4.2.3 Self-timer 4.2.4 Interval 4.2.5 AE Bracketing 4.2.6 Panorama 4.3 | Video Shooting 4.4 | Shoot to a Collection 4.5 | Helpers...
- Page 5 5.2 | Handling Contents 5.2.1 Share 5.2.2 Check Upload History 5.2.3 Copy/Move 5.2.4 Edit 5.2.5 Delete 5.2.6 Slideshow 5.2.7 View Content on TV/Monitor 5.3 | Video 5.4 | Backup Contents to Cloud Storage and NAS 5.4.1 Check Backup History 5.4.2 Manage Backup Settings 6 Settings 6.1 | Overview 6.2 | Camera Settings...
-
Page 6: Safety Instructions
Safety Instructions Please read the following safety instructions to prevent personal injury or damage to the ZEISS ZX1. This will ensure that you enjoy working with your new camera for as long as possible. - Page 7 WARNING – Danger of Injury. Ο Keep the camera out of reach of children. Children may choke on small parts; risk of strangulation from the camera strap or a cable. Ο Do not trigger the flash near the eyes, the skin, or other objects. This may lead to serious eye injuries or burns.
- Page 8 Intended Use The ZEISS ZX1 is intended for capturing pictures and videos in dry indoor and outdoor spaces only. Liability and warranty claims are excluded in the event of improper use.
-
Page 9: Hardware
Hardware Your ZEISS ZX1 comes with great accessories. They go together perfectly to ensure a smooth and efficient workflow. Find out what is in the box and learn the handling basics. -
Page 10: Box Content
& compliance USB cable anchors leaflet Find the full collection of original ZEISS ZX1 accessories here. * Mounted on the AC adapter in the sales package ** The type of plug included in the sales package may vary between countries/regions. -
Page 11: Handling Basics
2.2 | Handling Basics PART NOTE CHAPTER ON/OFF switch Switch the camera on and off, activate standby mode, wake it up and toggle be- tween still image and video mode. Shutter button Half-press to focus, full-press to take pictures and videos. Shutter speed dial Use to select the desired shutter speed. - Page 12 PART NOTE CHAPTER EVF (electronic Use either the display or the EVF for live view. view finder) with proximity sensor Diopter control Turn the diopter control while using the EVF to adjust the diopter and accommodate for differences in vision. Fn button Use the Fn button to lock the desired focus 4.1.1, 4.1.5,...
- Page 13 PART NOTE CHAPTER AF assist lamp The AF assist lamp lights up to illuminate the 4.2.3, 4.1.5, desired object in autofocus mode and gives Basic // Focus feedback regarding the self-timer countdown. Strap eyelets Use the eyelets to mount the strap anchors. 2.2.4 The camera strap can then be attached to the anchors.
- Page 14 Tripod mounting Use to mount the camera on a tripod or thread attach other accessories. The ZEISS ZX1 uses a standard ¼ inch thread. Handle Use the handle for a secure grip. White: booting up or shutting down...
- Page 15 2.2.2 Lens Cap, Lens Ring & Lens Shade Lens Cap Whenever you are not shooting pictures, use the lens cap to protect the lens. Pinch the two sliders to release or secure the cap. Lens Ring Use the rubber lens ring to protect the lens barrel. Place the lens ring with the eyelet directly facing the lens barrel and turn it 90°...
- Page 16 2.2.3 Power Supply & Charging Battery Handling Insert the battery before using the camera. Unlatch and open the battery compartment cover and insert the battery as shown. Once you have inserted the battery correctly, the battery lock will fix it in place. Then close the battery compartment cover. Open the battery compartment cover to remove the battery.
- Page 17 Battery Hot-Swap The ZEISS ZX1 comes with a hot swap function. It allows you to remove an almost dead battery and insert a charged one without powering off the camera. Open the battery compartment cover. The camera automatically switches into sleep mode. Wait until the LED flashes and has turned from red to white.
- Page 18 Charging the Battery in the Camera Connect the camera to the AC adapter using the USB cable. Plug the AC adapter into a power socket. When the camera is switched off, the battery charge level will appear on the display for a few seconds. After the screen turns off, the LED will light up blue until the battery is fully charged.
- Page 19 Charging the battery in the battery charger (sold separately) Connect the battery charger to the AC adapter using the USB cable. Plug the AC adapter into a power socket. Insert the battery in the battery charger compartment with contacts facing down.
- Page 20 Troubleshooting Keep the following points in mind to make sure the camera battery fully charges: Ο Ensure the USB cable is properly connected to both the battery charger and the AC adapter. Ο Make sure the connection between the AC adapter body and the changeable plug is tight.
- Page 21 2.2.4 Strap & Accessories Use the camera strap to carry the camera securely. To attach the strap to the camera, two anchors must be mounted to the camera first. To do so, you can use the two eyelets or alternatively attach one anchor to one eyelet and the other anchor to the bottom of the camera using the mini-anchor mount.
- Page 22 Attaching the Anchors You can attach the anchors to the camera eyelets or the anchor mount. The strap anchor cords will wear out over time. Replace the strap anchor cords as soon as the outer black layer starts getting fretted and the red inner cord becomes visible.
- Page 23 Attaching the Camera Strap Slide an anchor into the adapter at each of the two ends of the strap until they are locked in place. Make sure both anchors are locked properly; otherwise, a secure connection cannot be guaranteed. Press down the anchor disk and slide it back to remove the strap. 2 Hardware...
- Page 24 Carrying Options We recommend the following three options for carrying the camera. Attach the strap anchors accordingly. Slung across the body Hanging from the neck Hanging from the shoulder Left camera eyelet and Camera eyelets Right camera eyelet and anchor mount anchor mount Adjusting the Camera Strap Length Use the metal latch to adjust the length of...
-
Page 25: Getting Started
Getting Started For optimal ease of use, the ZEISS ZX1 boasts intuitive and reliable tools to enable photographers to shoot and edit their work smoothly, and even share it on the go. In this chapter, a few basic control principles are explained... -
Page 26: Levels Of Control
3.1 | Levels of Control Control elements on the ZEISS ZX1 are bundled together into 3 distinct levels: Ο Fundamental exposure settings must often be changed from shot to shot. The ZEISS ZX1 offers easily accessible hardware controls: ISO speed dial, shutter... -
Page 27: On/Off Switch
3.2 | ON/OFF Switch The ON/OFF switch is a 3-position toggle. It is also used to put the camera into standby, wake it up, and toggle between Still and Video Shooting mode. Note: When the camera is switched on, the booting process will take a moment. - Page 28 You are now all set to watch the tutorial video, which explains the basic functions and how to navigate on your ZEISS ZX1. If you want to start shooting right away, you can also skip the tutorial video and watch it later.
- Page 29 Screen Lock To change the screen lock settings, switch to Settings mode and go to Ἀ ¡ GENERAL SETTINGS > DISPLAY > SCREEN LOCK. To set a screen lock, tap on Screen lock and then select PIN. Follow the instructions on the screen. To remove a screen lock, tap on Screen lock, enter the current code, select None and confirm.
-
Page 30: Touch Gestures
3.3 | Touch Gestures Operating your ZEISS ZX1 is like using your smartphone. Many gestures you are used to already also work here. Some examples: TOUCH EXPLANATION EXAMPLES GESTURE Tap on an element to select it. Ο Tool in the toolbar Ο... -
Page 31: Modes & Mode Switch
3.4 | Modes & Mode Switch The ZEISS ZX1 offers four different modes: Shooting mode, Gallery mode, Settings mode, and Apps mode. The camera always starts in Shooting mode. To switch between modes, swipe up and down on the left side of the screen. If you rotate the camera to take portraits, the position of the switch area remains on the same side. -
Page 32: Shooting Mode
3.5 | Shooting Mode AREA NOTE Status Bar General information on battery status, remaining pictures, focus mode, picture format, flash, and other hardware (if connected) Exposure Information Overview of the current exposure settings Toolbar Set of tools which dynamically adapts to the current settings and the selected drive mode 3 Getting Started... - Page 33 Toolbar Operation The toolbar shows a set of tools which dynamically adapts to the current setup of the camera. To scroll through the available tools, slide the toolbar area up and down. To activate a tool, tap on it. The activated tool will be highlighted in blue. Use the slider—if available—to select a mode, option, or value.
- Page 34 Tool Overview DEPENDING DIAL Exposure compensation 4.1.1 POSITION FLASH Flash 4.1.1 (IF ATTACHED) (here: automatic) Shutter speed 4.1.3 (here: low shutter speed) Basic //Shutter Speed DEPENDING DIAL POSITION ISO speed 4.1.4 (here: high ISO speed) Basic // ISO Speed Drive modes (here: single) ALWAYS IN THE White balance...
- Page 35 Status Bar Here, battery charge level, remaining picture capacity, focus mode, and picture format are displayed. Swipe left on the left side of the screen to hide it and swipe right again to make it reappear. Critical status information, e.g. low battery charge, will appear automatically.
- Page 36 EVF & Blind Navigation A proximity sensor automatically activates the electronic viewfinder (EVF). It provides the same content as the back display. During use of the EVF, the display is switched off, however, the toolbar is still available. In the EVF, a small circle will indicate the position of your finger.
-
Page 37: Advanced Settings
3.6 | Advanced Settings Screen Rotation The screen content will automatically adapt to the current camera orientation. To disable this setting, switch to Settings Ἀ mode and go to GENERAL SETTINGS > ¡ DISPLAY > SCREEN ROTATION. The toolbar is always located at the screen bend. - Page 38 Sound and Vibration To adjust sound and vibration feedback, switch to Settings mode and go to Ἀ GENERAL SETTINGS > SOUND & Ἡ VIBRATION . To turn it on and off, tap on SOUNDS and use the slider to adjust the volume.
- Page 39 Firmware Update To get information about the firmware version currently installed, switch to Settings mode and go to Ἀ GENERAL SETTINGS > FIRMWARE ¿ & UPDATE > INFO & FIRMWARE UPDATE. You can also update your firmware and turn on automatic download for updates. To install firmware updates, make sure that the camera is fully charged or plugged in with the supplied AC charger.
-
Page 40: Shooting
Shooting This chapter provides all the information you need to tell outstanding visual stories with your ZEISS ZX1. This chapter will help you achieve the best results under various conditions and also assist you in developing your personal artistic style. -
Page 41: Camera Functions
4.1 | Camera Functions The ZEISS ZX1’s well-coordinated design delivers the incomparable ZEISS look and image quality for street, travel, and landscape photography and offers your creativity more free reign. 4 Shooting... - Page 42 Basic // Exposure A photograph’s exposure determines how light or dark an image will appear when it’s been cap- tured by your camera. The three controllable variables—shutter speed, lens aperture, and ISO value—form a single system and influence one another. Each of these variables can be used to control the exposure of the final picture.
-
Page 43: Exposure Adjustments
4.1.1 Exposure Adjustments Exposure Dials On the ZEISS ZX1 the exposure variables are set by rotating the dials. The exposure variable panel is made up of the ISO dial, the shutter speed dial, and the aperture ring. In the following description, they are referred to as exposure dials. - Page 44 Exposure Metering The selected exposure metering is represented by an icon on the toolbar, Ὼ here . Tap on the icon and select the desired mode with the slider. Ὄ Ο Multi-field evaluates the light conditions of the whole scene, with emphasis on the center of the image.
- Page 45 in place of the exposure compensation icon in the bottom left corner. It shows the current exposure of the picture: Ο Neutral Ο Underexposed [-1/3 to -3 or < -3] Ο Overexposed [+1/3 to +3 or > +3] Exposure Lock Use the exposure lock to quickly lock specific exposure settings.
- Page 46 To attach an external flash, remove the hot shoe cover and slide in the flash. For further instructions on attaching and flash settings, refer to the flash manual. After you have attached the external flash and turned it on, a flash icon appears in the status bar.
- Page 47 ὓ ὑ To choose between front curtains and rear curtains , tap on curtain ᾢ sync (here: When front curtain is selected, the flash fires at the beginning of the shutter speed. When rear curtain is selected, the flash fires at the end of the shutter speed.
- Page 48 Basic // Aperture The aperture consists of aperture blades ar- ranged in a circle. They are situated in the light path within the lens structure. By changing the diameter of the scene that appears to be sharp. If aperture opening, you can adjust the aperture is small (high f-stop), the amount of light which reaches the depth of field is wide.
-
Page 49: Aperture Adjustments
4.1.2 Aperture Adjustments Aperture Ring The ZEISS ZX1 offers aperture ranges from f/2 to f/22. To select a certain value or the automatic selection A, rotate the aperture ring. The selected aperture size is shown in the exposure information. 4 Shooting... - Page 50 Basic // Shutter Speed The shutter speed controls how long the sensor is exposed to the light. A slow shutter speed allows for to shaky hands with a slow shutter more light to reach the sensor. It speed, use a tripod to stabilize the is used for low-light and nighttime camera.
- Page 51 4.1.3 Shutter Speed Adjustments Shutter Speed Dial The ZEISS ZX1 offers fixed shutter speeds from 30 seconds to 1/2000 of a second and a manual long exposure mode referred to as the time mode. Rotate the shutter speed dial to select a certain value: low shutter speed L, high shutter speed H, time T, or automatic selection A.
- Page 52 the menu bar to set the exact exposure time in minutes and seconds [00:00]. Pressing the shutter button starts the exposure, and a second press stops it. The elapsed time is shown on the display in minutes and seconds [00:00]. To prevent the camera from shaking when the shutter button is pressed at the beginning and the end of the exposure,...
- Page 53 Basic // ISO Speed The ISO speed controls how sensitive the sensor is to the light that reaches it. The higher the ISO speed, the impacts the picture quality by greater the amplification applied to causing image noise. the sensor signal. This is especially To obtain the best results, work helpful for taking pictures in with ISO speed 100 as often as...
- Page 54 4.1.4 ISO Speed Adjustments ISO Dial The ZEISS ZX1 offers ISO values from 80 to 51200. Rotate the ISO dial to select a certain value: ISO low L, ISO high H, or automatic selection A. The selected ISO speed is shown in the exposure information.
- Page 55 Basic // Focus Make sure that the focus is on the subject/ object. Depending on the aperture size When manual focus mode is set, the area in which the picture selected, you have full control over appears to be sharp may be bigger the focus and can adjust the focus or smaller.
- Page 56 4.1.5 Focus Adjustments Overview To control the focus on the ZEISS ZX1, choose between the different modes and settings. To select automatic focus or manual focus, use the AF/MF switch. In the following sections, the different modes and options available on the ZEISS ZX1 will be explained in detail.
- Page 57 Another option is to tap on the set AF ᾥ focal point icon in the toolbar. A focus selection field appears on the screen bend. Set the focal point by dragging your thumb inside the focus selection field. This option is especially helpful when shooting with the EVF.
- Page 58 AF Area Modes To select the desired AF area mode, tap on ἡ the AF area mode icon (here ) in the toolbar and use the slider. The ZEISS ZX1 offers the following AF area modes: 4 Shooting...
- Page 59 AF AREA AF-S AF-C MODE Set a single focal point. Set a single focal point. ἡ Half-press the shutter button to focus on To focus on this focal point, half-press this focal point once. the shutter button. The focus stays on Single point the subject, even if it is moving.
- Page 60 Focus Lock Use the focus lock to lock a certain focus that you can switch on and off. To activate the focus lock, switch to Settings mode and go to ᾀ · GENERAL SETTINGS > FN BUTTON > SELECT BEHAVIOR. Select either Exposure &...
- Page 61 DMF (Direct Manual Focus) To manually set and adjust the focus while in AF mode, turn the focus ring while half-pressing the shutter button. Then fully press the shutter button to take a picture. Focus peaking highlights the edges of the highest contrast in the picture in blue as an indicator for sharpness.
- Page 62 Basic // White Balance Depending on the light source, and warm light by higher ones. By your pictures may have a cooler using the white balance feature, or warmer tint, even though the you can compensate different lighting of a scene may appear light colors to produce a neutrally neutral.
- Page 63 The selected white balance mode is represented by an icon in the toolbar, Ἤ here To change the mode, tap on the icon and use the slider. The ZEISS ZX1 offers the following white balance presets: ὥ Shade = 7500 K Ἤ...
- Page 64 4 Shooting 4 | Shooting...
- Page 65 4.2 | Drive Modes The ZEISS ZX1 offers a wide range of different drive modes. The drive mode determines how the camera captures the image when the shutter button is pressed. To change the drive mode, tap on drive mode in the toolbar. Use the slider to select the desired drive mode.
- Page 66 The display returns to live view after a By fully pressing the shutter button, the defined timeout duration or when the ZEISS ZX1 will capture one picture. To take shutter button is half-pressed. another picture, completely release the To define the duration of the image shutter button and then fully press it again.
- Page 67 If you hold down the shutter button, picture sequence will be taken at a lower speed. the ZEISS ZX1 will take multiple pictures in short succession at the highest speed Other camera modes, such as autofocus, available. Afterwards, you can choose the or a higher ISO will impact the speed of best picture from the gallery.
- Page 68 4.2.3 Self-timer Ῑ Use self-timer drive mode to have the overview appear. To open the self-timer Ὂ toolbar, tap on the ellipsis icon camera take a single picture or multiple ones after a defined countdown. This To select the desired self-timer delay, tap mode is helpful for taking selfies or group ὠ...
- Page 69 Ἳ picture, the picture counter in the top right By selecting AE bracketing , you can combine bracketing shots with the self- corner of the back display will show the timer function. The self-timer will then number of pictures taken. apply the number of pictures and exposure Only the last picture of the sequence will bracketing.
- Page 70 4.2.4 Interval ἱ Use the interval mode for creating time lapse and self-timer shots with an extended range of options. ἱ In this mode , the camera takes a defined number of pictures at a certain interval after a set countdown. Configuration Tap on drive mode and select interval ἱ...
- Page 71 You have the following options to choose from: Ο 2 to 10 pictures in increments of 1 Ο 10 to 100 pictures in increments of 10 Ο 100 to 1,000 pictures in increments of 100 Ο 1,000 to 10,000 in increments of 1,000 pictures To select the desired value, tap on delay ὠ...
- Page 72 The display turns off after a set timeout. When the interval mode is used in ἆ combination with AF-C mode , the camera refocuses for every picture. To cancel the interval, fully press the shutter button. All pictures taken up to this point will be saved.
- Page 73 4.2.5 AE Bracketing ᾔ Use AE bracketing mode to take a series of pictures with different exposure compensation values. You can pick the picture with the best exposure from the gallery. Configuration To display an overview of the current exposure compensation values, tap on drive ᾔ...
- Page 74 To select the desired EV steps, tap on EV ᾖ steps and use the slider. You have the following options to choose from: Ο Ο Ο Ο To define the value of the center frame, ᾕ tap on center frame and use the slider.
- Page 75 4.2.6 Panorama ἲ Use the panorama mode to shoot extra- wide or tall pictures. To select the desired resolution in panorama mode, tap on resolution in the ἴ toolbar . You have the following options to choose from: ἵ Ο High ἴ...
- Page 76 To finish the panorama, fully press the shutter button or tap on Cancel. A bar appears on the back display showing the progress of the stitching. To stop the process, tap on Cancel. A preview of the final panorama will appear on the back display.
- Page 77 4.3 | Video Shooting In addition to still shooting, the ZEISS ZX1 also offers the possibility to shoot videos. Use the ON/OFF switch to toggle to Video Shooting mode. For more information, refer to chapter 3.2. To start the recording, tap on or fully press the shutter button.
- Page 78 The current recording settings are displayed in the status bar. To adjust the video quality, switch to Settings mode and go to ᾀ CAMERA SETTINGS > VIDEO Ἄ SHOOTING > VIDEO QUALITY. Choose the desired resolution and frame rate from the list.
- Page 79 . To select an existing collection, tap on it. To add a new collection, tap on + and enter a name. For more information on collections, refer to chapter 5 Gallery. Note: All captured content is automatically added to the default collection ZX1. 4 Shooting...
- Page 80 4.5 | Helpers Use Helpers to optimize your image composition and exposure. Ή To switch helpers on and off, tap on the toolbar and use the slider. To open the helpers’ settings, switch helpers on and tap Ὂ on the ellipsis in the circle , then select the desired helpers.
- Page 81 4.5.1 Level Indicator Use the dual axis level indicator to make sure the camera is perfectly horizontal and not tilted. The level indicator shows up in the bottom half of the live view. It works in portrait and landscape mode. The level indicator is also known as the virtual horizon.
- Page 82 4.5.2 Histogram NUMBER OF PIXELS AT EACH BRIGHTNESS LEVEL BLACK MIDTONES WHITE Use the histogram to help you find the right exposure for your picture. The information is shown on the left side of the screen and helps you to achieve a well-balanced picture.
- Page 83 4.5.3 Grid Use the grid to compose dynamic and interesting pictures. You can align important elements along those lines and their intersections. 4 Shooting...
- Page 84 4.5.4 Clipping Use clipping to spot overexposed areas in the live view. Overexposed areas or blown highlights are directly related to the luminance histogram and are shown as black flashes. To identify overexposed areas, half-press the shutter button. When fully pressing the shutter button, the overexposed areas are saved as white space without any details.
- Page 85 4.5.5 Depth of Field 1,9m 1,9m Use depth of field to monitor the range and distance to achieve a sharp focus. Depth of field depends on focal length, distance to subject, and aperture. The depth of field values are shown on the scale at the top and bottom in absolute distance values relating to the distance from the camera system.
- Page 86 4.5.6 Hide helpers Use hide all helpers upon half-press when you want a clear view of the focused subject/object without any interruptions. By half-pressing the shutter button, all selected Helpers will disappear from the view, except for Clipping which is triggered by half-pressing the shutter button. By releasing the shutter button, the Helpers will reappear.
- Page 87 Gallery The high-resolution display of the ZEISS ZX1 enables you to view your captured pictures in the best quality possible. Edit your pictures and share them straight from the gallery. Use different collections to organize your pictures or create slideshows that you can watch on the camera or on a...
- Page 88 5.1 | Show Contents Gallery mode provides an overview of your captured images and videos. You can choose from three different standard viewing styles: FULL SIZE BELT VIEW 3 ROW GRID VIEW 2 ROW GRID VIEW 5 Gallery...
- Page 89 To switch between viewing styles, use the pinch-to-zoom gesture. To scroll through your content, swipe left or right. A slider appears on the bottom of the screen when you scroll through your pictures. To quickly browse through the entire list and to go to a specific date, tap on the slider and drag it.
- Page 90 5.1.1 Organize Contents In Gallery mode, you also have the possibility to organize content using various filters and sorting options. To open the gallery menu, tap on The following options are available in the gallery menu: ICON NAME DESCRIPTION All elements Overview of all images and videos on the camera.
- Page 91 ICON NAME DESCRIPTION Overview of different filters applied. Select from images, JPEG, RAW, videos, favorites, Filter and different drive modes. To display only certain pictures by applying a filter, tap on the respective filter. Switch between sorting from newest to oldest Date or oldest to newest pictures.
- Page 92 5.1.2 Content Review To mark a picture or video as a favorite, select the respective element and tap on . To unmark it as a favorite, tap on again. To view the image information, e.g. capture date and time, file name, or shooting ᾋ...
- Page 93 5.2 | Handling Contents To select a single picture or video, tap on the respective file. By swiping left or right, you can browse the gallery. To browse faster and skip pictures, use the slider on the bottom of the screen. Additionally, selecting a single picture or video will bring up the favorite ᾋ...
- Page 94 blue. Then tap on the last picture of the desired range. All pictures in between will automatically be selected. To select certain collections, tap and hold. Add more collections to the selection if you wish. Selecting any type of elements or a collection will bring up the gallery toolbar.
- Page 95 5.2.1 Share With the ZEISS ZX1, you can share selected images and videos directly to various services such as: Ο Dropbox Ο OneDrive Ο Flickr Ο Facebook Ο Instagram Ο Email To see the getting started video series follow the...
- Page 96 If you are currently not connected to the internet, you can still queue the uploading process, since the content will be saved. Once your ZEISS ZX1 connects to the internet, it will automatically start the upload.
- Page 97 5.2.2 Check Upload History Access the upload history to view the status of the wireless uploads and backup tasks. The following information will be shown: Ο Upload in progress Ο Upload pending Ο Upload failed To access the upload history, switch to Gallery mode and go to GALLERY MENU >...
- Page 98 After connecting the ZEISS ZX1 to your Mac via USB cable, open the app and select the ZX1 folder from the list. Wait until the content is fully loaded, before you select To see the getting started video the content to be imported.
- Page 99 Mac. To ensure compatibility, use the USB cable and the USB adapter that are supplied with your ZEISS ZX1 package. Move/Copy Content to an External Storage In order to copy your images from your camera to an external storage, simply connect the camera to a USB flash drive or SSD.
- Page 100 5.2.4 Edit ῖ By tapping on edit in the toolbar, Adobe Photoshop Lightroom will automatically open in Apps mode and import your selected content. To import a complete collection to Lightroom, switch to Gallery mode and go to GALLERY MENU >...
- Page 101 5.2.5 Delete ᾑ By tapping on delete , you delete the selected content. Select multiple items to delete them all at once. Note: An image/video cannot be deleted from the gallery if it is pending to be uploaded. During the upload process, the LED flashes blue. To delete a collection, tap and hold the respective collection until the ᾑ...
- Page 102 5.2.6 Slideshow By selecting files or collections and tapping ᾍ on slideshow in the toolbar, you are able to view your content in a slideshow. Before to start the slideshow, you have the opportunity to individually customize it: Ο Choose transition: Swipe left and right to choose one of four transition effects to view your content with.
- Page 103 To view the toolbar during the slideshow, tap on the screen. You now have different options while watching the slideshow: ῆ Ο Cancel Ἔ Ο Pause Ἕ Ο Resume ᾄ Ο Change the display time per slide ᾋ Ο Show image information Ο...
- Page 104 5.2.7 View Content on TV/Monitor Using an HDMI Alternate Mode supported USB adapter, you can connect the ZEISS ZX1 camera to an external monitor via an HDMI cable. This will mirror the content of the camera display to the external monitor.
- Page 105 5.3 | Video To watch a video you have recorded, simply Ἕ tap the play button in the gallery view and the video will start. You can also start playback after you have selected a video file. To view the toolbar during the playback, tap on the screen.
- Page 106 5.4 | Backup Contents to Cloud Storage and NAS By connecting your ZEISS ZX1 to a wireless network, you have the possibility to connect to a network-attached storage (NAS) device and copy or move content to To connect to a NAS, switch to Settings ᾎ...
- Page 107 5.4.1 Check Backup History To view the current status of your upload tasks, tap on UPLOADS. To see more ὄ details, tap on the respective entry. The icon indicates that the upload has been completed. To stop or delete an ongoing ᾑ...
- Page 108 5.4.2 Manage Backup Settings To manage your cloud-based backup accounts, switch to Settings mode and ᾎ go to STORAGE SETTINGS > CLOUD STORAGE > ADD NEW ACCOUNT and follow the instructions on the screen. To activate Automatic backups, tap on Automatic backup rules.
- Page 109 Settings Thanks to the ZEISS ZX1 camera’s tremendous array of screen settings, less frequently modified settings are organized here in Settings mode.
- Page 110 6.1 | Overview The Settings mode is divided into four sections. Select the desired section in the toolbar: ᾀ Ο Camera settings ; see chapter 6.2 ᾐ Ο Connection settings ; see chapter 6.3 ᾎ Ο Storage settings ; see chapter 6.4 Ἀ...
- Page 111 6.2 | Camera Settings ᾀ To go to camera settings, tap on ICON NAME ITEM DESCRIPTION CHAPTER Turn on focus peaking or magni- • Focus MF assist fication for support in MF or DMF 4.1.5 mode. Turn on the AF assist lamp to help 4.1.5 AF assist lamp with focusing in dark environ-...
- Page 112 Activate this option to save posi- tion information in your pictures Save geotags over Bluetooth while connected to the ZX1 Companion app. Select from two USB connection types: PTP or MTP. PTP means Picture Transfer Protocol Cable...
- Page 113 Network to control your camera remotely over Wi-Fi. Activate the Wi-Fi hotspot to identify and connect the ZX1 with Set up Wi-Fi your mobile device and the Com- hotspot panion app. You can set up the name of the hotspot and choose a password if wanted.
- Page 114 6.4 | Storage Settings ᾎ To go to storage settings, tap on ICON NAME ITEM DESCRIPTION CHAPTER Indicate the location you want to Camera shoot your pictures and videos to. Shoot to… It also shows the available storage storage space. Add a new cloud storage account Cloud Add new...
- Page 115 6.5 | General Settings Ἀ To go to general settings, tap on ICON NAME ITEM DESCRIPTION CHAPTER Define the behavior of the FN 4.1.1 · FN button Select behavior button. 4.1.5 Set the display brightness with the Display ¡ Display slider.
- Page 116 Date & time Date & time Set date and time. Camera About camera Camera information Register your ZEISS ZX1 if you did Register not already do so during the initial product setup. Report service Use this form to report a service issue issue.
- Page 117 In Apps mode, you additionally have access to 3rd-party applications, e.g. Adobe Lightroom. You also have various ZEISS applications at your fingertips that have been made specially for your ZEISS ZX1. These include the tutorial video and the user manual. Here, you can also reach the support website.
- Page 118 7.1 | General In Apps mode, you have access to the launcher home. Whenever you want to go back to the launcher home, tap on the circle icon. From here, the most important apps are available. Additional apps can be found by tapping on the launcher app overview.
- Page 119 7.2 | Companion App The ZEISS ZX1 Companion app is a seamless extension that allows you to shoot pictures on your ZEISS ZX1 camera using your smartphone. To enjoy the benefits of the ZEISS ZX1 Companion app, you must have firmware version 1.3.1 or later installed on the camera.
- Page 120 If setup is complete, all three icons (camera, mobile device, Wi-Fi network) (camera, mobile device, Wi-Fi network) on the ZEISS ZX1 Companion app will be on the ZEISS ZX1 Companion app will be highlighted in blue and the Wi-Fi network highlighted in blue and the Wi-Fi hotspot name will be displayed below.
- Page 121 To start remote control, tap on Start remote control in the ZEISS ZX1 Companion app. The screen on your mobile device will now stream the live view of the camera. The current exposure information set on the camera is shown in the same corner as on the camera.
- Page 122 Specifications In this chapter, you find all the details on the specifications of your ZEISS ZX1.
- Page 123 142 x 93 x 94 mm (5.59 x 3.66 x 3.70") Sensor Type: CMOS, Full-frame 24 x 36 mm Resolution: 37.4 megapixels (7488 x 4992 px) Lens ZEISS Distagon T* 35 mm f/2 Focal length: 35 mm Minimum focus distance: 30 cm Minimum working distance 0.23 m (0.75 ft)
- Page 124 REFERENCE PARAMETER VALUES Recording & Storage Recording formats: RAW (DNG), JPEG, MP4 Video quality: 4K (3,840 x 2,160 px) with 30 fps Full HD (1,920 x 1,080 px) with 60 fps AAC audio codec Internal storage: 512 GB Move/copy to external storage via USB, or to NAS via Wi-Fi using SMB protocol External storage: via USB adapter...
- Page 125 REFERENCE PARAMETER VALUES Focus modes AF-S (MF override possible), AF-C, manual focus with magnification & peaking assist Focus area modes Single point (touch-enabled), face detection, touch & release Exposure modes Automatic, aperture priority, shutter speed priority, manual exposure Exposure compensation +- EV in ⅓...
- Page 126 Box Content ZEISS ZX1 camera, lens cap, lens ring, lens shade, hot shoe cover, battery- pack, AC adapter, plug, USB cable, USB adapter, camera strap, anchor mounting plate, 4 strap anchors, Allen key, camera quick guide, strap accessory folder with strap quick guide, folder with warranty, safety &...
- Page 127 Handling Precautions Your ZEISS ZX1 is a complex and valuable technical product. Please take note of the following information on care and cleaning to preserve image quality and extend the camera’s lifespan.
- Page 128 9.1 | Care Use and store the ZEISS ZX1 only under the following conditions: Ο Temperature: 0 °C to 40 °C / 32 °F to 104 °F Ο Humidity: less than 85 % Ο Dry and well-ventilated Ο Do not store the camera close to devices with strong magnetic fields.
- Page 129 We recommend using the ZEISS cleaning products (ZEISS Lens Cleaning Kit, ZEISS Cleaning Wipes, ZEISS Display Cleaning Wipes, ZEISS Cleaning Spray, ZEISS microfiber cloth). ZEISS offers a range of professional cleaning products that perfectly complement your unique product experience. Our specialists have developed these products to meet the precise needs of high-quality optical surfaces.
- Page 130 Lens/Electronic Viewfinder Step 1: Use ZEISS blower to remove dust. Step 2: Use ZEISS Step 3: cleaning spray. Use ZEISS microfiber cloth to carefully remove fingerprints and other marks. Back Display Step 1: Use ZEISS blower to remove dust. Step 2:...
- Page 131 Legal Information We have pulled out all stops in designing and manufacturing your ZEISS ZX1. Nevertheless, problems may still occur. Should you ever require service for your camera, you’ll find all necessary information and further legal information in this chapter.
- Page 132 These statutory rights are not limited by the warranty. This warranty does not apply to hardware products that do not bear the ZEISS brand or to software, even if it is packaged or sold together with ZEISS hardware. Details concerning the rights regarding the use of the software can be found in the license conditions, which are stored in the firmware of the product and/or can be called up at www.
- Page 133 ZEISS product has been removed or made unrecognizable; Ο if it is a stolen product or if ZEISS has good reason to believe that it is a stolen product based on the information provided by law enforcement authorities; and Ο...
- Page 134 Trademark Notices Ο ZEISS, the ZEISS logo, DISTAGON, and ZEISS ZX1 are either trademarks or registered trademarks of Carl Zeiss AG. Ο Android is a trademark or registered trademark of Google, Inc. Ο Adobe, the Adobe logo, Creative Cloud, the Creative Cloud logo, Lightroom, and Photoshop are either registered trademarks or trademarks of Adobe in the United States and/or other countries.
- Page 135 CE-Declaration of Conformity According EU-Directive 2014/53/EU (L 153/62) for Radio-Equipment Devices Manufacturer: Carl Zeiss AG Carl-Zeiss-Str. 22 D-73447 Oberkochen We herewith declare under our sole responsibility that the product described below in the version that we have placed on the market...
- Page 136 50663:2017, EN 62479:2010 EN 60950-1:2006 + A11:2009 +A1:2010 +A12:2011 +A2:2013 IEC 60950-1:2005(2nd) + A1:2009 +A2:2013 EN 50581:2012 ¶ The Product is marked with Oberkochen, 18.08.2020 The complete CE declaration of conformity can be found at www.zeiss. com/zx1/register. 10 Legal Information...
- Page 137 FCC information © FCC ID: 2AMSPJ01K0L0 IC: 22938–J01K0L0 CAN ICES-003 (B)/NMB-003(B) This device complies with part 15 of the FCC Rules. Operation is subject to the following two conditions: (1) This device may not cause harmful interference, and (2) this device must accept any interference received, including interference that may cause undesired operation.
- Page 138 This device must not be co-located or operating in conjunction with any other antenna or transmitter. IC information This device complies with ISED’s licence-exempt RSSs. Operation is subject to the following two conditions: (1) This device may not cause harmful interference, and (2) this device must accept any interference received, including interference that may cause undesired operation.
- Page 139 Eurasian Conformity (EAC) information Подтверждение соответствия Минкомсвязи России (Verification of conformity by Mininformsvyaz of Russia): Декларация соответствия № Д-ИВРД-5718 от 12.12.2018 года, действительна до 12.12.2028 года, зарегистрирована в Федеральном агентстве связи 20.12.2018 года. Declaration of conformity No. D-RD-5718 of 12.12.2018, valid till 12.12.2028, registered in Federal Communication Agency on 20.12.2018.
- Page 140 Carl Zeiss AG Consumer Products Carl-Zeiss-Straße 22 73447 Oberkochen Germany +49 (0) 7364 20-6175 https://www.zeiss.com/photo...
Need help?
Do you have a question about the ZX1 and is the answer not in the manual?
Questions and answers