
Related Manuals for BZB Gear BG-B20SHA


Summary of Contents for BZB Gear BG-B20SHA
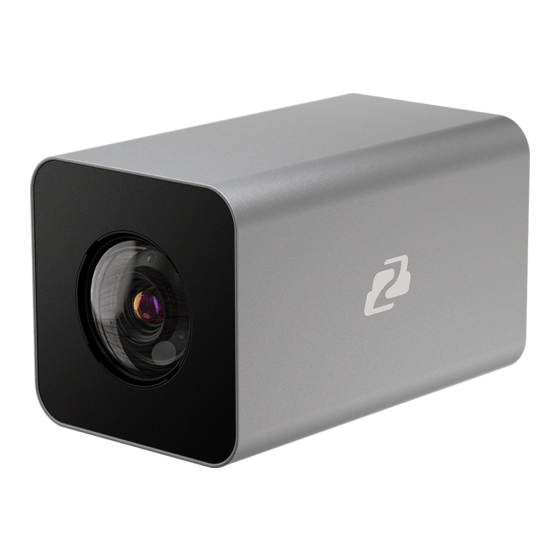
- Page 1 BG-B20SHA HD Integrated Camera User Manual CONTACT 1.888.499.9906 | support@bzbgear.com | bzbgear.com FOLLOW US...
-
Page 2: Table Of Contents
Contents 1. Precautions..........................2 2. Functions ..........................3 2.1 Technical Parameters ......................3 2.2 Camera Parameters ......................3 2.3 Technical Specification ......................4 3.1 Camera Interface Instruction ....................5 3.2 Camera Dimensions .......................5 4. Camera Menu Settings ......................6 4.1 Exposure ..........................6 4.2 Color ............................ -
Page 3: Precautions
Precautions Electronic The electrical safety standards of the country and region must be strictly observed in the installation and use of this product. There is no power switch in the body of this product. If there is an equipment failure immediately disconnect the power supply. -
Page 4: Functions
2. Functions Technical Parameters Electronics Communication Constant DC12V 4800/9600/19200/38400bps Baud Voltage rate Power Protocol VISCA /Pelco - D/Pelco - P/ONVIF Consumption 1 ~255 Encoding Built-in Operation -10°~+50° Environment Humidity 0~95% Installation Desk, Top-down Presets 1.2kg Camera Parameters Model Spec 1/2.8″ Progressive CMOS Senser 2. -
Page 5: Technical Specification
Technical Specification Input/Output Interface Video Output: 3G-SDI / HDMI / IP Streaming Audio Input: 3.5mm Audio Input Input/Output Control Interface: 2PIN Terminal,3.50mm Power Interface:2PIN Terminal,3.50mm or POE+ Features Supports RS232C or RS485 protocols, allowing a PTZ Controller or PC to control the camera. Improved image quality from the newly developed digital signal processor (DSP). -
Page 6: Camera Interface Instruction
3.1 Camera Interface instruction 1. Lens 3. Five-direction Button 2. Terminal Pin Interface 4. Audio-IN A: RS485+ 5. HDMI B: RS485- 6. 3G-SDI -/+: DC12V Power Interface 7. LAN 3.2 Dimensions (mm) -
Page 7: Camera Menu Settings
4. Camera Menu Settings 1. Press and hold the center button for 3 seconds to enter the MAIN MENU Main Menu EXPOSURE 2. Use the directional keys to navigate the menu and settings. COLOR PICTURE 4.1 EXPOSURE PRIVACY SYSTEM EXIT Enter the main menu and navigate to【EXPOSURE】. -
Page 8: Color
4.2 COLOR COLOR WB MODE: Enter Main Menu, navigate to【COLOR】, press right R GAIN: to enter sub-menu. B GAIN: COLOR GAIN 【WB MODE 】 COLOR HUE BACK Options: AUTO, INDOOR, OUTDOOR, ATW, OPW, MANUAL EXIT 【R GAIN/B GAIN 】 When the WB MODE is set to MANUAL the R Gain\B Gain values can be independently adjusted. 【COLOR GAIN】... -
Page 9: P/T/Z
4.4 P/T/Z Press the [MENU] button to display the OSD menu, then press the P / T / Z arrow keys to highlight [P/T/Z] and press right to enter the sub- menu. FLIP: L/R DIRECTION: AF [FILP]: ON/OFF MODE: AUTO AF SENS: NORMAL [L/R DIRECTION]: ON/OF... -
Page 10: System
SYSTEM SYSTEM SETUP Press the [MENU] button to display the OSD menu, press the arrow keys to highlight [SYSTEM SETTING], then press right to enter sub-menu. SYSTEM INFO LANGUAGE: • CHINESE [SYSTEM INFO]: press right button to enter the sub menu ZOOM LEVEL: •... - Page 11 • Right-click on your connection (Wi-Fi or Ethernet) and select “Properties”. • Select “Internet protocol version 4 (TCP/IPv4)” as shown below and click “Properties”. • For the following steps refer to the diagram below. Click on the bubble for “Use the following IP address” •...
-
Page 12: Camera Web Interface
• On the left side of your screen select Network. In the IP address field, you will enter the unused IP address you selected at the beginning. Our example will use an address of 192.168.20.186. *This address MUST NOT be in use by any other device on your network or you will create an IP conflict and be unable to access your camera. - Page 13 Preset Tab: Use the Preset tabs to Set, Recall, and Delete Preset positions. To record a preset, adjust the camera to the desired location and zoom level. Highlight the preset number you wish to record and click the “Set” button. To recall a preset, highlight the preset number you wish to recall and click the ”Call”...
- Page 14 end of your camera’s IP address as shown below: Default Main Stream: rtsp://192.168.1.162:554/0/0/0 Default Sub-Stream: rtsp://192.168.1.162:554/0/0/1 Frame Rate: Specify frame rate (1-30). Frame Rate Priority prioritizes frame rate over image quality when VBR mode is enabled. GOP: Frame interval (1-60). Default is 30. Bitrate: Video Bit Rate (1-10240).
-
Page 15: Tech Support
Sensitivity: Auto focus sensitivity level ICR Mode: Infrared Cutfilter Removal Mode AE Mode: Auto Exposure Mode AE Level: Auto Exposure Level adjustment HLC: Highlight Compensation Level DNR(2D): 2D Digital Noise Reduction adjustment Gamma: Gamma adjustment Safety Page From this screen you can modify the login information PTZ Page From this screen you can view and modify the PTZ control settings of the camera. -
Page 16: Warranty
7. Warranty BZBGEAR Pro AV products and Cameras come with a three-year warranty. An extended two-year warranty is available for our Cameras upon registration for a total of five years. For an extended two-year warranty on our Cameras, follow these steps: 1.
Need help?
Do you have a question about the BG-B20SHA and is the answer not in the manual?
Questions and answers