
Related Manuals for Lovibond EComparator Series


Summary of Contents for Lovibond EComparator Series
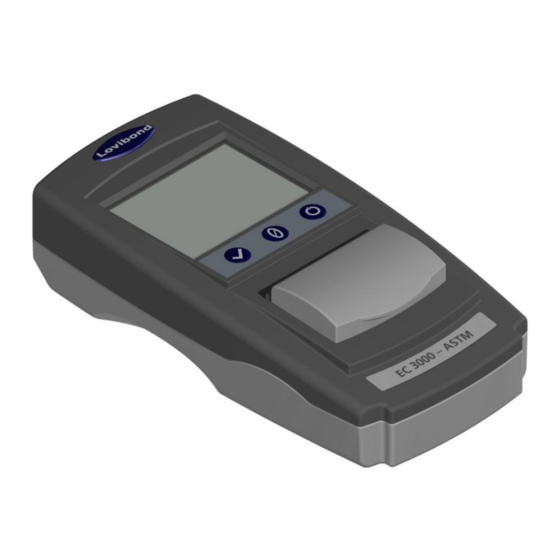
- Page 1 Operator Instruction Manual EC 3000 ASTM Lovibond® Water Testing and Colour Measurement LM163010 Version 2.2...
-
Page 2: Table Of Contents
Table of Contents Environment: ....................4 Introduction: ....................5 Keypad:......................6 Display Icons:....................6 Power- USB: ....................6 Power- Battery: .................... 6 Firmware and Version Number: ..............7 Settings ......................8 Instrument Diagnostics ................8 Instrument Settings .................. 9 Information .................... 11 Power Saving Settings ................ - Page 3 Delete a Measurement ................20 Save a Measurement (manual saving) ........... 21 Error Warnings: ..................22 Upgrading the instrument ................23 EC 3000 Kit Contents -ASTM ..............26 EC 3000 Technical Data - ASTM: ..............27 Performing a Zero - ASTM: ................. 29 Performing a Test - ASTM: .................
-
Page 4: Environment
Environment: This appliance is marked according to the European Directive 2002/95/EC on the waste of Electrical and Electronic Equipment (WEEE). By ensuring this product is disposed of correctly, you will help prevent potential negative consequences for the environment and human health, which could otherwise be caused by inappropriate waste handling of this product. -
Page 5: Introduction
Colour graders who are used to the traditional comparator series sometimes find the upgrade or transition to an electronic system daunting. The assurance of relying on physical colour difference is diminished. With the EComparator Series, users can view the colour in two different ways: On-Screen Numerical Display... -
Page 6: Keypad
Keypad: Test Zero Power Display Icons: Icon Function Battery Low Powered by Battery Powered by USB SD Card OK Warning Power- USB: The USB port can be accessed by sliding the panel at the rear of the instrument. Top of Instrument Ensure the cable connector is inserted into the socket in the correct orientation. -
Page 7: Firmware And Version Number
Firmware and Version Number: The Firmware and Version Number will be displayed when the instrument is switched on. (Please Note: “Scale Name” will be replaced by the Scale your EComparator measures). -
Page 8: Settings
Settings 1 - To enter the settings menu, press the settings icon at the bottom tool bar. 1a -The settings display will show. Instrument Diagnostics 2 - For Instrument Diagnostics, press the Diagnostics Icon. 2a - The instrument will perform diagnostics on the Memory, SD Card, LED and Light Sensor. -
Page 9: Instrument Settings
2c - The instrument will display the report. When finished, select Done. Instrument Settings 3 - For Instrument Settings, press the Instrument Icon 3a – To set the integration time, ensure the sample chamber is empty, and then press Set. (This will set the optimum time for taking a measurement). - Page 10 3d – Click OK when complete. 3e - To save the settings, press Save. 3f - To cancel the settings, press Cancel. 3g – To exit without saving, press Yes, or press No to continue.
-
Page 11: Information
Information 4a – The information screen will be displayed. Press the back arrow to return to the results screen. (Please Note: “Scale Name” will be replaced by the Scale your EComparator measures). Power Saving Settings 5 - For Power Saving Settings, press the Power Icon. -
Page 12: Regional Settings
Regional Settings 6 - For Regional Settings, press the Regional Icon. 6a - Select the language that you would like the instrument to display. The instrument will return to the settings screen. Date and Time 7 - To set the Date and Time, press the Clock Icon. -
Page 13: Calibrating The Touch Screen
Calibrating the Touch screen 1 - To enter the settings menu, press the settings icon at the bottom tool bar. 2 -The settings display will show. 3 - Press the Instrument Icon 4 – To set the Touch Screen press LCD cal 5 –... - Page 14 6 – The next screen will appear. Using a stylus, press the screen in the centre of the circle (top left) 7 – The next screen will appear, using a stylus, press the screen in the centre of the circle (bottom right) 8 –...
-
Page 15: Projects
Projects: 1 - To enter the projects menu, press the Projects Icon on the bottom tool bar. 2 – The projects screen will be displayed. The Project named at the top is the current project. 3 – To view, or manage projects, click on View Projects. -
Page 16: Set Tolerances
6 – Enter the new project name using the keypad, then select Return. Set Tolerances 7 – The instrument will display the Project Settings Screen, to set the Tolerances, select Tolerance. 8 – To apply the tolerance limits, select the Tolerance checkbox. -
Page 17: Averaging And Automatic Log (Automatic Saving)
Averaging and Automatic Log (automatic saving) 10 – To change the Averaging and Automatic Log (automatic saving), select Measurements. 11 – To change the Averaging, use the up and down arrows (This will set the number of measurements taken per test then take an average of those measurements). -
Page 18: Edit A Project
13 – To save all the settings, select Save. NOTE: Until save is selected, neither Tolerance nor Measurements are saved. Edit a Project 14 – To edit a project, go to the projects list. Highlight the project by clicking on it, and then select Edit. -
Page 19: Make A Project Default
17 – The following prompt will appear. Select Yes to confirm. Make a Project Default 18 – To make a project Default, go to the projects list (this will highlight the project that is current when the instrument is switched on). -
Page 20: Make A Project Current
Make a Project Current 21 – To make a project current, go to the project list, highlight the project required then press Select. All readings will be saved into the current project. View the Measurements 22 – To view the measurements of a project, go to the projects list, highlight the project required then press Meas. -
Page 21: Save A Measurement (Manual Saving)
25 – The following prompt will appear. Select Yes to confirm. 26 – To view the measurements from the main project screen for the current project (named at the top of the screen), select View Measurements. Save a Measurement (manual saving) 27 –... -
Page 22: Error Warnings
Error Warnings: Warning Description Error 1 SD Card Error Error 2 Light Level Too High Error 3 Light Level Too Low Error 4 Sensor Error Error 5 File System Error Error 6 Communication Error Error 7 Keypad Error Error 10 Non Volatile Memory Error Please contact you local Service Centre for help: www.lovibondcolour.com/ServiceCentre... -
Page 23: Upgrading The Instrument
Upgrading the instrument For the latest version of the EC 2000 and EC 3000 firmware please contact service@tintometer.com. 1 - Connect the EC Series Instrument to the Host Computer using the USB cable provided. 2 - Ensure the cable connector is Top of Instrument inserted into the socket in the correct orientation. - Page 24 6 - The disk contents will be similar to the following: 7 - If the ‘Image’ folder is present delete it and its contents. 8 - Copy the new ‘Image’ folder from the upgrade package to the instrument. 9 - Turn off the instrument. 10 - Press and hold the ‘Read’...
- Page 25 12 - Turn the instrument on. 13 - Confirm that the Firmware has been successfully installed by checking the Firmware Version field on the Information screen.
-
Page 26: Ec 3000 Kit Contents -Astm
EC 3000 Kit Contents -ASTM EComparator EComparator Reference Reference Solution Solution EC 3000 USB Power Series Supply Instrument Glass and 4 x AA Plastic Batteries Cells Cell Glass Reference Mini USB Cable Divider Standard Screwdriver Item Included Instrument Type EC 3000 ... -
Page 27: Ec 3000 Technical Data - Astm
EC 3000 Technical Data - ASTM: Sometime referred to as the "mineral oil color value", the ASTM Colour Scale is widely used for the grading of petroleum products such as lubricating oils, heating oils and diesel fuel oils. Mineral oils are constantly checked for colour during processing in order to establish when they have been refined to the required grade. - Page 28 the result is a selection of colour grading scales that have been adopted as international industry standards. The EComparators are fully equivalent to the appropriate Visual International Standards and fully compliant with Automatic International Standards detailed below: EC 3000 ASTM Color (ASTM D1500, D6045) because in the scope of ASTM: D6045 it states “This test method correlates to Test Method D 156 and Test Method D 1500 as calculated by the instrumentation”.
-
Page 29: Performing A Zero - Astm
Performing a Zero - ASTM: 1 – After initiation, the instrument will display: 2 – Ensure the sample chamber is empty. 3 - Close the sample lid and press the zero key on the keypad or the display. 4 - While performing a zero, the instrument will display: 5 - When complete, the instrument will display:... -
Page 30: Performing A Test - Astm
Performing a Test - ASTM: Note: Ensure that the sample being measured is free from turbidity; if necessary, filter the sample through a 0.45 micron filter paper. 1 – Fill a clean Cell 2/3 full with the sample. 2 - Place the cell in the sample chamber of the EComparator, push to the left hand side. - Page 31 5 – If averaging is set the instrument will measure again and display: 6 - The instrument will display the result as: 7 - Press the result button on the display to change between numeric and comparator mode. 8 - Press the up and down arrows to view the stages / steps as they would be on the visual disc.
-
Page 32: Performing A Liquid Instrument Validation Using A Liquid Reference Standard - Astm
Performing a Liquid Instrument Validation using a Liquid Reference Standard – ASTM The EC 3000 Saybolt and ASTM are supplied with two bottles of Validation Liquid. These liquids are used to validate that the instrument is measuring within the specified tolerances. 1 –Select a bottle of validation liquid and ensure that the selected validation liquid is within... - Page 33 5 – Fill the supplied cell 2/3 with the reference solution. 6 - Place the cell in the sample chamber of the EComparator, push to the left hand side. 7 - Close the sample lid and press the test key on the keypad or the display.
- Page 34 10 - Compare the result from the instrument to the value on the label of the validation liquid, to check it is within the specified tolerances.
-
Page 35: Performing An Instrument Validation Using A Glass Refrence Standard - Astm
Performing an Instrument Validation using a Glass Refrence Standard – ASTM 1 – Ensure the sample chamber is empty 2 –Close the sample lid and press the zero key 3– Place the selected standard in the sample chamber on the right hand side. - Page 36 5- Press the back arrow on the display to change between numeric and comparator mode...
-
Page 37: Sales Offices
Sales Offices Germany United Kingdom Tintometer GmbH The Tintometer Ltd ® Lovibond House Lovibond Water Testing Schleefstraße 8-12 Sun Rise Way 44287 Dortmund Germany Amesbury SP4 7GR Tel: +49 (0)231/94510-0 Tel: +44(0)1980 664800 Fax: +49 (0)231/94510-20 Fax: +44(0) 1980 625412 Email: sales@lovibond.com... - Page 38 Tintometer are registered trademarks of the Tintometer ® ® Group. All translations and transliterations of Lovibond and Tintometer are asserted as trademarks of the Tintometer® Group. Windows® and Microsoft® are registered trademarks of Microsoft Corporation. Linux® is the registered trademark of Linus Torvalds in the...
Need help?
Do you have a question about the EComparator Series and is the answer not in the manual?
Questions and answers