Table of Contents
Advertisement
Quick Links
Advertisement
Table of Contents

Related Manuals for ADJ DOTZ MATRIX


Summary of Contents for ADJ DOTZ MATRIX
- Page 1 DOTZ MATRIX User Instructions...
- Page 2 ©2021 ADJ Products, LLC all rights reserved. Information, specifications, diagrams, images, and instructions herein are subject to change without notice. ADJ Products, LLC logo and identifying product names and numbers herein are trademarks of ADJ Products, LLC. Copyright protection claimed includes all forms and matters of copyrightable materials and information now allowed by statutory or judicial law or hereinafter granted.
-
Page 3: Table Of Contents
CONTENTS General Information Limited Warranty (USA Only) Safety Guidelines Maintenance Guidelines Overview DMX Setup Installation Instructions System Menu DMX Traits: Channel Functions & Values Dimmer Curve Chart Multiple Unit Power Linking Fuse Replacement / Cleaning / Troubleshooting Specifications... -
Page 4: General Information
GENERAL INFORMATION INTRODUCTION Please read and understand all instructions in this manual carefully and thoroughly before attempting to operate these products. These instructions contain important safety and use information. UNPACKING The products in this kit have been thoroughly tested and have been shipped in perfect operating condition. -
Page 5: Limited Warranty (Usa Only)
All shipping charges must be pre-paid. If the requested repairs or service (including parts replacement) are within the terms of this warranty, ADJ Products, LLC will pay return shipping charges only to a designated point within the United States. If the entire instrument is sent, it must be shipped in its original package. No accessories should be shipped with the product. -
Page 6: Safety Guidelines
To guarantee a smooth operation, it is important to follow all instructions and guidelines in this manual. ADJ PRODUCTS LLC is not responsible for injury and/or damages resulting from the misuse of these devices due to the disregard of the information printed in this manual. Only qualified and/or certified personnel should perform installation of these devices and only the original rigging parts included with these devices should be used for installation. - Page 7 SAFETY GUIDELINES DO NOT position devices close to any FLAMMABLE MATERIALS while operating. DO NOT attempt installation and/or operation of devices without knowledge how to do so. DO NOT permit operation by persons who are not qualified to operate these types of devices. DO NOT shake devices, avoid brute force when installing and/or operating.
-
Page 8: Maintenance Guidelines
Regular inspections are recommended to insure proper function and extended life. There are no user serviceable parts inside these devices, please refer all other service issues to an authorized ADJ service technician. Should you need any spare parts, please order genuine parts from your local ADJ dealer. -
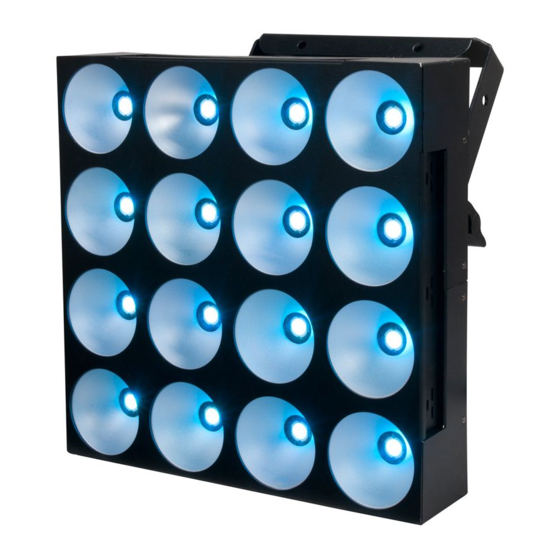
Page 9: Overview
OVERVIEW Mounting Bracket Safety Cable Menu Screen Attachment Point UP Button DOWN Button ENTER Button MODE Button M o u n t i n g Bracket Knob POWER OUT FUSE: 7A 3-pin POWER IN DMX OUT 3-pin DMX IN 5-Pin DMX IN 5-Pin DMX OUT... -
Page 10: Dmx Setup
D M X S E T U P POWER SUPPLY The Cob cannon wash contains an automatic voltage switch, which will auto sense the voltage when it is plugged into the power source. With this switch there is no need to worry about the correct power voltage, this unit can be plugged in anywhere. - Page 11 3 of a male XLR connector (DATA + and DATA -). This unit is inserted in the female XLR connector of the last unit in your daisy chain to terminate the line. Using a cable terminator (ADJ part number Z-DMX/T) will decrease the possibilities of erratic behavior.
-
Page 12: Installation Instructions
The Dotz Matrix is fully operational in two different mounting positions, hanging upside-down from a ceiling or set on a flat level surface. To avoid internal damage to the unit, never mount the unit on its side as illustrated above. -
Page 13: System Menu
SYSTEM MENU The fixture includes an easy to navigate system menu where fixture settings can be adjusted via the LCD control panel located on the back of the fixture. During normal operation, pressing the MODE button once will access the main menu. Navigate through the various sub-menus by pressing the UP and DOWN buttons, press the ENTER button to select a specific sub-menu, press the UP and DOWN buttons to adjust the selected sub-menu settings, and press the ENTER button again to confirm the sub-menu setting selection. - Page 14 SYSTEM MENU Built-In-Programs Blackout, 01. STATIC CL:RGBFlash00-99 Red-Green-Blue-Yellow-Cyan-Purple-White Flash speed ad- justable. 02. DREAM Seven color dreaming Speed & Flash adjustable Speed00-99 — Flash00-99 03. METEOR Seven color flow Speed00-99 — Flash00-99 Speed & Flash adjustable 04. FADE Seven color flow Speed00-99 —...
- Page 15 SYSTEM MENU DMX Mode - Set the DMX Address and DMX Channel Mode - 1. Press the MENU button until “DMX Mode” and underneath “ADDR: XXX” and “CH:XX” is displayed, press ENTER. 2. “XXX” will now begin to flash, use the UP and DOWN buttons to find your desired DMX address, then press ENTER.
- Page 16 A DMX controller allows you to create unique programs tailored to your individual needs. The Dotz Matrix has 5 DMX channel modes; a 3 Channel Mode, 6 Channel Mode, 7 Channel Mode, 48 Channel Mode, & (52 Channel Mode ), 53 Channel Mode (Added (6/21/18).
- Page 17 SYSTEM MENU STANDARD Flip 1 Flip 2 Flip 3 Flip 4...
-
Page 18: Dmx Traits: Channel Functions & Values
DMX TRAITS: CHANNEL FUNCTIONS & VALUES DMX CHANNELS / VALUES / FUNCTIONS (5 DMX Channels) SUPPORTS SOFTWARE VERSION ≥ 1.07 MODE / CHANNEL VALUE FUNCTION CH 3 CH 6 CH 48 CH 53 RED 1 0-255 0-100% GREEN 1 0-255 0-100% BLUE 1 0-255... - Page 19 DMX CHANNELS / VALUES / FUNCTIONS (11 DMX Channels) SUPPORTS SOFTWARE VERSION ≥ 1.07 MODE / CHANNEL VALUE FUNCTION CH 3 CH 6 CH 48 CH 53 RED 9 0-255 0-100% GREEN 9 0-255 0-100% BLUE 9 0-255 0-100% RED 10 0-255 0-100% GREEN 10...
- Page 20 DMX CHANNELS / VALUES / FUNCTIONS (11 DMX Channels) SUPPORTS SOFTWARE VERSION ≥ 1.07 MODE / CHANNEL VALUE FUNCTION CH 3 CH 6 CH 48 CH 53 COLOR MACROS & PROGRAMS 0 - 15 NO FUNCTION 16 - 23 24 - 31 GREEN 32 - 39 BLUE...
-
Page 21: Dimmer Curve Chart
DIMMER CURVE CHART DIMMER 100% Time (ms) 0 Sec Rise Time Down Time 0 sec Fade Time 1 sec Fade Time Dimming Curve Ramp Effect Rise Time (ms) Down Time (ms) Rise Time (ms) Down Time (ms) Standard (default) Stage 1100 1540 1660... -
Page 22: Multiple Unit Power Linking
Unit does not respond to sound: 1. Quiet or high pitched sounds will not activate the unit. If problems are not resolved, contact ADJ Products, LLC for service: 1-800-322-6337... -
Page 23: Specifications
• With Wired Digital Communication Network • AC IN/OUT to daisy chain power (up to 5 Dotz Matrix’s @ 120V and 9 Dotz Matrix’s @ 230V on one 20 amp circuit ) • Power Draw: 430W total (All LED’s @ Full) •... - Page 24 FCC STATEMENT This device complies with Part 15 of the FCC Rules. Operation is subject to the following two conditions: (1) this device may not cause harmful interference, and (2) this device must accept any interference received, including interference that may cause undesired operation. FCC RADIO FREQUENCY INTERFERENCE WARNINGS &...
Need help?
Do you have a question about the DOTZ MATRIX and is the answer not in the manual?
Questions and answers