Table of Contents
Advertisement
Quick Links
User Instructions
10/09
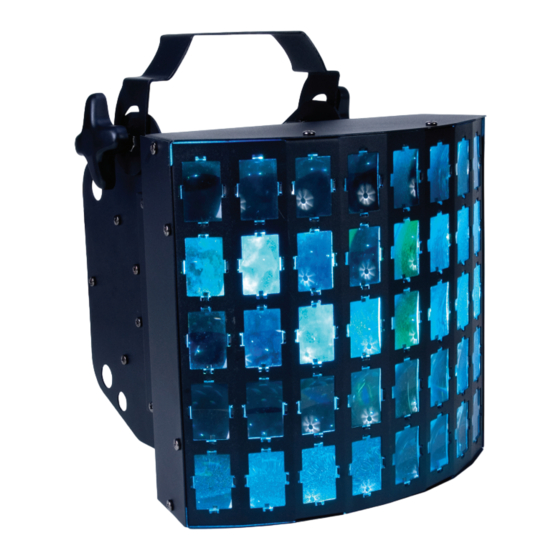
Dekker
Unpacking:
Thank you for purchasing the Dekker by American DJ
Every Dekker has been thoroughly tested and has been shipped in
perfect operating condition. Carefully check the shipping carton for
damage that may have occurred during shipping. If the carton appears
to be damaged, carefully inspect your fixture for any damage and be
sure all accessories necessary to operate the unit has arrived intact. In
the case damage has been found or parts are missing, please contact
our toll free customer support number for further instructions. Do not
return this unit to your dealer without first contacting customer sup-
port.
Introduction:
The Dekker is part of American DJ's continuing pur-
suit for creating high quality affordable intelligent fixtures. The Dekker
is a DMX intelligent LED mooflower effect. This fixture can be used
in a stand alone mode or connected in a Master/Slave configuration.
The unit can also be controlled via DMX controller. This wash has four
operating modes: Sound Active mode, Auto mode, Static mode, and
DMX control mode.
Customer Support:
American DJ
provides a toll free customer support line, to provide set
®
up help and to answer any question should you encounter problems
during your set up or initial operation. You may also visit us on the web
at www.americandj.com for any comments or suggestions.
Service Hours are Monday through Friday 9:00 a.m. to 6:00 p.m. Pacific
Standard Time.
Voice:
(800) 322-6337
Fax:
(323) 582-2941
E-mail:
support@americandj.com
To purchase parts online visit http://parts.americandj.com
Warning!
To prevent or reduce the risk of electrical shock or fire, do
not expose this unit to rain or moisture.
Caution!
There are no user serviceable parts inside this unit. Do not
attempt any repairs yourself, doing so will void your manufactures war-
ranty. In the unlikely event your unit may require service please contact
American DJ.
PLEASE recycle the shipping carton when ever possible.
American DJ
- www.americandj.com - Dekker Instruction Manual Page 2
©
®
Introduction
.
®
Advertisement
Table of Contents

Subscribe to Our Youtube Channel
Related Manuals for ADJ Dekker LED


Summary of Contents for ADJ Dekker LED
- Page 1 Dekker Introduction Unpacking: Thank you for purchasing the Dekker by American DJ ® Every Dekker has been thoroughly tested and has been shipped in perfect operating condition. Carefully check the shipping carton for damage that may have occurred during shipping. If the carton appears to be damaged, carefully inspect your fixture for any damage and be sure all accessories necessary to operate the unit has arrived intact.
- Page 2 Dekker General Instructions Dekker Safety Precautions To optimize the performance of this product, please read these • To reduce the risk of electrical shock or fire, do not expose this unit operating instructions carefully to familiarize yourself with the basic rain or moisture operations of this unit.
- Page 3 Using a cable terminator or anywhere in the middle. When a fixture is assigned a DMX address (ADJ part number Z-DMX/T) will decrease the possibilities of erratic of 1, the DMX controller knows to send DATA assigned to address 1 behavior.
-
Page 4: Dmx Mode
Dekker Operating Instructions Dekker Operating Instructions LED Display On/Off: displayed. “X” represents the current number being displayed. 2. Select your desired dance program by pressing either the To set the LED display to turn off after 10 seconds, press the MODE UP or DOWN buttons. - Page 5 Dekker Operating Instructions Dekker 2 Channel Mode DMX Values & Traits Channel Value Function 2. Now you can use the UC3 Controller (Not Included) to control vari- ous functions. See below for UC3 controls. PROGRAMS 1 - 26 4 COLOR FADE CHANGE Button Function 27 - 51...
- Page 6 Dekker 8 Channel Mode - DMX Values & Traits Dekker Fuse Replacement Channel Value Function Fuse Replacement: First unplug the power. The fuse holder is lo- cated at the rear of the unit next to the power cord. Using a flat-head MOTOR FUNCTION CONTROL screw driver unscrew the fuse holder.
- Page 7 Dekker Warranty Dekker Notes MANUFACTURER’S LIMITED WARRANTY American DJ, Inc. hereby warrants, to the original purchaser, American DJ and American Audio products to be free of manufacturing defects in material and workmanship for a prescribed period from the date of purchase (see specific warranty period on reverse). This warranty shall be valid only if the product is purchased within the United States of America, including possessions and territories.
-
Page 8: Technical Specifications
Dekker Specifications Technical Specifications: Model: Dekker LEDs: 1 x 8W RGBW LED Voltage: 100~240v 50Hz~60Hz Power Consumption: Dimensions: 11”(L) x 9.8”(W) x 10.23”(H) Colors: RGB + White Weight: 8.5 Lbs./3.85 Kgs. DMX Channels: 2 Channel or 8 Channels Fuse: 1 Amp Duty Cycle: None Please Note: Specifications and improvements in the design of...
Need help?
Do you have a question about the Dekker LED and is the answer not in the manual?
Questions and answers