Table of Contents
Advertisement
Available languages
Available languages
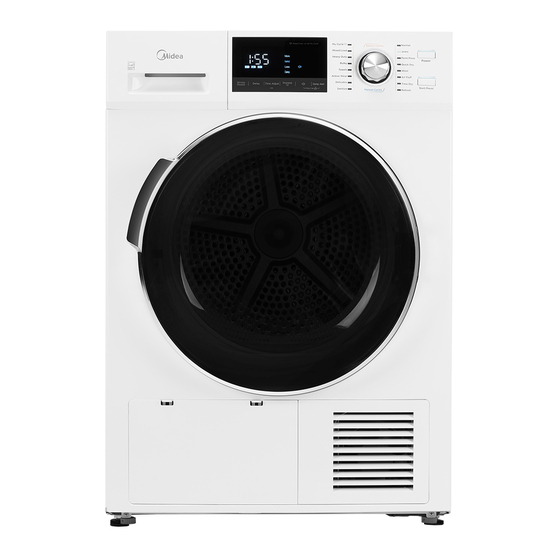
Dryer
Power supply: 240V
Frequency: 60 Hz
Warning:
Before using this product,
please read this manual carefully
and keep it for future reference.
The design and specifications
are subject to change without
prior notice for product
improvement. Consult with your
dealer or manufacturer for
details.
version A
USER MANUAL &
INSTALLATION
INSTRUCTIONS
MODEL NUMBER
MLE27N5AWWC
www.midea.com/ca
en
Advertisement
Chapters
Table of Contents

Related Manuals for Midea MLE27N5AWWC


Summary of Contents for Midea MLE27N5AWWC
- Page 1 Before using this product, please read this manual carefully and keep it for future reference. The design and specifications are subject to change without prior notice for product improvement. Consult with your dealer or manufacturer for details. MODEL NUMBER MLE27N5AWWC version A www.midea.com/ca...
-
Page 2: Table Of Contents
Dear user THANK YOU and CONGRATULATIONS on your purchase of this high-quality Midea product. Your Midea dryer is designed for reliable, trouble-free performance. Please take a moment to register your new dryer. Register your new dryer at www.midea.com/ca/support/Product-registration For future reference, record your product model and serial numbers located on the inside frame of the dryer. - Page 3 DRYER CARE ................... 30 Care and maintenance ................ 30 BEFORE YOU CALL FOR SERVICE ..........31 Error codes ....................33 WARRANTY ..................34 PRODUCT REGISTRATION............36 READ AND KEEP THESE INSTRUCTIONS FOR FUTURE REFERENCE This manual contains important information on the installation, use, and care of your appliance.
-
Page 4: Safety And Precautions
SAFETY AND PRECAUTIONS YOUR SAFETY AND THE SAFETY OF OTHERS ARE VERY IMPORTANT To prevent injury to the user or other people and property damage, the instructions shown here must be followed. Incorrect operation due to ignoring of instructions may cause harm or damage, including death. The level of risk is shown by the following indications. - Page 5 • Do not dry articles that have been previously cleaned in, washed in, soaked in, or spotted with gasoline, dry-cleaning solvents, other flammable or explosive substances as they give off vapors that could ignite or explode. • Do not use the dryer to dry clothes which have traces of any flammable substance, such as vegetable oil, cooking oil, machine oil, flammable chemicals, thinner, etc., or anything containing wax or chemicals, such as mops and cleaning clothes.
- Page 6 CAUTION • Do not sit on top of the dryer. Because of continuing product improvements, Midea America reserves the right of change specifications without notice. For complete details, see the Installation Instructions packed with your product before selecting cabinetry, making cutouts, or beginning installation.
- Page 7 • Residual oil on clothing can ignite spontaneously. The potential for spontaneous combustion increases when items containing vegetable oil or cooking oil are exposed to heat. Heat source such as your dryer can warm these items, allowing an oxidation reaction in the oil to occur.
-
Page 8: Installation Requirements
INSTALLATION REQUIREMENTS IMPORTANT TO INSTALLER Please read the following instructions carefully before installing the dryer. These instructions should be kept for future reference. CAUTION • The dryer is not suitable for installation in a mobile home. • Remove the door from all discarded appliances to avoid the danger of a child being trapped and suffocating, after unplugging Power Cord. - Page 9 Alcove or closet or wall insert/recessed installations WARNING No other fuel-burning appliance should be installed in the same closet as the dryer. Minimum clearances between the dryer and adjacent walls or other surfaces : Sides 1 in. (25.4 mm) Rear 2 in.
- Page 10 Undercounter installation ≥35.5 in. (≥901 mm) 23.4 in. (595 mm) 42.2 in. (1072 mm) 1 in. (25.4 mm) 33.5 in. (850 mm) 1 in. (25.4 mm)
- Page 11 Installation with stacked washing machine and dryer 3 in. (76 mm) 2 in. (50.8 mm) 3 in. (76 mm) 48 in. (3100 mm 25.7 in. (653 mm) 24 in. (1550 mm 1 in. (25.4 mm) 2 in. (50.8 mm) 3 in. (76 mm) 23.4 in.
-
Page 12: Drain System
DRAIN SYSTEM The following parts are optional for specific models. If your dryer has following parts, please wear gloves and install them as per the instruction below. Condensing drain hose Connector Installation • Take the hose out of the holder. •... - Page 13 • To prevent unnecessary risk of fire, electrical shock, or personal injury, all wiring and grounding must be done in accordance with local codes, or in the absence of local codes, with the National Electrical Code, ANSI/NFPA No. 70 - Latest Revision (for the U.S.) or the Canadian Electrical Code CSA C22.1 - Latest Revisions and local codes and ordinances.
-
Page 14: Grounding
Service personnel - do not contact the following parts while the appliance is energized: Main Motor, Cooling Fan. REPLACEMENT PARTS AND ACCESSORIES If your dryer requires replacement parts or accessories, contact the dealer where you purchased your dryer or email to customerserviceusa@midea.com. -
Page 15: Installation Instructions
INSTALLATION INSTRUCTION REMOVING FROM THE PACKAGE • Unpack your dryer and inspect it for shipping damage. Make sure you have received all the items shown below. • To prevent personal injury or strain, wear protective gloves whenever lifting or carrying the unit. WARNING •... -
Page 16: Tools Required
Wiring Box Drain Hose TOOLS REQUIRED Phillips screwdriver Flat screwdriver Level Adjustable wrench Pliers Cutting knife that opens to 1” (25 mm) Tape measure... -
Page 17: Installation Steps
INSTALLATION STEPS For the proper installation, we recommend that you hire a qualified installer. STEP 1 Choose the proper location • Move your dryer to an appropriate location for the installation. Consider installing the dryer and washer side-by-side, to allow access to the gas, electrical, and exhaust connections. - Page 18 Four wire outlet Then choose a 4-wire power supply cord with ring terminals and UL listed strain relief. The 4-wire power supply cord, at least 4.92 ft. (1.5 m) long, must have 4 10-gauge solid copper wires and match a 4-wire receptacle of NEMA Type 14-30 R, rated 120/240V, min 10A.
- Page 19 The dryer frame is grounded to the neutral conductor at the terminal block. A 4-WIRE SYSTEM CONNECTION is required for new or remodeled construction,mobile homes, or if local codes do not permit grounding through neutral conductor. If the 4-wire system is used, the dryer frame cannot be grounded to the neutral conductor at the terminal block.
- Page 20 STEP 4 Power on Make sure all electrical connections are complete. Plug in your dryer. STEP 5 Final check • Make sure the dryer is plugged into an electrical outlet and is properly grounded. • The dryer is leveled and is sitting firmly on the floor. •...
-
Page 21: Dryer Use
DRYER USE CONTROL PANEL WARNING • To reduce the risk of fire, electric shock, or injury to persons, read the IMPORTANT SAFETY INSTRUCTIONS before operating the appliance. Wrinkle Prevent Power Press to power on your dryer or into stand-by situation. If your dryer is on for more than 10 minutes without any buttons being pressed, it automatically turns into stand-by situation. - Page 22 Wrinkle Prevent Press once to add the wrinkle care step into the operating program. Press again to cancel selection. If wrinkle prevent was active, it provides approximately 90 minutes of intermittent tumbling in unheated air at the end of the cycle to reduce wrinkling.
- Page 23 Control Lock " and "Damp Alert" together to activate the control lock Press the " function. Press again for another 3 seconds to deactivate the function. All buttons except the "Power" will be out of function when control lock activated. Symbols Delay start Wrinkle Prevent...
-
Page 24: Drying A Load Of Laundry
DRYING A LOAD OF LAUNDRY Step 1: Power on your dryer • Press Power button to power your dryer on. Step 2: Load your dryer • Place only one wash load in your dryer at a time. • Mixed loads of heavy and light weight fabrics will dry differently,which may result in lightweight fabrics being dry while heavy fabrics remain damp at the end of a drying cycle. - Page 25 Maximum Dryness Time Damp Wrinke Cycle Delay Amount Level Adjust Alert Prevent Damp Less • • • Normal Normal More Damp Less • • • Jeans Normal More Damp Less Perm • • • Normal Press More Damp Less • •...
- Page 26 Load Size Recommendations: For best results, follow the wet load size recommendations noted for each cycle. For best results, follow the wet load size recommendations noted for each cycle. For the best performance, the load for each cycle should be recommended as follows: Cycle Items Weight...
-
Page 27: Filter Clean
Control Lock This function is useful to prevent children from playing with the unit. • ”and “Damp Alert” buttons simultaneously for Press and hold the “ 3 seconds to activate this function. The blue “Control Lock” light will turn ON. •... - Page 28 WARNING • Do not operate your dryer without the lint filter in place. • Do not use a damage or broken lint filter. This may reduce performance and/or cause fire. Clean the base filter • Open the cover. • Unlock three locking levers and grasp the filter handle.
-
Page 29: Special Laundry Tips
SPECIAL LAUNDRY TIPS Items Drying guide • Bedspreads & Follow the care label instructions or dry in Bulky cycle. Comforters • Make sure the item is thoroughly dry before using or storing. • May require repositioning to ensure even drying. •... -
Page 30: Dryer Care
DRYER CARE WARNING Certain internal parts are intentionally not grounded and may present a risk of electric shock only during servicing. Service Personnel – Do not contact the following parts while the appliance is energized: Main Motor, Cooling Fan. Do no touch the heat exchanger with your hand, which may cause an injury. -
Page 31: Before You Call For Service
BEFORE YOU CALL FOR SERVICE... Troubleshooting Tips Save time and money! Review the charts on the following pages first and you may not need to call for service. Problems Solutions • The unit does Make sure the door is latched shut. •... - Page 32 Problems Solutions • Clothes are Seams, pockets, and other similarly heavy areas may not be completely dry when the rest of the load has unevenly reached the selected dryness level. This is normal. dried Select the Time Dry setting if desired. •...
-
Page 33: Error Codes
• Keep the air inlet clean. • Use higher drying intensity level programme or time programme. ERROR CODES Code Reason Solutions Humidity Temperature sensor error Please contact Midea service centre if the problem occurs. Motor communication error PCB communication error... -
Page 34: Warranty
U.S. and Canada. Midea Customer Service In the U.S.A. or Canada, call 1-866-646-4332 or email customerserviceusa@midea.com. If outside the 50 States of the United States or Canada, contact your authorized Midea dealer to determine whether another warranty applies. LIMITED WARRANTY... - Page 35 DISCLAIMER OF REPRESENTATIONS OUTSIDE OF WARRANTY Midea makes no representations about the quality, durability, or need for service or repair of this major appliance other than the representations contained in this warranty. If you want a longer or more comprehensive warranty than the limited warranty t hat comes with this major appliance, you should ask Midea or your retailer about buying an extended warranty.
-
Page 36: Product Registration
REGISTRATION INFORMATION PROTECT YOUR PRODUCT: We will keep the model number and date of purchase of your new Midea product on file to help you refer to this information in the event of an insurance claim such as fire or theft. - Page 37 à titre de référence ultérieure. La conception et les spécifications peuvent être modifiées sans préavis pour l’amélioration des produits. Consultez votre concessionnaire ou votre fabricant pour plus de détails. NUMÉROS DE MODÈLE MLE27N5AWWC version A www.midea.com/ca...
- Page 38 Cher utilisateur MERCI and FÉLICITATIONS à l’achat de ce produit Midea de haute qualité. Votre sécheuse Midea est conçue pour offrir un rendement fiable et sans problème. Veuillez prendre un moment pour enregistrer votre nouveau sécheuse. Enregistrez votre nouveau sécheuse à...
- Page 39 ENTRETIEN DES SÉCHEURS ............30 Nettoyage et entretien ................ 30 AVANT DE FAIRE APPEL AU SERVICE ........31 Codes d’erreur ..................33 GARANTIE ..................34 ENREGISTREMENT DU PRODUIT ..........36 LIRE ET CONSERVER CES INSTRUCTIONS POUR CONSULTATION ULTÉRIEURE Ce manuel contient des renseignements importants sur l’installation, l’utilisation et la prise en charge de votre appareil.
-
Page 40: Sécurité Et Précaution
SÉCURITÉ ET DE PRÉCAUTION VOTRE SÉCURITÉ ET LA SÉCURITÉ DES AUTRES SONT TRÈS IMPORTANTES Pour éviter toute blessure à l’utilisateur ou à d’autres personnes et dommages matériels, les instructions présentées ici doivent être suivies. Une mauvaise utilisation en raison d’une omission des instructions peut causer des dommages ou des dommages, y compris la mort. - Page 41 • Ne pas sécher d'articles qui ont été préalablement nettoyés, lavés, imbibés ou tachés d'essence, de solvants de nettoyage à sec ou d'autres substances inflammables ou explosives, car ils dégagent des vapeurs qui pourraient s'enflammer ou exploser. • Ne pas utiliser la sécheuse pour sécher des vêtements qui ont des traces de toute substance inflammable, comme de l'huile végétale, l'huile de cuisson, l'huile à...
- Page 42 • Nettoyer le filtre à charpie avant ou après chaque utilisation. • Garder l'espace autour de l'ouverture d'évacuation et autour de l'appareil de charpie, poussière et saleté. • L'intérieur de la sécheuse et le conduit d'évacuation doivent être nettoyés périodiquement par un technicien compétent. •...
- Page 43 • 1. Ne pas s’asseoir sur la sécheuse. • 2. En raison de sa politique d’amélioration continue, Midea America se réserve le droit de modifier les caractéristiques sans préavis. Consulter les directives d’installation avant de choisir l’emplacement ou faire des coupes afin de connaître tous les détails.
-
Page 44: Exigences D'installation
EXIGENCES D’INSTALLATION REMARQUES POUR L’INSTALLATEUR Veiller à lire attentivement les présentes directives avant l’installation de la sécheuse. Les présentes directives doivent être conservées pour consultation ultérieure. ATTENTION • Cette sécheuse ne convient pas à une installation dans une maison mobile. •... - Page 45 Installation dans une alcôve, un placard ou encastrement mural AVERTISSEMENT Aucun appareil alimenté par de l’essence doit être installé dans l’emplacement où se trouve la sécheuse. Dégagement minimal entre la sécheuse et les surfaces ou murs adjacents : Côtés 1 po (25,4 mm) Arrière 2 po (50,8 mm) Dessus...
- Page 46 Installation sous un comptoir ≥35,5 po (≥901 mm) 23,4 po (595 mm) 42.2 po (1072 mm) 1 po (25,4 mm) 33.5 po (850 mm) 1 po (25,4 mm)
- Page 47 Installation superposée (machine à laver + sécheuse) 3 po (76 mm) 2 po (50,8 mm) 3 po (76 mm) 48 po (3100 mm 25,7 po (653 mm) 24 po (1550 mm 1 po (25,4 mm) 2 po (50,8 mm) 3 po (76 mm) 23,4 po (595 mm) REMARQU : Il ne doit y avoir aucun obstacle ou obtruction d’air sur le devant, à...
-
Page 48: Système D'évacuation
SYSTÈME D’ÉVACUATION Les pièces suivantes sont offertes en option sur certains modèles. Si la sécheuse a les pièces suivantes, porter des gants pour les installer, conformément aux directives ci-dessous. Tuyau d’évacuation de la condensation Connecteur Installation • Retirez le tuyau du support. •... - Page 49 conformément aux codes locaux, ou en l'absence de codes locaux, en conformité avec le Code américain d'électricité - ANSI / NFPA n ° 70 - ou le Code canadien de l'électricité CSA C22.1 - selon les plus récentes révisions. Il incombe à l'utilisateur de fournir des services électriques adéquats pour la sécheuse.
-
Page 50: Mise À La Terre
(située sur le boîtier du ventilateur). PIÈCES DE RECHANGE ET ACCESSOIRES Si votre sécheuse nécessite des pièces de rechange ou des accessoires, communiquez avec le concessionnaire où vous avez acheté votre sécheuse envoyez-nous un courriel à customerserviceusa@midea.com... -
Page 51: Directives D'installation
DIRECTIVES D’INSTALLATION RETRAIT DE L’EMBALLAGE • Retirer la sécheuse de son emballage et l'inspecter pour constater s'il y a des dommages dus au transport. S'assurer d'avoir reçu tous les éléments indiqués ci-dessous. • Pour éviter toute blessure corporelle, porter des gants de protection pour soulever ou transporter l'appareil. -
Page 52: Outils Nécessaires
Boîtier de câblage Tuyau d’évacuation OUTILS NÉCESSAIRES Tournevis à tête étoilée Tournevis à tête plate Niveau Clé réglable ouvrant Pinces Couteau jusquà 1 po (25 mm) Ruban à mesurer... -
Page 53: Étapes D'installation
ÉTAPES D’INSTALLATION Pour une installation adéquate, il est conseillé de faire appel à un installateur compétent. ÉTAPE 1 Choisir l’emplacement • Déplacer la sécheuse à un endroit approprié pour l'installation. Installer la sécheuse et la machine à laver côte à côte pour faciliter l'accès aux raccordements de gaz, d'électricité... - Page 54 Prise à quatre brins Choisir un cordon d'alimentation à 4 fils avec bornes à anneau et décharge de traction homologuée UL. Le cordon d'alimentation à 4 fils, d'au moins 4,92 pi (1,5 m) de long, doit avoir 4 fils en cuivre massif de calibre 10 et correspondre à...
- Page 55 Le boîtier de la sécheuse est mis à la terre avec le conducteur neutre du bloc. Une CONNEXION À 4 BRINS est nécessaire pour une nouvelle construction ou une résidence rénovée, ou lorsque les codes locaux n’autorisent pas une mise à la terre par un conducteur neutre. Si la connexion à...
- Page 56 ÉTAPE 4 Mettre en marche S’assurer que toutes les connexions ont été effectués. Brancher l’appareil. ÉTAPE 5 Vérification finale • S’assurer que la sécheuse est branchée dans une prise de courant et correctement mise à la terre. • La sécheuse est bien à niveau et repose sur un plancher solide. •...
-
Page 57: Utilisation De La Sécheuse
UTILISATION DE LA SÉCHEUSE CPANNEAU DE COMMANDE AVERTISSEMENT • Pour réduire les risques d'incendie, d'électrocution ou de blessures corporelles, lire les INSTRUCTIONS IMPORTANTES DE SÉCURITÉ avant d'utiliser l'appareil. Wrinkle Prevent Mise en marche Appuyer ce bouton pour mettre la sécheuse en marche ou en mode de veille. - Page 58 Défroisser Appuyer une fois pour ajouter cette fonction au cycle choisi. Appuyer à nouveau pour annuler la fonction. Si la fonction Défroisser est activée, elle procure environ 90 minutes de culbutage sans chaleur à la fin du cycle et ce, afin de réduire le froissage. La charge étant sèche, elle peut être retirée à...
- Page 59 Verrouillage Appuyer simultanément les boutons et Alerte d’humidité pour activer la fonction de verrouillage. Appuyer à nouveau durant trois secondes pour désactiver la fonction. Tous les boutons, sauf le bouton Mise en marche, ne peuvent pas fonctionner lorsque le verrouillage est activé. Symboles Démarrer l’Attente Défroisser...
-
Page 60: Séchage D'une Charge
SÉCHAGE D’UNE CHARGE ÉTAPE 1 : Mise en marche de la sécheuse • Appuyer le bouton Mise en marche pour faire fonctionner la sécheuse. ÉTAPE 2 : Mettre les vêtements dans la sécheuse • Ne placer qu’une charge de lessive à la fois dans la sécheuse. •... - Page 61 Maximal Degré de Attente Réglage de Alerte Cycle d’humidité Défroisser Quantité Séchage la minuterie Damp Less • • • Normal Normal More Damp Less • • • Jeans Normal More Damp Less Perm • • • Normal Press More Damp Less •...
- Page 62 Recommandations relatives à la taille de charge : Pour obtenir de meilleurs résultats, suivre les recommandations de taille de charge humide indiquées pour chaque cycle. Pour obtenir de meilleurs résultats, suivre les recommandations des charges de vêtements à sécher pour chaque cycle. Pour un rendement optimal, la charge de chaque cycle conseillé...
-
Page 63: Nettoyer Le Filtre
Commande de verrouillage Cette fonction est utile afin d’empêcher les enfants de jouer avec l’appareil. • Appuyer et maintenir enfoncé les boutons et Alerte d’humidité de façon simultanée durant trois secondes afin d’activer la fonction. Le témoin lumineux Verrouillage s’allumera. •... - Page 64 AVERTISSEMENT • Ne pas utiliser la sécheuse sans que le filtre à charpie soit en place. • Ne pas utiliser un filtre à charpie défectueux ou brisé. Cela pourrait réduire le rendement ou provoquer un incendie. Nettoyez le filtre de base •...
-
Page 65: Astuces Pour La Lessive
ASTUCES POUR LA LESSIVE Articles Guide de séchage • Couvre-lits et Suivre les directives sur les étiquettes d’entretien ou sécher au cycle Gros morceaux. édredons • S’assurer que tout article est bien sec avant de l’utiliser ou le ranger. • Peut devoir être replacé... - Page 66 ENTRETIEN DES SÉCHEURS AVERTISSEMENT Certaines pièces internes ne sont intentionnellement pas mises à la terre et peuvent présenter un risque de décharge électrique lors d'un service d'entretien. Remarque pour le technicien de service : ne pas toucher les pièces suivantes alors que l'appareil est sous tension : panneau des commandes, moteur, pompe et ventilateur.
- Page 67 AVANT DE FAIRE APPEL AU SERVICE... Des conseils de dépannage Gagnez du temps et de l’argent! Examinez d’abord les tableaux des pages suivantes et vous n’avez peut-être pas besoin d’appeler le service. Problèmes Solutions • L’appareil ne Vérifier que la porte est bien fermée. •...
- Page 68 Problèmes Solutions • Séchage non Les coutures, les poches ou d’autres parties plus épaisses pourraient ne pas être complètement sèches uniforme des alors que le restant de la charge est sec. Cela est vêtements normal. Modifier le Temps de séchage au besoin. •...
- Page 69 Problèmes Solutions • Le degré de Nettoyer le filtre. • séchage n’est Vider le réservoir. pas atteint ou • Vérifier le tuyau d’évacuation. le temps de • L’espace d’installation est trop limité. séchage est • Nettoyer les capteurs d’humidité. trop long. •...
- Page 70 fixées ou fournies avec le produit, Midea America (Canada) Corp. (ci-après « Midea ») paiera les pièces de rechange spécifiées en usine et la main- d’œuvre réparée pour corriger les défauts de matériaux ou de fabrication qui existaient lorsque cet appareil majeur a été...
- Page 71 également avoir d’autres droits qui varient d’une juridiction à l’autre. EXCLUSION DE DÉCLARATIONS HORS GARANTIE Midea ne fait aucune déclaration sur la qualité, la durabilité ou le besoin d’entretien ou de réparation de cet appareil majeur autre que les déclarations contenues dans la présente garantie.
- Page 72 PROTÉGEZ VOTRE PRODUIT : Nous conserverons le numéro de modèle et la date d’achat de votre nouveau produit Midea dans le dossier pour vous aider à consulter ces renseignements en cas de réclamation d’assurance comme un incendie ou un vol.
Need help?
Do you have a question about the MLE27N5AWWC and is the answer not in the manual?
Questions and answers