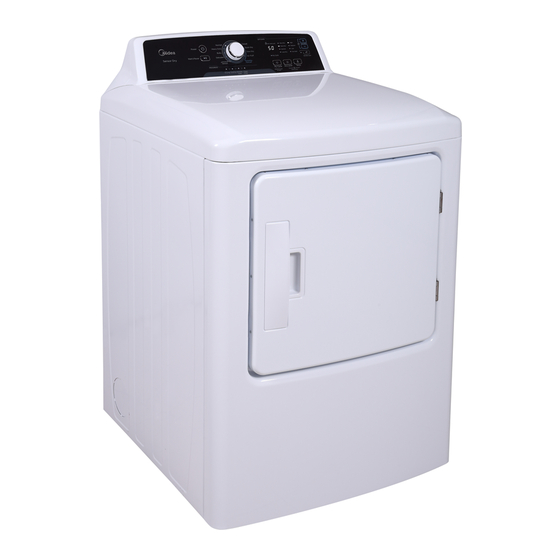
Midea MDD160-V062/F01-US1305 Service Manual

Midea MDD160-V062/F01-US1305 Service Manual

Dryer machine

Advertisement

Laundry
DRYER MACHINE
Service Manual
Models:
MDD160-V062/F01-US1305
MDD160-VG062/F01-US13
MLE41N1AWW
MD041EWAL10C1
MLG41N1AWW
MD041GWAL10C1
READ THIS MANUAL CAREFULLY TO DIAGNOSE TROUBLES CORRECTLY BEFORE OFFERING SERVICE.

Advertisement

Table of Contents
loading

Summary of Contents for Midea MDD160-V062/F01-US1305

  • Page 1 Laundry DRYER MACHINE Service Manual Models: MDD160-V062/F01-US1305 MDD160-VG062/F01-US13 MLE41N1AWW MD041EWAL10C1 MLG41N1AWW MD041GWAL10C1 CAUTION READ THIS MANUAL CAREFULLY TO DIAGNOSE TROUBLES CORRECTLY BEFORE OFFERING SERVICE.
  • Page 2 Service manual for Dryer Machine CONTENTS 1. PRECAUTION ......................6 1.1 Safety precaution ........................6 1.2 Warning ............................ 6 1.3 Caution ............................. 8 2. HOW TO USE ......................9 2.1 Controls and function ....................... 9 2.2 Cycle guide with option settings ..................... 11 3.
  • Page 3 Service manual for Dryer Machine Midea America Company WARNING: For your safety the information in this manual must be followed to minimize the risk of fire or explosion, or to prevent property damage, personal injury or death. –Do not store or use gasoline or other flammable vapors and liquids in the vicinity of this or any other appliance.
  • Page 4 Service manual for Dryer Machine WARNING This conversion kit shall be installed by a qualified service agency in accordance with the manufacturer’s instructions and all applicable codes and requirements of the Authority Having Jurisdiction. The information in these instructions must be followed to minimize the risk of fire or explosion or to prevent property damage, personal injury, or death.
  • Page 5 Service manual for Dryer Machine Temperature conversion: ℃ ℉ ℃ ℉ ℃ ℉ 64.4 62.6 60.8 57.2 55.4 53.6 51.8 102.2 100.4 48.2 98.6 46.4 96.8 44.6 42.8 93.2 91.4 39.2 89.6 37.4 87.8 35.6 33.8 84.2 zero 82.4 30.2 80.6 28.4 78.8...
  • Page 6 Service manual for Dryer Machine Midea America Company 1. PRECAUTION 1.1 Safety precaution For your safety the information in this manual must be followed to minimize the risk of fire or explosion, or to prevent property damage, personal injury or death.
  • Page 7 Service manual for Dryer Machine  such as vegetable oil, cooking oil, machine Packaging material can be dangerous for oil, flammable chemicals, thinner, etc., or children. There is a risk of suffocation! Keep anything containing wax or chemicals, such all packaging from children. ...
  • Page 8 Residual oil on clothing can ignite  Because of continuing product spontaneously. The potential for improvements, Midea America reserves the spontaneous combustion increases when right of change specifications without notice. items containing vegetable oil or cooking oil For complete details, see the Installation are exposed to heat.
  • Page 9 Service manual for Dryer Machine 2. HOW TO USE 2.1 Controls and function 1. Power button Press once to turn your dryer on.Press again to turn your dryer off.If the dryer is left on for more than10 minutes without any buttons beingpressed, the unit will automaticallyturn OFF. 2.
  • Page 10 Service manual for Dryer Machine Press and hold for 3 seconds to remember your favorite drying cycle. Press once to load your favorite cycle setting. 9. Dry Level button Press the button to select the dryness level. Different dryness level will result in different drying time.
  • Page 11 Service manual for Dryer Machine 2.2 Cycle guide with option settings * Table in grey is an initial setting. Dots are all optional functions you can select. ------------------------------------------------------------------------------------------------------------------------------------------------------- - 11 -...
  • Page 12 Service manual for Dryer Machine 3. DIMENSION AND INSTALLATION 3.1 Unit dimension The dryer should be located where there is enough space at the front for loading the dryer, and enough space behind for the exhaust system. - This dryer is factory-ready for the rear exhaust option. To exhaust out the bottom or left, use the accessory exhaust kit.
  • Page 13 Service manual for Dryer Machine Alcove or closet installations The dryer must be exhausted to the outside to reduce the risk of fire when installed in an alcove or closet.  No other fuel-burning appliance should be installed in the same closet as the dryer. ...
  • Page 14 Service manual for Dryer Machine drafts and entry of wildlife. Never use an exhaust hood with a magnetic damper. 12. The hood should have at least 12 inches (30.5cm) of clearance between the bottom of the hood and the ground or other obstruction. The hood opening should point down. 13.
  • Page 15 Service manual for Dryer Machine  The dryer is not suitable for installation in a mobile home.  Remove the door from all discarded appliances to avoid the danger of a child being trapped and suffocating. Exhausting The dryer shall not be exhausted into a chimney, a wall, a ceiling, an attic, a crawl space, or a concealed space of a building.
  • Page 16 Service manual for Dryer Machine Gas dryers installed in residential garages must be raised 18" (46cm) above the floor. Additionally, a 1/8" (0.3cm) N.P.T. (National Pipe Thread) plugged tapping, accessible for test gauge connection, must be installed immediately upstream of your dryer’s gas supply connection. Your dryer must be disconnected from the gas supply pipe system during any pressure testing of the system.
  • Page 17 Service manual for Dryer Machine terminals, open-end spade lugs with turned up ends, or with tinned leads.  Do not reuse a power supply cord from an old dryer. The power cord electric supply wiring must be retained at the dryer cabinet with a suitable UL-listed strain relief. ...
  • Page 18 Service manual for Dryer Machine C. Green or bare copper wire of the power cord D. Neutral grounding wire (White) E. Neutral wire (white or center wire) F. 3/4" (1.9cm) UL-listed strain relief Gas models  Your dryer has a cord with an equipment-grounding conductor and a grounding plug. ...
  • Page 19 Service manual for Dryer Machine  All gas installations must be done in accordance with the National Fuel Code ANSI/Z2231 - Latest Revision (for the U.S.) or CAN/CGA - B149 Installation Codes - Latest Revision (for Canada) and local codes and ordinances. Installation Steps For the proper installation, we recommend that you hire a qualified installer.
  • Page 20 Service manual for Dryer Machine D r y e r W a l l T a p e M a k e s u r e y o u r U s e a 4 i n c h . ( 1 0 . 2 c m ) D u c t d r y e r i s i n s t a l l e d d i a m e t e r r i g i d m e t a l...
  • Page 21 Service manual for Dryer Machine Check all gas connections for leaks using a soap solution. If bubbles appear, tighten the connections and recheck. DO NOT use an open flame to check for gas leaks. 7. Using a level, check your dryer and make the necessary adjustments to the leveling legs. 8.
  • Page 22 Service manual for Dryer Machine 4. TROUBLE SHOOTING 4.1 Test mode by Control Make sure the door are closed, press [Time Adjust] and [Buzzer] at the same time within 3s after power on, then unit will go into test mode, scree will show St. 4.2 Test modes 1.
  • Page 23 Service manual for Dryer Machine 4. Press [Time Adjust] again, screen will show 04, NTC test. If NTC error, error code “E5” will show up, or the screen will show current temp. 5. Press [Time Adjust] again, screen will show 05, and unit will operate normally. 6.
  • Page 24 Service manual for Dryer Machine 4.4 Wiring diagram and terminals ELECTRIC MODEL GAS MODEL ① DOOR SWITCH ① DOOR SWITCH ② L1 ② L ③ / ③ / ④ N ④ N ① LAMP ① LAMP ② / ② / ③...
  • Page 25 Service manual for Dryer Machine ELECTRIC MODEL: GAS MODEL: ------------------------------------------------------------------------------------------------------------------------------------------------------- - 25 -...
  • Page 26 Service manual for Dryer Machine 4.5 Trouble shooting Problem What To Do ● All wires are hooked up to their corresponding terminals. ● Dryer is plugged in. ● Blown fuse or circuit breaker. ● Door switch functional…door closed. ● Star/Pause button rotary selector dial functional. Will not start or ●...
  • Page 27 Service manual for Dryer Machine ● Open flame switch. ● Open igniter. ● Shorted booster coil. ● Open wiring. ● Bad motor switch (Neutral supply). ● No power from control (L1 supply). If the igniter heats up but the main burner flame is not ignited, remove power and using an ohmmeter, check the following: Igniter glows –...
  • Page 28 Service manual for Dryer Machine COMPONENT TESTING PROCEDURES THERMISTOR THERMOSTAT 1 THERMAL FUSE 70/50℃, 25A 91℃, 14A HI-limit Thermal cut-off ● Thermostat 1 resistance < 1Ω (Electronic & ● Thermal fuse resistance < 1Ω (Electronic & GAS) - If resistance is infinity, replace Thermostat 1. GAS) ●...
  • Page 29 Service manual for Dryer Machine GAS MODELS ONLY FLAME SENSOR THERMOSTAT 1 10RS 120V ● Flame sensor resistance < 1Ω 230/160F 25A (60T21) - If resistance is infinity, replace Flame sensor. Hi-Limit ● Thermostat 1 resistance < 1Ω IGNITER - If resistance is infinity, replace Thermostat 1. 120V 60Hz THERMOSTAT 2 ●...
  • Page 30 Service manual for Dryer Machine 5. HOW TO DISASSEMBLY THE UNIT Caution Disconnect the electrical power. Turn off the gas supply. 1. Remove the control panel 1.1 Remove the screws that is used to fix the control panel with a screwdrive;...
  • Page 31 Service manual for Dryer Machine 4. Remove the back cover 4.1 Remove the screws that is used to fix power line; 4.2 Pull out the terminals; 4.3 Remove the screws on the back cover; 4.4 Take down the back cover; 4.
  • Page 32 Service manual for Dryer Machine 6. Remove the heater assy 6.1 Pull out all the terminals; 6.2 Remove the screw that is used to fix the heater assy; 6.3 Take down the heater assy; 6.4 Remove the thermostat; 6. Remove the burner assy (Gas model only) 6.1 Pull out all the terminals;...
  • Page 33 Service manual for Dryer Machine Install the conversion kit: This kit is acceptable for: MDD160-VG012/F0110E-US13/ FFRG4120** This kit comprises one nozzle( Orifice Size:1.2mm) and one valve cover. This kit is used for LP GAS(Propane). 7(a). Change the thermostats (Gas model only) 7(b).
  • Page 34 Service manual for Dryer Machine 7(e). Change the burner (Gas model only) 7(f). Change the gas valve (Gas model only) 7(g). Change the nozzle for LP (Gas model only) 7(g).1 Remove the 2 screws fixing the burner 7(g).2 Remove the burner 7(g).3 Remove the nozzle with spanner 3/8", torque in range from 25 to 45 in.lbs...
  • Page 35 Service manual for Dryer Machine 7(h). Take care all ternimals. (Gas model only) 8. Remove the Door assy 8.1 Remove the screws on the Door Hinge and Take down the Door assy; 9. Remove the Door Hinge 10. Remove the Door seal ------------------------------------------------------------------------------------------------------------------------------------------------------- -...
  • Page 36 Service manual for Dryer Machine 11. Deleave the Door assy 11.1 Remove all 12 screws around the door. 11.2 Depart the door front and back. 12. Remove the handle Take care the slots fixing the handle. 13. Remove the door lock. Take care the slots.
  • Page 37 Service manual for Dryer Machine connecting to the Front Cover; 16. Take down the Lint Filter 17. Pull out the terminals as shown on the fig. 18. Remove the screws as shown on the fig. ------------------------------------------------------------------------------------------------------------------------------------------------------- - 37 -...
  • Page 38 Service manual for Dryer Machine 19. Remove the air flow channel assy 20. Remove the temperature fuse. 21. Remove the temperature sensor 22. Remove the temperature switch ------------------------------------------------------------------------------------------------------------------------------------------------------- - 38 -...
  • Page 39 Service manual for Dryer Machine 23. Remove the belt switch. 24. Remove the idle wheel. 25. Remove the motor and fan assy. ------------------------------------------------------------------------------------------------------------------------------------------------------- - 39 -...
  • Page 40 Service manual for Dryer Machine 26. Remove the fan 26.1 Disconnect all hooks fixing the fan cover. 26.2 Remove the nut fixing the fan. 27. Remove the motor. 27. Remove the wheels supporting the drum. ------------------------------------------------------------------------------------------------------------------------------------------------------- - 40 -...
  • Page 41 Service manual for Dryer Machine 6. EXPLODED VIEW ELECTRIC MODEL ------------------------------------------------------------------------------------------------------------------------------------------------------- - 41 -...
  • Page 42 Service manual for Dryer Machine GAS MODEL ------------------------------------------------------------------------------------------------------------------------------------------------------- - 42 -...
  • Page 43 Service manual for Dryer Machine 7. SPARE PARTS ELECTRIC MODEL Part Name Quantity Door Handle Door Cover Door Cover Back Door Gasket Door Hinge Assembly Fixed Seat Front Panel Cover Switch Front Panel Cover (2) Door Pin Front Panel Cover (1) Fireproofing Plate Front Air Flue Assembly Lint Filter Assembly...
  • Page 44 Service manual for Dryer Machine Heater Front Panel Pin Adjustable Foot Assembly Side Plate Rear Vent Pipe Assembly Belt 14.1 Felt 14.2 Basket Assembly 14.3 Felt 14.4 Heating Wind Cover Assembly 14.5 Bearing House Assembly 14.6 Cabinet Cover Back Support Power Cord Cover Internal Wire Assembly Panel Installed Base...
  • Page 45 Service manual for Dryer Machine GAS MODEL Part Name Quantity Door Handle Door Cover Door Cover Back Door Gasket Door Hinge Assembly Fixed Seat Front Panel Cover Switch Front Panel Cover (2) Door Pin Front Panel Cover (1) Fireproofing Plate Front Air Flue Assembly Lint Filter Assembly Sponge...
  • Page 46 Service manual for Dryer Machine Thermostate Burner Lgnition Needle Support Gas Valve Assembly Internal Wire Assembly Heater Support 7.10 Flame Switch Front Panel Pin Adjustable Foot Assembly Side Plate Rear Vent Pipe Assembly Belt 13.1 Felt 13.2 Basket Assembly 13.3 Felt 13.4 Heating Wind Cover Assembly...
  • Page 47 Service manual for Dryer Machine 8. SPECIFICATION Model No. MDD160-V062/F01-US1305 MDD160-VG062/F01-US13 ERP No. 22038210000721 22038210000722 Picture Heater Type Electric Power Supply 120/240V/60Hz 120V/60hz Capacity (Cuft) CEF (lb/kWh/cycle) 3.73 Energy Star, 2015 Certification, safety Watts (Heater) 4800W 16000BTU/h input power(watts) 5230...
  • Page 48 Service manual for Dryer Machine Door switch error alarm auto-power off Dimensions & loading Width, body, Inch Depth, body, Inch 30 1/8 30 1/8 Height, body, Inch Width, body, mm Depth, body, mm Height, body 1092 1092 Net weight, lbs 127 4/5 127 4/5 Gross weight, lbs...

Table of Contents