
Related Manuals for Midea MDG80-CH05/B05E-EU(A2)-P2


Summary of Contents for Midea MDG80-CH05/B05E-EU(A2)-P2
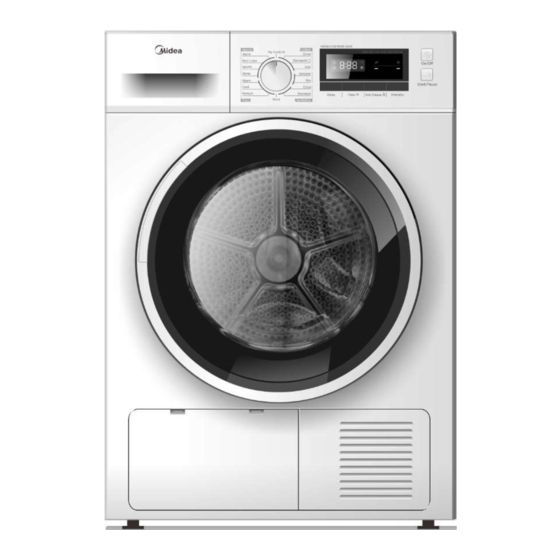
- Page 1 Tumble Heat Pump Dryer Model: MDG80-CH05/B05E-EU(A2)-P2 Service Manual Note: Before service the unit, please read this manual first. Contact with your service center if meet problem...
-
Page 2: Table Of Contents
Contents 1. PRECAUTION…………………………..……………………………………………………. 1.1 SAFETY PRECAUTION 1.2 Servicing Precautions 1.3 CAUTIONS FOR SAFETY 2. FACTORY PATTERN DETECTION ……………………………………………………………………………………………………..… 3. UNPACKING WAYS OF MAIN PARTS ………………………………………………………………………………………………… 3.1 Common questions when disassembling the machine 3.2 Methods of disassembling the main subassemblies 4. MALFUNCTIONS CODES AND EXPLANATIONS ……………………………………………………………………………….. 4.1 Condensing dryer alarm code 5. -
Page 3: Precaution
1 Precaution When performing troubleshooting and part replacement during servicing, note the following safety precautions: §1.1 Safety Precautions 1-1-1. Use Genuine Parts The components of the washing machine have safety features such as non-combustibility and voltage withstanding. Therefore, always use the same part as suggested by the maker. In particular, be sure to use only designated parts in case of major safety parts identified by the marker. -
Page 4: Servicing Precautions
1 Precaution §1.2 Servicing Precautions 1-2-1. Observe Warnings Be sure to follow special warning and precautions that are described on part labels and in the owner's manual. 1-2-2. Parts Assembly and Wiring Be sure to use insulation material (such as tube and tape). And be sure to restore all parts and wires to their original position. -
Page 5: Cautions For Safety
§1.3 CAUTIONS FOR SAFETY • Please observe the following notes for safety. • The symbols indicate as follows. Symbol Meaning Indicates possibility of death or serious injury of a repair technician and a person nearby through the misconducted work, or of a user by a defect of the product after the work performed by the technician. - Page 6 §1.3 CAUTIONS FOR SAFETY • Please observe the following notes for safety. • The symbols indicate as follows. WARNING • Advise the customer to keep children out of the work place. Children may be injured with a tool or a disassembled part. OUT OF CHILD •...
- Page 7 §1.3 CAUTIONS FOR SAFETY WARNING • Use an exclusive A socket for the washing machine. Otherwise, an electric shock or ignition may cause. Sharing the same socket with other instrument causes heating of a branch socket and USE EXCLUSIVE result in a fire. SOCKET •...
- Page 8 §1.3 CAUTIONS FOR SAFETY WARNING • Do not put inflammable into the washing tub. Do not put cloths stained with kerosene, gasoline, benzene, thinner, alcohol, AVOID etc. lt may cause a fire or explosion. INFLAMMABLE • Do not touch the laundry before the spin basket stops completely.
-
Page 9: Factory Pattern Detection
2 Factory Pattern Detection When the repairing work is done, select the "Time" programme to operate the dryer for at least 10 minutes. During this time, check if the dryer the tumble turnning right and there is no undesired noise. After the programme is done, open the door, use your hand to check the tumble. - Page 10 3 DISASSEMBLY WARNING • Unplug power cord for the work such as disassembling which is not unnecessary to power on . Do not hold the plug by a wet hand. Failing to unplug may cause an electric shock. UNPLUG POWER ITEM PICTURE Unfasten the two screws...
-
Page 11: Unpacking Ways Of Main Parts
3 UNPACKING WAYS OF MAIN PARTS ITEM PICTURE Pull out the knob cover Pull out all connection pin behind the Control panel sub MDG80-CH05/B05E-EU(A1)-P1 MDG80-CH05/B05E-EU(A2)-P2 Remove 2 pcs of screws, then take off the control box The control box The central panel... - Page 12 3 UNPACKING WAYS OF MAIN PARTS ITEM PICTURE Unfasten the 2 screws on the door hinge Unfasten 11 screws on the inner ring Remove the inner ring Take off the door hinge Take off the door plunger...
- Page 13 3 UNPACKING WAYS OF MAIN PARTS ITEM PICTURE Pull out the drain pipe and unscrew 1 screw on the rear cover of drain pump kit. Remove all of the screws on the back cover and take it off. Unscrew 4 screws at the back of side plates.
- Page 14 3 UNPACKING WAYS OF MAIN PARTS ITEM PICTURE Take off the strainer and door sealing ring. Unscrew two screws to take off door lock assembly, open the movable cover plate and cooling fan cover plate. Move the Yellow clasp and take off the maintenance cover.
- Page 15 3 UNPACKING WAYS OF MAIN PARTS ITEM PICTURE Unscrew 2 screws on the side plates(left and right). Take off two side plates, unfasten the belt by pulling it outward. Fix the motor shaft with a spanner and rotate the wind wheel anticlockwise to take it off.
- Page 16 3 Disassembling Ways of Main Parts ITEM PICTURE Unfasten the screw of the bearing box. Pull out the inlet and return pipes from all the buckles. Lift up the tub assembly and move it backwards to separate it Unscrew 4 screws on the bearing house assembly and remove the bearing cover.
- Page 17 3 Disassembling Ways of Main Parts ITEM PICTURE Unscrew 4 screws on barrel. Remove 2 lifters. Unfasten 5 screws(3 in the front and 2 in the back) and take off the front support. Unfasten the screw on the cooling fan and the reinforce plate. Unfasten 1 screw in the back and 2 screws in the front to take off the base.
- Page 18 3 Disassembling Ways of Main Parts ITEM PICTURE Pull out all the connections of the filter and control box. A: connection of the tub lamp B: connection of the cooling fan C: connection of the humidity sensor D: connection of the door lock Pull out the connection of temperature sensor and three terminals on the compressor.
- Page 19 3 Disassembling Ways of Main Parts ITEM PICTURE Unfasten 5 screws of the front support(3 in the front and 2 in the back) to take off the front support. The front support assembly contains a bucket lamp, two wheels, a humidity sensor, and a felt ring seal .
- Page 20 3 UNPACKING WAYS OF MAIN PARTS ITEM PICTURE Unfasten the screws of reinforcing plate and unscrew the compression gasket. Remove the upper foam duct. Unfasten 2 screws to remove the motor and unfasten 3 screws to remove the motor bracket Unfasten the nuts(M6) and pull out the pin of temperature sensor and the...
-
Page 21: Malfunctions Codes And Explanations
4 MALFUNCTIONS CODES AND EXPLANATIONS MDG80-CH05/B05E-EU(A1)-P1 MDG80-CH05/B05E-EU(A2)-P2 Lamp Display Error Error description Error type Check content code(flashing) Pause the Check the water Container is full; program; storage container; Water pump failure Can restore after Check the water pump ; or water level sensor... - Page 22 5 TROUBLESHOOTING Circuit diagram of dryer The circuit program Wiring connection figure Neutral wire Live wire + Drain pump + Cooling fan Motor Humidity sensor Compressor Door switch + Lamp Communication between Displayed panel and Control panel Water level sensor +NTC1+NTC2...
-
Page 23: Troubleshooting
5 Troubleshooting 5.1 The dryer breaks down and the control panel can not display The dryer breaks down and the control panel can not display Check and find if the Check and find if outlet is powered Replace the fuse fuse is damaged Switch off the program P0 of program controller;... -
Page 24: The Drum Does Not Spin But The Control Panel Can Display
5 Troubleshooting 5.2 The drum does not spin but the control panel can display The drum does not spin but the panel control can display Check and find if the belt Reassemble or replace the belt is loosened or broken Check and find if the terminals of P3 are Plug well the terminals... -
Page 25: The Heating System Does Not Work
5 Troubleshooting 5.3 The heating system does not work The heating system does not work The use of the environment in Stop running or to move the machine to the specified range the appropriate range Whether the program to To choose the correct procedure choose the correct Check the filter, the evaporator Clean filter, the surface of the evaporator... -
Page 26: The Dryer Marks Abnormal Noise When Operating
5 Troubleshooting 5.4 The dryer makes abnormal noise when operating The dryer makes abnormal noise when operating Check and find if the screw tightening the drum and baffles become loose Fasten the screws and cause the screws to scratch on the side panel Replace the front support wheel Check and find if the front support... -
Page 27: The Dryer Gives Out Abnormal Smell When Operating
5 Troubleshooting 5.5 The dryer gives out abnormal smell when operating The dryer gives out abnormal smell when operating Whether the belt slipping Replace big belt rubber produced Solve the stall, if motor damage should be Whether motor stall replaced motor Whether any other electrical Replace the corresponding electrical components damage... - Page 28 5 Troubleshooting 5.7 E32 after the cycle finished. E32 after the cycle finished. Check the humidity sensor Clean or replace the humidity sensor whether blocked by fluff or not Replace the control panel 5.8 E33 are lighting E33 are lighting Check and find if the terminals of P3 Plug well the terminals are loosened...
-
Page 29: Heat Pump System Parts Repair
5 Troubleshooting 5.7 Heat pump system parts repair: Warning : If the heat pump system parts need repair , we suggest you buy new machines rather than repair. The heat pump system parts include capillary , dry filter, connect pipe, condenser, evaporator, compressor and etc. - Page 30 5 Troubleshooting 5.7.2Condenser and evaporator repair Operation step Picture Release refrigerant Melt condenser and evaporator Prepare new part Weld condenser , evaporator, capillary, dry filter and connect pipe Vacuumize Fill refrigerant ( R134a &310g ) Seal Face lifting and leak hunting...
- Page 31 5 Troubleshooting 5.7.3 Compressor repair Operation step Picture Release refrigerant Melt compressor and connect pipe Prepare new part Weld compressor and connect pipe Vacuumize Fill refrigerant ( R134a &310g ) Seal Face lifting and leak hunting...
-
Page 32: Check Point Of Circuit
6 CHECK POINT OF CIRCUIT Before repairing, use multimeter to judge circuit stand of fail Part Picture Test Description parameters With a multimeter to test the connection at Electric both ends of the N and L are each turned 250VAC 50/60HZ Filter on. -
Page 33: Service Tools
7 Service tools Number Tools Suitable kit Sleeve(14#)or spanner drum tub assembly Sleeve(10#)and pliers Wheel Assembly Other tools Common service tools (screwdriver,pliers and so on) Vacuum pump, welding torch, Weld and cut the pipe butane and oxygen carrier, Vacuum and charge. pipe cutter and so on. -
Page 34: Appendix
8 Appendix Machine function description, program description, the whole detailed parameter table, fault codes, etc. Please refer to the instructions. Note: The schedule for the reference value. - Page 35 The end!
Need help?
Do you have a question about the MDG80-CH05/B05E-EU(A2)-P2 and is the answer not in the manual?
Questions and answers