Advertisement
Table of Contents
- 1 User Manual
- 2 Table of Contents
- 3 Safety Information
- 4 Transport & Installation
- 5 Attention & Advice
- 6 Identifying Parts of the Dryer
- 7 Quick Start
- 8 Description of Controls
- 9 Programme Table
- 10 Drying Functions
- 11 Operation Instruction
- 12 Cleaning & Maintenance
- 13 Troubleshooting Guide
- 14 Repairs, Service & Warranty
- 15 Specifications
- Download this manual
Advertisement
Table of Contents

Related Manuals for Midea MDC07


Summary of Contents for Midea MDC07
-
Page 1: User Manual
Condenser Dryer 7kg USER MANUAL MDC07... -
Page 2: Table Of Contents
CONTENTS Safety Information..........................2 Transport & Installation........................5 Attention & Advice..........................6 Identifying Parts of the Dryer......................7 Quick Start.............................8 Description of Controls........................9 Programme Table..........................10 Drying Functions..........................11 Operation Instruction........................13 Cleaning & Maintenance........................14 Troubleshooting Guide........................16 Repairs, Service & Warranty......................17 Specifications..........................18... -
Page 3: Safety Information
SAFETY INFORMATION Congratulations on your new Midea condenser dryer. This manual contains important information on the installation, use and care of your appliance. Please read this manual carefully before use. Follow instructions and keep the manual for future reference. CAUTION: HOT SURFACE! - Page 4 SAFETY INFORMATION 7. Items that have been soiled with substances such as cooking oil, acetone, alcohol, petrol, kerosene, spot removers, turpentine, waxes and wax removers should be washed in hot water with an extra amount of detergent before being dried in the tumble dryer. 8.
- Page 5 SAFETY INFORMATION Electric Shock Hazard 1. Do not pull the power cord forcefully to pull out the mains plug. 2. Please do not plug/draw the mains plug with wet hands. 3. Do not damage the power cord and the power plug. Injury Danger 1.
-
Page 6: Transport & Installation
TRANSPORT & INSTALLATION Transport Move cautiously. Do not grasp any salient parts of machine. The machine door can not be used as the handle for delivery. Installation Position Please install the dryer on solid and flat ground 2. Please do not place the dryer on the slope, soft carpet or wooden floor. 3. -
Page 7: Attention & Advice
ATTENTION & ADVICE Attention Before the first cycle, the dust and grease may remain in this dryer during the period of manufacture and transportation. To avoid contaminating your clothes, please follow these steps: Put some clean rags into the drum Plug the power Press “On/Off”... -
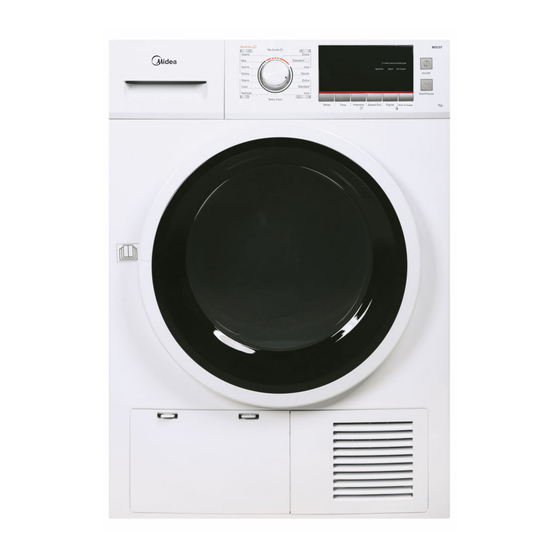
Page 8: Identifying Parts Of The Dryer
IDENTIFYING PARTS OF THE DRYER Control panel Container Power cord Door Drum Lint filter Air inlet Handle Maintenance flap Hose holder External drainage hose External Drain Hose Installation The water container does not require to be emptied when water is externally drained. Step 2: Insert the external drainage hose. -
Page 9: Quick Start
QUICK START 1. Open the door and 10.Unplug the power cord load the laundry 9.Press the 【On/Off】button 2 Close the machine door 8. Clean the lint filter 3 Plug the power cord and empty container 4.Press the 【On/Off】button 7. Take out the laundry when finished 6. -
Page 10: Description Of Controls
DESCRIPTION OF CONTROLS 1. Programme Selection Knob 2. Display Window 3. Function Buttons (Delay, Time, Intensity, My Cycle, Speed Dry, Signal, Anti-Crease, Child lock) 4. Start / Pause Button 5. On / Off Button Display Delay start Child lock Remaining Time indicator / Error message Cycle phase status Clean filters (warning) Empty water container (warning) -
Page 11: Programme Table
PROGRAMME TABLE Weight Programme Application / Properties Delay Time (max) For cottons and coloureds made of cotton or linen. Extra To dry cotton pieces of clothing. Drying level: extra dry. Cotton Standard 7.0kg To dry cotton pieces of clothing. Drying level: cupboard dry. Iron To dry cotton pieces of clothing. -
Page 12: Drying Functions
DRYING FUNCTIONS 1.【Delay】 With the delay function you can delay the programme start from 0 to 24 hours. When the programme starts, the delay start time begins to count down and the icon on the display blinks. Steps in details: (1). - Page 13 DRYING FUNCTIONS 5.【Speed Dry】 Use this function to reduce the drying time when a Speed Dry programme is selected. 6.【Signal】 Use to turn the buzzer on or off. Default setting of the buzzer is on. Press it to turn it off if needed. When the buzzer is on: (1) The dryer will give the leading sound when press the extra function buttons.
-
Page 14: Operation Instruction
OPERATION INSTRUCTION Select the Programme 1. Press the【On/Off 】 key. When the LED display screen brightens up, rotate the programme knob to select the desired programme. 2. Select the【Delay】,【Time】,【Intensity】,【 Speed dry】,【Signal】or【Anti-Crease】 functions for additional option. 3. Press the【Start/Pause】button. Programme Start The drum will keep rotating after the programme starts, the state light in the display area will flash in sequence, the remaining time displayed will change automatically. -
Page 15: Cleaning & Maintenance
CLEANING & MAINTENANCE Always disconnect the clothes dryer from the mains power source before performing any maintenance Ÿ or cleaning of the appliance. For optimal performance, regular maintenance and cleaning is highly recommended. Ÿ Regular maintenance will extend the service life of the clothes dryer. Ÿ... - Page 16 CLEANING & MAINTENANCE Wash Air Condenser - Leave the dryer to cool down. - Residual water may escape, place an absorbent cloth under the maintenance flap. 1. Unlock the maintenance flap. 2. Completely open maintenance flap. 3. Screw both locking levers towards each other. 4.
-
Page 17: Troubleshooting Guide
If the clothes dryer does not perform as expected, malfunctions, or an alarm is sounding, please check the following list of possible solutions. If a solution cannot be found or the problem persists, please contact Midea service (refer to page 17). Do not, under any circumstance, dismantle the appliance yourself. -
Page 18: Repairs, Service & Warranty
Please refer to the enclosed warranty card or visit www.mideaappliances.com.au for warranty information. Ensure you have the appliance model number and proof of purchase handy before calling Midea Customer Care to enquire about a warranty claim. Complete and retain the following information for your records: Model No. -
Page 19: Specifications
SPECIFICATIONS Model MDC07 Power supply 220-240V~ 50Hz Rated power 2000W Ambient temperature +5ºC ~ +35ºC Product dimensions (W x D x H) 595 x 615 x 845(mm) Rated drying capacity 7.0kg Net weight 42kg This product is subject to continuous improvement, specifications are subject to change without prior notice.
Need help?
Do you have a question about the MDC07 and is the answer not in the manual?
Questions and answers
my midea dryer is showing a c9 code how do i fix it