
Related Manuals for Midea MDS70-V032_A0431-EU18-P1


Summary of Contents for Midea MDS70-V032_A0431-EU18-P1
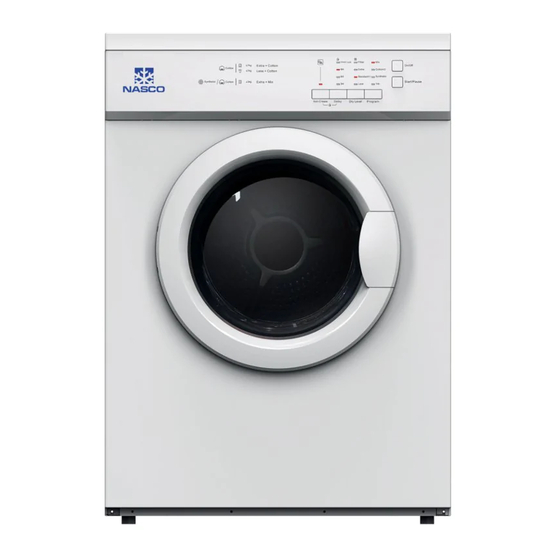
- Page 1 Dryer Model:MDS70-V032_A0431-EU18-P1 Service Manual Note: Before service the unit, please read this manual first. Contact with your service center if meet problem...
-
Page 2: Table Of Contents
Contents 1 PRECAUTION………………….………………..……………………………………………………….3 1.1 Safety Precautions 1.2 Servicing Precaution 1.3 Cautions For Safety 2 UNPACKING WAYS OF MAIN PARTS…………………………………………………………..5 3 MALFUNCTIONS CODES AND EXPLANATIONS …………………………………...…..12 4 TROUBLESHOOTING………………………………………………………………………..………13 4.1 The Control panel not displayed after selecting the program 4.2 The drum not worked after selecting the program 4.3 Maintenance non‐heating malfunction 4.4 Drum worked ,but the effect of drying is not good 4.5 Noise 4.6 Peculiar smell appears when the dryer is working 5 CHECK POINT OF CIRCUIT ……………………………………………………………….…….. 17 6 SERVICE TOOLS……..………………..............18 7 APPENDIX………………………………………………………………………………………..……..19... -
Page 3: Precaution
1 Precaution When performing troubleshooting and part replacement during servicing, note the following safety precaution. 1‐1.Safety Precautions 1‐1‐1.Use Genuine Parts The components of the Tumble Dryer machine have safety features such as non‐combustibility and voltage withstanding. Therefore, always use the same part as suggested by the maker. In particular, be sure to use only designated parts in case of major safety parts identified by the marker. -
Page 4: Cautions For Safety
1 Precaution 1.3 Cautions For Safety Please observe the following notes for safety. • The symbols indicate as follows. • Symbol Meaning Indicates possibility of death or serious injury of a repair technician and a person nearby through the misconducted work, or of a user by a defect of product after the work performed by the technician. WARNING Indicates possibility of injury or physical damages* of a repair technician and a person nearby through the misconducted work, or of a user by a defect of the product after the work performed by the technician. CAUTION Graphic Symbol Meaning Caution : Read the operator’s manual before using this product! caution, hot surface caution, risk of fire Unplug power cord for the work such as disassembling which is not unnecessary to power on . Do not hold the plug by a wet hand. Failing to unplug may cause an electric shock. UNPLUG POWER... -
Page 5: Unpacking Ways Of Main Parts
2 Unpacking Ways Of Main Parts Ordinary Information 1.Please unplug the power cord when you disassemble or maintain the product; 2.Please use the regulation connector lug between the wires as much as possible. Then crimp them firmly by the proper tools and bundle them by the insulating tape; 3.When you plug the wires, please insert the plug to the bottom so it is not easily to be unplugged; 4.Make sure that the wires cannot touch the mobile part such like the drum, and also cannot touch the sharp/hard‐edged party and high‐heat part (motor); 5.Please preserve the screws when you take them down. You will use them when you install the dryer; 6 6.ometimes you must operate the dryer when it is electriferous. In this case, you must be careful and pay attention to the electric shock. - Page 6 2 Unpacking Ways Of Main Parts Steps of disassembling machine Pictures 1. Remove the top cover components of the case (1) Remove the screw cap; (2) Remove the screws fixed roof component; (3) Take out the roof component. 2.Remove the back board component of the case (1) remove the screws fixed back board ; (2) remove the screws fixed thermostat support component; (3) pulled out wire harness assembly and Line firm and terminal connected with back board; (4) take down the back board component. 2‐1. Removed the back vent flange 2‐2. Remove the power line...
- Page 7 2 Unpacking Ways Of Main Parts Steps of disassembling machine Pictures 2‐3. Remove the filter 3. remove the door component (including the door hinge) (1) remove the screws fixed door hinge; (2) take down the door component and hinge. 3‐1. remove the door hinge, front door and back door frame 4. Remove the inner tub assey (1) Remove the reinforced plate; (2) take out the belt from the motor shaft ; (3) removed the screws which is fixed drum kit and automatic thermostat; (4) pull out the terminal connected wire with heating pipe; (5) take out the drum kit and the belt. 4‐1. Remove the body of drum, lifting bar, heating pipe cover and drum shaft, etc 4‐2. Remove the heating pipe, heating pipe cover and its Support...
- Page 8 2 Unpacking Ways Of Main Parts Steps of disassembling machine Pictures 5. Remove the control panel component (1) removed the screws fixed control panel component; (2) Pull out the terminals connected wire with PCB board. 5‐1. Remove the control pannel, PCB board and buttons, etc. 6. Remove the wiring harness (including the thermostat) (1) remove all the line firm fixed wires; (2) pull out the terminals connected the wires with the motor and the door switch ; (3) take out the wires. 6‐1. Remove the automatic thermostat 6‐2. Remove the support components of the manual Thermostat 6‐3. Remove the manual thermostat...
- Page 9 2 Unpacking Ways Of Main Parts Steps of disassembling machine Pictures 7. Remove the front plate assembly (1) remove the screws fixed front plate assembly; (2) take out the front plate assembly 7‐1. remove the door switch plate 7‐2. Remove the support components of the drum 7‐3. Remove the door gasket and front plate 8. Remove the side plates and base assembly (1) remove the screws fixed side plates; (2) take out the side plates and base assembly. 8‐1. Remove the front air duct...
- Page 10 2 Unpacking Ways Of Main Parts Pictures Steps of disassembling machine 8‐2. Remove the impeller 8‐3. Remove the fixd block of the motor 8‐4. Remove the fixd stator of the motor 8‐5. Remove the tight spring 8‐6.Take out the motor components 8‐7. Remove the capacitance...
- Page 11 2 Unpacking Ways Of Main Parts Pictures Steps of disassembling machine 8‐8. Remove the motor bracket, Bottom plate and the air duct Motor Door switch Heating pipe Temperature sensor Power cord...
-
Page 12: Malfunctions Codes And Explanations
3 Malfunctions Codes And Explanations... -
Page 13: Troubleshooting
4 Troubleshooting 4.1 The Control panel not displayed after selecting the program Whether the power socket has voltage or check the fuse check whether the Whether the both wiring harness ends of assemble well or not reliable the connection connector Jack has voltage or not whether The filter is well or not Change the PCB kit Change the filter 4.2 The drum not worked after selecting the program Whether the PCB has whether the strap whether the spring is alarm or not break off well Change the strap Change the spring Whether the connection is well or not Whether the door is lose the door or change closed well or not the door lock Whether the whether the axes is whether the motor connection break off or not wrecked is short or not... -
Page 14: Maintenance Non-Heating Malfunction
4 Troubleshooting 4.3 Maintenance non‐heating malfunction Whether to set up non‐ To choose the new program heating Whether the connect of Reliable connection heater、thermostat and PCB panel is well or not Whether the thermostat is Whether the heater is well well or not or not Change the heater Change the thermostat 4.4 Drum worked ,but the effect of drying is not good Whether the volume make sure the volume of clothes is more of clothes is no more than 6kg or not connect power cord, Whether the filter lint Choose the cotton program, Whether the have been cleaned in clean the filter lint heater is heating or time Whether the connect Whether the Impeller Whether the underprop of heater is well or is well or not was block clean the underprop Whether the thermostat Change the Impeller thermostat is well or not Change the thermostat... -
Page 15: Noise
4 Troubleshooting 4.5 Noise Check the source of voice Whether the Screw which connect to Tub wrap and lifter twist the Screw is loose, cause the Screw and the Side plates Whether the Underprop wheel adjust the axial position of Underprop wheel Whether the Tub shaft is change Tub shaft break off Whether the Pulley Spring is invalidation change Pulley Spring Whether the Motor support change Motor support or install Motor support again Whether the Motor friction change Motor or oscillation is too big change Impeller install Whether the Impeller was Impeller again broke or broke off Whether the Bearing block change Bearing block the Tub shaft install Drain‐hose and the Whether the Drain hose and Overflow‐tube in pipe catch the Overflow tube‐chafe the Side‐board... -
Page 16: Peculiar Smell Appears When The Dryer Is Working
4 Troubleshooting 4.6 Peculiar smell appears when the dryer is working Whether something burning Clean heater in heater Solve the motor blocked , if Whether the motor blocked the motor damaged ,it Whether the belt sliding or Replace the belt wear leading to rubber odor Whether other electrical Replace corresponding components broken down electrical components... -
Page 17: Check Point Of Circuit
5 Check Point Of Circuit Before repairing, use multimeter to judge circuit stand of fail. Parts parameter Measured with a multimeter primary and secondary windings of the motor. Main winding (white‐blue) 30.0 × (1 ± 10%) Ω (20 ℃) Motor Assembly Secondary winding (white ‐ red) 30.0 × (1 ± 10%) Ω (20 ℃) Capacitor Test capacitance value should be 9±5%uF With a multimeter to test the connection at both ends are each turned on. Conducting OK, the replacement is Thermostat not turned on. Measured across the resistor with a multimeter, the resistance line with RT table. According to the prevailing ambient temperature determination, error ± 3 ℃. 5℃: 25KΩ Temperature level 10℃: 20KΩ Sensor 15℃: 15.5KΩ 20℃: 1 2.5KΩ 25℃: 10KΩ... -
Page 18: Service Tools
5 Service Tools 13# 14# Number Tools Suitable kit Drum tub assembly Sleeve (13#) and spanner Capacitance Sleeve(14#) and pliers Impeller Other tools Common service tools (screwdriver,pliers and so on) -
Page 19: Appendix
7 Appendix Machine function description, program description, the whole detailed parameter table, fault codes, etc. Please refer to the instructions. Note: The schedule for the reference value. MDS70-V032_A0 31-EU18-P1说明书... - Page 20 The end!
Need help?
Do you have a question about the MDS70-V032_A0431-EU18-P1 and is the answer not in the manual?
Questions and answers