
Subscribe to Our Youtube Channel
Related Manuals for Midea MLTE45N4BWW


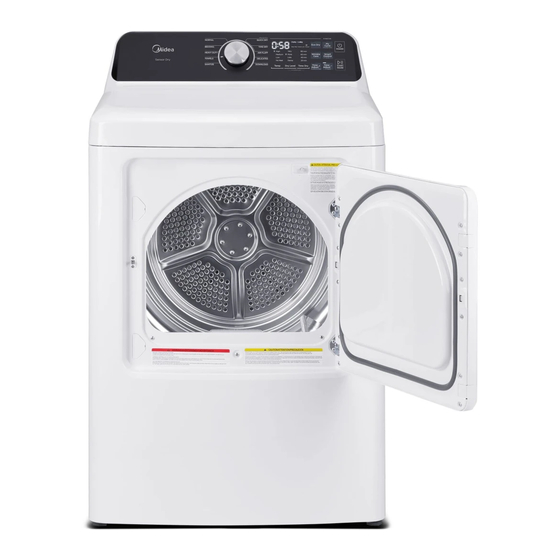
Summary of Contents for Midea MLTE45N4BWW
- Page 1 Laundry DRYER MACHINE Service Manual Models: MDH170-V032/F01-US1305 MDH170-VG032/F01-US13 CAUTION READ THIS MANUAL CAREFULLY TO DIAGNOSE TROUBLES CORRECTLY BEFORE OFFERING SERVICE.
-
Page 2: Table Of Contents
Service manual for Dryer Machine CONTENTS 1. PRECAUTION .......................... 6 1.1 Safety precaution ............................ 6 1.2 Warning ..............................6 1.3 Caution ..............................8 2. HOW TO USE ........................... 9 2.1 Controls and function ..........................9 2.2 Cycle guide with option settings ......................11 3. - Page 3 Service manual for Dryer Machine Midea America Company WARNING: For your safety the information in this manual must be followed to minimize the risk of fire or explosion, or to prevent property damage, personal injury or death. –Do not store or use gasoline or other flammable vapors and liquids in the vicinity of this or any other appliance.
- Page 4 Service manual for Dryer Machine WARNING This conversion kit shall be installed by a qualified service agency in accordance with the manufacturer’s instructions and all applicable codes and requirements of the Authority Having Jurisdiction. The information in these instructions must be followed to minimize the risk of fire or explosion or to prevent property damage, personal injury, or death.
- Page 5 Service manual for Dryer Machine Temperature conversion: ℃ ℉ ℃ ℉ ℃ ℉ 64.4 62.6 60.8 57.2 55.4 53.6 51.8 102.2 100.4 48.2 98.6 46.4 96.8 44.6 42.8 93.2 91.4 39.2 89.6 37.4 87.8 35.6 33.8 84.2 zero 82.4 30.2 80.6 28.4 78.8...
-
Page 6: Precaution
Service manual for Dryer Machine Midea America Company 1. PRECAUTION 1.1 Safety precaution For your safety the information in this manual must be followed to minimize the risk of fire or explosion, or to prevent property damage, personal injury or death. - Page 7 Service manual for Dryer Machine Midea America Company items are quickly removed and spread out that is not grounded adequately and in so that the heat is dissipated. accordance with local and national codes. Turn off the water faucets and unplug the...
-
Page 8: Caution
Because of continuing product items containing vegetable oil or cooking oil improvements, Midea America reserves the are exposed to heat. Heat source such as right of change specifications without notice. your dryer can warm these items, allowing For complete details, see the Installation an oxidation reaction in the oil to occur. -
Page 9: How To Use
Service manual for Dryer Machine Midea America Company 2. HOW TO USE 2.1 Controls and function 1. POWER Button Press to turn your dryer on or off. If your dryer is on for more than 10 minutes without any buttons being pressed, it automatically turns off. - Page 10 Service manual for Dryer Machine Midea America Company when you want to take some garments out for ironing. The unit will beep 8 times when the moisture in the clothes is good for ironing. At this time, you can take those garments out and continue drying the other by pressing the START/PAUSE button once.
-
Page 11: Cycle Guide With Option Settings
Service manual for Dryer Machine Midea America Company 2.2 Cycle guide with option settings * Table in grey is an initial setting. “Y” are all optional functions you can select. * For even better drying effect, please select higher dryness level.. -
Page 12: Dimension And Installation
Service manual for Dryer Machine Midea America Company 3. DIMENSION AND INSTALLATION 3.1 Unit dimension -The dryer should be located where there is enough space at the front for loading the dryer, and enough space behind for the exhaust system. - Page 13 Service manual for Dryer Machine Midea America Company 1 in. (25mm) 24 in.(610mm) 2 in.(51mm) 5 in.(127mm) 3 in. (76mm) 48 in. (31000 mm 24 in. (15500mm 3 in. (76mm) NOTE: The front of the closet must have two unobstructed air openings for a combined minimum total area of 72 sq.in.
-
Page 14: Ducting Requirements
Service manual for Dryer Machine Midea America Company 3.2 Ducting requirements If this new dryer is installed into an existing exhaust system you must make sure: - The exhaust system meets all local, state, and national codes. - That a flexible plastic duct is not used. -
Page 15: Exhausting Requirements
Service manual for Dryer Machine Midea America Company 11. The exhaust duct should end with an exhaust hood with a swing-out damper to prevent back drafts and entry of wildlife. Never use an exhaust hood with a magnetic damper. 12. The hood should have at least 12 inches (30.5cm) of clearance between the bottom of the hood and the ground or other obstruction. -
Page 16: Gas Requirements
Service manual for Dryer Machine Midea America Company 3.4 Gas requirements Use only natural or LP (liquid propane) gases. THE INSTALLATION MUST CONFORM WITH LOCAL CODES, OR IN THE ABSENCE OF LOCAL CODES, WITH THE NATIONAL FUEL GAS CODE, ANSIZ223.1/NFPA 54, LATEST REVISION (FOR THE UNITED STATES), OR THE NATURAL GAS AND PROPANE INSTALLATION CODE, CSA B149.1, LATEST REVISION (FOR CANADA). -
Page 17: Electric Requirements
Service manual for Dryer Machine Midea America Company 3.5 Electric requirements The wiring diagram is located on the back board of the unit. - The improper connection of the equipment grounding conductor can result in the risk of electric shock. Check with a qualified electrician or serviceman if you are in doubt as to whether your dryer is properly grounded. -
Page 18: Grounding
Service manual for Dryer Machine Midea America Company Electric models - Canada only - A 120/240 volt, 60Hz AC approved electrical service fused through a 30-ampere fuse or circuit breaker on both sides of the line is required. - All Canadian models are shipped with the power cord attached. The power cord should be plugged into a 30-ampere receptacle. -
Page 19: Tools Needed In Installation
Service manual for Dryer Machine Midea America Company Tools needed in installation Tools needed: Installation steps CHOOSE THE PROPER LOCATION 1. Move your dryer to an appropriate location for the installation. Consider installing the dryer and washer side-by-side, to allow access to the gas, electrical, and exhaust connections. Place two of the carton cushion-tops on the floor. - Page 20 Service manual for Dryer Machine Midea America Company CONNECT THE GAS LINE (FOR GAS MODELS) Review the “Gas requirements” section. Remove the pipe thread protective cap. Apply a pipe joint compound or about 1 ½” wraps of teflon tape over all threaded connections.
- Page 21 Service manual for Dryer Machine Midea America Company WARNING 1.All gas installations of the dryer must be equipped with Manual Shut-Off valve. 2.Uncoated copper tubing will corrode when subjected to natural gas, causing gas leaks. Use ONLY black iron, stainless steel, or plastic-coated brass piping for gas supply.
- Page 22 Service manual for Dryer Machine Midea America Company Four wire outlet Then choose a 4-wire power supply cord with ring or spade terminals and UL listed strain relief. The 4-wire power supply cord, at least 4 ft. (1.22 m) long, must have 4-wire #10 AWG-mimimum gauge solid copper wires and match a 4-wire receptacle of NEMA Type 14-30R.
- Page 23 Service manual for Dryer Machine Midea America Company LEVEL THE DRYER To ensure that the dryer provides the optimal drying performance, it must be leveled. To minimize vibration, noise, and unwanted movement, the floor must be a perfectly level, solid surface.
-
Page 24: Door Reversal
Service manual for Dryer Machine Midea America Company 3.9 Door reversal Step 1: Remove the dryer door 1 Make sure that the power cord is unplugged. 2 While supporting the door, remove the four hinge screws from the door, then lift the door to remove it and set the door aside. - Page 25 Service manual for Dryer Machine Midea America Company Step 3: Rotate the door frame 1. Remove the 16 screws that hold the door frame to your dryer. 2. Use a flat-head screwdriver to pry open the 5 tabs, pull the inside door panel from the outside door panel.
-
Page 26: Change The Dryer Vent Location
Service manual for Dryer Machine Midea America Company 3.10 Change the dryer vent location Your new dryer is shipped to vent to the rear. It can also be configured to vent to he bottom or left side (as seen from the front). - Page 27 Service manual for Dryer Machine Midea America Company Secure in place with aluminum tape. Be sure that the male end of the duct protrudes 1.5 inches (3.8cm) to connect the remaining ductwork. Attach aluminum tape to the back of the dryer.
- Page 28 Service manual for Dryer Machine Midea America Company Sider Venting Bottom Venting ------------------------------------------------------------------------------------------------------------------------------------------------------- - 28 -...
-
Page 29: Trouble Shooting
Service manual for Dryer Machine Midea America Company 4. TROUBLE SHOOTING 4.1 Test mode by Control Make sure the door are closed, touch [Smart Control] and [Time Adjust-] at the same time within 3s after plug in, then unit will go into test mode. -
Page 30: Wiring Diagram And Terminals
Service manual for Dryer Machine Midea America Company 4.3 Wiring diagram and terminals ELECTRIC MODEL GAS MODEL ① DOOR SWITCH ② ① DOOR SWITCH ③ ② ④ ③ ① ④ ② ① ③ LAMP ② ① TEMP_OUT ③ LAMP ②... - Page 31 Service manual for Dryer Machine Midea America Company ELECTRIC MODEL: GAS MODEL: ------------------------------------------------------------------------------------------------------------------------------------------------------- - 31 -...
-
Page 32: Trouble Shooting
Service manual for Dryer Machine Midea America Company 4.5 Trouble shooting Problem What To Do ● All wires are hooked up to their corresponding terminals. ● Dryer is plugged in. ● Blown fuse or circuit breaker. ● Door switch functional…door closed. - Page 33 Service manual for Dryer Machine Midea America Company three symptoms. If the igniter does not heat up, remove power and using an ohmmeter, check the following: ● Open flame switch. ● Open igniter. The igniter does ● Shorted booster coil.
- Page 34 Service manual for Dryer Machine Midea America Company COMPONENT TESTING PROCEDURES 2.88Ω between Pin# 3 and 4 THERMOSTAT 3 HEATER THERMOSTAT 2 3.5Ω between Pin# 4 and 5 175℃, 25A 100/80℃, 25A 240V/4000W Thermal cut-off HI-limit ● Thermostat 3 resistance < 1Ω (Electronic models only) ●...
- Page 35 Service manual for Dryer Machine Midea America Company GAS MODELS ONLY FLAME SENSOR THERMOSTAT 1 10RS 120V ● Flame sensor resistance < 1Ω 230/160F 25A (60T21) - If resistance is infinity, replace Flame sensor. Hi-Limit ● Thermostat 1 resistance < 1Ω...
-
Page 36: How To Disassembly The Unit
Service manual for Dryer Machine Midea America Company 5. HOW TO DISASSEMBLY THE UNIT Caution Disconnect the electrical power. Turn off the gas supply. Wear gloves for operation. 1.Remove the control panel 1.1 Remove the screws that is used to fix the control panel;... - Page 37 Service manual for Dryer Machine Midea America Company 4. Remove the back cover (Electric model only) 4.1 Remove the screw of the power cable box cover; 4.2 remove the power cord box cover; 4.3 Remove the screws fixing the power cable;...
- Page 38 Service manual for Dryer Machine Midea America Company thermostat; 6. Remove the burner assy (Gas model only) 6.1 Pull out all the terminals; 6.2 Remove the 4 screws fixing the burner assy; ------------------------------------------------------------------------------------------------------------------------------------------------------- - 38 -...
- Page 39 Service manual for Dryer Machine Midea America Company Install the conversion kit: This kit is acceptable for: MDV160-VG012/F01-US13 / NS-TDRG67W1 This kit comprises one nozzle( Orifice Size:1.2mm) and one valve cover. This kit is used for LP GAS(Propane). 7(a). Change the...
- Page 40 Service manual for Dryer Machine Midea America Company 7(e). Change the burner (Gas model only) 7(f). Change the gas valve (Gas model only) 7(g). Change the orifice for LP (Gas model only) 7(g).1 Remove the 2 screws fixing the burner 7(g).2 Remove the burner...
- Page 41 Service manual for Dryer Machine Midea America Company Orifice Cover dial STYLE”B” STYLE A GAS VALVE ① ② CONVERSION 7(h).1 Remove the regulator vent cap from the pressure regulator. 7(h).2 Install the new Remove blocking pin finger-tight. Do not tighten more than 1/8 turn to seal it.
- Page 42 Service manual for Dryer Machine Midea America Company STYLE B GAS VALVE CONVERSION ① ② 7(i).1 Disconnect the 2 connectors from the valve. 7(i).2 Position a pair of long nose pliers into the slots of the cover dial. Rotate cover dial 25 degrees counter clockwise lining up ”LPG”...
- Page 43 Service manual for Dryer Machine Midea America Company 8. Remove the Door assy 8.1 Remove the screws on the Door Hinge and Take down the Door assy; 9. Remove the Door seal 11. Deleave the Door assy 11.1 Remove all 12 screws around the door.
- Page 44 Service manual for Dryer Machine Midea America Company 14. Remove the Front Cover 14.1 Remove the screws that is used to fix the Front Cover; 14.2 Take down the Front Cover; 14.3 Pull out the terminals connecting to the Front Cover;...
- Page 45 Service manual for Dryer Machine Midea America Company 18. Remove the air flow channel assy 19. Remove the belt switch. 20. Remove the idle wheel. 21. Remove the motor and fan assy. ------------------------------------------------------------------------------------------------------------------------------------------------------- - 45 -...
- Page 46 Service manual for Dryer Machine Midea America Company 22. Remove the fan 22.1 the screws that is used to fix the Fixed Sheet Assembly; 22.2 Remove the Fixed Sheet Assembly. 23. Remove the motor. 24. Remove the wheels supporting the drum.
- Page 47 Service manual for Dryer Machine Midea America Company ------------------------------------------------------------------------------------------------------------------------------------------------------- - 47 -...
-
Page 48: Specification
Service manual for Dryer Machine Midea America Company 6. SPECIFICATION Model No. MDH170-V032/F01-US1305 MDH170-VG032/F01-US13 ERP No. 22038210001362 22038210001361 Picture Heater Type Electric Power Supply 120/240V,60Hz 120V,60hz Capacity (Cuft) CEF (lb/kWh/cycle) 3.73 Energy Star, 2015 Certification, safety Watts (Heater) 4000W 16000BTU/h... - Page 49 Service manual for Dryer Machine Midea America Company Reversable door Yes, left-right Yes, left-right Exhaust Options 3-Way (Rear; Left & Bottom) 3-Way (Rear; Left & Bottom) Special feature child lock Door switch error alarm auto-power off Dimensions & loading Width, body, Inch Depth, body, Inch 30.7...
Need help?
Do you have a question about the MLTE45N4BWW and is the answer not in the manual?
Questions and answers