Table of Contents
Advertisement
Advertisement
Table of Contents

Related Manuals for Midea MLE45N1AWW


Summary of Contents for Midea MLE45N1AWW
- Page 1 1-844-224-1614 MLE45N1AWW MLG45N1AWW version A - 1 - 2020...
- Page 2 Thank you for letting Midea help you "make yourself at home." This manual is part of our commitment to your total satisfaction. Please read this manual carefully before use and keep it in a convenient place for future reference. To help us serve you better, please consider registering your product using our convenient Midea app MSmartlife, by visiting http://www.midea.com , or by texting a picture of...
-
Page 3: Table Of Contents
Final Check ....................28 Door Reversal Procedure..............29 Change the dryer vent location............30 DRYER USE ..................33 Control Panel ................... 33 Drying a Load of Laundry ..............36 Using the Drying Rack .................39 Special Laundry Tips ................40 DRYER CARE ................... 42 Cleaning and Maintenance ..............42 TROUBLESHOOTING ..............43 Check These Solutions if Your Dryer... - Page 9 This dryer is factory-ready for the rear exhaust option. If you want to change the vent location, see "Change the dryer vent location" on page 30.
- Page 15 Gas dryer are equipped with a burner orifice for use with natural gas. If you...
- Page 21 Duct tape Pipe wrench Cutting knife / " ratchet wrench (gas only)
- Page 22 to the gas, electrical, and exhaust connections. To move the dryer easily, lay the carton cushions from the packaging on the floor. Tip the dryer on its side so it lies across both cushion-tops. Push the dryer so that it is near its final location, and then set the dryer upright.
- Page 25 If converting from a 4-wire electrical system to a 3-wire, the neutral grounding wire must be connected to the external ground connector to ground the dryer frame to the neutral conductor. Ring-type terminals are recommended. If using strap terminals, make sure they are tightened.
- Page 26 Connect the neutral wire (white ) of power cord and the appliance neutral grounding wire (white) under the center screw of terminal block. Be sure to cross the screw through the ring of the power cord and appliance neutral grounding wire. Tighten screw. Neutra l wire (white)
- Page 27 hole provided in the cabinet near the terminal block. Be sure they are tight. Use a / "(1 cm) deep-well socket.
-
Page 28: Final Check
A plastic flexible duct is NOT used. -
Page 30: Change The Dryer Vent Location
CHANGE THE DRYER VENT LOCATION Your new dryer is shipped to vent to the rear. It can also be configured to vent to he bottom or left side (see from the front). An Adapter kit is standard component which you can purchase from local market. - Page 31 Preassemble a 4 inches (10.2cm) elbow to the next 4 inches (10.2cm) duct section, and secure all joints with duct tape. Be sure that the male end of the elbow faces AWAY from the dryer. Insert the elbow/duct assembly through the side opening and press it onto the adapter duct.
- Page 32 Dimensions for installation Rear Venting (Default) 12" 30.5cm Side Venting 1.5" 3.8cm 14.96" 5" 38cm 12.9cm Bottom Venting 12" 30.5cm...
-
Page 33: Dryer Use
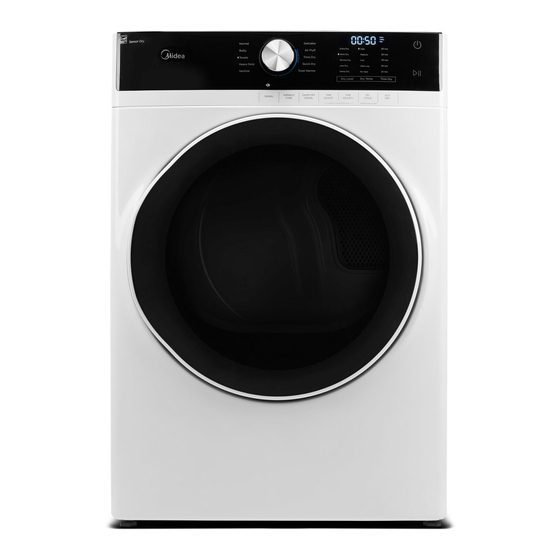
DRYER USE CONTROL PANEL WARNING To reduce the risk of fire, electric shock, or injury to persons, read the IMPORTANT SAFETY INSTRUCTIONS before operating the appliance. Power button Press to turn your dryer on or off. If your dryer is on for more than 10 minutes without any buttons being pressed, it automatically turns off. - Page 34 Signal Press once to stop the beeping sound. Press again to activate the sound. Your selection will be kept until next pressing. A double beep means selection not available. Wrinkle Care Press once to add the Wrinkle Care step into the operating program. Press again to cancel selection.
- Page 35 Digital display This digital will display the time of cycle you are setting or remaining time of cycle operating. Cycle status display The relative indicator graphic or text will be lit when the dryer is in its drying program, When the whole program is finished, the “Done” indicator graphic will flash to remind you to unload your laundry.
-
Page 36: Drying A Load Of Laundry
DRYING A LOAD OF LAUNDRY 1. Power on your dryer. • Press this Power button to power your dryer on. • The “ ” (Clean Filter) indicator graphic in the display will flash 10 times when your dryer is powered on. •... - Page 37 Cycle Fabric type Dry T emp Dry Level Time WRINKLE DAMP TIME Default Default Maximum CARE ADJUST time time Amount SIGNAL (Elec.) (Gas) Normal Cotton Medium Extra Dry 61min 61min Under More Dry wear Normal Dry Linen Less Dry Damp Dry Bulky Blankets Medium...
- Page 38 5. Unloading your laundry. • After the cycle is done, the “Done” indicator graphic will flash, and the dryer will beep 6 times. CONTROL LOCK Your dryer has a control lock feature to prevent children from playing with your dryer. When you turn on the control lock, the only button that works is Power.
-
Page 39: Using The Drying Rack
The rack is designed for use with manual cycles only, not sensor cycles. -
Page 40: Special Laundry Tips
Select Time Dry. Select the No Heat, Low or Ultra Low Temp setting. or by using No Heat temp setting. - Page 44 example, a pair of black linen parts).
- Page 48 12/20...
-
Page 49: Product Registration
Product registration is not mandatory. Failure to complete and return the card or form does not diminish the consumer’s warranty rights. V1 ENGLISH... - Page 50 1-844-224-1614...
- Page 51 1-844-224-1614 *La extensión de la garantía es por los tres meses inmediatamente después de la finalización del período de la garantía original del producto. MLE45N1AWW MLG45N1AWW version A - 1 - 2020...
- Page 52 Midea le ayude a “hacerlo sentir en casa”. GRACIAS Este manual es parte de nuestro compromiso con su satisfacción total. Lea detenidamente este manual antes de utilizar este producto, y guárdelo en un lugar conveniente para su consulta futura.
- Page 53 Nivelación de la secadora ..............28 Encendido ....................28 Revisión final ..................28 Procedimiento de inversión de la puerta ........29 Cambie el secadora vent ubicación ..........30 USO DEL SECADOR ................33 Panel de control ..................33 Cómo secar una carga de ropa ............36 Uso de la rejilla de secado ..............
- Page 59 Esta secadora viene lista de fábrica para la opción de escape trasero. Si desea cambiar la ubicación del conducto de ventilación, consulte “Cambiar la ubicación del conducto de ventilación de la secadora” en la página 30.
- Page 71 5/16" llave de trinquete...
- Page 72 Para mover la secadora con facilidad, coloque los protectores de cartón del embalaje en el suelo. Incline la secadora de lado para que repose sobre ambos protectores. Empuje la secadora para que esté cerca de su ubicación final, y luego coloque la secadora en posición vertical.
- Page 76 Si se convierte de un sistema eléctrico de 4 alambres a un sistema de 3 alambres, el alambre de conexión a tierra neutro debe conectarse al conector de tierra externo para conectar a tierra el marco de la secadora al conductor neutro. Se recomiendan terminales de tipo anillo. Si utiliza terminales de correa, asegúrese que estén apretados.
- Page 78 NO se utiliza un conducto de plástico flexible.
- Page 80 CAMBIE EL SECADORA VENT UBICACIÓN Su nueva secadora se envía para ventilar hacia la parte trasera. También puede configurarse para que se ventile a él abajo o de lado izquierdo (visto desde la parte delantera). Un kit adaptador es un componente estándar que puede adquirir en el mercado local.
- Page 81 3. Preensamble un 4 pulgadas (10.2 cm) el codo hasta la proxima 4 pulgadas (10.2 cm) sección del conducto, y asegure todas las uniones con cinta adhesiva. Asegúrese de que el extremo macho del codo caras ALEJADOS de la secadora. Inserte el codo/ensamble del ducto a través de la Apertura lateral y colóquela en el adaptador del conducto.
- Page 82 Dimensiones para la instalación Ventilación trasera (predeterminado) 12" 30.5cm Ventilación lateral 1.5" 3.8cm 14.96" 5" 38cm 12.9cm Ventilación inferior 12" 30.5cm...
- Page 83 Los ciclos Normal, Delicates (Prendas delicadas), Bulky (Artículos voluminosos), Towels (Toallas), Heavy Duty (Intenso) y Sanitize (Desinfectar) son ciclos Sensor Dry (Sensor de humedad). Los ciclos Air Fluff (Secado con aire), Time Dry (Secado por tiempo), Quick Dry (Secado rápido), Towel Warmer (Secado con calor para toallas) son ciclos Manual Dry (Secado con detención manual).
- Page 84 Un doble pitido significa que la selección no está disponible.
- Page 85 Esta función reducirá el consumo de energía al reducir la temperatura de secado pero aumentando el tiempo de operación. El familiar indicador gráfico o mensaje de texto se enciende cuando la secadora se encuentra en su programa de secado. Cuando todo el programa haya finalizado, el "Listo"...
- Page 86 El "Limpie el filtro" luz en el proceso barra se deje secar otros 10 veces cuando la secadora esté encendido. Debe limpiar el filtro antes de la secadora esté cargado. ciclos en la página 37. tabla en la página 37. Un doble pitido significa que la selección no está...
- Page 87 ANTI- ARRUGAS Media Extra Seco Sí Sí Sí 37min 37min Media Extra Seco Sí Sí 42min 42min Alta Extra Seco Sí Sí Sí 50min 50min Alta Extra Seco Sí Sí Sí 54min 54min Alta Extra Seco Sí 62min 62min Baja Extra Seco Sí...
- Page 88 El gráfico del indicador "Listo" parpadeará, la Su secadora tiene un control función de bloqueo para evitar que los niños jueguen con la secadora. Cuando se enciende el control de bloqueo, el único botón que trabaja "POWER". • Usted puede encender la secadora, establecer esta función, luego apáguelo.
- Page 89 La rejilla está dise ada para ser utilizada solo con ciclos manuales, no ñ con ciclos con sensor.
- Page 96 ejemplo, un par de prendas de lino negro).
- Page 99 12/20...
- Page 100 El registro del producto no es obligatorio. El no completar y devolver la tarjeta o el formulario no disminuye los derechos de garantía del consumidor. V1 ESPAÑOL...
- Page 104 1-844-224-1614...
Need help?
Do you have a question about the MLE45N1AWW and is the answer not in the manual?
Questions and answers