Table of Contents
Advertisement
Quick Links
Advertisement
Table of Contents

Related Manuals for Field Tuff FTF-05SDTC


Summary of Contents for Field Tuff FTF-05SDTC
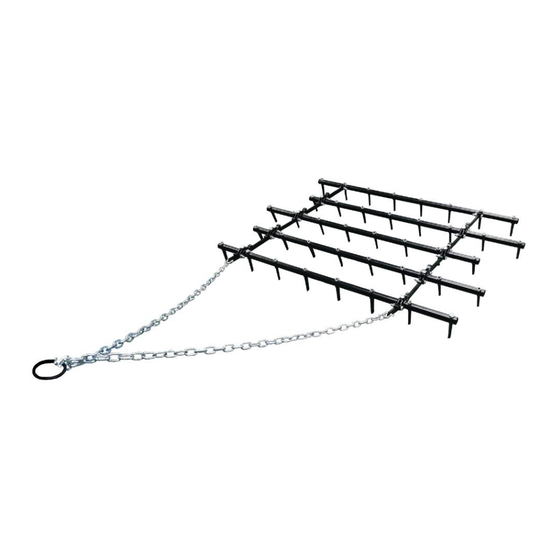
- Page 1 5’ Spike Drag OWNER’S MANUAL WARNING: Carefully read and understand all ASSEMBLY AND OPERATION INSTRUCTIONS before operating. Failure to follow the safety rules and other basic safety precautions may result in serious personal injury. MODEL # FTF-05SDTC 12082020...
- Page 2 Thank you very much for choosing this product! For future reference, please complete the owner’s record below: Model: FTF-05SDTC Purchase Date: _______________ Save the receipt, the warranty, and these instructions. It is important that you read the entire manual to become familiar with this product before you begin using it.
- Page 3 SAVE THESE INSTRUCTIONS WORK AREA • Keep work area clean, free of clutter, and well-lit. Cluttered and dark work areas can cause accidents. • Keep children and bystanders away while operating the landscape rake. Distractions can cause you to lose control, so visitors should remain at a safe distance from the work area. •...
- Page 4 ASSEMBLY Step #1: Using self-locking nuts (9) secure forty spikes (10) on the horizontal pipes (eight spikes (10) for each horizontal pipe). Step #2: Use bolts (7) and self-locking nuts (9) to connect the eight connectors (6) to the first(1), second(2), third(3), and fourth(4) horizontal pipes, two connectors (6) are installed on each pipe, and the short ends of the connectors (6) should be facing forward towards the chain.
- Page 5 Step #4: Connect the long connecting bars (12) with the fifth horizontal pipe with bolts (8) and self-locking nuts (9). Step #5: Connect the short connecting bars (11) with the first horizontal pipe(1) with bolts (8) and self-locking nuts (9), and connect the chain (14) with the other end of the short connecting bars (11) with a clevis (13).
- Page 6 PARTS DIAGRAM Each horizontal pipe has a label put on the left end of the pipe showing the part # of the pipe. PARTS LIST: Part # Description Qty. Horizontal Pipe 1 Horizontal Pipe 2 Horizontal Pipe 3 Horizontal Pipe 4 Horizontal Pipe 5 Connector Bolt M12*65...
- Page 7 WARRANTY One-year limited parts warranty. PO BOX 203 Miltona, MN 56354 Made in China Page 7...
Need help?
Do you have a question about the FTF-05SDTC and is the answer not in the manual?
Questions and answers