Table of Contents
Advertisement
Quick Links
Advertisement
Table of Contents

Related Manuals for Field Tuff FTF-044BCP


Summary of Contents for Field Tuff FTF-044BCP
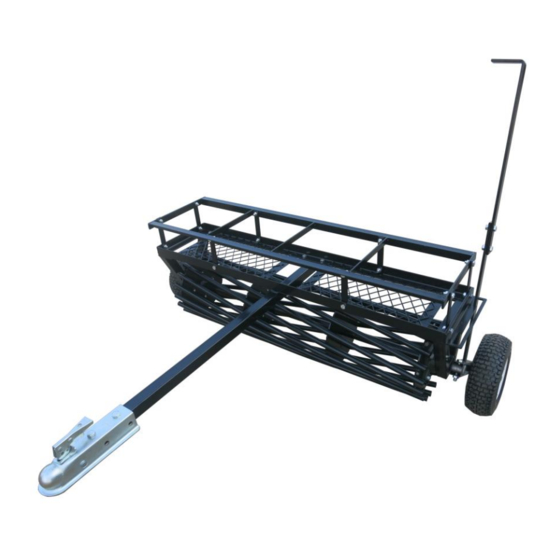
- Page 1 48” Tow Behind Culti-packer OWNER’S MANUAL WARNING: Read carefully and understand all ASSEMBLY AND OPERATION INSTRUCTIONS before operating. Failure to follow the safety rules and other basic safety precautions may result in serious personal injury. -MODEL # FTF-044BCP 10142015...
- Page 2 Thank you very much for choosing this product! For future reference, please complete the owner’s record below: Model: FTF-044BCP Purchase Date: _______________ Save the receipt, warranty, and these instructions. It is important that you read the entire manual to become familiar with this product before you begin using it.
- Page 3 WORK AREA • Keep work area clean, free of clutter, and well-lit. Cluttered and dark work areas can cause accidents. • Keep children and bystanders away while operating the culti-packer. Distractions can cause you to lose control, so visitors should remain at a safe distance from the work area. •...
- Page 4 ASSEMBLY Step #1: Attach the Coupler (#1) to the Tow Bar (#2) using two Hex Bolts (#3) and two Hex Lock Nuts (#4). Step #2: Attach the Tow Bar (#2) to the Frame (#19) using four Hex Bolts (#16) and four Hex Lock Nuts (#17). Step #3: Attach the Stub Axle A (#11) and the Stub Axle B (#22) to the Spindle Unit (#5) using two Hex Bolts (#3) and two Hex Lock Nuts (#4).
- Page 5 Step #4: Attach the Support Frame (#21) to the Frame (#19) using eight Connect Plates (#20), eight Hex Bolts (#16), and eight Hex Lock Nuts (#17). Step #5: Attach the Adjustable Plate (#18) to the Frame (#19) using two of the Hex Bolts and Hex Lock Nuts from Step #4.
- Page 6 Step #7: Fully tighten all hardware. OPERATION For operation, put the Switch Rod (#15) in the A Position. For transportation, put the Switch Rod (#15) in the B Position. Page 6...
- Page 7 MAINTENANCE • Maintain your culti-packer. It is recommended that the general condition of any culti-packer be examined before it is used. Keep your culti-packer in good repair by adopting a program of conscientious repair and maintenance. If any abnormal vibrations or noise occurs, have the problem corrected before further use.
- Page 8 PARTS LIST: Part Description Qty. Part # Description Qty. 2” Coupler Flat Washer Ø20 Tow Bar Pin Ø4x50 Hex Bolt, M12x65 Switch Rod Hex Lock Nut, M12 Hex Bolt, M10x25 Spindle Unit (located inside of the Roller) Hex Lock Nut, M10 Roller Adjustable Plate Ball Bearing...
Need help?
Do you have a question about the FTF-044BCP and is the answer not in the manual?
Questions and answers