
Related Manuals for Spaceman 6220 Series


Summary of Contents for Spaceman 6220 Series
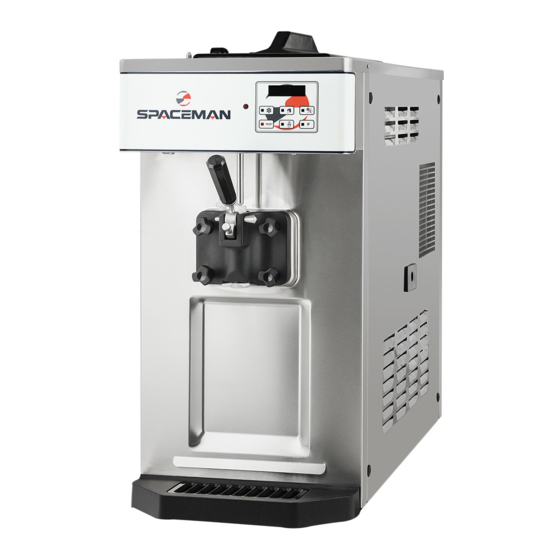
- Page 1 Soft Serve Models Two-Line Display :: Standard or Air Pump :: Counter or Floor Standing...
- Page 2 SPM-D-XS-TY001 R2 202005...
-
Page 3: Table Of Contents
Information contained in this manual may be subject to change. Please check online or contact your local Spaceman distributor for continued updates and detailed information about your Spaceman machine. -
Page 4: Quick Operation Guide
6. Place the machine in its final location according to the Installation Requirements. Check for shipping damage Inspect the machine for any shipping damage. If you find any, contact Spaceman Technical Service immediately after unpalletizing. Our technicians will help you assess the damage and determine the appropriate action prior to accepting the delivery. -
Page 5: Getting To Know Your Machine
Getting to Know Your Machine Common Machine Parts Screws Hopper Dispensing Door (Short & Long) Cover with Beater Rods Retention Pin Prime Plug Draw Handle with Nut with Seals Side & Middle Dispensing Door Design Caps Draw Valves Gaskets with Seals Front Drip Tray Internal Drip Tune-Up Kit... -
Page 6: Installation Requirements
220V 380V 50HZ 50HZ If you require an alternative refrigerant, please call Spaceman Technical Support for a list of compatible alternatives for your compressor. 110V 220V 220V 60HZ 60HZ... -
Page 7: Routine Maintenance
Read about Routine Maintenance carefully prior to disassembling your machine for the first time. For optimal machine performance and many years of efficiency and reliability from your machine, Spaceman recommends cleaning and sanitizing the machine and its parts weekly. -
Page 8: Preparation Before Using The Machine
Preparation : Disassemble Parts NOTE: Prepare dishwashing area prior to disassembly, use bucket to temporarily store large removed parts and a small container for O-rings, and have a towel nearby to capture excess water. CAUTION: Always separate O-rings and gaskets from metal parts to prevent damage while washing. 1. - Page 9 Preparation : Disassemble Parts 5. Disassemble beater assemblies Option A: Stainless Steel Beater a. Remove beater assembly from cylinder. b. Remove seal from beater assembly. Option B: Flexible Blade Beater V1 a. Remove beater assembly from cylinder. b. Remove scraper blades from beater assembly;...
-
Page 10: Wash Parts
Preparation : Wash Parts CAUTION: Never wash parts in a dishwasher. Always hand-wash components with nontoxic, food-safe cleaners. 1. Verify power switches are in the OFF position. 2. Use the large brush and cool water to thoroughly clean inside the cylinder; be sure to scrub the back of the cylinder 3. -
Page 11: Assemble Parts
Preparation : Assemble Parts CAUTION: Never force the installation of any parts. All parts fit correctly without force. If parts don’t seem to fit, remove all parts and repeat assembly. 1. Switches 2. Install beater assemblies to OFF Option A: Stainless Steel Beater a. - Page 12 Insert suction tubes into pumps; rotate to lock, and turn to desired overrun setting. f. Coat air pump drive shafts with Spaceman lubricant. g. Install air pumps onto machine: →...
-
Page 13: Sanitize
Sanitize 5. Install hopper cover, agitators, and drip trays a. Coat inside of agitators (if present) with Spaceman lubricant and install with arrow pointing up. b. Install internal and front drip trays. c. If machine will be left unused, install air tubes and place hopper lids on top;... -
Page 14: Operating Control
Touch Switch Panel: To better communicate in the International arena, symbols have replace words on many of your operator switches. SPACEMAN equipment is designed with these international symbols. 1. FREEZE Button 2. WASH Button 3. -
Page 15: Freeze
Operating Control : Freeze Add product to machine NOTE: The mix-low lights illuminate when a hopper is low on product mix and automatically de-illuminate when machine is filled. NOTE: Instructions assume product is added one hopper at a time. Repeat steps as needed. 1. - Page 16 Operating Control : Freeze Dispense product Side draw handles dispense product from their respective hoppers. The middle draw handle twists product from the left and right hoppers. 1. OPEN draw valve (Handle Down) until desired amount is dispensed OPEN CLOSED 2.
-
Page 17: Wash/Standby/Defrost
Operating Control : Wash/Standby/Defrost Wash Mode To turn on Wash mode: • Press RESET button, then WASH button • Displays read WASHING when machine is in Wash mode To turn off Wash mode: • Press RESET button • Machine is ready for a new mode selection Standby Mode IMPORTANT: When the machine will NOT be utilized for several hours, place it in STANDBY mode to conserve electricity and reduce product loss. - Page 18 Operating Control : Set Menu Adjust product consistency IMPORTANT: 1. Viscosity controls how hard ice cream will be. Slightly adjust viscosity during initial setup and for each flavor/brand change. 2. Start with lower viscosity and gradually increase. Allow at least 2 freezing cycles to verify. Adjust maximum 0.3A at a time.
-
Page 19: Set Menu
Operating Control : Set Menu Auto Programming 1. Press RESET to stop all machine functions. Press and hold RESET until display shows settings. Press RESET to reach the Auto Programming setting. If you scroll past the Automatic Mode Programming setting, continue pressing RESET until it comes back around. -
Page 20: Viscosity Range & Brush Kit
Viscosity Range & Brush Kit Adjust product consistency 110V-60Hz-1Ph 220V-50Hz-1Ph 220V-60Hz-1Ph Model Series Viscosity Range (A) Model Series Viscosity Range (A) Model Series Viscosity Range (A) 6220 3.5 - 6.0 6220 2.5 - 3.5 6220 2.5 - 3.5 6210-C 3.5 - 5.5 6228 2.5 - 3.5 6228... -
Page 21: O-Rings & Seals
O-Rings & Seals Dispensing Door 6210 6220 6228 Series 6236 6338 Series 6225 6234 6235 6245 6240 6250 6248 6368 Series 6260 6378 Series 6265 6268 Series Optional Parts Agitator Blade Feed Tube V1 & V2 Air Pump Bill of Material Parts Number Description Parts Number... - Page 22 O-Rings & Seals Use below 1:1 size comparison chart and explosion diagrams on left page to confirm item, size and location of O-rings and seals. Scale : 1:1...
-
Page 23: Troubleshooting
Troubleshooting Problem: STOP 1—Low Temp Protect Remedy Probable Cause 1. Ensure hopper is at least half full. 1. Starved cylinder 2. Follow manufacturer instructions for 2. Inadequate mix in hopper. mixing product; ensure correct mix ratios. 3. Improper mixing of product. 3. - Page 24 2. Adjust hopper temperature warmer (Page 16). 1. Use sufficient food-grade lubricant, and add sufficient lubricant inside drive shaft gasket 3. Call Spaceman Technical Support. during assembly (Page 9). 2. Replace drive shaft gaskets every 1 to 3 months. Problem: Hopper is freezing...
Need help?
Do you have a question about the 6220 Series and is the answer not in the manual?
Questions and answers
What does this code mean?
The part number "6220 Series" refers to a specific series of Spaceman machines. These machines have their own operating instructions, maintenance requirements, and features outlined in the manual. The series includes models with various viscosity ranges and may include configurations with air pumps, as indicated by green instruction boxes.
This answer is automatically generated
spaceman 6250a-s the compressor does not turn on but the motor works as it should
The compressor may not turn on if an alternative refrigerant is used instead of the specified one. Using the wrong refrigerant can damage the cooling system or prevent the machine from operating at optimal performance.
This answer is automatically generated