Advertisement
Quick Links
Customer Service
Sunday – Saturday
8 AM – 5 PM Mountain
Toll-Free: +1
Local: +1 (720) 328-1020
service@spacemanusa.com
Phone: (720) 328-1020
Phone: (720) 328 - 1020
Machine M
M
ODEL
F
B
ROZEN
EVERAGE
Spaceman USA, LLC
226 Commerce Street
Suite B
Broomfield, CO 80020
(888) 610-5520
www.spacemanusa.com
www.spacemanusa.com
ANUAL
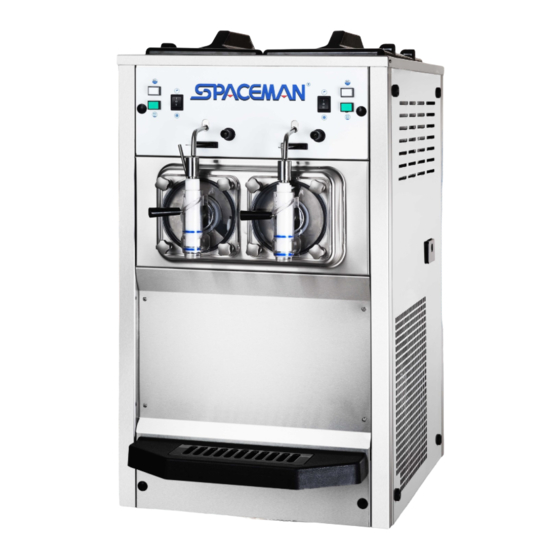
SM-6695H
- C
- T
OUNTERTOP
WO
F
LAVOR
Sales and Product Information
Monday – Friday
8 AM – 5 PM Mountain
Toll-Free: +1 (888) 610-5520
Local:
+1 (720) 328-1020
sales@spacemanusa.com
info@spacemanusa.com
Email: service@spacemanusa.com
Email: info@spacemanusa.com
Advertisement

Subscribe to Our Youtube Channel
Related Manuals for Spaceman SM-6695H


Summary of Contents for Spaceman SM-6695H
- Page 1 ANUAL SM-6695H ODEL ROZEN EVERAGE OUNTERTOP LAVOR Customer Service Spaceman USA, LLC Sales and Product Information Sunday – Saturday 226 Commerce Street Monday – Friday 8 AM – 5 PM Mountain Suite B 8 AM – 5 PM Mountain Broomfield, CO 80020...
- Page 2 This machine manual is intended to instruct users on installation, operation, cleaning, and routine maintenance procedures. Information contained in this manual may be subject to change. Please check online or contact Spaceman USA Technical Support at (720) 328-1020 for continued updates, training, and detailed information about your Spaceman machine.
-
Page 3: Table Of Contents
Table of Contents What do you want to do? Learn about the manual ………………………………………………………………………………………………………. 1 Quickly refresh your knowledge on basic machine operation and parts ……………………………….. 3 Ensure installation requirements …………………………………………………………………………………………. 5 Unpack machine ………………………………………………………………………………………………………………….. 6 Perform routine maintenance ……………………………………………………………………………………………… 7 Clean ……………………………………………………………………………………………………………………………. - Page 4 Quick Operation Refresh WARNING: The Quick Operation Refresh is for experienced 6695H operators and for reference ONLY. Detailed start-up instructions MUST be followed to ensure proper installation, cleaning, and operation of the machine. Failure to do so may result in severe damage or injury. Installation and Setup Read and understand ALL Place machine in appropriate food...
- Page 5 Quick Operation Refresh Machine Parts Draw Valve Pins (2) Dispensing Doors (2), with Draw Valves (2), with Ice Busters (2) O-Rings (4) Prime Plugs (2) and Gaskets (2) Scraper Blade Clips (4) Beaters (2) Scraper Blades (4) Draw Handles (2) Beater Guides (2) Door Hand Screws (8) Torque Assemblies (2), with...
- Page 6 Electrical requirements Refrigerant requirements In the United States, it is required that this machine Spaceman USA requires that only the specified refrigerant be used in your machine. Alternative be installed in compliance with National Electrical refrigerants may cause damage to the cooling...
- Page 7 6. Place the machine on top of the stand, countertop, or table. 3. Inspect for damage immediately upon unpacking. 7. Place the machine in its final location and call Spaceman USA Technical Support if you according to the Installation Requirements discover any damaged or missing parts. (Page 5).
-
Page 8: Clean
** Based on cleanliness of location and proximity to powder-based machines For optimal machine performance and many years of efficiency and reliability from your machine, Spaceman USA recommends cleaning and sanitizing the machine and its parts daily. The machine comes equipped... - Page 9 Cleaning: 1. Drain Product NOTES: To expedite draining, turn off machine 30 minutes prior to soften product. To expedite process, keep a bucket nearby to temporarily store removed parts. CAUTION: Never use warm water when rinsing the machine to prevent damage. NOTE: Instructions throughout are written for one side only.
- Page 10 Cleaning: 2. Disassemble NOTE: Prepare dishwashing area prior to disassembly, and use a bucket to temporarily store removed parts. CAUTION: Always separate O-rings and gaskets from metal parts to prevent damage while washing. 1. Verify the power switch is turned to OFF 8.
-
Page 11: Wash Parts
Cleaning: 3. Wash All Parts CAUTION: Never wash parts in a dishwasher. Always hand-wash components with nontoxic, food-safe cleaners. 1. Verify power switch is turned to OFF 2. Use the large brush and cool water to thoroughly clean inside the cylinder; be sure to scrub the back of the cylinder and verify the cylinder is free of ALL product 3. - Page 12 Place drive shaft gasket on drive shaft the OFF position b. Seal gasket open space with Spaceman lubricant, extending onto drive shaft and avoiding the top square part c. Insert drive shaft into rear shell bearing at the back of the cylinder, and turn it until the key engages firmly into the socket (when inserted correctly, the drive shaft will no longer turn 360°)
- Page 13 Insert draw handle; secure in place with valve pin g. Screw prime plug onto dispensing door h. Place dispensing door gasket on door, coating with Spaceman lubricant i. Place beater guide onto dispensing door, with flange flush with the back of the door j.
-
Page 14: Sanitize
Sanitiza- Sanitization IMPORTANT: After sanitizing the machine, DO NOT rinse or touch areas that have been sanitized. Product must be added immediately. If new product will not be added immediately, rinse machine with clean water and loosen door hand-screws to allow cylinder to air-dry. Sanitize machine before using again. -
Page 15: Add Product To Machine
Frozen Product Operation Add product to machine NOTE: The MIX LOW light illuminates and alarm sounds when the hopper is low on product mix and automatically turn off when machine is filled. 1. Verify machine has been recently sanitized (within 1 7. -
Page 16: Freeze Product
Frozen Product Operation Dispense product Freeze product 1. Verify cylinder is full of mixed product 1. OPEN draw handle (RIGHT) until the desired amount is dispensed 2. Turn power switch to FREEZE and verify STANDBY mode is off (see below) 2. -
Page 17: Adjust Product Consistency
Frozen Product Operation Adjust product consistency The viscosity adjustment screw, located above the draw handle, controls the firmness of dispensed product. The higher the viscosity, the more firm the product. Viscosity settings should NOT need continuous adjustment. To adjust product consistency, use a #2 Phillips-head screwdriver to turn the viscosity adjustment screw. - Page 18 2. Inspect scraper blades for damage and correct 1. Do NOT lubricate the square end of the drive installation shaft; contact Spaceman USA Technical Support 3. Increase viscosity setting as required (Page 16) for instructions on removing and inspecting 4. Call Spaceman USA Technical Support drive shaft and gear box for damage 2.
- Page 19 O-rings. 7. Reset machine (Page 15) 2. Cracked, broken, or worn draw valve O-rings 8. Contact Spaceman USA Technical Support Remedy 1. Use sufficient food-grade lubricant when assembling draw valve (Page 12) Problem: Scored Cylinder walls 2.
- Page 20 Machine Specifications www.spacemanusa.com www.spacemanusa.com Phone: (720) 328 - 1020 Phone: (720) 328-1020 Email: service@spacemanusa.com Email: service@spacemanusa.com...
- Page 21 Parts Dia- Specs—External Parts Item Part # Description Item Part # Description Item Part # Description 3.4.04.02.001 Internal Drip Tray 3.4.03.01.004 Hopper Lid 2.3.4.17.015 Panel - Front - L 2.3.4.13.013 Panel - Rear 2.3.4.18.021 Panel - Left 2.1.1.10.0004 Beater 2.1.1.23.0001 Agitator Blade 2.1.1.03.0006 Hopper Assembly 3.4.04.01.003 Drip Tray 2.1.3.39.0006 Air Tube...
- Page 22 Specs—Operating Parts Dispensing Door and Beater Control Levers Item Part # Description Item Part # Description 2.1.3.36.0004 Draw Valve Pin 2.1.4.04.018 Draw Lever 2.1.3.01.0006 Draw Valve 3.6.22.026 Visc. Screw - M5x45 3.4.08.01.036 O-Ring - Valve 2.1.4.04.012 Viscosity Housing 2.1.3.14.0006 Dispensing Door 2.1.4.04.011 Nut - Viscosity 3.4.05.01.002 Dispending Handle...
- Page 23 Specs—Internal Parts Hopper Agitator Item Part # Description Item Part # Description Item Part # Description 2.1.1.06.0020 Cylinder Assembly 3.3.03.03.005 Belt - A1219 2.1.1.23.0001 Agitator Blade 3.2.01.02.005 Compressor - Main 3.3.04.01.005 Bushing - 1008 2.1.4.02.005 HA Housing Cap 3.2.04.08.001 Liquid Receiver 3.3.04.02.012 Pulley - 63x1-1008 2.1.4.02.002...
- Page 24 Specs—Wiring www.spacemanusa.com Phone: (720) 328-1020 Email: service@spacemanusa.com...
Need help?
Do you have a question about the SM-6695H and is the answer not in the manual?
Questions and answers