Advertisement
Quick Links
Advertisement

Subscribe to Our Youtube Channel
Related Manuals for Spaceman 6210


Summary of Contents for Spaceman 6210
- Page 1 SPACEMAN 6210 TRAINING Spaceman USA 6210 Training rev111918...
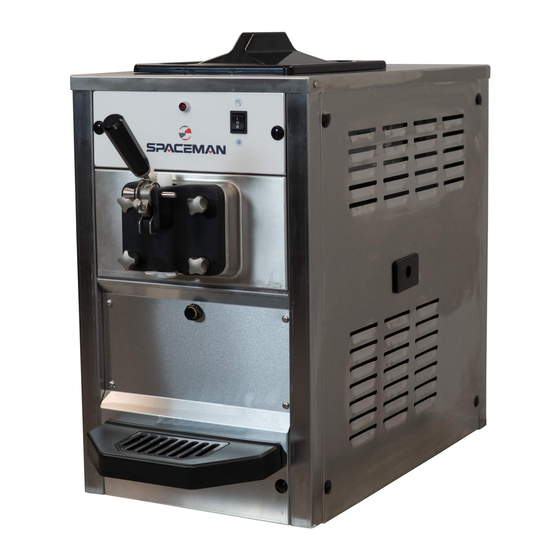
- Page 2 NOTES AND FUNCTIONS OF THE 6210 MACHINE THE 6210 is a single flavor, gravity feed, countertop, soft serve machine. The machine is capable of producing a variety of products that include: Soft Serve Frozen Yogurt, Ice Cream, select custard products, and sorbets.
-
Page 3: Routine Maintenance Operations
* Based on machine usage and cleaning intervals; a specifically designed to efficiently and Tune-Up Kit is available with all wearable parts (O-rings, properly clean the machine. gaskets, etc.) except scraper blades ** Based on cleanliness of location and proximity to powder-based machines Spaceman USA 6210 Training rev111918... - Page 4 Doing so may cause damage to the stainless Cleaning and sanitizing steel material. schedules are governed by state ONLY use Spaceman-USA-included cleaning brushes and lubrication. or local regulatory agencies and MUST be followed accordingly. NEVER use metal objects to clean or operate the machine.
-
Page 5: Turn Power Switch
DISASSEMBLY 1.TURN POWER 2.REMOVE SWITCH DISPENSING DOOR Remove dispensing-door hand-screws (4) Remove dispensing door assembly from cylinder Spaceman USA 6210 Training rev111918... - Page 6 O-ring removal tool down first to pop up draw valve, then pulling out Disassemble dispensing door Remove beater guide from door assembly; remove gasket from door Remove retention pin assembly using O-ring removal tool Spaceman USA 6210 Training rev111918...
- Page 7 DISASSEMBLY Remove draw valve, twisting while removing to prevent damage Remove O-rings (2) from draw valve using O-ring removal tool Disassemble dispensing door Rotate star cap so that tab is accessible; snap off star cap Spaceman USA 6210 Training rev111918...
- Page 8 DISASSEMBLY Remove beater assembly from cylinder “clip-less” blade Disassemble beater Remove scraper blade assembly and from beater drive shaft assembly; separate scraper blade clip from scraper blade *some new models will not have blade clips Spaceman USA 6210 Training rev111918...
- Page 9 Remove drive shaft from inside cylinder using a dry assembly and towel; separate gasket drive shaft from drive shaft ** If you experience assembly difficulty with drive shaft, Spaceman offers a specialized removal tool for purchase. Spaceman USA 6210 Training rev111918...
- Page 10 DISASSEMBLY Remove internal drip tray and front drip tray + splash shield Spaceman USA 6210 Training rev111918...
- Page 11 ALL product Thoroughly clean and dry the rear of the cylinder with the supplied black brushes and a clean, dry towel Gently clean and wipe down the outside of the machine Spaceman USA 6210 Training rev111918...
- Page 12 Carefully and thoroughly clean all gaskets and O-rings removed from the machine; be sure to wipe gaskets and O-rings to remove excess lubricant Verify all parts are clean and free of all food product prior to re- assembling machine Spaceman USA 6210 Training rev111918...
-
Page 13: Install Drive Shaft
(when inserted square part correctly, the drive shaft will no longer turn 360°) Spaceman USA 6210 Training rev111918... - Page 14 Insert beater assembly into cylinder, making sure beater shoes stay in place; turn assembly until it engages the drive shaft key and no longer turns 360° NOTE: * Newer models will not have blade clips OR beater shoes Spaceman USA 6210 Training rev111918...
- Page 15 Place O-rings (2) on Insert draw valve draw valve; place O- into dispensing Push prime plug rings (2) on prime plug; door, O-rings-first into hole on top of coat all ring areas with dispensing door Spaceman lubricant Spaceman USA 6210 Training rev111918...
- Page 16 ASSEMBLE ASSEMBLE Set draw handle into slot on dispensing door, with adjustment screw facing down Slide retention pin through draw Install handle; secure with nut dispensing door Snap star cap onto bottom of dispensing door Spaceman USA 6210 Training rev111918...
- Page 17 (4) edge against the door as you insert Spaceman USA 6210 Training rev111918...
- Page 18 Insert dispensing door assembly into Install cylinder, beater rod first, pushing handle all the way up as you insert dispensing door Secure door assembly in a cross- pattern using hand-screws (4) Spaceman USA 6210 Training rev111918...
- Page 19 Install internal If machine will be left unused, install and front drip air tube and place hopper lid on top; trays otherwise, set air tube aside until after machine has been primed Spaceman USA 6210 Training rev111918...
- Page 20 (UP) solution into hopper Always use food-grade, no-rinse sanitizer (Stera-Sheen green label or equivalent) to sanitize. If warm water is required to dissolve sanitizer, allow the solution time to cool before adding to machine. Spaceman USA 6210 Training rev111918...
- Page 21 While agitating, gently use a cylinder to air-dry. Sanitize clean brush to scrub and Press RESET button to machine before using again. distribute sanitizer solution stop cycle along hopper walls Spaceman USA 6210 Training rev111918...
- Page 22 2 gallons of product below draw valve not been recently sanitized, verify door according to manufacturer hand-screws are tight, and perform instructions; mix should be cool sanitizing steps (Page 15) and smooth (free of large chunks) Spaceman USA 6210 Training rev111918...
- Page 23 OPEN draw handle (DOWN); Once sanitizer has been purged from the machine and a steady stream of into hopper sanitizer will start to flow out product is flowing from the spout, draw valve CLOSE draw handle (UP) Spaceman USA 6210 Training rev111918...
- Page 24 (inlet hole door until flow is on side of air tube at 100% product bottom) NOTE: The mix-low lights illuminate when a hopper is low on product mix and automatically de-illuminate when machine is filled. Spaceman USA 6210 Training rev111918...
- Page 25 (viscosity can be changed in If machine doesn't turn on, turn power OFF, wait 30 minutes, and repeat steps 1 to 5. If problem persists, contact service team. the Settings menu, Page 19) Spaceman USA 6210 Training rev111918...
-
Page 26: Freeze Product
When product reaches the set mixed product and agitate the product, and the viscosity, it is ready to dispense primed cooling system will begin to (viscosity can be changed in the freeze the product Settings menu, Page 19) Spaceman USA 6210 Training rev111918... - Page 27 Make only small adjustments to viscosity setting; allow at least 10 to 15 minutes between adjustments to evaluate product firmness. Viscosity setting should not need continuous adjustment. A setting of 3 is a good starting point for most product Spaceman USA 6210 Training rev111918...
- Page 28 Insert air tube into machine with correct orientation (inlet hole slow-periods. on the side of the air tube at the bottom) Machine is ready for normal operation Spaceman USA 6210 Training rev111918...
Need help?
Do you have a question about the 6210 and is the answer not in the manual?
Questions and answers