Advertisement
Item #1003 952 699
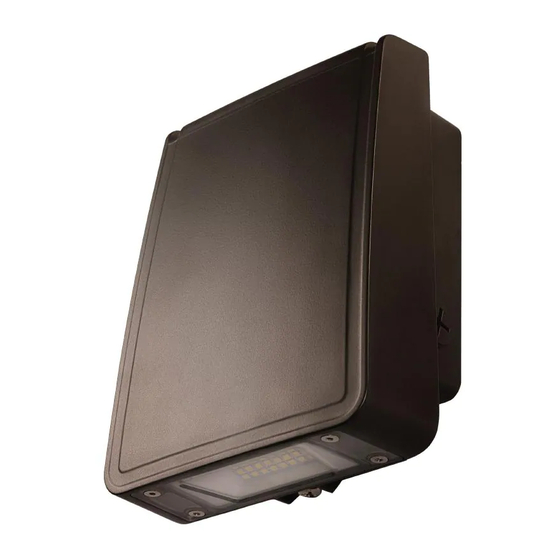
Model #STL15-4K-BZ
USE AND CARE GUIDE
STEALTH LED SLIM WALLPACK
Questions, problems, missing parts? Before returning to the store,
call Commercial Electric Customer Service
9 a.m. - 5 p.m., EST, Monday - Friday
1-844-548-3776
HOMEDEPOT.COM
THANK YOU
We appreciate the trust and confidence you have placed in Commercial Electric through the purchase of this LED
wallpack. We strive to continually create quality products designed to enhance your home. Visit us online to see our
full line of products available for your home improvement needs. Thank you for choosing Commercial Electric!
Advertisement
Table of Contents

Summary of Contents for Commercial Electric STL15-4K-BZ
- Page 1 HOMEDEPOT.COM THANK YOU We appreciate the trust and confidence you have placed in Commercial Electric through the purchase of this LED wallpack. We strive to continually create quality products designed to enhance your home. Visit us online to see our...
-
Page 2: Table Of Contents
Table of Contents Safety Information .............2 Installation ..............5 Warranty..............2 Care and Cleaning .............9 Pre-Installation ............3 Troubleshooting ............9 Preparing for Installation ..........5 Safety Information IMPORTANT WARNING: Before installation or servicing, turn the power OFF at the circuit breaker or fuse. Place tape over THIS PRODUCT MUST BE INSTALLED IN ACCORDANCE the circuit breaker switch and verify power is OFF at the WITH THE APPLICABLE NATIONAL ELECTRICAL CODE AND... -
Page 3: Pre-Installation
Warranty (continued) LIMITATION OF LIABILITY In no event shall the manufacturer be liable for indirect, consequential, incidental or special damages, or lost profits. The manufacturer is not liable for any claims or damage arising out of or connected with the manufacture, sale, delivery, use, maintenance and repair or modification of the manufacturer products, or supply of any replacement parts that exceed the purchase price of the manufacturer products giving rise to a claim. - Page 4 Pre-Installation (continued) HARDWARE INCLUDED NOTE: Hardware not shown to actual size. Part Description Quantity #8-32x3/4 in. Phillips mounting base screw PACKAGE CONTENTS Part Description Quantity Light fixture Conduit entry plug Mounting base screw (pre-installed) Mounting base Wago quick wire connectors (pre-installed in fixture back box) Leveling bubble (pre-installed in fixture back box)
-
Page 5: Preparing For Installation
Preparing for Installation Review this information to ensure a successful installation: □ The fixture can be mounted in the following two ways: □ Junction Box Mount: Use an external junction box to mount the fixture. □ Surface Conduit Mount: The fixture can be mounted directly on a wall surface using conduit entry. - Page 6 Installation (continued) Removing the mounting base NOTE: The mounting base screw (C) comes pre-assembled on the light fixture. □ Remove the mounting base (D) from the bottom of the fixture by loosening (do not fully remove) the mounting base screw (C) using a Phillips screwdriver.
- Page 7 Installation (continued) Installing the mounting base Junction Box Mount □ Route the junction box wires through the rubber center plug in the mounting base (D), by pushing one wire through each hole in the plug. □ Use the leveling bubble (F) inside the back housing to adjust the mounting base (D) for a level install.
- Page 8 Installation (continued) Making the electrical connections □ For handsfree operation, to allow both hands to make electrical connections, use the hinge on the mounting base (D) to hang the fixture. □ For the conduit mount installation, remove one conduit plug (B) from the side of the fixture where the conduit will enter.
-
Page 9: Care And Cleaning
Installation (continued) Mounting the light fixture □ Close the fixture by tightening the mounting base screw (C) using a Phillips screwdriver. Caulking around the light fixture □ Caulk around the mounting base (D) and surface with silicone sealant (not included). NOTICE: Failure to properly caulk around the surface and mounting base (D) could lead to water damage and is not covered under warranty. - Page 10 Questions, problems, missing parts? Before returning to the store, call Commercial Electric Customer Service 9 a.m. - 5 p.m., EST, Monday-Friday 1-844-548-3776 HOMEDEPOT.COM Retain this manual for future use.


Need help?
Do you have a question about the STL15-4K-BZ and is the answer not in the manual?
Questions and answers