Table of Contents
Advertisement
Advertisement
Table of Contents

Related Manuals for Casio G'zOne Commando


Summary of Contents for Casio G'zOne Commando
- Page 1 USER GUIDE...
-
Page 2: Important Customer Information
Important Customer Information Data Plans and Features: Content and Internet Access Many services and applications offered through your device may be provided by third parties. Before you use, link to or download a service provided by a third party, or an application such as a non-Verizon Wireless location-based GPS type service, chat room, marketplace or social network from your device, you should review the terms of such service or application and applicable privacy... -
Page 3: Table Of Contents
Contents Getting Started with Your Phone ... 7 Phone overview ...7 Feature overview ...11 Installing and removing the battery ...13 Removing and installing a microSD card ...16 Charging the battery ...21 Touchscreen operations ...22 Turning the phone on and off ...25 Initial setup ...25 Basics ... - Page 4 Contents Dialing by voice ...71 Using voicemail ...72 Using Visual Voice Mail...73 Contacts ... 80 Opening your contacts ...80 Adding a new contact ...82 Editing contact details ...83 Deleting a contact ...86 Communicating with your contacts ...87 Changing which contacts are displayed ...88 Joining or separating contact information ...89 Importing, exporting, and sharing contacts ...90 Working with Groups ...92...
- Page 5 Starring messages ...123 Searching your messages ...123 Working with message in batches ...123 Composing and sending email ...124 Working with account folders ...125 Adding and editing email accounts ...125 Messaging ...130 Checking sent and received messages ...130 Sending a message ...133 Changing Messaging settings ...135 Mobile IM ...137 Signing in and out ...137...
- Page 6 Contents Music ...173 Copying music files to the phone’s microSD card ...173 Opening Music and working with your library ...175 Playing music ...177 Working with playlists ...179 Using V CAST Media Manager ...182 Calendar ... 183 Viewing your calendar and events ...183 Creating an event ...190 Editing or deleting an event ...191 Setting an event reminder...192...
- Page 7 My Verizon Mobile ... 207 Opening My Verizon Mobile ...207 ® G’zGEAR ... 208 Opening G’zGEAR ...208 Earth Compass ...209 Walking Counter ...213 Adventure Training ...215 Trip Memory ...218 Thermometer ...220 Tides ...221 Sun/Moon ...223 Star Gazer ...224 Configuring G’zGEAR ...227 Widgets in G’zGEAR ...228 More Applications ...
- Page 8 Safety Information for FCC RF Exposure ...279 FDA Information ...282 Emergency Calls ...290 Compliance with Other FCC Regulations ...292 General Safety ...292 Games ...298 Camera ...299 Accessibility ...299 RECYCLE YOUR CELL PHONE! ...303 12 MONTH LIMITED WARRANTY ... 305 Index ... 309...
-
Page 9: Getting Started With Your Phone
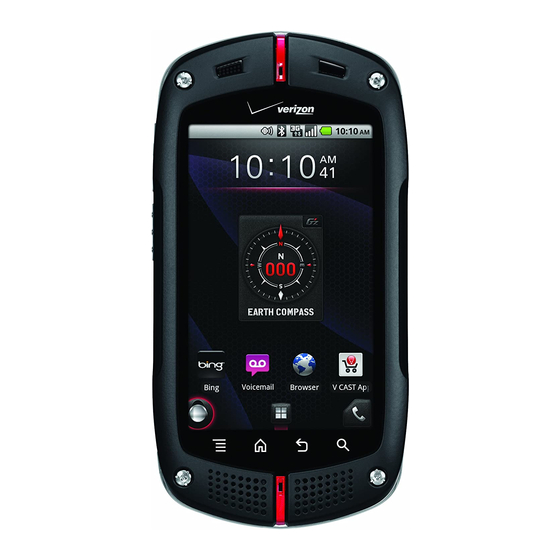
Getting Started with Your Phone Phone overview 2. Temperature Sensor 3. Touchscreen 4. Microphone 5. Speaker 12. Internal Antenna Area* 13. Camera/ Camcorder Lens 14. Battery Cover Lock 12. Internal Antenna Area* * For best performance, do not touch these areas when using your phone. 1. - Page 10 20. Volume Keys 21. Tactile Key 22. Charging Terminals 23. Power Key 1. Earpiece 2. Temperature Sensor 3. Touchscreen You can operate your phone by touching the screen. 4. Microphone 5. Speaker 6. Light Sensor Senses the ambient light and the phone will automatically adjust the brightness of the display accordingly (applicable when Automatic brightness is enabled).
- Page 11 Touch and hold to display up to eight icons of recently used applications. 10. B Back Key Touch to return to the previous screen. When a pop-up screen, such as menu or a dialog box, is displayed touching this key will close it. 11.
-
Page 12: Tactile Key
21. , Tactile Key Press to open the application selected in the Tactile key setting of Personalization in advance. By default, G’zGEAR 22. Charging Terminals The terminals used to charge the phone when it is placed on the cradle (sold separately). 23. -
Page 13: Feature Overview
Feature overview Water resistance The CASIO G’zOne Commando™ is water resistant. It provides reliable performance for outdoor activities, and in wet conditions such as driving rain or high humidity. The tested device meets the requirements of the MIL-STD-810G (Rain &... -
Page 14: Dust Resistance
Shock resistance The rugged construction of the Commando™ provides outstanding shock and vibration resistance. The tested device meets the requirements of the MIL-STD-810G (Drop 1.5m) standard. Warning! The shock and vibration resistance features do not guarantee protection against every type of shock and vibration. Your phone may be damaged or malfunction depending on the severity of the shock or vibration. -
Page 15: Installing And Removing The Battery
Warning! • Do not clean terminals inside the phone, or they may be damaged. • If mud or sand is adhered to the phone, do not use it until wiping completely. • Do not place the phone directly on sand. If sand gets into the Earpiece or Speaker, sounds may be difficult to hear. - Page 16 Slide the Battery Cover Lock to the left to the FREE position, as shown in the figure. Insert your finger in the groove 1 and pull up on the battery cover in the direction of the arrow 2. When the battery cover is disengaged, pull it up in the direction of the arrow 3.
- Page 17 Press down firmly on all sides of the battery cover at each arrow point, as shown in the right figure. Slide the Battery Cover Lock to the right to the LOCK position, as shown in the figure. Warning! • Do not twist the battery cover as shown in the right figure.
-
Page 18: Removing A Microsd Card
Removing and installing a microSD card To use the multimedia functions such as the Camera application and downloading/playing music or video, a microSD card should be installed in the phone. NOTE The phone comes with a pre-installed 8GB microSD card. Removing a microSD card Warning! •... - Page 19 Raise the microSD card cover by rotating it in the direction of the arrow shown in the right figure. Remove the microSD card from the microSD card cover as shown in the right figure. Lower the microSD card cover by rotating it in the direction of the arrow shown in the right figure.
-
Page 20: Installing A Microsd Card
Installing a microSD card Warning! • Whenever installing or removing a microSD card, make sure the phone is turned off and that the Wall/USB Charger is not connected. • When installing or removing a microSD card, avoid touching the microSD card terminal to avoid damaging the microSD card, causing malfunction or loss of data. - Page 21 Lightly press and hold the microSD card cover with your finger cushion 1, then unlock it by sliding it in the direction of the arrow 2 as shown in the right figure. Raise the microSD card cover by rotating it in the direction of the arrow shown in the right figure.
- Page 22 Lightly press and hold the microSD card cover 1, then lock it by sliding it in the direction of the arrow 2 shown in the right figure. Install the battery and replace the battery cover, making sure to slide the Battery Cover Lock to the LOCK position. •...
-
Page 23: Charging The Battery
Charging the battery To charge your battery: To open the Charging/Data Port cover, insert your fingertip into the notch and open the cover. Then connect the USB Cable (included in box) to the Charging/Data Port. Connect the opposite end of the USB Cable to the USB port on the Wall Charger (included in box). -
Page 24: Touchscreen Operations
Warning! • Hold the small connector with the USB mark facing up. When inserting the connector into the Charging/Data port on the phone, hold the connector straight against the port without tilting it vertically or horizontally and insert it gently. •... -
Page 25: Swipe Or Slide
Touch To select an item, touch the Touchscreen with your finger once. You can select a menu item or icon, or enter text, by touching the screen. Touch and hold To open the pop-up menu, touch and hold the Touchscreen with your finger. -
Page 26: Rotate The Screen
Pinch In some applications (such as Browser, Maps, Gallery, and Document Viewer), you can zoom in and out by placing two fingers on the screen at once and spreading them apart (to zoom in) or pinching them together (to zoom out). Rotate the screen In many applications, turning the phone clockwise or counterclockwise from upright to sideways rotates the orientation of the screen display. -
Page 27: Turning The Phone On And Off
Turning the phone on and off Turning the phone on Press and hold the Power key P for at least two seconds. NOTES • When you first turn on the phone, you are prompted to perform Initial setup. See “Initial setup” on page 25. •... - Page 28 Set up the Google account. Touch Set up > Next, then touch one of the following options: Create: Enables you to create a new Google account. Follow the on-screen instructions to enter information such as a user name. Once the Google account is created, you can sign in to your account by entering your username and password.
- Page 29 About Google account To use Google services such as Gmail™, Google Talk™, Google Calendar™, and other Google applications, or for backing up settings to the Google server, you should sign in to your Google account. When signed in, the phone will be synchronized with the data such as Contacts, Gmail Messages, and Event Calendar that are registered in the applications and services on the web.
-
Page 30: Basics
Turning the screen on and off You can turn off the screen to conserve the battery. The touchscreen is locked while the screen is off to prevent improper operation. NOTE The screen also turns off when the phone is not used for a certain period of time. -
Page 31: Getting To Know The Home Screen
NOTES • Drag the slide icon will cancel the Silent mode if the phone is already in Silent mode. • If you have locked your screen, you must draw an unlock pattern or enter a PIN or password to unlock it. See “Locking your screen” on page 52. -
Page 32: Viewing Other Parts Of The Home Screen
• You can customize the Home screen with different wallpaper and display the items you want. See “Customizing the Home screen” on page 40. • Touch the Launcher icon installed applications. See “Opening and switching applications” on page 35. • Touch and hold the Launcher icon Home screen and its extensions, which you can touch to open. -
Page 33: Monitoring Your Phone's Status
Monitoring your phone’s status The Status bar appears at the top of every screen. It displays icons indicating that you have received notifications (on the left) and icons indicating the phone’s status (on the right), along with the current time. Notification icons If you have more notifications than can fit in the status bar, a plus icon prompts you to open the Notifications panel to view them all. -
Page 34: Notification Icons
Location information is available GPS is on Notification icons The following icons indicate that you have received a notification. See “Responding to a notification” on page 34 for information about responding to these notifications. In addition to these icons, applications you install on your phone may use their own notification icons. -
Page 35: Managing Notifications
Call in progress Call in progress using a Bluetooth headset Missed call Call forwarding is on Song is playing Uploading data Downloading data Managing notifications Notification icons report the arrival of new messages, calendar events, and alarms, as well as ongoing events, such as when call forwarding is on or the current call status. -
Page 36: Opening The Notifications Panel
Opening the Notifications panel Drag the Status bar down from the top of the screen. The Notifications panel displays your wireless provider and a list of your current notifications. Notifications about ongoing activities are listed first, followed by Notifications about events, such as new mail notifications or Calendar reminders. -
Page 37: Closing The Notifications Panel
Clearing all notifications Open the Notifications panel. Touch Clear at the top right of the panel. All event-based notifications are cleared; ongoing notifications remain in the list. Closing the Notifications panel Drag the tab at the bottom of the Notifications panel to the top of the screen. -
Page 38: Opening And Closing The Launcher
Opening and closing the Launcher Touch the Launcher icon The Launcher opens. If you have more applications than can fit on the Launcher in one view, you can slide the Launcher up or down to view more. Touch to close the Launcher. •... - Page 39 Switching to a recently used application Touch and hold the Home key H. A small window opens, with icons of applications that you have recently used. Touch an icon to open its application. Or, touch the Back key B to return to the current application. Opening an application from the Snap Out Menu You can quickly open applications using the Snap Out Menu.
- Page 40 While touching the screen with your finger, drag back the Snap Out Menu icon to select a shortcut icon. Lift your finger to open the application corresponding to the selected shortcut icon. NOTES • If you drag the Snap Out Menu icon the Home screen to the right and up, drawing an arc to the right edge of the screen, and then lift your finger, the Snap Out Menu remains displayed.
- Page 41 Deleting or adding a Snap Out Menu shortcut The Snap Out Menu can contain up to five shortcuts. If you want to add your favorite shortcuts, delete some shortcuts before adding. The shortcuts that are available depend on the applications you have installed.
-
Page 42: Customizing The Home Screen
Customizing the Home screen You can add application icons, shortcuts, widgets, and other items to any part of the Home screen. You can also change the wallpaper. Adding an item to the Home screen Open the Home screen where you want to add the item. For an introduction to working with the Home screen, including how to switch Home screens, see “Getting to know the Home screen”... -
Page 43: Renaming A Folder
NOTE If there are no empty spots on the Home screen, Add is dimmed; you must delete or move an item before you can add another item, or switch to another Home screen. Moving an item on the Home screen Touch and hold the item you want to move, until it vibrates. -
Page 44: Changing The Home Screen Wallpaper
Changing the Home screen wallpaper On the Home screen, touch the Menu key M > Wallpaper. Touch one of the following wallpaper types: Gallery: Allows you to use a picture that you have captured using the camera, or copied to your phone as a wallpaper. You can crop the picture before setting it as a wallpaper. -
Page 45: Data Usage
Bing™ Touch the text field of the Bing widget and enter the word(s) to search for. As you type, search results from your phone, previously chosen search results, and web search suggestions appear. Touch a suggestion to open it. Or, touch the microphone icon Touch to enter the word(s) you want to search for. - Page 46 Flashlight Touch the Flashlight widget to turn the Flashlight on or off. ® G’zGEAR With G’zGEAR, you can use six types of widgets: Compass, Moonrise Moonset, Pedometer, Sunrise Sunset, Tide, and Virtual Trek. See “Widgets in G’zGEAR” on page 228 for details. Market The Market widget displays recommended application one after another.
-
Page 47: Picture Frame
Music You can use the Music widget to control the playback of music from the Home screen. Touch to open the Music application. News and Weather The News and Weather widget displays the latest news and today’s weather forecast for the current location. Touch to open the News and Weather application with a summary of the... -
Page 48: Read Out
Read out You can use the Read out widget to have the phone read out the unread received messages with a synthetic voice. The Read out widget displays the number of unread messages. Touch the widget to start reading out unread messages. -
Page 49: Voice Memo
Voice Memo You can use the Voice Memo widget to record and save voice recordings to the microSD card. Touch to start recording. Touch again to stop recording and save to the microSD card. Voicemail The Voicemail widget displays the number of new voicemails. -
Page 50: Working With Menus
Working with menus There are two kinds of Android menus: options menus and context menus. Options menus Options menus contain tools that apply to the activities of the current screen or application, not to any specific item on the screen. You open options menus by touching the Menu key M. -
Page 51: Context Menus
Context menus Context menus contain tools that apply to a specific item on the screen. You open a context menu by touching and holding an item on the screen. Not all items have context menus. If you touch and hold an item that has no context menu, nothing happens. -
Page 52: Placing Your Phone In Silent Mode
Touch a Quick Contact icon to open a bubble with icons for all the ways you can communicate with the contact. If there are more icons than can fit in the bubble, drag them left and right to view them all. Touch an icon to open its application, so you can start communicating with your contact right away. -
Page 53: Placing Your Phone In Airplane Mode
NOTES • Repeat the same operation in Silent mode to exit Silent mode. • The audio from music, videos, and other media and any alarms you have set still sound in Silent mode. You must silence media and alarms in their own applications. Placing your phone in Airplane mode Some locations may require you to turn off your phone’s mobile, Wi-Fi, and Bluetooth wireless connections. -
Page 54: Locking Your Screen
Selecting a ringtone to sound when receiving a call On the Home screen, touch the Menu key M > Settings > Personalization > Phone ringtone. In the scrolling list of ringtones that opens, touch the one to play when you receive a phone call. The ringtone plays a sample. -
Page 55: Optimizing Battery Life
The next time you turn on your phone or wake up the screen, you must draw your unlock pattern or enter your PIN or password to unlock the screen. NOTE Even when the screen is locked, you can still place an emergency call by touching Emergency call on the screen to draw an unlock pattern or enter your PIN or password. -
Page 56: Checking The Battery Charge Level
Checking the battery charge level On the Home screen, touch the Menu key M > Settings > About phone > Status. The battery status (charging, discharging) and level (as a percentage of full charge) are displayed at the top of the screen. Monitoring and controlling what uses the battery The Battery Use screen shows which applications consume the most battery power. -
Page 57: Receiving A Notice To Update Your System Software
Warning! Depending on the type of update, all your personal data and customized settings may be erased, and applications and widgets you installed may be deleted by performing the update. Be sure to backup necessary files and information before performing an update. NOTE Checking and downloading system software updates may incur additional data transfer fees from Verizon Wireless. -
Page 58: Entering And Editing Text
Entering and editing text Entering text You can enter text using the onscreen keyboard. Some applications open the keyboard automatically. In others, you touch a text field where you want to enter text to open the keyboard. Touch a text field. The onscreen keyboard opens. - Page 59 NOTES • If you touch a suggested word that is not in the predictive text dictionary, it is automatically added to the dictionary. • Depending on a key, the list of relevant characters or symbols pops up when you touch and hold the key. You can enter a character or symbol by touching it in the list.
-
Page 60: Changing The Keyboard Type
Changing the keyboard type Touch the right arrow icon The icon menu will be displayed on the keyboard. Type of keyboard will be switched every time you touch the keyboard switch icon You can switch between the following types of keyboards: Keyboard: Full QWERTY keyboard same as that of PC. -
Page 61: Keys With Special Functions
Keys with special functions The following table describes the keys with special assigned functions. Some keys are not displayed depending on types of keyboards or applications. Shift Case key ?123 key Delete key Enter key Emoticons key Smart Punctuation key Touch once to capitalize the next character you type. - Page 62 XT9/ABC key Next key Done key Search key Entering words using Trace Input feature On the Full QWERTY keyboard, you can enter a word by tracing from key to key with your finger held on it. If, for example, you want to enter “Word”, trace from W to D key on the keyboard as shown in the figure below.
-
Page 63: Editing Text
Changing the keyboard orientation When entering text, you can change the keyboard orientation to horizontal by turning the phone sideways. You may feel the horizontal keyboard is easier to use because the keys are displayed larger. Turn the phone sideways. The screen rotates to horizontal, and so does the keyboard. -
Page 64: Selecting Text
Selecting text You select text that you want to cut or copy. Selected text is highlighted in orange. Touch the text field or other portion of the screen that contains the text to select. Touch in the text field to move the cursor to the beginning or end of the text to select. -
Page 65: Pasting Text
Pasting text You can paste text that you cut or copied from one application into a text field of another application. Cut or copy the text to paste. Touch the text field where you want to paste the text. Touch in the text field to move the cursor to the location where you want to paste the text. -
Page 66: Phone
You can use the Phone application to place a call. You can dial an incoming, outgoing, or missed call number recorded in the call log. Placing a call Touch the phone icon The Phone application opens. Touch to call your voicemail. Enter a phone number by touching the dialpad on the screen (include the area code if needed). -
Page 67: To Adjust The Call Volume
Touch the call icon The call in progress screen appears. Name in Contacts or caller’s phone number. City ID Touch to call another person. Touch to switch between using your Bluetooth headset or just your phone. • Press the Volume keys Touch the end call icon When a call ends, the Call log screen appears. -
Page 68: Answering A Call
• To end a call in progress when another application is opened, touch the phone icon call in progress, and then touch the end call icon Answering a call When there is an incoming call, the Incoming call screen opens. Information such as the caller’s phone number or the caller’s name is displayed if the phone number is already stored in Contacts. -
Page 69: Operation During A Call
Rejecting an incoming call When there is an incoming call, the Incoming call screen opens. Drag the slide icon The Send Message dialog appears prompting you to send a message to a caller after you rejected an incoming call. Touch OK to compose a message. See “Messaging” on page 130. Touch Cancel to return to the Home screen. -
Page 70: Muting The Microphone
Muting the microphone To mute the microphone, touch the microphone icon call in progress screen. When you mute the microphone, the mute icon Status bar. To un-mute the microphone, touch the microphone icon on the call in progress screen. NOTE The microphone un-mutes automatically when you end a call. -
Page 71: Managing Multiple Calls
Managing multiple calls Switching between multiple calls If you accept a new call when you are already on a call, you can switch between the two calls. When there is another incoming call while you are already on a call, the Incoming call screen opens. -
Page 72: Working With The Call Log
Working with the Call log The Call log is a list of all the calls you have placed, received, or missed. Placing a call from the Call log Touch the phone icon Touch the Call log tab. The Call log screen opens. Calls are listed with the most recent call at the top. -
Page 73: Dialing By Voice
Touch Call phone number or name to place a call. NOTES • Touch and hold a phone number or name on the Call log screen to access the following options: Call phone number or name: Calls a number in the Call log. View contact: Opens the details of the phone number in Contacts. -
Page 74: Using Voicemail
Say “Call” followed by the name of the contact to call. Or, follow one of the suggestions for dialing a number or controlling your phone in other ways. NOTE If you have a Bluetooth headset that supports “voice-recognition” or “voice dialing,” you may be able to open the Voice Dialer by pressing your headset’s main button or in some other way, and dial by voice using your headset. -
Page 75: Using Visual Voice Mail
The dialpad will automatically appear on the call in progress screen. Follow the instructions and enter a number or the # sign as requested. Follow the prompts to enter your password and retrieve your messages. NOTES • When you have a new voicemail message, the new voicemail icon appears on the Status bar. - Page 76 Touch Subscribe to Visual Voice Mail > Accept. Touch OK > Subscribe > Accept > Accept > Exit. Typical steps when you access the Visual Voice Mail for the first time are described above. Steps may be different if you have accessed it before.
-
Page 77: Listening To Your Voicemail
Listening to your voicemail Touch the Voicemail icon Launcher. The Visual Voice Mail screen opens. Touch the voicemail you want to listen to. The Voicemail player screen is displayed. Touch to display the previous voicemail. Touch to turn on the speakerphone. - Page 78 NOTE When you have a new voicemail message, a new voicemail icon appears on the Status bar. If you have already subscribed to Visual Voice Mail, drag the Status bar down to open the Notification panel and touch New voicemails to open Visual Voice Mail. Using the menu on the Visual Voice Mail screen The following menu is available on the Visual Voice Mail screen.
- Page 79 Play: Plays your voicemail. Mark as Heard: Marks the selected voicemail as heard. Call Voicemail: Places a call to the voicemail. (Only applicable for Voicemail system message) Delete: Deletes a voicemail. Call Back: Places a call to the sender of voicemail. Reply: Sends a reply by voicemail, text message, or Email.
- Page 80 Deleting multiple voicemails or marking as “Heard” From the Visual Voice Mail screen, touch the Menu key M > Select All. All voicemails will be check-marked. Touch a check-marked voicemail to un-check it. Touch Mark as Heard to mark all the check-marked voicemails as heard.
- Page 81 Touch the stop icon don’t touch the stop icon Touch Send to send a voicemail. NOTE Touch the Menu key M on the Voicemail composing screen to access the following options: Add from Contacts: Allows you to select and add a recipient from Contacts.
-
Page 82: Contacts
The Contacts application gives you quick and easy access to the people you want to reach. Information about your contacts is shared with other applications, such as Email, Messaging, Gallery (for sharing photos and videos), and so on. Opening your contacts Open Contacts to add, view, and communicate with your friends and acquaintances. -
Page 83: Searching For A Contact
NOTE If you have a new phone and haven’t added any contacts yet, Contacts displays a message with hints on how to start adding contacts to your phone. Viewing details about a contact Open your contacts. Touch the contact whose details you want to view. Entries for communicating with the contact are followed by details. -
Page 84: Adding A New Contact
Start entering the name of the contact you are searching for. As you type, contacts with matching names appear below the search box. Touch the matching contact in the list to open the Details screen, or touch the search icon contacts. -
Page 85: Editing Contact Details
Touch a category of contact information, such as phone numbers and email addresses, to enter that category of information about your contact. Scroll the page to view all categories. Touch a category’s plus icon category—for example, to add both work and home numbers. Touch the label to the left of the item of contact information to open a menu with preset labels, such as Mobile and Work for a phone number, or touch Custom in the menu to create your own label. - Page 86 NOTES • Some contact entries contain information from multiple sources: information that you added manually, information that Contacts joined from multiple accounts to consolidate duplicates, and so on. If you find duplicate entries in Contacts, you can join them into a single entry, as described in “Joining contacts” on page 89. If you find that information from unrelated contacts was joined in error, you can separate them, as described in “Separating contact information”...
-
Page 87: Setting A Ringtone For A Contact
Changing a contact’s default phone number The default phone number is used when you initiate a call or send a text message from the list by touching and holding a contact. Open your contacts. Touch the name of a contact in the list to view its details. Touch and hold the phone number to use as the contact’s default phone number. -
Page 88: Deleting A Contact
Setting a ringback tone for a contact Open your contacts. Touch the name of a contact in the list to view its details. Touch the Menu key M > Options > Ringback tone. In the scrolling list of ringback tones that opens, touch the one to play when you call the contact. -
Page 89: Communicating With Your Contacts
Communicating with your contacts From the Contacts or Favorites tab, you can quickly call or send a text (SMS) or multimedia message (MMS) to a contact’s default phone number. You can also open details to view a list of all the ways you can communicate with that contact. -
Page 90: Changing Which Contacts Are Displayed
Calling a contact’s default number Open your contacts. Touch and hold the entry for the contact to call. Touch Call in the menu that opens. The actual menu item depends on the default number you set for your contact, so it may be Call Mobile, Call Work, and so on. The Phone application is automatically activated when the number is called. -
Page 91: Joining Or Separating Contact Information
Displaying/hiding contacts without phone numbers If you use your list of contacts only to call people, you can hide any contacts that don’t have phone numbers. Open your contacts. Touch the Menu key M > Display options. Check or uncheck Only contacts with phones. Changing what account’s groups are displayed Open your contacts. -
Page 92: Separating Contact Information
Touch the Menu key M > Edit contact. Touch the Menu key M > Join. Likely contacts are displayed at the top of the screen. You can touch Show all contacts to pick a contact from your full list of contacts. -
Page 93: Importing Contacts From Your Microsd Card
Importing contacts from your microSD card You can copy individual or group contacts in vCard format onto your microSD card and then import them into one of your accounts on the phone. NOTES • For details about copying files to a microSD card from your PC, see “Connecting to a PC via USB”... -
Page 94: Working With Groups
Sharing a contact You can share the contact in vCard format via Email, Messaging, or Bluetooth connection. Open your Contacts. Open the contact you want to share. Touch the Menu key M > Share. In the menu that opens, touch the application to use for sharing the contact. -
Page 95: Editing A Group
Sending messages or emails to group members Open the Groups tab. Touch the group for which you want to send a message. Touch the Menu key M > Group Send SMS or Group Send Email. The Messaging or Email application is automatically activated. For more information about sending a message, see “Messaging”... -
Page 96: Working With Favorites
Working with Favorites The Favorites tab contains the contacts you have starred as favorites followed by a short list of the contacts you communicate with most frequently. Adding a contact to your favorites Touch the phone icon Touch the Contacts tab. Touch a contact to view its details. -
Page 97: Configuring Backup Assistant
Configuring Backup Assistant Backup Assistant safeguards your phone’s contacts and automatically saves a copy of the names, phone numbers, email addresses, etc., stored in your phone. You can view, print, add, delete, or edit your contacts online. NOTES • Subject to specific terms of use. Results may vary based on backup schedule and other factors. - Page 98 NOTE If you forgot or do not know the PIN code, touch Get PIN in step 5. Then, touch OK if you forgot the PIN code. The received PIN code will be displayed. To use Backup Assistant as the new user, touch New.
-
Page 99: Changing Pin
Changing schedule for auto-syncing You can change the time to perform auto-syncing. Touch the phone icon Touch the Contacts tab. Touch the Menu key M > Backup Assistant. Touch Account settings > Set Schedule. Touch the time to perform syncing in the menu that opens. Touch OK. -
Page 100: Connecting To Networks
Connecting to networks Connecting to networks Connecting to mobile networks When you buy your phone and sign up for service, your phone is configured to use your provider’s mobile networks for voice and data communication. The icons in the Status bar indicate which type of data network you are connected to and the network signal strength. -
Page 101: Connecting To Wi-Fi Networks
Configuring system select You can set your phone to search or roam for another network when you are not in your home area. Leave this setting as default unless you want to alter the system selection as instructed by your service provider. On the Home screen, touch the Menu key M >... -
Page 102: Turning Wi-Fi On And Connecting To A Wi-Fi Network
Turning Wi-Fi on and connecting to a Wi-Fi network On the Home screen, touch the Menu key M > Settings > Wireless & networks > Wi-Fi settings. The Wi-Fi settings screen appears. Touch Wi-Fi to check it. Wi-Fi turns on and your phone scans for available Wi-Fi network. A list of available Wi-Fi networks will be displayed. -
Page 103: Adding A Wi-Fi Network
• When connecting to a Wi-Fi network, your phone obtains network address and other information from the network via DHCP protocol. • Touch the Menu key check MAC address, or set Wi-Fi sleep policy. Adding a Wi-Fi network You can add a Wi-Fi network manually if it does not broadcast its name (SSID) or if you want to add a Wi-Fi network when you are out of its range. -
Page 104: Connecting To Virtual Private Networks
Receiving notifications when open networks are in range Set to receive notifications in the Status bar when your phone detects an open Wi-Fi network when Wi-Fi is on. On the Home screen, touch the Menu key M > Settings > Wireless &... -
Page 105: Connecting To A Vpn
NOTE There are numerous systems for securing VPN connections, including some that rely on secure certificates or other methods to ensure that only authorized users can connect. For instructions on how to install secure certificates, see “Installing a secure certificate from the microSD card”... -
Page 106: Working With Secure Certificates
The VPNs you have added are listed on the VPN settings screen. Touch the VPN to which you want to connect. In the dialog box that opens, enter any required credentials then touch Connect. NOTES • When you are connected to VPN, a VPN icon the Status bar. - Page 107 On the Home screen, touch the Menu key M > Settings > Location & security. Scroll the screen up, then touch Install from SD card. Only the names of certificates that you have not already installed on your phone are displayed. Touch the file name of the certificate to install.
-
Page 108: Connecting To Devices
Connecting to devices Connecting to devices Connecting to a Headset You can connect a compatible headset device equipped with a standard 3.5mm plug to your phone for safe, convenient, hands-free conversations. To open the Headset Jack cover, insert your fingertip into the notch and open the cover. Plug the connector into the Headset Jack. -
Page 109: Connecting To A Pc Via Usb
PC. NOTE The first time you connect the phone to your PC using the USB Cable, you need to install the USB driver for CASIO G’zOne Commando™, following the instructions displayed on the PC. Warning! •... -
Page 110: Formatting A Microsd Card
NOTE While the microSD card is mounted as a drive on your PC, you cannot access the microSD card from your phone, so you will not be able to use applications that rely on the microSD card, such as Camera, Gallery, and Music. You also will not be able to share your phone’s data connection with your PC via USB. -
Page 111: Turning Bluetooth On Or Off
Connecting to Bluetooth Bluetooth is a short-range wireless communications technology that devices can use to exchange information over a distance of about 8 meters. The most common Bluetooth devices are headphones for placing calls or listening to music, hands-free kits for cars, and other portable devices, including laptops and cell phones. -
Page 112: Pairing Your Phone With A Bluetooth Device
NOTE Turn off Bluetooth when you are not using it, to extend the life of your battery between charges. You may also be required to turn Bluetooth off in some locations. Bluetooth should be turned off during flight by setting it to Airplane mode. Changing your phone’s Bluetooth name Your phone’s Bluetooth name is visible to other devices when you connect them. -
Page 113: Connecting To A Bluetooth Device
Touch the ID of the other device in the list in Settings to pair them. The devices will pair with each other. If you are prompted to enter a passcode, try entering 0000 or 1234 (the most common passcodes), or consult the manual that came with the device for its passcode. -
Page 114: Sharing Your Phone's Mobile Data Connection
Disconnecting from a Bluetooth device Touch and hold the device in the Bluetooth settings screen. Touch Disconnect in the menu that opens. Unpairing a Bluetooth device You can unpair a Bluetooth device to erase all pairing information about the device. Touch and hold the device in the Bluetooth settings screen. - Page 115 name or secure it. See “Renaming or securing your mobile hotspot” on page 113. Uncheck 3G Mobile hotspot to stop sharing your data connection via Wi-Fi. Renaming or securing your mobile hotspot You can change the name of your phone’s Wi-Fi network name (SSID) and secure its Wi-Fi network.
-
Page 116: Accounts And Sync
Accounts and sync You can sync contacts, email, calendar events, and other information with your phone, from multiple Google Accounts, Microsoft Exchange ActiveSync accounts, or other types of accounts, depending on the applications installed on your phone. For example, you can start by adding your personal Google Account, so your personal email, contacts, and calendar are always available. -
Page 117: Adding An Account
Adding an account NOTE To add some accounts, you may need to obtain details from an IT support representative about the service to which the account connects. For example, you may need to know the account’s domain or server address. On the Home screen, touch the Menu key M >... -
Page 118: Removing An Account
Removing an account You can remove an account and all information associated with it from your phone, including email, contacts, settings, and so on. On the Home screen, touch the Menu key M > Settings > Accounts & sync. The Accounts & Sync Settings screen displays your current sync settings and a list of your current accounts. -
Page 119: Configuring General Sync Settings
• For some accounts, syncing is two-directional; changes that you make to the information on your phone are made to the copy of that information on the web. Your Google Account works this way. Other accounts support only one-way sync; the information on your phone is read-only. - Page 120 Changing account sync settings On the Home screen, touch the Menu key M > Settings > Accounts & sync. The Accounts & Sync Settings screen opens. Touch the account to configure. Touch the account whose sync settings you want to change. The Data and Synchronization screen opens, displaying a list of the types of information the account can sync.
-
Page 121: Email
You can use the Email application to read and send email. Email includes a wizard that makes it easy to configure it to several popular email service providers. Opening Email Touch the Launcher icon The Launcher opens. Touch the Email icon The first time you open Email, the Select service screen opens to help you add an email account, as described in “Adding an email account”... - Page 122 • The account from which you send email by default is indicated with a checkmark. Touch an account to open its Inbox. • Only some of your account’s recent emails are downloaded to your phone. To download earlier messages in batches for IMAP or POP3 accounts, touch Load more messages at the bottom of the list of emails.
-
Page 123: Reading Your Messages
Reading your messages You can read messages in the Inbox or other folders for individual accounts. NOTE When you receive a new message, you also receive a notification in the Status bar, unless you have turned off Email notifications using the Email Account settings, where you can also set whether or not the phone vibrates when it receives an Email notification, and pick a ringtone. -
Page 124: Responding To A Message
Responding to a message You can reply to, or forward, a message that you receive. You can also delete messages and manage them in other ways. Replying to, or forwarding a message While reading a message, touch Reply or Reply all. Or, touch the Menu key M >... -
Page 125: Starring Messages
Starring messages You can star an important message to make it easy to keep track. NOTE You can also star a batch of messages. See “Working with message in batches” on page 123. Starring a message While reading a message, touch the star Or, while viewing a list of messages in a folder, touch a message’s star The star turns gold... -
Page 126: Composing And Sending Email
Touch Mark read/unread, Add star/Remove star, Delete, or Move. You can also touch the Menu key M > Deselect all. Your action affects the entire batch of messages. Composing and sending email You can send email to your contacts or to other people or groups. On the Accounts screen or a folder screen, touch the Menu key M >... -
Page 127: Working With Account Folders
Working with account folders Each account has an Inbox, Outbox, Sent, and Drafts folders. Depending on the features supported by your account’s service provider, you may have additional folders. Open an account’s Inbox or another folder of messages. Touch the Menu key M > Folders. The account’s Folders screen opens, with a scrolling list of the folders in the account. -
Page 128: Adding An Email Account
though you will typically need to contact your email service provider to determine the right settings for your account. You can also set up a Microsoft Exchange ActiveSync account (Exchange 2003 and 2007), so you can read and work with the same emails you have on a PC using Microsoft Outlook. - Page 129 Adding an account of the provider that does not appear on the Select service screen If your email service provider is not listed on the Select service screen, perform the following steps to add an email account. Open the Accounts screen. Touch the Menu key M >...
- Page 130 Touch and hold the account whose settings you want to change. Touch Account settings in the menu that opens. Change the following settings as necessary. These settings apply only to the account with which you are working. Account name: The name of the account as it appears in the Accounts and Folders screens.
-
Page 131: Deleting An Email Account
have separate outgoing server settings. This option is not displayed for Yahoo!, Windows Live Hotmail, AOL, Gmail, or Verizon.net account.) Sync contacts: For accounts that can sync contacts, check to sync contacts from this account to your phone. See “Configuring account sync settings”... -
Page 132: Messaging
Checking sent and received messages You can check the messages you exchanged with each person as a different thread. Touch the Launcher icon The Launcher opens. Touch the Messaging icon The Messaging screen opens. Touch the thread of the exchanged message you want to check. The Message thread screen opens. - Page 133 • If the message contains a multimedia file, you can touch open, view, or listen to the file. NOTE When there is a new message, the new message icon appears on the Status bar. Drag the status bar down to open the Notifications panel and touch the new message to open the Message thread screen.
- Page 134 Using the menus on the Message thread screen The following options are available on the Message thread screen. • Touch the Menu key Call: Calls the phone number of the person with whom you are exchanging messages. View contact: Opens the details of the phone number in Contacts. (Only applicable if the phone number is already in your Contacts) Add subject: Adds subject to the message you are composing.
-
Page 135: Sending A Message
Import contacts: Imports content of attached vCard file to Contacts. (Only applicable if an attached file is vCard.) Copy message text: Copies the text of the message to the clipboard. View message details: Displays details such as message type and sender’s phone number. -
Page 136: Sending A Multimedia Message
NOTE If you touch the Back key B while composing a message, it is saved as a draft. Touch the message draft displayed in the Messaging screen to resume composing the message. Sending a multimedia message You can attach text, photo, recorded voice, audio file, video, contact, or photo slideshow to a multimedia (MMS) message. -
Page 137: Changing Messaging Settings
Capture picture: The Camera application opens so you can take a picture and attach it. Videos: Allows you to select and attach a video saved on the microSD card. Capture video: The Camera application opens in camcorder mode so you can take a video and attach it. Audio: Prompts you to select one of the internal audio files. - Page 138 Multimedia message (MMS) settings Delivery reports: Check to receive delivery reports for the multimedia messages you send. Read reports: Check to receive reports when your multimedia messages are read or deleted. Auto-retrieve: Uncheck to download only the heading of multimedia messages. You can later touch a heading to open a menu to download the whole message.
-
Page 139: Mobile Im
For Mobile IM, you can use AOL Windows Live™ Messenger Service, and Yahoo! Signing in and out Signing in to instant messaging service Touch the Launcher icon The Launcher opens. Touch the Mobile IM icon The Select service screen opens. Touch the service you want to sign in: AIM, Windows Live, or Yahoo!. -
Page 140: Signing Out
If you sign in to Yahoo! Messenger Service, check Enable IM Forwarding to enable IM Forwarding feature. Touch Sign in. When signed in, the Top screen is displayed. The following screen is displayed when you signed in to Yahoo! Touch to refresh the information currently displayed. Touch to update My Status. -
Page 141: Conversation
Conversation Starting a conversation On the Top screen, touch the Menu key M. Touch Send IM to... > Other. Enter a contact name (ID) to send a message. Touch OK. The Conversation screen opens. Enter your message and touch Send. The messages that you exchange are alternately displayed on the screen. -
Page 142: Adding A Contact
Adding a contact On the Top screen, touch the Menu key M. Touch Add Contact. Enter a contact name (ID). Touch OK. Touch the group to which you want to add a contact. Added contact will be displayed on the Top screen. Starting a conversation with registered contact On the Top screen, touch the contact with whom you want to start a conversation. -
Page 143: Changing Preferences
Closing a conversation On the Conversation screen, touch the Menu key M. Touch Close Conversation. Closing all conversations On the Top screen, touch and hold Conversations. Touch Close All Conversations in the menu that opens. Updating My Status On the Top screen, touch My Status. Touch a status in the menu that opens. - Page 144 IM Forwarding: Check to enable IM Forwarding feature. (Only applicable to Yahoo! Messenger Service.) Incoming Text Color: Displays a menu from which you can select the text color for incoming messages. Outgoing Text Color: Displays a menu from which you can select the text color for outgoing messages.
-
Page 145: Browser
The Browser allows you to view web pages. Opening Browser Touch the Browser icon The Browser opens with the web page you most recently viewed. If you have not used the Browser recently, your home page is displayed. NOTES • The Browser also opens when you touch a link to a web page included in an email or text message. - Page 146 Viewing a web page by specifying URL Touch the URL bar at the top of the Browser screen. If the URL bar is not visible, scroll up until the URL bar can be seen, or touch the Menu key M. Enter the address (URL) of the web page.
-
Page 147: Viewing A Web Page
NOTES • The URL bar may not be displayed at the top of the Browser screen on some websites. In that case, drag the page downward or touch the Menu key M to display the URL bar. • If it takes long time to open the specified web page, or if you change your mind, you can cancel the downloading of the page. -
Page 148: Searching For Text On A Web Page
• Place two fingers on the desired area of the screen at once and pinch them together to zoom out. • Slightly slide your finger on the Browser screen to display the zoom control icons of the zoom control to zoom in or out. Zooming in a section on a web page Double-tap on a section of a web page you want to zoom in. -
Page 149: Navigating Between Web Pages
Copying text on a web page Touch the Menu key M while viewing the Browser screen. Touch More > Select text. Highlight the text you want to copy. The text is copied to the clipboard. Refreshing the current web page Touch the Menu key M while viewing the Browser screen. - Page 150 Share link: Shares the link via Email, text message, or social networking site. Copy link URL: Copies the link’s URL to the clipboard. • When you touch a phone number link, the Phone application opens and allows you to place a call to that number. •...
-
Page 151: Working With Bookmarks
Touch the History tab. The browser history is sorted by time period, such as Today or 5 days ago. Touch a time period. Touch the page’s title to open the page. NOTES • You can also open the Back key B on the Browser screen. •... -
Page 152: Viewing Bookmarked Pages
NOTES • You can also view the M > Bookmarks while viewing the web page. • You can also bookmark the most recently viewed web page by touching the Menu key M > Bookmark last-viewed page while viewing the Bookmarks tab. •... -
Page 153: Downloading Files
Set as homepage: Sets the bookmarked web page as the Home page. • You cannot edit or delete the default bookmarks. Downloading files Image files, web pages, and applications can be downloaded from websites. Downloaded files will be stored in the phone’s microSD card. NOTES •... -
Page 154: Working With Multiple Browser Windows
NOTE If you change your mind about downloading a file, or want to stop downloading one started by mistake, you can cancel the download in progress. Touch the Menu key M > More > Downloads > Menu key M > Cancel all downloads. Viewing downloaded files Touch the Menu key M while viewing the Browser screen. -
Page 155: Changing Browser Settings
Switching Browser windows Touch the Menu key M while viewing the Browser screen. Touch Windows. The list of Browser windows is displayed. Touch to view the Browser windows. Touch the Browser window you want to view. Closing a Browser window Touch the Menu key M while viewing the Browser screen. - Page 156 Default zoom: Allows you to increase or decrease the magnification ratio that the Browser uses when first opening a web page. Open pages in overview: When checked, web pages are displayed in an overview. When unchecked, web pages are displayed at 100% size. Text encoding: Allows you to change the character-encoding standard that the Browser uses when displaying text on a web page.
- Page 157 Desktop mode: Check to enter Desktop mode. Privacy settings Clear cache: Allows you to delete the temporary files which the Browser stores in order to open web pages more quickly. Clear history: Allows you to delete the browser history. Accept cookies: When checked, the Phone allows web pages to store cookies on it.
- Page 158 Clear password: Touch to delete, all passwords which the Browser has stored. Show security warnings: When checked, the Browser warns you about web pages with common security problems such as outdated or invalid certificates. When unchecked, these warnings are suppressed. Advanced settings Website settings: Opens a screen where you can access advanced settings for particular web pages.
-
Page 159: Camera
The Camera application is a combination of both the camera and camcorder, which allows you to take pictures, shoot videos, and share them. Opening Camera Touch the Launcher icon The Launcher opens. Touch the Camera icon Camera opens, ready to take a picture. Touch to open the Icon menu. -
Page 160: Taking Pictures And Shooting Videos
Taking pictures and shooting videos NOTE Be sure to clean the protective lens cover with a microfiber cloth before taking pictures. A lens cover with smudges from fingers can cause blurry pictures with a “halo” effect. Taking a picture Touch the Launcher icon The Launcher opens. -
Page 161: Shooting A Video
NOTES • To focus first and then take a picture, press the Camera key halfway to focus on a subject, then press the key the rest of the way down to take a focused picture. If you want to cancel taking the picture, take your finger off the key before pressing the key the rest of the way down. -
Page 162: Changing Camera Settings
Press the Camera key S or touch the stop video icon shooting. An image from your most recent video is displayed as a thumbnail at the top right. Touch the thumbnail to view, share, and work with your videos in Gallery. - Page 163 • Picture quality: Touch to choose from Super fine, Fine, or Normal picture quality when taking pictures. Environment: Touch to open the Environment settings menu. • Brightness: Touch to adjust the brightness level within the range of +5 to –5. •...
-
Page 164: Camcorder Settings
• Store location: measured with the phone’s GPS to be stored with each picture you take. On: Location stored with photo Off: Location not stored with photo Zoom level: Touch to zoom. (You cannot zoom in or out a picture if its size is 5M.) Camcorder settings Quality: Touch to open the Quality setting menu. -
Page 165: Gallery
You can use Gallery application to view pictures and play videos that you have taken with Camera, downloaded, or copied onto your microSD card. Opening Gallery and viewing your albums Touch the Launcher icon The Launcher opens. Touch the Gallery icon The main Gallery screen opens displaying the pictures and videos on your microSD card, including those taken with Camera and downloaded from websites or other locations. -
Page 166: Working With Albums
Working with albums Albums are groups of images and videos in folders on your microSD card. Opening an album and viewing its contents Touch the Launcher icon The Launcher opens. Touch the Gallery icon The main Gallery screen opens. Touch the album with the contents you want to view. The album opens and displays the pictures and videos it contains in a chronological order. - Page 167 Changing how the contents of an album are displayed You can view the images and videos in your albums in a chronological grid or in stacks, sorted by the date and by the location where the images or videos were taken. You can switch album views with the Album View switch Drag the Album View switch to the right to view the contents of the album in stacks.
-
Page 168: Sharing An Album
Sharing an album You can share the entire contents of one or more albums. Open the main Gallery screen. Touch and hold a picture or video. Or, touch the Menu key M twice. Check or uncheck the albums you want to share. Touch Share at the bottom of the screen. -
Page 169: Deleting An Album
Deleting an album Open the main Gallery screen. Touch and hold a picture or video. Or, touch the Menu key M twice. Check or uncheck the albums you want to delete. Touch Delete at the bottom of the screen. Touch Confirm Delete in the dialog that opens. Working with pictures Use Gallery to view pictures that you have taken with Camera, downloaded, or copied onto your microSD card. -
Page 170: Rotating A Picture
• Touch the zoom icons zoom in or out. • Place two fingers on the screen at once and spread them apart or pinch them together to zoom in or out. • When the picture is zoomed in, drag the picture to view parts that are not in view. -
Page 171: Cropping A Picture
Cropping a picture You can save a zoomed-in portion of a picture by cropping it. Touch a picture to view the controls. Touch Menu > More > Crop. The cropping rectangle appears on top of the picture. Use the cropping tool to select the portion of the picture to crop. •... -
Page 172: Working With Videos
Sharing a picture You can share a picture by sending it to friends. Touch a picture to view the controls. Touch Menu > Share. In the menu that opens, touch the application you want to use to share the selected picture. The application you select will open with the picture (or a link) attached to a new message. -
Page 173: Sharing A Video
Touch a video to play it. Video always plays back in landscape mode. Touch to pause playback; touch again to resume playback. Touch to fast forward the video. Drag the slider to go directly to a section of the video. Sharing a video You can share a video by sending it in an email or with a multimedia (MMS) message. -
Page 174: Deleting A Video
NOTES • MMS messages have size limits, typically 1.2MB, or approximately 1 minute of high-quality video or 2 minutes of low- quality video. • If you are sharing one or more videos via Gmail, do not delete the originals before the message is completely sent (wait until it has the Sent label, not the Outbox label), or the attached videos will not be sent. -
Page 175: Music
You can use the Music application to organize and play music and audio files transferred from your PC to your microSD card. Copying music files to the phone’s microSD card The Music application plays audio files that are stored on your phone’s microSD card, so before you open Music, you must copy audio files from your PC to the microSD card. - Page 176 NOTES • You can use subfolders on the microSD card to organize your music files, or simply copy the audio files to the top level of the microSD card. • If the music files have accompanying artwork in JPEG format, include it in the same folder as the music files.
-
Page 177: Opening Music And Working With Your Library
Opening Music and working with your library After you have copied some music to your microSD card according to the instructions in “Copying music files to the phone’s microSD card” on page 173, or downloaded music from another source, you can open the Music application and see your music library, sorted in one of four ways. -
Page 178: Searching For Music In Your Library
Searching for music in your library Touch the Search key K on any Music application screen. Start typing the name of the artist, album, or track you are looking for. Matching songs are displayed in the list below the search box. Touch a song to play it, or touch an album or artist to view a list of associated songs. -
Page 179: Playing Music
Playing music Touch a song in your library to listen to it. The Playback screen opens and the song you touched starts to play. The tracks in the current playlist play in order until the last track of the playlist (unless you choose a repeat option). Otherwise, playback stops only if you stop it, even when you switch applications or receive a phone call. - Page 180 • You can return to the Playback screen from any other application by opening the Notifications panel and touching the ongoing music notification. • You can listen to music by using the phone’s built-in speaker, through a wired headset, or through a wireless Bluetooth stereo headset that supports the A2DP profile.
-
Page 181: Working With Playlists
Using a song as a ringtone You can use a song as your phone ringtone, in place of one of the ringtones that come with the phone. Touch and hold a song in a library list. Touch Use as phone ringtone in the menu that opens. NOTE You can also use the song that is playing in the Playback screen as your phone ringtone by touching the Menu key M >... -
Page 182: Adding A Song To A Playlist
Adding a song to a playlist While viewing a list of tracks in the Library, touch and hold a song to add it to a playlist. Touch Add to playlist. Touch the name of the playlist to add the song to. The song is added to the playlist. - Page 183 Renaming or delete a playlist Touch and hold a playlist in the Playlists tab. Touch Rename or Delete in the menu that opens. NOTES • You cannot delete or rename the Recently Added playlist. • No songs will be affected by the deleting of a playlist. Creating playlists on your PC You can create playlists on your PC to use in the Music application.
-
Page 184: Using V Cast Media Manager
Using V CAST Media Manager The CASIO G’zOne Commando™ is compatible with V CAST Media Manager. The desktop application, offered free by Verizon Wireless, allows you to transfer photos, music and videos between your phone and PC. Once the desktop application is installed, simply connect your phone and PC with a USB cable, and V CAST Media Manager makes it easier than ever to transfer, play and manage your media. -
Page 185: Calendar
Calendar on the phone works with the web-based Google Calendar service for creating and managing events, meetings, and appointments. It also works with the Microsoft Exchange ActiveSync calendar service. NOTE Calendar on the phone is optimized for the phone. Some Calendar features, such as creating Calendars, are only available in Google Calendar on the web. -
Page 186: Changing Your Calendar View
Opening your calendar Open Calendar to view events you have created or that others have invited you to. Touch the Launcher icon The Launcher opens. Touch the Calendar icon The calendar displays events added to your phone for each account that is set to synchronize with the calendar. Changing your calendar view Calendar has four views: Agenda, Day, Week, and Month. -
Page 187: Working In Agenda View
Working in Agenda view Agenda view is a list of your events in chronological order. All-day and multiday events are listed at the start of each day. Touch the Menu key M > Agenda. • Touch an event to view its details. A screen with details about the event opens. -
Page 188: Working In Day View
Working in Day view Day view displays a chart of the events of one day in a table of one-hour rows. The red line indicates the current time. All-day and multiday events are displayed at the top. Part of the title of each event is displayed in the rows that correspond to when it occurs. -
Page 189: Working In Week View
Working in Week view Week view displays a chart of the events of one week. All-day and multiday events are displayed at the top. Touch the Menu key M > Week. • Touch an event to view its details. A screen with details about the event opens. See “Viewing event details”... -
Page 190: Working In Month View
Working in Month view Month view displays a chart of the events of one month. Segments with scheduled events turn blue in each day’s vertical bar. Touch the Menu key M > Month. • Touch a day to view its events in Day view. See “Working in Day view”... -
Page 191: Viewing Event Details
Viewing event details Depending on the viewing type, you can view more information about an event in a number of ways. In Agenda, Day, or Week view, touch an event to view its details. In Month view, touch one of the days to switch to Day view. Then touch an event to view its details. -
Page 192: Creating An Event
Creating an event You can use Calendar on your phone to create events that appear on your phone and in Google Calendar on the web. In any Calendar view, touch the Menu key M > More > New event to open an Event details screen for a new event. Add details about the event. -
Page 193: Editing Or Deleting An Event
NOTE You can also touch and hold a spot in Day, Week, or Month view. In the menu that opens, touch New event to open the Event details screen with that day and time already entered. Editing or deleting an event You can edit or delete an event that you created on the phone or on the web. -
Page 194: Setting An Event Reminder
NOTE If a specific event repeats, you will be asked if you want to delete that one occurrence, or all future and past occurrences of that event in your Calendar application. Setting an event reminder You can set one or more reminders for an event. Setting an event reminder Open the event summary. -
Page 195: Responding To An Event Reminder
Responding to an event reminder If you set a reminder for an event, the Upcoming Event icon appears in the Notifications area of the Status bar when the reminder time arrives. If you receive notifications in the Status bar, drag the Status bar down to open the Notifications panel. - Page 196 Setting whether calendars are stored on the phone or visible Touch the Menu key M > More > Calendars. The Calendars screen displays all the calendars you have added or subscribed to for each account that is configured to synchronize events to your phone, organized by account.
-
Page 197: Changing Calendar Settings
Changing Calendar settings You can change the following settings for how Calendar displays event and how it notifies you of upcoming events. Open a Calendar view, touch the Menu key M > More > Settings. Change any of the following settings as needed: Hide declined events: Check to hide events you have declined invitations to. -
Page 198: Cast Apps Store
V CAST Apps Store V CAST Apps Store V CAST Apps Store is Verizon Wireless’s mobile storefront which delivers thousands of applications, games, and more to advanced devices. V CAST Apps Store enables you to discover, purchase, and use applications from your phone. Opening V CAST Apps Store Touch the V CAST Apps Store icon the Launcher. -
Page 199: Cast Music With Rhapsody
V CAST Music with Rhapsody V CAST Music with Rhapsody is a digital music service that lets you listen to millions of songs from thousands of artists. Discover new and old favorites in an extensive music catalog. Download V CAST Music with Rhapsody to sync tracks, albums, and playlists to your new compatible phone, while managing your existing PC music library all in one place. -
Page 200: Transferring Music From A Pc
Review the items and price, then touch Buy This Song to confirm your purchase. You’ll receive a confirmation of your purchase and that the music is ready for download. Touch Download Now to save the music to your phone. Downloaded songs will be stored in the phone’s microSD card. For instructions on how to play the downloaded songs, see “Music”... - Page 201 NOTE The system requirements for the V CAST Music with Rhapsody PC software are as follows: ® • Windows XP, Windows Vista • Pentium III 1.0 GHz or higher • 128 MB RAM • 380 MB available hard disk space (This is the minimum disk space required to install the program.
- Page 202 Syncing music from your PC Start V CAST Music with Rhapsody on your PC. Use the USB cable (included in box) to connect the phone to a USB port on your PC. If your phone is not recognized by V CAST Music with Rhapsody, drag the Status bar down from the top of the screen on your phone, then touch USB connection.
-
Page 203: Cast Tones
V CAST Tones V CAST Tones application lets you preview and buy from Verizon Wireless’ extensive catalog of Ringtones, Ringback Tones, and Ringback Tones Jukeboxes. You can download, manage, preview, and play the latest Tones content from your phone. Opening V CAST Tones Touch the Launcher icon The Launcher opens. -
Page 204: Cast Videos
Get news and entertainment on your phone with streaming video clips. NOTES • You will be charged application fees. • You must be within the Coverage Area to use V CAST. V CAST may not be available in all areas. Opening V CAST Videos Touch the Launcher icon The Launcher opens. - Page 205 Touch Yes to play the video, or touch No to return to the V CAST Videos menu screen. Downloaded videos will be stored in the phone’s microSD card. For Instructions on how to play the downloaded videos, see “Music” on page 173.
-
Page 206: Vz Navigator
Now you can find the address of an excellent restaurant or the nearest ATM. Check movie times. Discover the latest hot spots. And know exactly how to get where you are going. VZ Navigator puts all the advanced features of the latest GPS devices and systems on your phone —... -
Page 207: Opening Vz Navigator
Opening VZ Navigator Touch the Launcher icon The Launcher opens. Touch the VZ Navigator icon VZ Navigator opens. Touch to get turn-by-turn directions in a map view. Finding a location On the VZ Navigator screen, touch Find. Touch to select Addresses & My Places, Places by bing, Movies, Events, or Airport, then touch the search icon criteria such as an address, company or city in the search box, then touch the search icon... -
Page 208: Getting Directions
Getting directions On the VZ Navigator screen, touch Navigate. Enter the address of the starting place, then touch Find. Alternatively, touch to select Current location, Recents, Favorites, Contacts, or Airport, then touch the desired place from the displayed list. Touch Destination and repeat the above procedure to set the destination. -
Page 209: My Verizon Mobile
My Verizon Mobile You can use My Verizon Mobile to manage your Verizon Wireless account, i.e. you can view minute, message and data usage, and adjust an allowance minutes on current plans. NOTE No airtime or minute charges apply when accessing My Verizon Mobile. -
Page 210: G'zgear
G’zGEAR provides eight useful tools for outdoor activities. Warning! Do not use G’zGEAR while engaging in any dangerous sports. NOTE To get the current location with GPS, check the VZW Location Services option of Location & security settings to enable GPS function. -
Page 211: Earth Compass
• Touch Settings to configure G’zGEAR. See “Configuring G’zGEAR” on page 227. • Touch How To Use > Tutorial to play the video tutorial for G’zGEAR. The video tutorial is stored on the pre-installed microSD card. • Touch How To Use, then the name of the tool to display how to use it. - Page 212 • To calibrate the electronic compass, touch the Menu key M > Calibrate compass. Next, hold the phone as shown in the right figure and wave the phone in the shape of a large figure eight, making sure that each of six sides of the phone faces down toward the ground by rolling your wrists as illustrated in the figure below for about 15 seconds.
-
Page 213: Compass Mode
Compass mode You can check the direction in Compass mode. On the G’zGEAR Home menu screen, touch Earth Compass. If necessary, touch either of the switch mode icons to Compass mode. The Compass mode screen shows the direction and angle of direction together with the compass. - Page 214 the object on the map. Touch Edit to edit the point. Touch Delete to delete the point. • If more than one objects or points are selected by touching the screen, a list of the selected objects or points will be displayed. Touch an icon on the list to display the detail screen.
-
Page 215: Walking Counter
Walking Counter You can count the number of steps you traveled with the Walking Counter tool. NOTES • The pedometer counts your steps while the phone power is on. You do not need to open G’zGEAR to count your steps. •... -
Page 216: Pedometer Mode
Body Settings: Allows you to enter your height, weight, age, sex, and length of stride which are used to calculate the traveled distance and burned calories from the number of steps. Check Automatic calculation to automatically calculate the length of stride. -
Page 217: Adventure Training
Adventure Training With Adventure Training tool, you can enjoy running with the selected virtual opponent and record running logs. You can also analyze your running form. Running with your virtual opponent You can choose your virtual opponent among male or female world record holders of one mile, marathon or 100km races, or from wild animals such as emperor penguin. - Page 218 When you complete the target distance defined per virtual opponent or touch Stop > Save, the race result will be displayed. The information such as recorded time and date, traveled time and distance, burned calories, speed and distance chart, average speed, distance difference from the opponent will be displayed.
- Page 219 Secure the holster firmly on the belt so as not to move left or right and tilt against the belt. The form analysis result may be affected if the speaker sounds or the vibrator vibrates while you are running. Using menus in Run Training mode On the G'zGEAR Home menu screen, touch Adventure Training.
-
Page 220: Trip Memory
• Touch Form Analysis to view the form analysis result. • Touch Delete to delete currently viewed training history. • Touch Maps to view the traveled route on the map. Red markers are placed at one-mile intervals on the traveled route. Touch Graph to return to the previous screen. - Page 221 NOTE Touch and hold the screen or touch the Menu key M, then touch Home to return to the G’zGEAR Home menu screen. Trip List mode You can check the record of outdoor activities you saved. On the G’zGEAR Home menu screen, touch Trip Memory. If necessary, touch either of the switch mode icons to Trip List mode.
-
Page 222: Thermometer
Thermometer You can check the current temperature with the Thermometer tool. NOTES • The Thermometer cannot be used while the phone is being charged. • Expose the phone to open air and wait until it reaches the same temperature as the environment, which may take about 30 minutes. -
Page 223: Tides
Temperature Trip mode Based on meteorological data from 30 cities across the world, you can find a city whose average, highest, or lowest temperature is the closest to your current location temperature. On the G’zGEAR Home menu screen, touch Thermometer. If necessary, touch either of the switch mode icons to Temperature Trip mode. - Page 224 One-Day View mode The One-Day View mode displays the tidal graph for a single day. On the G’zGEAR Home menu screen, touch Tides. If necessary, touch either of the switch mode icons to One-Day View mode. The One-Day View screen displays the tidal graph, time of sunrise and sunset, and time of high and low tides.
-
Page 225: Sun/Moon
Sun/Moon You can use the Sun/Moon tool to check the time of sunrise, sunset, moonrise, and moonset at current location or desired point. NOTES • The Sun/Moon tool can display information for dates between January 1, 2010 and December 31, 2015. •... -
Page 226: Star Gazer
Moonrise Moonset mode You can check the time of moonrise and moonset and the position of the Moon. On the G’zGEAR Home menu screen, touch Sun/Moon. If necessary, touch either of the switch mode icons to Moonrise Moonset mode. The Moonrise Moonset screen displays the time of moonrise and moonset and the position of the Moon. - Page 227 • Touch the plus icon • Touch a constellation to display a detail screen showing its illustration and the main stars. Then touch Wikipedia to open a browser to view the information of that constellation in Wikipedia. • Touch and hold the screen or touch the Menu key the following options: Home: Returns to the G’zGEAR Home menu screen.
- Page 228 Constellation Finder mode You can locate constellations in the sky using Constellation Finder mode. On the G’zGEAR Home menu screen, touch Star Gazer. If necessary, touch either of the switch mode icons to Constellation Finder. Touch the constellation to find from the displayed list. Touch Search.
-
Page 229: Configuring G'zgear
Configuring G’zGEAR On the G’zGEAR Home menu screen, touch Settings. Change the following settings as necessary. Calibrate compass: Allows you to calibrate the electronic compass. GPS: Check to automatically set the current location while using G’zGEAR. G Switch: Check to enable switching of tools by shaking the phone to the left. -
Page 230: Widgets In G'zgear
Widgets in G’zGEAR G’zGEAR provides six different widgets. For instructions on how to add a widget to the Home screen, see “Adding an item to the Home screen” on page 40. Compass The Compass widget displays a stationary compass. When touched, the compass activates for 30 seconds to display the direction. -
Page 231: Moonrise Moonset
Moonrise Moonset The Moonrise Moonset widget displays the time of moonrise and moonset and the date in the lunar cycle. When touched, G’zGEAR opens to display the Moonrise Moonset screen. -
Page 232: More Applications
More Applications More Applications Bing™ Use the Bing search application to search webs, images, or videos. You can also retrieve current location-related information or view its map. NOTE To get the current location with GPS, check the VZW Location Services option of Location & security settings to enable GPS function. - Page 233 Using the menu on the Bing Maps screen The following menu is available on the Bing Maps screen. M to access the following options: • Touch the Menu key Home: Opens Bing homepage. Directions: Displays driving, public transport, or walking directions. List view: Displays the search results in a list format rather than with icons on the map.
-
Page 234: Android Market
Location: Check to use your location information to display search results that are close to you. Clear history: Erases recent search criteria records. Restore defaults: Resets all Bing Maps settings to defaults. Reset: Removes recent searches, favorites, locations and resets all Bing Maps settings to defaults. -
Page 235: Searching For Applications
NOTE You can return to the Android Market home screen from most of the other screens in Android Market, by touching the Market icon the top left or touching the Menu key M > Home. Searching for applications Touch the search icon Search key K. -
Page 236: Creating A Google Checkout Account
Touch Free (for free applications) or application price displayed under “Buy” (for paid applications). If the application requires access to your data or control of any functions on your phone, you are asked to review and grant permission before downloading. Read this screen carefully. Be especially cautious with applications that have access to many functions or to a significant amount of your data. -
Page 237: Requesting A Refund For An Application
Warning! When you have used Google Checkout once to purchase an application from Android Market, the phone remembers your password, so you do not need to enter it the next time. For this reason, you should secure your phone to prevent others from using it without your permission. -
Page 238: Youtube
YouTube YouTube is Google’s online video streaming service for viewing and uploading videos. Opening YouTube Touch the Launcher icon The Launcher opens. Touch the YouTube icon The YouTube home screen shows the list of the most popular, most discussed, and featured videos. Watching a video On any YouTube screen, touch a video to play it. -
Page 239: Searching For Videos
• Touch the Back key list. Searching for videos At the top of the YouTube home screen, touch the search icon Enter the text to search for. Touch a suggestion below the search box or touch the search icon Scroll through the search results and touch a video to watch it. Sharing your videos on YouTube You can shoot a video on the phone’s camcorder and upload it to YouTube. -
Page 240: Changing Youtube Settings
Enter a title for your video. You can add additional details by touching More details. Touch Upload. Changing YouTube settings On the YouTube home screen, touch the Menu key M > Settings. Change the following settings as necessary. High quality video on mobile: Check if you prefer to watch videos in high-quality by default when connected to mobile networks, to reduce startup time and data use. -
Page 241: Gmail
Gmail Gmail is Google’s web-based email service. Your messages are stored on Google servers, but you can read, write, and organize messages with the Gmail application on your phone or by a web browser. Because your mail is stored on Google servers, you can search your entire message history, backed by the speed and power of Google search. -
Page 242: Composing And Sending A Message
• Conversations with new messages have bold subject lines. To read a message in a conversation, touch its subject. • The current Google Account is displayed at the top right of the Inbox. If you have more than one account, touch the current account to switch accounts. -
Page 243: Google Talk
Google Talk Google Talk is Google’s instant messaging service. You can use it to communicate in real time with other people who also use Google Talk, on a phone, on the web, or with a desktop application. NOTE For more information about Google Talk, visit the Google website at the following URL: http://www.google.com/talk/. -
Page 244: City Id
® City ID You can use the City ID application to display the City and State of the telephone number you entered, or check the status of the subscription to City ID. Touch the Launcher icon The Launcher opens. Touch the City ID icon City ID opens. -
Page 245: Skype Mobile
Skype Mobile™ You can place unlimited Skype-to-Skype calls and unlimited amount of instant messages by using Skype Mobile application. Touch the Launcher icon The Launcher opens. Touch the Skype Mobile icon Skype Mobile opens. Follow the on-screen instructions. NOTE For more information about Skype, go to: http://www.verizonwireless.com/skype. -
Page 246: Slacker Radio
Slacker Radio Slacker Radio allows you to access to the entire Slacker music library featuring millions of songs from thousands of artists. Listen to over 120 expert programmed radio stations or create your own custom stations. Touch the Launcher icon The Launcher opens. -
Page 247: Document Viewer
Document Viewer You can use the Document Viewer to view files in Microsoft Microsoft ® Excel, Microsoft Touch the Launcher icon The Launcher opens. Touch the Document Viewer icon Document Viewer opens. Touch Folders to view folders and supported files on the microSD. Touch Supported files to view the list of supported files. - Page 248 Touch the Alarm Clock icon The Alarm Clock screen opens. Touch to open a screen where you can set the alarm’s time and other attributes. Touch an existing alarm to change its time and other attributes. The Set alarm screen opens. Touch Time to set the alarm.
-
Page 249: Adding An Alarm
NOTES • On the Alarm Clock screen, touch the Menu key to hide the clock on the Alarm Clock screen. • On the Set alarm screen, touch the Menu key to delete the set alarm. • When any alarm is set to on, the alarm icon Status bar. -
Page 250: Calculator
Calculator Use Calculator to solve simple arithmetic problems or use its advanced operators to solve more complex equations. Touch the Launcher icon The Launcher opens. Touch the Calculator icon Calculator opens with Basic panel. Enter numbers and arithmetic operators. NOTES •... -
Page 251: Voice Control
Perform any of the following operations as necessary: • Touch Use this recording to save the recorded data on your microSD card. • Touch Discard to discard the recorded data. • Touch the play icon • Touch the start record icon your microSD card and start the new recording. - Page 252 example, “Call John Work”) to access the contact’s phone number directly. Send <MSG Type>: To create a message, say “Send,” and the command system will prompt you for the type of message you want to send: Text, Picture or Video. You can state the name and number of the contact, the message type, and the contact name, number, or group (for example, “Send text message to Bob”) and the Messaging application will automatically start.
-
Page 253: Desk Cradle
Prompts: Displays the menu in which you can touch Mode to set the level of audio assistance, and touch Timeout to set how long the system listens for a command before timing out. About: Displays the Voice Control version. Desk Cradle The Desk Cradle application is automatically activated when you place your phone on the cradle that is sold separately and charging starts. -
Page 254: Car Mode
not displayed, if the brightness is set to the darkest by the Brightness option of Display setting. • If your phone is left for five minutes without operation, the screen will be dimmed. Touch the screen to return to previous brightness. - Page 255 Touch Accept. The Car Mode screen opens with large icons that you can touch to access VZ Navigator other features that are useful when driving. • Car Mode application places the phone in Car mode, which means that touching the Home key H returns you to the Car Mode screen, not the Home screen;...
- Page 256 Changing Car Mode settings Touch Settings on the Car Mode screen. Change the following settings as necessary. Brightness: Opens a dialog for adjusting the brightness of the screen. You can check Automatic brightness to set the phone to adjust the brightness automatically, using the phone’s built-in light sensor.
-
Page 257: Settings
You can use the Settings application to configure how your phone looks, sounds, communicates, protects your privacy, and operates in many other ways. Opening Settings On the Home screen or the Launcher, touch the Menu key M > Settings. The Settings application opens. NOTE You can also open the Settings application by touching the Settings icon... -
Page 258: Wireless & Network Settings
Wireless & network settings Use Wireless & Network settings to configure and manage connections to networks and devices by using Wi-Fi, Bluetooth, and mobile networks. You can also use Wireless & Network settings to configure connections between your phone and virtual private networks (VPNs), to connect your PC to the Internet using your phone, and to turn off all radios with Airplane mode. -
Page 259: Bluetooth Settings Screen
Add Wi-Fi network: Opens a dialog where you can add a Wi-Fi network by entering its SSID (network name) and security type. See “Connecting to Wi-Fi networks” on page 99. M > Scan on the Wi-Fi settings screen to • Touch Menu key manually scan for networks. -
Page 260: Mobile Networks Settings Screen
Scan for devices: Touch to search for and display information about nearby Bluetooth devices. Bluetooth devices: Displays a list of Bluetooth devices that you have previously configured and those detected when the phone last scanned for Bluetooth devices. 3G Mobile hotspot settings screen For details about these settings, see “Sharing your phone’s mobile data connection”... -
Page 261: Call Settings
Data roaming: Uncheck to prevent your phone from transmitting data on other carriers’ mobile networks when you can’t access your own carrier’s mobile networks. See “Disabling data when roaming” on page 98. Data usage: Displays Data used in current period, Data use period, and Data rate policy. -
Page 262: Sound Settings
Sound settings Use the Sound settings to configure how and at what volume the phone rings, vibrates, sounds when it receives a notification, sounds an alarm, or when you play music or other media with audio, as well as some related settings. Sound settings screen Silent mode: Check to silence all sounds (including call and notification ringtones) except the audio from music, videos, and other... -
Page 263: Display Settings
Digit dial readout: Check to have the phone read out digits entered when dialing a phone number. Screen lock sounds: Check to play a sound when the screen is locked or unlocked. Haptic feedback: Check to have the phone vibrate briefly when you touch the keys beneath the Touchscreen and perform other actions. -
Page 264: Location & Security Settings
Screen timeout: Opens a dialog where you can set how long to wait after you touch the screen or press a key before the screen darkens. For the best battery performance, use the shortest convenient timeout. Location & security settings Use the Location &... - Page 265 Use tactile feedback: Check to have the phone vibrate briefly as you touch each dot when you draw an unlock pattern or as you enter the unlock PIN or password. (This setting is not visible unless you have configured a screen unlock pattern, PIN, or password.) Visible passwords: Check to briefly show each character of the password as you enter them, so that you can see what you enter.
- Page 266 Password: Opens a set of screens that guide you through entering a password, as described in “Locking your screen” on page 52. Location Based Services (LBS) Your wireless device can determine its (and your) physical, geographical location (“Location Information”). Certain applications and services can access, collect and use Location Information and disclose the information to others.
-
Page 267: Applications Settings
parties who have access to your Location Information. Significant risks can be associated with disclosing your Location Information to others. Applications settings Use the Applications settings to view details about the applications installed on your phone, to manage the data, to forcibly stop installation, and to set whether or not you want to permit installation of applications that you obtain from websites and email. -
Page 268: Application Info Screen
memory you would recover if you stopped the service). Depending on the service, when you touch it in the list, it either opens a dialog in which you can stop it or opens its Settings screen. Development: See “Development screen” on page 267. Application Info screen The Application Info screen for each application lists its name and version, along with details about the application. -
Page 269: Development Screen
Development screen The Development screen contains settings that are useful for developing Android applications. USB debugging: Check to permit debugging tools on a PC to communicate with your phone via a USB connection. Stay awake: Check to prevent the screen from dimming and locking when the phone is connected to a charger or to a USB device that provides power. -
Page 270: Configuring Backup Assistant Sm
Accounts & sync settings Use the Accounts & Sync settings to add, remove, and manage your Google and other supported accounts. You also use these settings to control how and whether or not applications send, receive, and sync data on their own schedules, and whether or not applications can synchronize user data automatically. -
Page 271: Account Screen
Account screen This screen contains different options, depending on the account type. For Google Accounts, it lists the types of data you can synchronize to the phone, with checkboxes so you can turn synchronizing on and off for each type. You can also touch the Menu key M > Sync now to synchronize data. -
Page 272: Sd Card & Phone Storage Settings
Factory data reset: Erases all of your personal data from internal phone storage, including information about your Google Account, any other accounts, your system and application settings, and any downloaded applications. Resetting the phone does not erase any system software updates you have downloaded or any files on your microSD card, such as music or photos. -
Page 273: Usb Settings
Internal phone storage Available space: Shows the amount of internal phone storage used by the operating system, its components, applications (including those you downloaded there), and their permanent and temporary data. USB settings You can use the USB settings screen to set the pop-up menu for selecting the USB mode to appear when using the USB connection, or change the USB mode. -
Page 274: Keyboard Input Screen
switch icon appears on the icon menu of the onscreen keyboard. English and Spanish will be switched every time you touch the language switch icon To set English or Spanish input method, touch English or Español after you checked the language to use. Then touch Keyboard Input to display the Keyboard Input screen. -
Page 275: Voice Input & Output Settings
Auto-capitalization: Check to automatically capitalize the first letter of a new sentence. Auto-punctuation: Check to automatically insert a period if you touch the Space key twice. Voice input & output settings Use the Voice Input & output settings to configure the Android voice input feature and the text-to-speech synthesizer for applications that can take advantage of it, such as TalkBack. -
Page 276: Accessibility Settings
Language: Opens a dialog where you can select the language of the text you want the synthesizer to read. This is particularly useful in combination with Always use my settings, to ensure that text is spoken correctly in a variety of applications. Pico TTS: Opens a screen where you can set up Pico TTS. -
Page 277: About Phone
About phone About Phone includes information about your phone. About Phone screen System updates: Opens a screen that reports availability of Android system software updates. If no update is available the message “Your system is currently up-to-date.” appears. See “Updating your phone’s system software”... -
Page 278: Safety
TIA Safety Information The following is the complete TIA Safety Information for wireless handheld phones. Tips on Efficient Operation Do not touch the antenna unnecessarily when the phone is in use. Contact with the antenna affects call quality and may cause the phone to consume more power than otherwise needed. -
Page 279: Electronic Devices
Electronic Devices Your wireless handheld portable telephone is a low power radio transmitter and receiver. When it is ON, it receives and also sends out radio frequency (RF) signals. Most modern electronic equipment is shielded from RF energy. However, certain electronic equipment may not be shielded against the RF signals from your wireless phone. -
Page 280: Other Medical Devices
Other Medical Devices If you use any other personal medical device, consult the manufacturer of your device to determine if they are adequately shielded from external RF energy. Your physician may be able to assist you in obtaining this information. Hospitals and Health Care Facilities Turn your phone OFF in health care facilities when any regulations posted in these areas instruct you to do so. -
Page 281: Safety Information For Fcc Rf Exposure
Blasting Areas To avoid interfering with blasting operations, turn your phone OFF when in a “blasting area” or in areas posted “Turn off two-way radio”. Obey all signs and instructions. Potentially Explosive Atmospheres Turn your phone OFF when in any area with a potentially explosive atmosphere and obey all signs and instructions. -
Page 282: Sar Information
SAR information THIS MODEL PHONE MEETS THE GOVERNMENT’S REQUIREMENTS FOR EXPOSURE TO RADIO WAVES. Your wireless phone is a radio transmitter and receiver. It is designed and manufactured not to exceed the emission limits for exposure to radiofrequency (RF) energy set by the Federal Communications Commission of the U.S. - Page 283 in violation of FCC RF Exposure guidelines. The highest SAR value for this model phone when tested for use at the ear is 1.13W/Kg and when worn on the body, as described in this guide, is 1.44W/Kg. (Body-worn measurements differ among phone models, depending upon available accessories and FCC requirements).
-
Page 284: Fda Information
These types of wireless phones can expose the user to measurable radiofrequency energy (RF) because of the short distance between the phone and the user’s head. These RF exposures are limited by U.S. Food and Drug Administration Cell Phone Facts Consumer Information on Wireless Phones... - Page 285 Federal Communications Commission safety guidelines that were developed with the advice of FDA and other federal health and safety agencies. When the phone is located at greater distances from the user, the exposure to RF is drastically lower because a person’s RF exposure decreases rapidly with increasing distance from the source.
- Page 286 radiofrequency energy (RF) at a level that is hazardous to the user. In such a case, FDA could require the manufacturers of wireless phones to notify users of the health hazard and to repair, replace or recall the phones so that the hazard no longer exists. Although the existing scientific data do not justify FDA regulatory actions, FDA has urged the wireless phone industry to take a number of steps, including the following:...
- Page 287 rely upon. While these base stations operate at higher power than do the wireless phones themselves, the RF exposures that people get from these base stations are typically thousands of times lower than those they can get from wireless phones. Base stations are thus not the primary subject of the safety questions discussed in this document.
- Page 288 What research is needed to decide whether RF exposure from wireless phones poses a health risk? A combination of laboratory studies and epidemiological studies of people actually using wireless phones would provide some of the data that are needed. Lifetime animal exposure studies could be completed in a few years.
- Page 289 FDA and the Cellular Telecommunications & Internet Association (CTIA) have a formal Cooperative Research and Development Agreement (CRADA) to do research on wireless phone safety. FDA provides the scientific oversight, obtaining input from experts in government, industry, and academic organizations. CTIA-funded research is conducted through contracts to independent investigators.
- Page 290 What about children using wireless phones? The scientific evidence does not show a danger to users of wireless phones, including children and teenagers. If you want to take steps to lower exposure to radiofrequency energy (RF), the measures described above would apply to children and teenagers using wireless phones.
-
Page 291: Medical Equipment
Do wireless phone accessories that claim to shield the head from RF radiation work? Since there are no known risks from exposure to RF emissions from wireless phones, there is no reason to believe that accessories that claim to shield the head from those emissions reduce risks. Some products that claim to shield the user from RF absorption use special phone cases, while others involve nothing more than a metallic accessory attached to the phone. -
Page 292: Emergency Calls
phones and helped develop a voluntary standard sponsored by the Institute of Electrical and Electronic Engineers (IEEE). This standard specifies test methods and performance requirements for hearing aids and wireless phones so that no interference occurs when a person uses a “compatible” phone and a “compatible” hearing aid at the same time. -
Page 293: In Lock Mode
67 percent of calls and within 150 meters of the actual location for 95 percent of calls. CASIO G’zOne Commando™ — ALI Capability The Commando™ is an ALI-capable phone equipped with a GPS (Global Positioning System) receiver supporting a satellite-based GPS ALI-capable network to comply with the FCC’s ALI requirements. -
Page 294: Compliance With Other Fcc Regulations
911 Using Any Available System Touch Emergency call. Enter “911” then touch the call icon The call connects. The phone remains in Emergency Mode for 5 minutes. To exit emergency mode, press the Power key P. Compliance with Other FCC Regulations Operating Procedures Never violate any of the following Rules and Regulations of the FCC when using your Cellular Phone. - Page 295 and/or property damage due to battery liquid leakage, fire or rupture. DO NOT use or store this equipment in a place where it will be exposed to high temperatures, such as near an open flame or heat- emitting equipment. DO NOT drop your device or subject it to severe shock. When not using, lay down the unit to avoid possible damage due to instability.
- Page 296 touch the device’s charging terminal with your hand or finger. It may cause electric shock, injury or product failure. If the device does not finish recharging within the specified timeframe, stop charging. It may cause leakage, heat generation, explosion or fire. If the device is damaged by dropping it and the internal parts are exposed, do not touch the exposed parts.
-
Page 297: Antenna Safety
Never bring the device near a floppy disk, magnetic card, magnetic tape, MOs, MDs, prepaid cards, or other similar objects. It may destroy or corrupt the data. Never press or poke the phone’s display with your finger or another object. It may cause damage to the display. Never twist the device. - Page 298 • Try to keep batteries in a temperature between 41°F (5°C) and 95°F (35°C). • If the battery is stored in temperatures above or below the recommended range, give it time to warm up or cool down before using. • Completely drain the battery before recharging.
- Page 299 with RBRC standards. When disposing of the battery by yourself, please call RBRC at (800) 822-8837 for proper disposal tips. Never touch any fluid that might leak from the battery. Such liquid when in contact with the eyes or skin, could cause injury to the skin or eyes.
-
Page 300: Games
Always disconnect the wall charger from the power source when it is not in use. If the plug is not inserted completely, it may cause electric shock, heat generation or fire. Do not use a damaged AC-Adapter or loosened plug. Do not touch the charging terminal with your hand or finger while it is conducting electricity. -
Page 301: Camera
Repetitive Motion Injuries When you play games on your phone, you may experience occasional discomfort in your hands, arms, shoulders, neck, or other parts of your body. Follow these instructions to avoid problems such as tendonitis, carpal tunnel syndrome, or other musculoskeletal disorders: •... - Page 302 What is Hearing Aid Compatibility? The Federal Communications Commission has implemented rules and a rating system designed to enable people who wear hearing aids to more effectively use these wireless telecommunications devices. The standard for compatibility of digital wireless phones with hearing aids is set forth in American National Standard Institute (ANSI) standard C63.19.
-
Page 303: Avoid Potential Hearing Loss
For more information about hearing aids and digital wireless phones: • FCC Hearing Aid Compatibility and Volume Control http://www.fcc.gov/cgb/dro/hearing.html • Hearing Loss Association of America http://www.hearingloss.org/learn/cellphonetech.asp • CTIA http://www.accesswireless.org/hearingaid/ • Gallaudet University, RERC http://tap.gallaudet.edu/voice Teletypewriter (TTY) Devices You can use an optional teletypewriter (TTY) device with your phone to send and receive calls. - Page 304 players and cellular telephones, at high volume settings for long durations may lead to permanent noise-induced hearing loss. This includes the use of headphones (including headsets, earbuds and Bluetooth or other wireless devices). Exposure to very loud sound has also been associated in some studies with tinnitus (a ringing in the ear), hypersensitivity to sound and distorted hearing.
-
Page 305: Recycle Your Cell Phone
Voice: 1-800-35-NIOSH (1-800-356-4674) Internet: www.cdc.gov/niosh/topics/noise/default.html RECYCLE YOUR CELL PHONE! Carriers marketing this cell phone have an in-store phone take-back program. Consumers can drop off their used wireless devices to specified carrier retail outlets for recycling purposes. For a list of carrier members and collection sites, visit the cellular industry’s... - Page 306 To mail in your old wireless device to PCD Personal Communications for recycling purposes, simply package your old wireless device and any accessories (including discharged batteries) in appropriate shipping materials and mail to: For Recycling Personal Communications Devices, LLC 555 Wireless Blvd. Hauppauge, NY 11788 Wireless phones also can be donated to the Wireless Foundation’s ®...
-
Page 307: 12 Month Limited Warranty
12 MONTH LIMITED WARRANTY Personal Communications Devices, LLC. (the “Company”) warrants to the original retail purchaser of this handheld portable cellular telephone, that should this product or any part thereof during normal consumer usage and conditions, be proven defective in material or workmanship that results in product failure within the first twelve (12) month period from the date of purchase, such defect(s) will be repaired or replaced (with new or rebuilt parts) at the Company’s... - Page 308 (f) Product damaged from external causes such as fire, flooding, dirt, sand, weather conditions, battery leakage, blown fuse, theft or improper usage of any electrical source. The Company disclaims liability for removal or reinstallation of the product, for geographic coverage, for inadequate signal reception by the antenna or for communications range or operation of the cellular system as a whole.
- Page 309 area, you may telephone in the United States (800) 229-1235, and in Canada (800) 465-9672 (in Ontario call 416-695-3060). THE EXTENT OF THE COMPANY’S LIABILITY UNDER THIS WARRANTY IS LIMITED TO THE REPAIR OR REPLACEMENT PROVIDED ABOVE AND, IN NO EVENT, SHALL THE COMPANY’S LAIBILITY EXCEED THE PURCHASE PRICE PAID BY PURCHASER FOR THE PRODUCT.
- Page 310 IN USA: Personal Communications Devices, LLC. 555 Wireless Blvd. Hauppauge, NY 11788 (800) 229-1235 IN CANADA: PCD Communications Canada Ltd. 5535 Eglinton Avenue West Suite# 234 Toronto, ON M9C 5K5 (800) 465-9672...
-
Page 311: Index
12 MONTH LIMITED WARRANTY ... 305 3G Mobile hotspot ... 112 3G Mobile hotspot settings ... 258 About phone ...275 Accessibility ... 299 Accessibility settings ...274 Account ... 269 Accounts & sync settings ... 268 Accounts and sync ... 114 Advanced Wi-Fi settings ...257 Adventure Training ...215 Agenda view ...185... - Page 312 Data Usage ... 43 Date & time settings ...274 Day view ...186 Desk Cradle ...251 Development ...267 Dialing by voice ...71 Display settings ...261 Document Viewer ...245 Double-tap ...23 Downloading an application ... 233 Downloading files ... 151 Drag...23 Dust resistance ...12 Earth Compass ...
- Page 313 Language & keyboard settings ...271 Launcher ...36 Library ...175 Location & security settings ... 262 Location Based Services (LBS) ... 264 Market ... 44 Memo ... 44 Messaging ... 44, 130 microSD card ...16 Mobile IM ...44, 137 Mobile networks ...98 Mobile networks settings ...
- Page 314 Removing a microSD card ...16 Removing the battery ...13 Requesting a refund for an application ... 235 Ringtone ...52, 179 Roaming ...98 Rotate the screen ...24 Rotating a picture ...168 Safety ...276 Safety Information for FCC RF Exposure ...279 SAR information ... 280 Screen lock ...52 Screen unlock security...
- Page 315 Trip Memory ...218 Turning the phone on and off ...25 Turning the screen on and off ...28 Tutorial settings ...267 Updating system software ...55 USB connection ...107 USB settings ...271 V CAST Apps Store ...196 V CAST Media Manager ...182 V CAST Music with ®...
- Page 316 THIS PRODUCT IS LICENSED UNDER THE MPEG-4 VISUAL PATENT PORTFOLIO LICENSE FOR THE PERSONAL AND NON- COMMERCIAL USE OF A CONSUMER FOR (i) ENCODING VIDEO IN COMPLIANCE WITH THE MPEG-4 VISUAL STANDARD (“MPEG4-VIDEO”) AND/OR (ii) DECODING MPEG-4 VIDEO THAT WAS ENCODED BY A CONSUMER ENGAGED IN A PERSONAL AND NON-COMMERCIAL ACTIVITY AND/OR WAS OBTAINED FROM A VIDEO PROVIDER LICENSED BY MPEG LA TO PROVIDE MPEG-4 VIDEO.
- Page 317 Nuance, XT9, T9 Trace and the logos are trademarks and/or registered trademarks of Nuance Communications, Inc. or its subsidiaries in the United States and other countries. Wi-Fi is a registered trademark of the Wi-Fi Alliance, Inc. This product contains NetFront FlexUI and NetFront Document Viewer of ACCESS CO., LTD.
- Page 318 Commando is a trademark of Verizon Wireless. G’zOne is a trademark of Casio Computer Co., Ltd. G’zGEAR are trademarks of NEC Casio Mobile Communications, Ltd. Google, the Google logo, Gmail, Google Talk, YouTube, Picasa, Android and Android Market are trademarks of Google, Inc.
Need help?
Do you have a question about the G'zOne Commando and is the answer not in the manual?
Questions and answers