Table of Contents
Advertisement
Advertisement
Table of Contents

Related Manuals for Casio Ravine 2


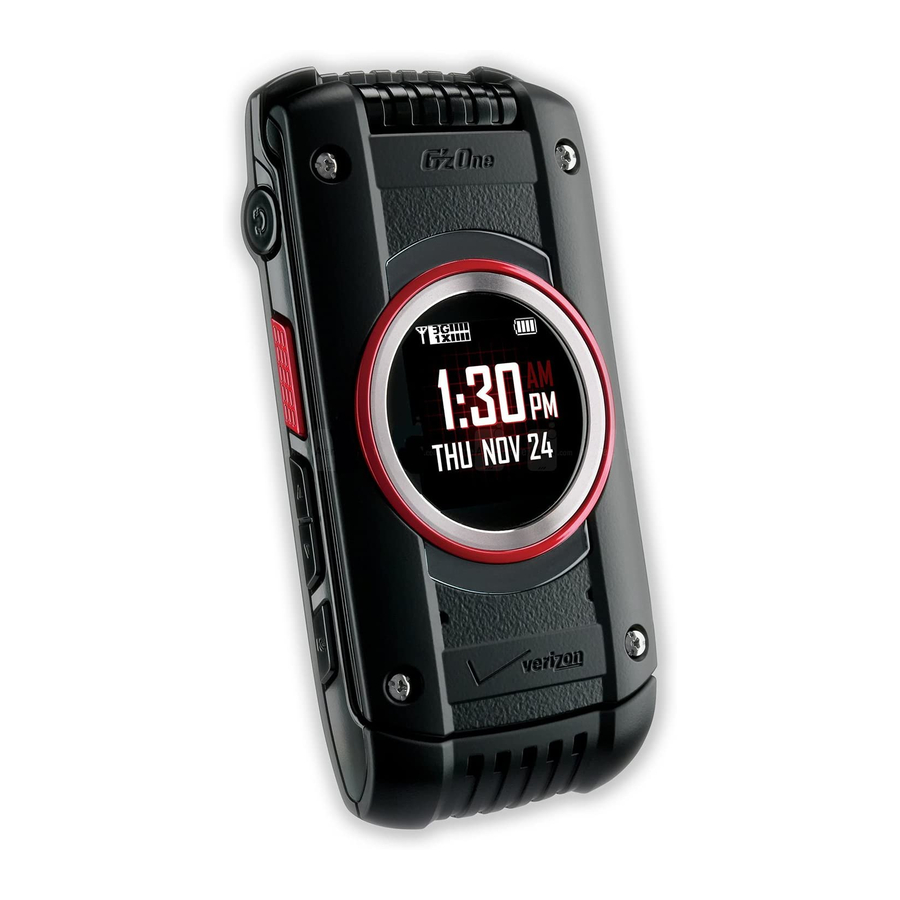
Summary of Contents for Casio Ravine 2
- Page 1 USER GUIDE USUARIO GUÍA...
- Page 2 User Guide...
-
Page 3: Table Of Contents
CHAPTER 1. BEFORE USING ENDING A CALL ..................... 44 MISSED CALL NOTIFICATION ................. 44 BEFORE USING ....................7 WAIT/PAUSE ......................44 INSIDE THE PACKAGE ....................8 MAKING AN INTERNATIONAL CALL ..............45 HANDSET DESCRIPTIONS ..................9 3 WAY CALLING ..................... 45 DISPLAY INDICATORS .................... 12 CALL WAITING ....................... - Page 4 CHAPTER 4. MENU FUNCTION MENU FUNCTION..................67 CONTACTS ......................68 MESSAGING ......................76 RECENT CALLS ....................... 88 MEDIA CENTER ...................... 92 VZ NAVIGATOR ....................... 98 SETTINGS & TOOLS ....................99 CHAPTER 5. SAFETY AND WARRANTY SAFETY AND WARRANTY ................145 SAFETY INFORMATION FOR WIRELESS HANDHELD PHONES ......146 GENERAL SAFETY ....................
-
Page 5: Before Using
BEFORE USING This chapter provides important information about using the Ravine® Ravine®2 including: INSIDE THE PACKAGE REMOVING THE BATTERY HANDSET DESCRIPTIONS CHARGING THE BATTERY DISPLAY INDICATORS BATTERY HANDLING INFORMATION FEATURE OVERVIEW USING A MEMORY CARD INSTALLING THE SIM CARD AND BATTERY CONNECTING TO THE HEADSET... - Page 6 INSIDE THE PACKAGE HANDSET DESCRIPTIONS This package should include all items pictured below. If any are missing or different, 1. Earpiece: Allows you to hear immediately contact the retailer where you purchased the phone. the other caller. 2. Main Display Screen: Displays all the information needed to operate your phone.
- Page 7 a call or browser session. Within a menu, press to return to idle mode. 7. [ ] Voicemail Key: In idle mode, press and hold to automatically connect to your voicemail box. 12. [ ] Speakerphone / Flashlight Key: With the flip open, press to turn speakerphone on or off.
-
Page 8: Display Indicators
18. Camera Lens: Built-in camera lens. Main Indicator Icons 19. Flashlight: Built-in flashlight GPRS Signal Strength: GPRS service is available. 20. Sim Card Slot: Allows you to insert a SIM card. The SIM Card comes pre- installed in the device (located under the battery). 3G Signal Strength: 3G service is available. - Page 9 Main Indicator Icons Main Indicator Icons Location On: Location Service of your phone is Location On. Speaker: Speakerphone mode is active. Bluetooth: Indicates Bluetooth mode. Urgent Message: Indicates you have an urgent message. Bluetooth Active: Indicates Bluetooth Active mode. Urgent Voicemail: Indicates you have an urgent voicemail. Bluetooth Connected: Indicates a Bluetooth Device is connected.
- Page 10 PTT Icons PTT Icons PTT Individual Do Not Disturb PTT Connected To Individual PTT Individual Received PTT Connecting To Enterprise Group PTT Listening To Enterprise Group PTT Connecting To Group PTT Listening To Group PTT Connecting To Individual PTT Listening To Individual PTT Enterprise Group PTT Missed Call PTT Enterprise Group Dialed...
- Page 11 New Contact Icons Message Icons Mobile1 Speed Dial Opened/Read Message Unread CMAS Mobile2 Home/Work Address Message Delivered Read CMAS Incomplete Delivery Unread EMS Home Company Sent Message Delivery Read EMS Business Title Failed Message Locked Sent Message Personal Email Birthday Text Message Draft Received Message Business Email...
-
Page 12: Feature Overview
FEATURE OVERVIEW • Your handset can be rinsed with clean water when dirty. To ensure water resistance, make sure that all covers are securely closed before rinsing. WATER RESISTANCE • Periodically, clean the Charging Terminals and Battery Terminals with a dry cloth or cotton swab. - Page 13 3. Insert the battery cover into the slots (1) and CAUTION • Wipe your handset before opening the battery cover to prevent moisture or dust press the battery cover in the direction of the from entering. arrow (2). • Failure to follow the below directions for installing/removing the battery could result in product failure.
-
Page 14: Removing The Battery
CHARGING THE BATTERY 1. Connect the USB cable into the Wall/USB Charger. 2. Plug the USB cable into the phone’ s Charging/ Data Port. Plug the Wall/USB Charger into an electrical outlet. The battery starts charging. 3. Disconnect the charger when the battery is fully charged. -
Page 15: Battery Handling Information
4. To remove the wall charger, unplug the USB • Properly and promptly dispose of the battery according to local laws. • Battery usage by children should be supervised. cable from the phone’ s Charging/Data Port. • Dispose of used battery according to the instructions. •... -
Page 16: Using A Memory Card
USING A MEMORY CARD microSD™ REMOVING A CARD The Ravine®2 supports the use of a microSD™ memory card as a source of external memory. 1. Open the microSD card cover, and use your thumb to press and release the microSD USING A microSD™... -
Page 17: Basic Operation
BASIC OPERATION This chapter addresses and explains the basic features for including: Ravine®2 TURNING THE PHONE ON AND OFF 3 WAY CALLING MENU ACCESS CALL WAITING MENU SUMMARY VOLUME QUICK ADJUSTMENT MAKING A CALL CALLER ID ABOUT PUSH TO TALK VIBRATE MODE USING A PUSH TO TALK (PTT) ALERT MUTE FUNCTION... -
Page 18: Turning The Phone On And Off
TURNING THE PHONE ON AND OFF MENU SUMMARY TURNING ON Main Menu 2nd DEPTH 3rd DEPTH 4th DEPTH 1. Press and hold the END/PWR key until the phone display turns on. 1. New Contact 2. Enter your 4-digit lock code if the phone is locked. The default lock code is the 2. - Page 19 Main Menu 2nd DEPTH 3rd DEPTH 4th DEPTH Main Menu 2nd DEPTH 3rd DEPTH 4th DEPTH 1. Missed 1. My Verizon 2. Master Volume 2. Received 1. Voice Commands Recent Calls 3. Dialed 4. All 2. Calculator 5. View Timers 3.
- Page 20 Main Menu 2nd DEPTH 3rd DEPTH 4th DEPTH Main Menu 2nd DEPTH 3rd DEPTH 4th DEPTH 1. Easy Set-up 1. Menu Layout 2. Replace Menu 1. Call Ringtone Items 2. Call Sounds 2. Call Vibrate 6. Main Menu Settings 3. Position Menu 3.
- Page 21 Main Menu 2nd DEPTH 3rd DEPTH 4th DEPTH Main Menu 2nd DEPTH 3rd DEPTH 4th DEPTH 3. Phone Lock 1. Pictures Setting 1. Save Options 2. Videos 4. Lock Phone Now 3. Sounds 5. Restore Phone 1. Phone Memory 1. PIN Code Usage 9.
-
Page 22: Making A Call
MAKING A CALL a voice call, you cannot receive a Push to Talk call. You cannot prevent others who have your wireless phone number from entering you into their Push to BY DIALING ThE PhONE NUMBER Talk Contact List. Only one person can speak at a time during Push to Talk calls. 1. -
Page 23: Using A Push To Talk (Ptt) Barge
3. Press and hold the PTT key/Red Side key while talking and then release 3. Wait until the “OK to Talk” tone sounds and the message “Talking to” appears the PTT key/Red Side key to let the other party talk. on the display. -
Page 24: Ending A Call
1. Answer or ignore the alert. WAIT To answer the alert, press and hold the PTT key/Red Side key and begin The phone stops dialing until you press the SEND key to dial the next number. 1. Enter the phone number. talking. -
Page 25: Call Waiting
VIBRATE MODE 3. When you’re connected to the second party, press the SEND key again to begin your 3-Way call. Vibrate mode mutes the tones and activates an alert for an incoming call or message. 1. To activate, press and hold the Vibrate Mode key If one of the participants hangs up during the call, you and the remaining participant stay connected. -
Page 26: Voice Dictation
VOICE DICTATION 4. Press the Right Soft key [Options] to select the desired options. 5. Press the CLR key to stop reading out. By using the voice dictation function, you can input the text by speaking your words instead of using the keypad. 6. -
Page 27: Making An Emergency Call
MAKING AN EMERGENCY CALL 1. From idle mode, press the Center Select key [MENU] and select Settings&Tools, then The 911 feature automatically places the phone in Emergency Call Mode when you dial press the Center Select key [OK]. the preprogrammed emergency number, 911. It also operates in Lock Mode and out of the service area. -
Page 28: Memory Function
MEMORY FUNCTION This chapter addresses memory functions including: STORING A PHONE NUMBER TEXT INPUT USING THE TEXT INPUT MODE ONE, TWO, THREE DIGIT SPEED DIALING... -
Page 29: Storing A Phone Number
STORING A PHONE NUMBER 1. Press the Right Soft key [Contacts] and select the contact you would like to edit. ADDING A NEW CONTACT 2. Press the Left Soft key [Edit]. 1. Enter the phone number you want to save. 3. - Page 30 ADDING OR ChANGING ThE PICTURE ID ADDING OR ChANGING COMPANY/TITLE/NOTES To select a picture or graphic to assign to a Caller ID: To add or change information: 1. Press the Right Soft key [Contacts], then select the contact you want to 1.
- Page 31 ADDING OR ChANGING AN IM SCREEN NAME DEFAULT NUMBERS To add or change a IM screen name: The phone number saved when a Contact is created is the Default Number. If more 1. Press the Right Soft key [Contacts], then select the contact you want to than one number is saved in a Contact entry, another number can be set as the Default edit.
-
Page 32: Text Input
USING THE TEXT INPUT MODE DELETING A CONTACT ENTRY 1. Press the Right Soft key [Contacts] and select the contact to delete. There are six modes for entering text, numbers, symbols, and punctuation. 2. Press the Right Soft key Erase and press the Center [Options], select ABC (MULTI-TAP) TEXT INPUT MODE... -
Page 33: One, Two, Three Digit Speed Dialing
2. Select TXT Message and press the Center Select key [OK]. USING VOICE DICTATION MODE TEXT INPUT 3. Enter the email address or phone number in the “To” field and press the Center By using the voice dictation function, you can input the text by speaking your words Select key [OK]. - Page 34 ThREE DIGIT SPEED DIALING: If the speed dial is set to three digit numbers, press the first and second digits then press and hold the third digit of the number to dial. The following speed dial entries are already assigned to your Verizon Wireless Account Information: Speed Dial No.
-
Page 35: Menu Function
MENU FUNCTION This chapter addresses accessing the menu and using its functions and features to customize your Ravine®2 CONTACTS MESSAGING RECENT CALLS MEDIA CENTER VZ NAVIGATOR SETTINGS & TOOLS... -
Page 36: Contacts
CONTACTS 3. To add a contact, press the Center Select key [ADD]. Select the contact to add and press the Center Select key [MARK] then press the Left Soft key NEW CONTACT [Done] to add. For details on adding a new contact, see page 54. TO ChANGE GROUP NAME CONTACT LIST 1. - Page 37 1. Press the Center Select key [MENU], select Contacts and press the Center VIEWING TEMP PTT GROUP MEMBERS Select key [OK]. 1. In the idle mode, press the Center Select key [MENU], select Contacts, then 2. Select PTT Contact List then press the Center Select key [OK].
- Page 38 2. Select the Speed Dials position or enter the Speed Dial digit and press the 6. Enter the contact information and press the Center Select key [SAVE]. Center Select key [SET]. 7. The contact name will be displayed in place of Contact Contact 2 Contact...
- Page 39 TO ADD PERSONAL INFO MY NAME CARD To store a Medical Record Number or other information that may be useful in case of A Name Card with the handset’ s mobile number automatically appears. an emergency: EDIT MY NAME CARD 1.
-
Page 40: Messaging
SEND MY NAME CARD TO ANOThER BLUETOOTh DEVICE NEW MESSAGE Turn Bluetooth on for both devices (steps 1-4) and turn Discovery Mode to On. TXT MESSAGE Please refer to Bluetooth on page 114. • The SIM card must be installed in order to send TXT Messages in GSM mode. 1. - Page 41 2. Enter the email address or phone number and press the Center Select key 2. Enter the email address or phone number and press the Center Select key [OK]. Or press the Right Soft key [Add] to access the following options. [OK].
- Page 42 3. Enter the email address or phone number and press the Center Select key [OK] to select Yes. With the message opened, press the Right Soft key [OK]. Or press the Right Soft key [Add] to access the following options. [Options] to access the following options.
- Page 43 Play Again: Play a sent picture or voice message. DRAFTS • • Forward: Forward the TXT, Picture, Video, and Voice message. The Drafts folder contains any draft messages or saved messages. If a message was • Erase: Erase a sent message. interrupted by a voice call or other interrupting event, the message will automatically •...
- Page 44 2. Press the Left Soft key [Settings] to display available menus. Shortcut: In idle mode, press and hold to access Voicemail. One Touch Dial must be enabled, please see page 137 for details. 3. Select one of the following menus, then press the Center Select key [OK]. 2.
- Page 45 • On: TXT messages are displayed automatically when received. 2. To edit the predefined Quick Text, select the Quick Text from the list, then press • Off: TXT messages are displayed by going into the Inbox, or by responding to the the Center Select key [EDIT].
-
Page 46: Recent Calls
1. Select or Off, then press the Center Select key [OK]. MISSED 2. If is selected, enter a new callback number then press the Center Select key Displays information about the 90 most recently missed calls. [OK]. 1. Press the Center Select key [MENU], select Recent Calls and press the Center Select key [OK]. - Page 47 Video Message: Send a Video message to the contact. If the saving option doesn’t appear, the selected entry is already in your contact list. • • Voice Message: Send a Voice message to the contact. • Details: Displays details about the caller if entered in Contacts. •...
-
Page 48: Media Center
1. Press the Center Select key [MENU], select Recent Calls and press the Center STARTING ThE MOBILE WEB View Timers Select key [OK]. Select and press the Center Select key [OK]. 1. From idle mode, press the Center Select key [MENU], select Mobile Web, and 2. - Page 49 4. Press the Center Select key [STOP] to stop playing. 3. Select My Pictures and press the Center Select key [OK]. As] to access the following options: Press the Left Soft key [Set 4. Select the desired image then press the Center Select key [VIEW] to display •...
- Page 50 4. Select the desired video then press the Center Select key [PLAY] to play the Name Description video. Brightness -5, -4, -3, -2, -1, 0, +1, +2, +3, +4, +5 5. Press the Right Soft key [Options] to access the following options. White Balance Auto, Sunny, Cloudy, Tungsten, Fluorescent •...
-
Page 51: Vz Navigator
• Detailed color maps that can be quickly panned and zoomed With VZ Navigator, Name Description you’ll know exactly where you are, what’ s around you and how to get there. Call Interruption Allow, Block Download, subscription, and airtime required for use; only in National Enhanced Viewfinder Main Display, Front Display Services Coverage Area;... - Page 52 TOOLS 1. Press the Center Select key [MENU], select Settings & Tools and press the Center Select key [OK]. Select Tools, press the Center Select key [OK], select USING VOICE COMMANDS Voice Commands then press the Center Select key [OK]. Your phone is equipped with an AVC (Advanced Voice Commands) feature.
- Page 53 2. You will hear Please say a command and the Voice Commands menu will be 2. You will hear Please say a command and the Voice Commands menu will be displayed. displayed. 3. Say Redial. 3. Say Go To followed immediately by one of the application names. ChECk <ITEM>: MY VERIZON: Check...
- Page 54 2. Press the Right Soft key [Settings], select Confirm Choices and press the 3. Select Train Voice and press the Center Select key [OK]. Center Select key [OK]. To begin press the Center Select key [OK]. • Train Voice: Requires that you make recordings of your voice to customize the voice 3.
- Page 55 Voice Mode Training: • Press the Right Soft key [Operator] to use the following: ( / ) / Power. • Press the Left Soft key [Clear] to reset. Allows you to be trained by reading 25 sentences displayed on-screen. • To change the displayed number from positive (+) to negative (-) and vice versa, 1.
- Page 56 ERASING ALL PASSED EVENTS MEASURING MORE ThEN ONE EVENT 1. Press the Center Select key [MENU], select Settings & Tools and press the 1. Press the Center Select key [START] to start. Center Select key [OK]. Select Tools, press the Center Select key [OK], select 2.
- Page 57 SETTING DST (DAYLIGhT SAVING TIME) G’zGEAR® provides you with useful tools for outdoor activities. 1. Press the Left Soft key [Set DST] to set the DST options. For information about “Motion Detection, ” see page 50. 1. Press the Center Select key [MENU], select Settings&Tools, then press the 2.
- Page 58 ThERMOMETER • Lunar Phase: Displays the phase of the Moon. The Thermometer measures the current temperature. • Cosmic View: Displays the location of Sun, Moon, and Earth. You can change the following operation modes by pressing the Right Soft key STAR GAZER The Star Gazer displays the stars in the sky and the names of the constellations and •...
- Page 59 3. Press the Left Soft key [Turn On/Turn Off]. • Calibrate the electronic compass with the handset open before using it with the handset open. You can also turn Bluetooth on/off through MY SHORTCUTS by pressing the Directional • To calibrate the electronic compass with the flip open, wave the phone in a right in idle mode.
- Page 60 8. Once connected, you will see the device listed in the Bluetooth menu and the • Send Picture: Allows you to send photos to a selected device. 1. Press the Directional key Bluetooth device connected icon will appear at the top of the screen when up, down, left or right to highlight a desired photo or photos, then press the Center Select key [MARK].
- Page 61 DISCOVERY MODE: 2. Select Keyguard Settings and then press the Center Select key [OK]. Set your device to be searched for by other Bluetooth® devices in the area. 3. Set the desired Keyguard setting options and press the Center Select key [OK]. 1.
- Page 62 CALL RINGTONE kEYPAD VOLUME 1. Press the Center Select key [MENU], select Settings & Tools and press the To set the keypad volume: Center Select key [OK]. Select Sounds Settings, press the Center Select key Settings & Tools 1. Press the Center Select key [MENU], select and press the [OK], select Call Sounds...
- Page 63 POWER ON/OFF ERI BANNER: To set the phone to sound a tone when the phone is powered on/off: If you use ERI Service, ERI Text is shown on the sub banner. 1. Press the Center Select key [MENU], select Settings & Tools and press the 1.
- Page 64 3. Select the desired image, video or animation and press the Center Select key REPLACE MENU ITEMS 1. Press the Center Select key [MENU], select Settings & Tools and press the [OK]. - To view the image or animation, press the Left Soft key Center Select key [OK].
- Page 65 Item Positions: Restore menu items to their initial positions. PhONE SETTINGS • • All: Restore all to your initial menu settings. AIRPLANE MODE 4. Press the Right Soft key [Help] to view help information. In Airplane Mode, all menu functions can be accessed except making calls, receiving If you change this setting, you will not be able to follow the instructions as provided in calls, data connection and Bluetooth®.
- Page 66 RESETTING MY ShORTCUTS: SET RED SIDE kEY To restore My Shortcuts to their original defaults: 1. Press the Center Select key [MENU], select Settings & Tools and press the 1. Press the Center Select key [MENU], select Settings & Tools and press the Center Select key [OK].
- Page 67 6. Press the Center Select key [SAVE] to save. 2. Enter the four-digit lock code and press the Center Select key [OK]. The default lock code is last 4 digits of your mobile telephone number. This menu appears only in Global Mode.
- Page 68 • Messages: Select and press the Center Select 2. Enter the four-digit lock code and press the Center Select key [OK]. The default Incoming Messages Outgoing Messages key [OK]. Select Allow All Block All and press the Center Select key [SET]. lock code is the last 4 digits of your mobile telephone number.
- Page 69 SIM LOCk: 1. Press the Center Select key [MENU], select Settings & Tools and press the Phone Settings, press the Center Select key Allows you to lock/unlock the SIM code. Center Select key [OK]. Select 1. Press the Center Select key [MENU], select Settings &...
- Page 70 CALL SETTINGS 1. Press the Center Select key [MENU], select Settings & Tools and press the Call Settings, press the Center Select key [OK], Center Select key [OK]. Select ANSWER OPTIONS TTY Mode then press the Center Select key [OK]. select To determine how to handle an answered call: 2.
- Page 71 PTT MODE NOISE REDUCTION Allows you to set PTT mode setting. To reduce the noise while talking on the headset: Settings & Tools Settings & Tools 1. Press the Center Select key [MENU], select and press the 1. Press the Center Select key [MENU], select and press the Center Select key [OK].
- Page 72 USING ThE CARD MEMORY OPTIONS PhONE INFO Allows you to view the card memory information and erase/move the file location. MY NUMBER 1. Press the Center Select key [MENU], select Settings & Tools and press the To view your phone number: Center Select key [OK].
- Page 73 SOFTWARE UPDATE 2. The SIM ID number is displayed. The update phone firmware (software) option allows you to download and update 3. Press the Center Select key [OK] to return to the previous screen. the software in your phone automatically. Only the internal software is updated; no TUTORIAL contacts entries or other information saved to your phone will be deleted.
-
Page 74: Safety And Warranty
SAFETY AND WARRANTY This chapter addresses the safety guidelines and precautions to follow when operating your phone. Before operating your phone, please be aware of all the safety details. This chapter contains the terms and conditions of services and the warranty for your phone. Please review them thoroughly. SAFETY INFORMATION FOR WIRELESS FDA CONSUMER UPDATE HANDHELD PHONES... -
Page 75: Safety Information For Wireless Handheld Phones
SAFETY INFORMATION FOR WIRELESS HANDHELD PHONES Do not use the phone with a damaged antenna. If a damaged antenna comes into contact with the skin, a minor burn may result. Please contact your local READ THIS INFORMATION BEFORE USING YOUR HANDHELD dealer for replacement antenna. - Page 76 or fire. Do not use a damaged AC-Adapter or loosened plug. Do not touch the Most modern electronic equipment is shielded from RF energy. However, certain charging terminal with your hand or finger while it is conducting electricity. It electronic equipment may not be shielded against the RF signals from your wireless may cause electric shock, injury or product failure.
-
Page 77: General Safety
Your physician may be able to assist you in obtaining this information. Turn your POTENTIALLY EXPLOSIVE ATMOSPhERES phone OFF in healthcare facilities when any regulations posted in these areas instruct Turn your phone OFF when in any area with a potentially explosive atmosphere and you to do so. - Page 78 • DO NOT disassemble the phone or its accessories. If service or repair is required, • DO NOT place the device on an unstable area, such as wobbly stools or slanted return unit to an authorized PCD cellular service center. If unit is disassembled, places.
-
Page 79: Safety Information For Fcc Rf Exposure
• DO NOT put stickers on the LCD screen or keypad. These stickers may touch and CAMERA press keys when the Flip is closed. This may cause improper operating of the Do not aim your camera at the Sun. The sunlight passing through the Camera/ Camcorder Lens may cause damage to the camera. -
Page 80: Sar Information
The use of belt-clips, holsters and similar accessories should not contain metallic Before a phone model is available for sale to the public, it must be tested components in its assembly. The use of accessories that do not satisfy these and certified to the FCC that it does not exceed the limit established by the government adopted requirement for safe exposure. -
Page 81: Hearing Aid Compatibility (Hac) For Wireless Telecommunications Devices
HEARING AID COMPATIBILITY (HAC) FOR WIRELESS A digital wireless phone is considered Hearing Aid Compatible for inductive coupling (telecoil mode) if it has a “T3” or “T4” rating. TELECOMMUNICATIONS DEVICES This phone has been tested and rated for use with hearing aids for some of the PCD’S COMMITMENT wireless technologies that it uses. -
Page 82: Teletypewriter (Tty) Devices
TELETYPEWRITER (TTY) DEVICES been confirmed by additional research. In some cases, other researchers have had difficulty in reproducing those studies, or in determining the reasons for You can use an optional teletypewriter (TTY) device with your phone to send and inconsistent results. - Page 83 The National Institutes of Health participates in some inter-agency working group investigating the effects of radiofrequency energy (RF) exposures characteristic of activities, as well. FDA shares regulatory responsibilities for wireless phones with wireless phones have yielded conflicting results that often cannot be repeated in the Federal Communications Commission (FCC).
- Page 84 agent and the time tumors develop - if they do -may be many, many years. The FCC established these guidelines in consultation with FDA and the other interpretation of epidemiological studies is hampered by difficulties in measuring federal health and safety agencies. The FCC limit for RF exposure from wireless actual RF exposure during day-to-day use of wireless phones.
- Page 85 9. What steps can I take to reduce my exposure to radiofrequency energy effects. Their recommendation to limit wireless phone use by children was strictly from my wireless phone? precautionary; it was not based on scientific evidence that any health hazard exists.
-
Page 86: Emergency Calls
radiation with making false and unsubstantiated claims. According to FTC, these • Federal Communications Commission (FCC) RF Safety Program defendants lacked a reasonable basis to substantiate their claim. (http://www.fcc.gov/oet/rfsafety) • International Commission on Non-Ionizing Radiation Protection 13. What about wireless phone interference with medical equipment? (http://www.icnirp.de) Radiofrequency energy (RF) from wireless phones can interact with some •... -
Page 87: Compliance With Other Fcc Regulations
COMPLIANCE WITH OTHER FCC REGULATIONS CASIO G’ZONE RAVINE®2 — ALI CAPABILITY The Ravine®2 is an ALI-capable phone equipped with a GPS (Global Positioning OPERATING PROCEDURES System) receiver supporting a satellite-based GPS ALI-capable network to comply Never violate any of the following Rules and Regulations of the FCC when using with the FCC’... - Page 88 The amount of sound produced by a portable audio device varies depending on YOU CAN OBTAIN ADDITIONAL INFORMATION ON ThIS SUBjECT FROM ThE FOLLOWING SOURCES: the nature of the sound, the device, the device settings and the headphones. You should follow some commonsense recommendations when using any portable AMERICAN ACADEMY OF AUDIOLOGY audio device: •...
-
Page 89: Fcc Compliance Information
FCC COMPLIANCE INFORMATION RECYCLE YOUR CELL PHONE! This device complies with Part 15 of FCC Rules. Carriers marketing this cell phone have an in-store phone take-back program. Consumers can drop off their used wireless devices to specified carrier retail Operation is subject to the following two conditions: outlets for recycling purposes. -
Page 90: Month Limited Warranty
12 MONTH LIMITED WARRANTY (f) Product damaged from external causes such as fire, flooding, dirt, sand, weather conditions, battery leakage, blown fuse, theft or improper usage of Personal Communications Devices, LLC. (the “Company”) warrants to the original any electrical source. retail purchaser of this handheld portable cellular telephone, that should this product or any part thereof during normal consumer usage and conditions, be The Company disclaims liability for removal or reinstallation of the product,... - Page 91 THE EXTENT OF THE COMPANY’S LIABILITY UNDER THIS WARRANTY IS LIMITED TO IN USA: Personal Communications Devices, LLC. THE REPAIR OR REPLACEMENT PROVIDED ABOVE AND, IN NO EVENT, SHALL THE 555 Wireless Blvd. COMPANY’S LAIBILITY EXCEED THE PURCHASE PRICE PAID BY PURCHASER FOR Hauppauge, NY 11788 THE PRODUCT.
Need help?
Do you have a question about the Ravine 2 and is the answer not in the manual?
Questions and answers