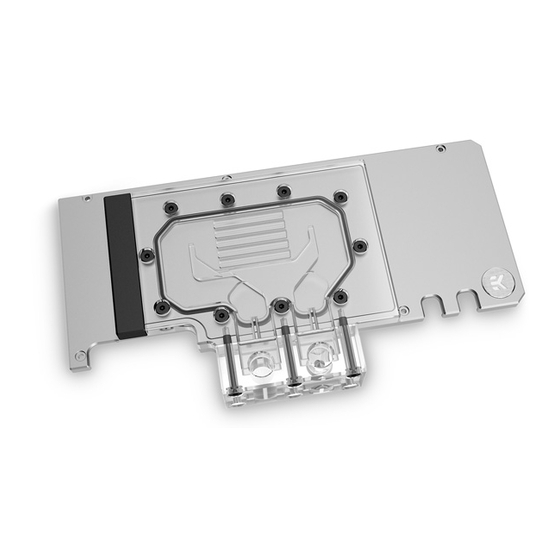
ekwb EK-Quantum Vector Trinity RTX 3080/3090 Active Backplate User Manual
Active backplate
Hide thumbs
Also See for EK-Quantum Vector Trinity RTX 3080/3090 Active Backplate:
- User manual (15 pages) ,
- User manual (14 pages)
Table of Contents
Advertisement
Quick Links
Advertisement
Table of Contents

Summary of Contents for ekwb EK-Quantum Vector Trinity RTX 3080/3090 Active Backplate
- Page 1 EK-Quantum Vector Trinity RTX 3080/3090 Active Backplate USER GUIDE...
- Page 2 Please, read the manual carefully before beginning with the installation process. For updates, you can visit our official website www.ekwb.com. Before you start using this product, please follow these basic guidelines: Carefully read the manual before beginning with the installation process.
-
Page 3: Table Of Contents
TABLE OF CONTENTS BOX CONTENTS ACTIVE BACKPLATE DIMENSIONS REQUIRED TOOLS ACTIVE BACKPLATE SPECIFICATIONS AND MAIN PARTS INSTALLING THE ACTIVE BACKPLATE PREPARING THE GRAPHICS CARD CUTTING AND PLACING THERMAL PADS REMOVING THE TERMINAL METAL PLATE ATTACHING THE ACTIVE BACKPLATE INSTALLING FITTINGS AND TUBING CONNECTING THE D-RGB LED STRIP TESTING THE LOOP SUPPORT AND SERVICE... -
Page 4: Box Contents
Universal Mounting Mechanism – You may not need every screw from this package. M2.5x4 AX1 Screw (3 pcs) M2.5x6 AX1 Screw (7 pcs) EK-Quantum Vector Trinity RTX 3080/3090 Active Backplate D-RGB M2.5x7 AX1 Screw (7 pcs) PVC Washer M2.5 (10 pcs) M2.5 Nut (5 pcs) Thermal Pad G 1.0 mm (3 pcs) -
Page 5: Active Backplate Dimensions
ACTIVE BACKPLATE DIMENSIONS 110.35 mm 139.35 mm 233 mm REQUIRED TOOLS Phillips Head Screwdriver Scissors - 5 -... -
Page 6: Active Backplate Specifications And Main Parts
ACTIVE BACKPLATE SPECIFICATIONS AND MAIN PARTS Technical Specifications: Dimensions (L x H x W): 233 x 124 x 33.4 mm D-RGB (Addressable RGB) Cable Length: 500 mm D-RGB LED Count: 9 M4 x 27 DIN7984 SCREW D-RGB Connector: Standard 3-Pin (+5V, Data, Blocked, Ground) EK-PLUG G1/4 TERMINAL O-RING 15 x 1 mm TERMINAL METAL PLATE... -
Page 7: Installing The Active Backplate
In case the water block is already installed, remove the six (6) AX1 screws and their PVC washers, as shown in the image. EK-Quantum Vector Trinity RTX 3080/3090 Active Backplate comes with its own terminal, meaning the original terminal, along with two... -
Page 8: Cutting And Placing Thermal Pads
STEP 2 Thermal PAD G 1.0 mm (120 x 24 mm) CUTTING AND PLACING THERMAL PADS Your backplate comes with thermal pads that have to be cut into smaller pieces to cover all the VRM components. EK made sure to 1 mm provide you with more than an adequate quantity of thermal pads to 120 mm... -
Page 9: Removing The Terminal Metal Plate
3090 Version Thermal Pad G 1.0 mm Thermal Pad G 1.5 mm STEP 3 Thermal Pad G 2.0 mm STEP 4 REMOVING THE TERMINAL METAL PLATE TERMINAL METAL PLATE The Metal plate attached on the Terminal is meant as a precaution, to secure the two O-rings to prevent them from falling out of their sockets during transport and handling. -
Page 10: Attaching The Active Backplate
STEP 5 ATTACHING THE ACTIVE BACKPLATE First, make sure the two (2) 15 x 1 O-rings are IN terminal slots, as shown in the image. Place the active backplate on the PCB and make sure all holes are M2.5 x 7 AX1 SCREW aligned. -
Page 11: Installing Fittings And Tubing
INSTALLING FITTINGS AND TUBING STEP 1 Screw-in two (2) G1/4 threaded male fittings. Attach liquid cooling tubes and connect the water block to the cooling loop. TUBING Do not forget to plug the remaining two openings with enclosed EK-Plug G1/4 or its equivalent. You can use any opening as an inlet/outlet port. -
Page 12: Connecting The D-Rgb Led Strip
CONNECTING THE D-RGB LED STRIP STEP 1 Plug the 4-pin D-RGB connector from the GPU water block to the D-RGB Header on your motherboard or controller. The LED strip will work only if the pin layout on the header is as follows: +5V, Data, Empty, Ground. -
Page 13: Support And Service
SUPPORT AND SERVICE In case you need assistance, please contact: https://www.ekwb.com/customer-support/ EKWB d.o.o. Pod lipami 18 1218 Komenda Slovenia - EU SOCIAL MEDIA EKWaterBlocks @EKWaterBlocks ekwaterblocks EKWBofficial ekwaterblocks...


Need help?
Do you have a question about the EK-Quantum Vector Trinity RTX 3080/3090 Active Backplate and is the answer not in the manual?
Questions and answers