Advertisement
Table of Contents
- 1 Table of Contents
- 2 Ultra Mag Flow Meter Specifications
- 3 Ultra Mag Flow Meter Dimensions
- 4 Sensor Grounding and Electrical Interference
- 5 Procomm Converter Dimensions
- 6 Procomm Converter Cable Connection from Sensor
- 7 Procomm Converter Power Hook-Up
- 8 4-20Ma Hook-Up
- 9 Opto-Isolated Pulse Output and Opto-Isolated Input Hook-Up
- 10 ML255 Converter Dimensions
- 11 ML255 Converter Cable Connections from Sensor
- 12 ML255 Converter Battery Installation and Connection
- Download this manual
Advertisement
Table of Contents

Related Manuals for McCrometer ULTRA MAG UM06


Summary of Contents for McCrometer ULTRA MAG UM06
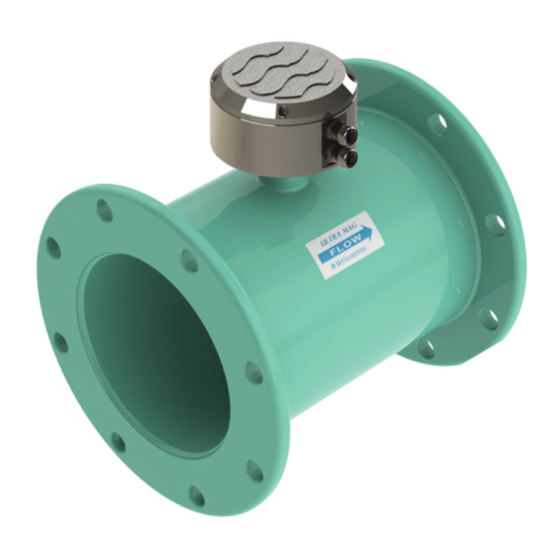
- Page 1 Clear Form ULTRA MAG™ ELECTROMAGNETIC FLOW METER SUBMITTAL PACKAGE From McCROMETER 3255 WEST STETSON AVENUE HEMET, CA 92545 Phone (951) 652-6811 Toll Free (800) 220-2279 Fax (951) 652-3078 www.mccrometer.com Date: Page i 30107-10 Rev. 2.5 | 24NOV2020...
- Page 2 Data Logger When completing this submittal package, it must also include the Ultra Mag Specification Data Sheet, which is also an electronic document. A copy can be downloaded from the McCrometer web site with the following link. Lit. No. 30124-74 The Specification Data Sheet is a macro-enabled Excel spreadsheet that contains multiple drop down fields for multiple product configurations.
-
Page 3: Table Of Contents
Contents Ultra Mag Flow Meter Specifications ..........3 Ultra Mag Flow Meter Dimensions . -
Page 4: Ultra Mag Flow Meter Specifications
5-point wet ow calibration of every complete ow tube with its signal converter. If desired, the tests can be witnessed by the customer. The McCrometer test facilities are traceable to the National Institute of Standards & Technology. Uncertainty relative to ow is ±0.15% Pipe Run Requirements 2”... - Page 5 Speci cation Sheet Ultra Mag Flow Meter with ProComm Converter Ultra Mag Flow Meter Specifications FLOW METER SPECIFICATIONS (CONT.) Head Loss None. No obstruction in line and no moving parts Warranty Meter 2 year warranty Liner Lifetime guarantee Pressure Range 150 PSI maximum working pressure (UM06);...
-
Page 6: Ultra Mag Flow Meter Dimensions
be used to establish a connection to earth ground. Plastic or internally coated pipe - Grounding rings can be installed to establish a connection to earth ground See the Ultra Mag IOM Manual, Lit. # 30119-03, for more information on grounding con gurations using grounding rods and grounding rings. - Page 7 Ultra Mag Flow Meter Dimensions Grounding Rings are 0.125" thick. 14+" Models Body Style Flow Ranges GPM DIMENSIONS Est. Shipping (Lay Lengths) Weight (lbs.)** Pipe Size Meter Standard (Nominal) Pipe ID .2 to 32 FPS Min - Max UM06 UM08 UM06 UM08 UM06 UM08 14"...
-
Page 8: Sensor Grounding And Electrical Interference
Consult an electrician experienced with instrumentation installations to determine if electrical interference is present. For further information on installation environments and sensor grounding, please contact McCrometer Technical Support. Lines With Cathodic Protection On meters installed on a line with cathodic protection it may be necessary to insulate the meter from the line. -
Page 9: Procomm Converter Dimensions
3.1" Copyright © 2001-2019 McCrometer, Inc. All printed material should not be changed or altered without permission of McCrometer. Any published pricing, technical data, and instructions are subject to change without notice. Contact your McCrometer representative for current pricing, technical data, and instructions. -
Page 10: Procomm Converter Cable Connection From Sensor
TO SPI SENSOR Copyright © 2020 McCrometer, Inc. All printed material should not be changed or altered without permission of McCrometer. Any published pricing, technical data, and instructions are subject to change without notice. Contact your McCrometer representative for current pricing, technical data, and instructions. -
Page 11: Procomm Converter Power Hook-Up
Converter Power Wiring Diagram WARNING! ProComm Converter Power Hook-Up Hazardous supply voltage can shock, burn, or cause death. The power supply line must be equipped with external surge protection for current overload (fuse or circuit breaker with limiting capacity not greater than 10A). It must be easily accessible for the operator and clearly identi ed. Power connection is made using the power terminal block on the upper right side of the terminal board. -
Page 12: 4-20Ma Hook-Up
ProComm CONNECTING WIRES TO TERMINALS 4-20mA Hook-Up 4-20mA Hook-Up Isolated 4-20mA current loops are used to output ow data to external devices. Maximum load impedance is 1,000Ω, and the maximum voltage without load is 27VDC. The converter has the capability to detect a loss of load on this output. To disable this function set the value “mA Val. -
Page 13: Opto-Isolated Pulse Output And Opto-Isolated Input Hook-Up
ProComm Opto-Isolated Pulse Output and Opto-Isolated Input Hook-Up CONNECTING WIRES TO TERMINALS Opto-Isolated Pulse Output Hook-Up Opto-Isolated Pulse Output Hook-Up The outputs are open collector transistor outputs used to communicate with or activate external devices. • Opto-isolated output with collector and emitter terminals oating and freely connectable •... -
Page 14: Ml255 Converter Dimensions
Lit. # 30120-47, Rev. 2.5 / 5-31-18 Copyright © 2018 McCrometer, Inc. All printed material should not be changed or altered without permission of McCrometer. Any published technical data and instructions are subject to change without notice. Contact your McCrometer www.mccrometer.com... -
Page 15: Ml255 Converter Cable Connections From Sensor
INSTALLING THE CONVERTER AND CABLES ML255 Converter Cable Connections from Sensor Installing Cables To Converter And Service Loop Conduit of any kind CANNOT be attached directly to the electronics enclosure. Attaching conduit directly to the enclosure will introduce dangerous gasses and moisture into the enclosure creating a dangerous condition, and will remove the enclosure's IP67 rating. - Page 16 ELECTRICAL CABLE CONNECTIONS ML255 Converter Cable Connections from Sensor FPI Mag and Ultra Mag 4" through 48" Ultra Mag 4” through 48” Black Ground To Chassis Lug Terminal Block Assignments Cable Terminal Wire Color Connected To 11 12 13 Right Sensing #1 (E1) Blue electrodes...
-
Page 17: Ml255 Converter Battery Installation And Connection
QUICK START For the ML255 Battery Powered Converter This describes how to install the batteries and start up the ML255 for the rst time. ML255 Converter Battery Installation and Connection Install the batteries Step Note: Ensure there is no power connected externally and that the battery DIP switches are in the OFF position.
Need help?
Do you have a question about the ULTRA MAG UM06 and is the answer not in the manual?
Questions and answers