Harmonic ProView 7000 Installation Manual
Hide thumbs
Also See for ProView 7000:
- User manual (230 pages) ,
- Quick setup manual (15 pages) ,
- Installation manual (6 pages)
Table of Contents
Advertisement
Quick Links
Advertisement
Table of Contents

Related Manuals for Harmonic ProView 7000


Summary of Contents for Harmonic ProView 7000
- Page 1 ProView 7000 RELEASE 3.4 Installation Guide Rev A...
- Page 2 Harmonic assumes no responsibility or liability arising from the use of the products described herein, except as expressly agreed to in writing by Harmonic. The use and purchase of this product do not convey a license under any patent rights, copyrights, trademark rights, or any intellectual property rights of Harmonic.
- Page 3 Commercial Computer Software and Commercial Computer Software Documentation are being licensed to U.S. Government as end users (a) only as Commercial Items and (b) with only those rights as are granted to all other end users pursuant to the terms and conditions herein. Harmonic, 4300 North First Street, San Jose, CA 951 34 U.S.A.
- Page 4 CAUTION: The Caution symbol calls your attention to information that, if ignored, can adversely affect the performance of your Harmonic product, or that can make a procedure needlessly difficult. LASER DANGER: The Laser symbol and the Danger alert call your attention to information about the lasers in this product that, if ignored, can cause physical harm to you.
-
Page 5: Table Of Contents
Mounting ProView 7000 units in the 19" Rack ....... . . -
Page 6: Chapter 1: Proview™ 7000 Installation Guide
CAUTION: If anything is missing or damaged, do not continue with the installation and report to your Harmonic support representative. Earthing The unit must be connected to earth before any other cables are connected and it should remain permanently connected to protected earth. Cable 18AWG should be used. When the unit is rack‐ mounted, the device’s earth stud must be connected to the rack housing, which must be correctly earthed. When removing cables the earth must be removed last. Grounding jack screw Figure 2: AC Connector © 2014 Harmonic Inc. All rights reserved. ProView 7000 Release 3.4, Rev A... -
Page 7: Power Supply To The Unit
DANGER: To avoid electrocution, ensure that the rack has been correctly grounded before switching on the ProView 7000 device. When removing the unit, remove the grounded connection only after the unit is switched off and unplugged. Installing the Unit in a Rack For rack installation, ensure that a designated 19" rack is fully prepared for installation. Ensure ... -
Page 8: Mounting Proview 7000 Units In The 19" Rack
Wird das Gestell mit Stabilisierungszubehör geliefert, sind zuerst die Stabilisatoren zu installieren, bevor sie die Einheit im Gestell anbringen oder sie warten. CAUTION: Ensure that a sufficient amount of airflow enters the ProView 7000 from the left end (from the front panel point of view) . Consider if other devices in the rack use airflow in the opposite direction.... -
Page 9: Electrical Power Connection
Wechselstrom, 20 A (bzw. in den USA 120 V Wechselstrom, 20 A) an den Phasenleitern (allen stromführenden Leitern) verwendet wird. Connecting the Cables All ProView 7000 connectors are located on the rear panel. Connect the following: Input Cables If you are using DVB‐S/S2, connect the satellite cable to the RF IN connector. If you are using ASI, connect the ASI cables to the connectors marked ASI IN. Management LAN Cable Connect the management LAN cable to the Management port. Video Output Connect an output destination to one of the output connectors on the output interface. Video Monitor Connect a video monitor, for local monitoring of the output, to either the CV MON or the HDMI port. © 2014 Harmonic Inc. All rights reserved. ProView 7000 Release 3.4, Rev A... -
Page 10: Switching On
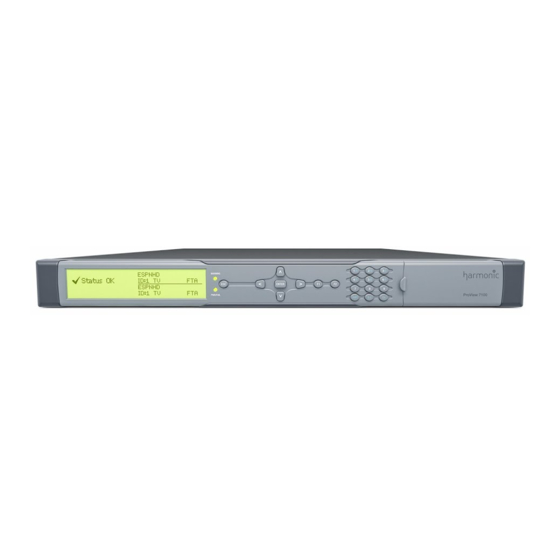
Chapter 1 ProView™ 7000 Installation Guide Switching On Switching On Before switching the ProView 7000 on, make sure that all cables are correctly connected. Ensure that the unit is connected to the main power supply and correctly grounded. Switch the unit on with the rear power switch. Once the boot process is completed (after 2‐3 minutes) the Status OK message displays on the front panel LCD. No Service Selected Status OK No Service Selected Figure 3: Front panel startup display © 2014 Harmonic Inc. All rights reserved. ProView 7000 Release 3.4, Rev A... -
Page 11: Appendix A: Contacting The Technical Assistance Center
Appendix A Contacting the Technical Assistance Center Harmonic Global Service and Support has many Technical Assistance Centers (TAC) located globally, but virtually co-located where our customers can obtain technical assistance or request on-site visits from the Regional Field Service Management team. The TAC operates a Follow-The- Sun support model to provide Global Technical Support anytime, anywhere, through a single case management and virtual telephone system. - Page 12 Appendix A Contacting the Technical Assistance Center The Harmonic Inc. support website is: http://www.harmonicinc.com/content/technical-support The Harmonic Inc. Distribution and Delivery product software downloads site is: ftp://ftp.harmonicinc.com The Harmonic Inc. Playout and Production software downloads site is: ftp://ftp.Omneon.com//Updates/Omneon/Current/ The Harmonic Inc. corporate address is: Harmonic Inc....
-
Page 13: Appendix B: Compliance, Safety, And Agency Approvals
(1) this device may not cause harmful interference, and (2) this device must accept any interference received, including interference that may cause undesired operation. Connections between the Harmonic equipment and other equipment must be made in a manner that is consistent with maintaining compliance with FCC radio frequency emission limits. -
Page 14: Restricted Substance Statement
Harmonic’s WEEE Take-Back program for product disposal. Harmonic will pay for the costs of shipping and will provide a Certificate of Recycling or a Certificate of Destruction upon request. For more information on collection, reuse and recycling or to initiate the WEEE Take-Back process for please contact Harmonic through WEEE Take-Back Request Form. - Page 15 In order to assist EU member states to preserve, protect and improve the quality of the environment, protect human health and utilize natural resources prudently and rationally, Harmonic strives to recycle in compliance with the WEEE Directive any of its products that cannot be re-used.
-
Page 16: Standards And Agency Approval
Agency Approval EMI: AS/NZS CISPR22:2009+A1 Class A AS/NZS CISPR22 Korea Standards Agency Approval EMI: KN22 Class A and KN 24 KN22 Class A and KN 24 © 2014 Harmonic Inc. All rights reserved. <Product Short Name> Release XXX, Rev A... -
Page 17: Canadian Emc Notice Of Compliance
Class B CE Mark EN 55022 Class B, EN55024, EN61000-3-2, VCCI EN61000-3-3 BSMI Class B C-Tick Class A SABS Class B Class B Class B Class A © 2014 Harmonic Inc. All rights reserved. <Product Short Name> Release XXX, Rev A... - Page 18 ContentBridge 2010B/2010C ACMA or C-Tick Class A BELLIS KVALITET ICES CNCA or CCC KONCAR VCCI OTAN – CKT INSM NEMKO GOST SABS BSMI UKRTEST or UKRSERTCOMPUTER © 2014 Harmonic Inc. All rights reserved. <Product Short Name> Release XXX, Rev A...
- Page 19 CNCA or CCC KONCAR IECEE IECEE CB OTAN – CKT KEBS KUCAS NYCE or NOM INSM SONCAP NEMKO GOST KSA ICCP NRCS BSMI UKRTEST or UKRSERTCOMPUTER NRTL © 2014 Harmonic Inc. All rights reserved. <Product Short Name> Release XXX, Rev A...
- Page 20 CNCA or CCC KONCAR IECEE IECEE CB OTAN – CKT KEBS KUCAS NYCE or NOM INSM SONCAP NEMKO GOST KSA ICCP NRCS BSMI UKRTEST or UKRSERTCOMPUTER NRTL © 2014 Harmonic Inc. All rights reserved. <Product Short Name> Release XXX, Rev A...
- Page 21 EN 55022, EN1000-2-3, IECS-003, Issue 3, Class A EN1000-3-3 EN55024, AS/NZS 3548 (CISPR-22 Class A) VCCI V-3 Safety IEC/EN 60950-1: CB report and CB certificate UL/CSA 60950-1: cTUVus-mark © 2014 Harmonic Inc. All rights reserved. <Product Short Name> Release XXX, Rev A...
- Page 22 Applicable EU Directives for the MediaDirector 2201, 2202, 2251, 2252, and the MediaCenter: Regulatory Directive(s) Notes Compliance Low Voltage Directive is 2006/95/EC, EN 60950-1 EMC directive is: 2004/108/EC Safety of Information Technology Equipment © 2014 Harmonic Inc. All rights reserved. <Product Short Name> Release XXX, Rev A...
- Page 23 IEC 60950-1:2005 (Second Edition) EN 670950-1,2006 + A1 1:2009 Applicable EU Directives for the Ellipse1000 and 2000: Regulatory Directive(s) Notes Compliance Low Voltage Directive is: 2006/95/EC, EMC directive is: 2004/108/EC © 2014 Harmonic Inc. All rights reserved. <Product Short Name> Release XXX, Rev A...
- Page 24 Low Voltage Directive is: 2006/95/EC, EMC directive is: 2004/108/EC EN55022, EN61000-3-2, EN61000-3-3 and EN55024. VCCI V-3, AS/NZS CISPR22, KN22 and KN24 Safety EN60950-1, EN60525-1, EN60825-2, UL60950-1, CSA C22.2 No. 60950-1 © 2014 Harmonic Inc. All rights reserved. <Product Short Name> Release XXX, Rev A...
-
Page 25: Important Safeguards And Notices
Visible and invisible laser radiation may be emitted from the aperture of the optical transceiver ports when no cable is connected. Avoid exposure to laser radiation and do not stare into open apertures. © 2014 Harmonic Inc. All rights reserved. <Product Short Name> Release XXX, Rev A... -
Page 26: Lithium Battery Notice For Service Personnel
If the rack is provided with stabilizing devices, install the stabilizers before mounting or servicing the unit in the rack. © 2014 Harmonic Inc. All rights reserved. <Product Short Name> Release XXX, Rev A... - Page 27 Stabilisatoren zu installieren, bevor Sie die Einheit im Gestell anbringen oder sie warten. The Technical File is available to proper authorities and the product is marked. © 2014 Harmonic Inc. All rights reserved. <Product Short Name> Release XXX, Rev A...
-
Page 28: Safety Symbols
Risk of explosion if battery is replaced incorrectly or with an incorrect type. There are no user-serviceable batteries inside Harmonic products. Refer to Harmonic qualified personnel only to service the replaceable batteries. Dispose of batteries according to the instructions. Use only specified replacement parts. - Page 29 Il y a danger d'explosion si la batterie est remplacée de manière incorrecte ou par une batterie de type incorrect. Les batteries des produits Harmonic ne peuvent pas être réparées ni entretenues par l'utilisateur. Ne confier l'entretien des batteries remplaçables qu'à...
- Page 30 Mechanical Loading - Mounting of the equipment in the rack should be such that a hazardous condition is not achieved due to uneven mechanical loading. ” © 2014 Harmonic Inc. All rights reserved. <Product Short Name> Release XXX, Rev A...
- Page 31 operating with the fiber disconnected. AVOID DIRECT EXPOSURE TO THE BEAM. Never operate a unit with a broken fiber or with a separated fiber connector. © 2014 Harmonic Inc. All rights reserved. <Product Short Name> Release XXX, Rev A...
-
Page 32: Safety Precautions
Ne déplacer ou expédier l'appareil que s'il est correctement emballé dans son emballage d'origine. Seul le personnel dûment qualifié de Harmonic peut effectuer la réparation et la maintenance de l'appareil. Afin de prévenir les dommages causés par la foudre, connecter l'appareil à la terre ... -
Page 33: Alimentation Secteur De L'unité
Ne jamais travailler sur un appareil alimenté en c. c. lorsqu'il est sous tension. Couper l'alimentation avant d'effectuer les raccordements au dispositif. Vérifier qu'un dispositif de protection contre les surtensions est installé entre l'appareil et la source électrique. © 2014 Harmonic Inc. All rights reserved. <Product Short Name> Release XXX, Rev A... -
Page 34: Rack Mount Instructions
Always use the correct tools for stripping and cleaving the fiber. It will save time and reduce breakage caused by scratches. © 2014 Harmonic Inc. All rights reserved. <Product Short Name> Release XXX, Rev A... -
Page 35: Product End-Of-Life Disassembly Instructions
Fiber optics and plastic tubing not containing electrical or data wiring. Safety Rules Recycler personnel are to wear personal protective equipment including proper eye protection, proper hand protection, and proper breathing protection if needed. © 2014 Harmonic Inc. All rights reserved. <Product Short Name> Release XXX, Rev A... -
Page 36: Règles De Sécurité
Le personnel du recycleur doit avoir de l'expérience des outils de démontage de l'appareil. Les produits Harmonic ne doivent pas être démontés par du personnel non qualifié. Une mauvaise connaissance des outils peut causer des dommages et des blessures. - Page 37 © 2014 Harmonic Inc. All rights reserved.
Need help?
Do you have a question about the ProView 7000 and is the answer not in the manual?
Questions and answers