PEAKnx Controlmicro Getting Started
Hide thumbs
Also See for Controlmicro:
- Getting started (38 pages) ,
- User manual (27 pages) ,
- Getting started (28 pages)

Related Manuals for PEAKnx Controlmicro


Summary of Contents for PEAKnx Controlmicro
- Page 1 Controlmicro Kurzanleitung | Getting started | Notice abrégée DE | EN | FR V 1.1.2...
- Page 2 Controlmicro Kurzanleitung Produkt Artikelnummer Controlmicro PNX13-10001 In diesem Dokument erwähnte Produktnamen können Marken oder eingetragene Marken der jeweiligen Eigentümer sein. Diese sind nicht ausdrücklich durch „™“ und „®“ gekennzeichnet. © PEAKnx GmbH Otto-Röhm-Straße 69 64293 Darmstadt Deutschland www.peaknx.com info@peaknx.com Dokumentversion: 1.1.2...
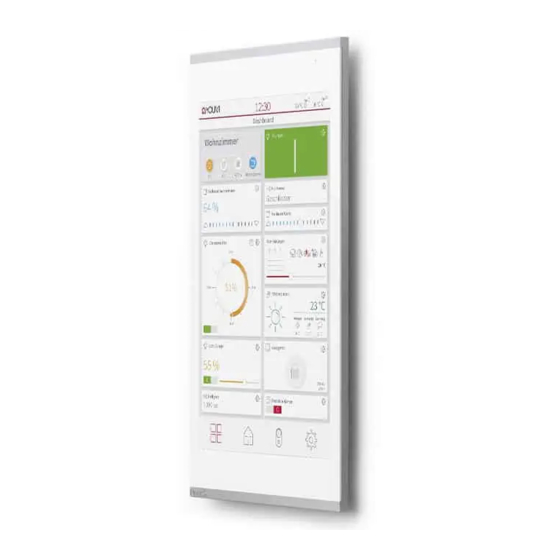
- Page 3 DE Controlmicro Kurzanleitung Touchpanel-Elemente Position Beschreibung Mikrofon Näherungssensor Helligkeitssensor Touchscreen MicroSD-Karteneinschub Schraubenaufnahme zur Befestigung des Panels USB 2.0 Typ C Status LED: rot: Panel ist heruntergefahren, grün: Panel ist eingeschaltet...
- Page 4 Nehmen Sie keine eigenmächtigen Reparaturen oder Änderungen am Gerät vor! ▪ Lieferumfang Controlmicro Panel ▪ ▪ USB-Stick: YOUVI Basic Software und Controlmicro Handbuch ▪ Kurzanleitungen zur Inbetriebnahme von Panel und Software ▪ Stecker für KNX und Stromversorgung; Netzwerk-Aufsteckplatine ▪ Schrauben zur Sicherung des Panels gegen Diebstahl inkl. Werkzeug ▪...
- Page 5 DE Controlmicro Kurzanleitung Warnung Stellen Sie vor der Montage sicher, dass alle Anschlusskabel des Gerätes unversehrt ▪ sind. Vorbereitung Tipp: Die Einbauhöhe über dem Boden orientiert sich an der Größe des primären Benut- zers. Wir empfehlen, dass die Oberkante des Panels sich ungefähr auf Augenhöhe befindet.
- Page 6 DE Controlmicro Kurzanleitung Verbinden Sie das Netzwerkkabel mit der Netzwerk-Aufsteckplatine, wie im Bild links ge- zeigt. Stecken Sie die Netzwerkplatine auf den LAN-Anschluss, wie im Bild rechts gezeigt. Befestigen Sie das Netzwerkkabel mit Hilfe eines Kabelbinders am schwarzen Gehäuse. −...
- Page 7 DE Controlmicro Kurzanleitung ^ r q e l o = k ^ j b q fq i b ` o b ^ q fl k = a ^ q b p r _ q fq i b p r mb o s fp l o = k ^ j b...
-
Page 8: Bedienung
DE Controlmicro Kurzanleitung Bedienung Achtung Schäden am Panel durch zu frühe Inbetriebnahme vermeiden! Beachten Sie die klimatischen Bedingungen am Installationsort. ▪ Vor dem Einschalten des montierten Gerätes muss sich das Gerät an die ▪ klimatischen Gegebenheiten am Installationsort angepasst haben. - Page 9 Controlmicro ein- und ausschalten Hinweis: Im Auslieferungszustand meldet sich das Panel automatisch mit dem Benutzer- namen Controlmicro ohne Passwort an. Nach dem Login können in den Windows Einstellungen jederzeit weitere Benutzer hinzugefügt oder weitere Einstellungen geändert werden. Einschalten Das Panel schaltet sich nach dem Einschalten der Sicherung selbst an.
-
Page 10: Technischer Support
Anschluss am Panel) ist dazu nötig. Hinweis: Alles Weitere zum Start mit YOUVI erfahren Sie in der Kurzanleitung von YOUVI, die sich ebenfalls im Lieferumfang befindet. Technischer Support Sollten Probleme mit Ihrem Controlmicro auftreten, kontaktieren Sie bitte unser PEAKnx Support Team: − Mail: support@peaknx.com −... -
Page 11: Getting Started
EN Controlmicro, Getting started Controlmicro Getting started... - Page 12 EN Controlmicro, Getting started Product Item number Controlmicro PNX13-10001 The product names mentioned in this document may be brands or registered trademarks of their respective owners. These are not explicitly labeled with “™” or “®”. © PEAKnx GmbH Otto-Röhm-Strasse 69...
- Page 13 EN Controlmicro, Getting started Touch panel elements Position Description Microphone Proximity sensor Brightness sensor Touchscreen MicroSD card slot Screw holes for fixing the panel USB 2.0 Type C Status LED: red: panel is shut down, green: panel is switched on...
- Page 14 Panel mounting and installation Important safety and handling information Warning The Controlmicro may only be installed and commissioned by qualified electricians! Observe the national regulations applicable in your country regarding installation, functional testing, repair and maintenance of electrical products! Observe the „Five Safety Rules“ (DIN VDE 0105, EN 50110) and apply them correctly: ▪...
- Page 15 EN Controlmicro, Getting started Warning ▪ Before installation, make sure that all connecting cables of the device are undama- ged. Preparation Tip: Choose the installation height of the panel according to the height of the primary user so that the top edge of the panel is at his/her eye level. A slightly lower screen prevents fatigue of the arms during operation.
- Page 16 EN Controlmicro, Getting started Connect the network cable to the LAN board as shown in the picture on the left. Plug the LAN board onto the LAN connector as shown in the picture on the right. Fasten the network cable to the black housing using a cable tie.
- Page 17 EN Controlmicro, Getting started ^ r q e l o = k ^ j b q fq i b ` o b ^ q fl k = a ^ q b p r _ q fq i b p r mb o s fp l o = k ^ j b...
-
Page 18: Operation
EN Controlmicro, Getting started Operation Caution Avoid damage to the panel due to early commissioning! ▪ Note the climatic conditions at the installation site! ▪ Before switching on the mounted device, the device must have adapted to the clima- tic conditions at the installation site. - Page 19 Switching the Controlmicro on and off Note: In the delivery state, the panel automatically logs on with the user name Controlmicro without a password. After the Login, additional users can be added at any time or further set- tings may be changed in the Windows Settings.
-
Page 20: Technical Support
Note: Everything else about the start with YOUVI can be found in the also delivered short guide. Technical support If you experience problems with your Controlmicro, please contact our PEAKnx Support Team: − Mail: support@peaknx.com − Create a Support Ticket: support.peaknx.com −... - Page 21 FR Controlmicro, Notice abrégée Controlmicro Notice abrégée...
- Page 22 FR Controlmicro, Notice abrégée Produit Référence Controlmicro PNX13-10001 Les noms de produits mentionnés dans ce document peuvent être des marques commerciales ou des marques déposées de leurs propriétaires respectifs. Elles ne sont pas expressément marquées par « ™ » et « ® ». © PEAKnx GmbH Otto-Röhm-Straße 69...
- Page 23 FR Controlmicro, Notice abrégée Éléments du panneau tactile Position Description Micro Capteur de proximité Capteur de luminosité Écran tactile Fente pour carte MicroSD Trous de fixation USB 2.0 de type C LED d’état : rouge : panneau est éteint, vert : le panneau est allumé...
- Page 24 Contenu de la livraison Panneau Controlmicro ▪ ▪ Clé USB : Logiciel YOUVI Basic, manuel d‘utilisation Controlmicro ▪ Brèves instructions pour la mise en service du panneau et du logiciel ▪ Connecteurs pour KNX et alimentation, circuit imprimé pour la connexion au réseau ▪...
- Page 25 FR Controlmicro, Notice abrégée Avertissement ▪ Avant l’installation, assurez-vous que tous les câbles de connexion de l’appareil ne sont pas endommagés. Préparation Conseil : Prenez pour la hauteur de montage du panneau la taille de l’utilisateur principal, pour que le bord supérieur du panneau soit à hauteur de ses yeux. Un écran légèrement plus bas empêche la fatigue des bras pendant l’opération.
- Page 26 FR Controlmicro, Notice abrégée Connectez le câble réseau à la carte LAN enfichable comme indiqué sur l’image de gauche. Branchez la carte LAN sur le connecteur LAN comme indiqué sur l’image de droite. Fixez le câble réseau au boîtier noir à l’aide d’un serre-câble.
- Page 27 FR Controlmicro, Notice abrégée ^ r q e l o = k ^ j b q fq i b ` o b ^ q fl k = a ^ q b p r _ q fq i b p r mb o s fp l o = k ^ j b...
- Page 28 FR Controlmicro, Notice abrégée Mise en service et fonctionnement initial Attention Évitez d’endommager le panneau en le mettant en service trop tôt ! ▪ Veillez aux conditions climatiques sur le site d’installation. ▪ Avant d’allumer l’appareil monté, il doit s’être acclimaté aux conditions sur le site d’installation.
- Page 29 Remarque : À la livraison, le panneau se connecte automatiquement avec le nom d’utili- sateur Controlmicro sans mot de passe. Après la connexion, des utilisateurs supplémentaires peuvent être ajoutés ou d’autres paramètres peuvent être modifiés à tout moment dans les paramètres Windows.
-
Page 30: Assistance Technique
Conseil : Après l‘installation et la mise en service du panneau, nous vous recommandons de créer une sauvegarde en utilisant le Recovery Stick de PEAKnx, disponible en option. Système d’exploitation Le système d’exploitation utilisé est Microsoft Windows 10 IoT Enterprise LTSC. D’autres pro- grammes pour la visualisation des informations du bâtiment et pour le contrôle du bâtiment... - Page 31 FR Controlmicro, Notice abrégée...
- Page 32 www.peaknx.com...
Need help?
Do you have a question about the Controlmicro and is the answer not in the manual?
Questions and answers