Table of Contents
Advertisement
Advertisement
Table of Contents

Related Manuals for SGM R-2 RGBW


Summary of Contents for SGM R-2 RGBW
- Page 1 R‐2 RAIL LIGHT RGBW R‐2 RAIL LIGHT WHITE...
-
Page 2: Dimensions
Dimensions Measurements in millimetres and inches (in brackets). Drawing not to scale. - Page 3 The SGM logo, the SGM name and all other trademarks in this document pertaining to services or products by SGM or its affiliates and subsidiaries are trademarks owned or licensed by SGM or its affiliates or subsidiaries.
-
Page 4: Table Of Contents
Contents Dimensions ........................2 Safety information ......................6 Overview ..........................9 Parts identification and terminology .................10 Preparing for installation ....................11 Connecting AC Power ......................12 Connecting power adaptor to track rail .......................... 13 Installing the R-2 Rail Light ....................14 Pan/Tilt adjustment ......................15 Connecting to a wireless DMX control device ..............16 Lumen Radio transmitter ....................17 Local Area Network (LAN) ............................. - Page 5 SGM Rail Light Configuration ...................22 Overview..................................22 Interaction with R-2 Rail Light (software)........................23 Wireless status ................................23 ....................................... 24 Interaction with R-2 Rail Light (hardware) ........................24 DMX Control .................................. 25 Creating a preset (RGBW)............................. 26 Creating a preset (White)............................... 26 Service ..........................27...
-
Page 6: Safety Information
Safety information WARNING! Read the safety precautions in this section before unpacking, installing, powering or operating this product. The R-2 Rail Light is an LED luminaire intended for professional use only. It is not suitable for household use. Impropre a l’usage domestique. - Page 7 Preventing burns and fire WARNING! Take measures to prevent burns and fire. • Install in a location that prevents accidental contact with the fixture. • Install only in a well-ventilated space. • Install at least 0.3 m (12 in.) away from objects to be illuminated. •...
- Page 8 Avoid personal injury WARNING! Take measure to prevent personal injury. • Do not look directly at the light source from close range. • Take precautions to prevent injury due to falls when working at height. • For permanent installation, ensure that the fixture is securely fastened to a load-bearing surface with suitable corrosion- resistant hardware.
-
Page 9: Overview
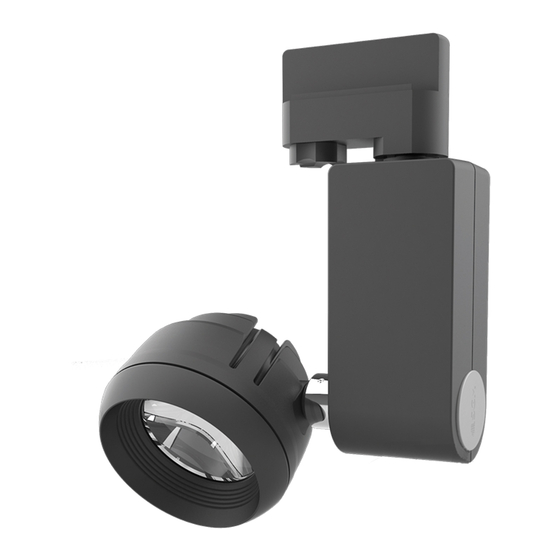
The R-2 series is available in both black and white housings, so that they blend into your existing installations. The R-2 RGBW features a 13° lens and the R-2 White features a 25° lens as standard. This manual covers installation, use and maintenance of the R-2 Rail Light. All documentation is also available from the SGM web-site: http://www.sgmlight.com... -
Page 10: Parts Identification And Terminology
Parts identification and terminology Head Lens Base Lens cap Control button Rotational phase selector Track adapter Twist lock Diode... -
Page 11: Preparing For Installation
Preparing for installation Unpack the fixture and inspect it to ensure that it has not been damaged during transport. The R-2 Rail Light is shipped with: • User manual When selecting a location for the fixture, ensure that: • It is situated away from public thoroughfares and protected from contact with people. •... -
Page 12: Connecting Ac Power
Connecting AC Power The R-2 Rail Light can operate on any 100–240V, 50/60 Hz AC mains power supply. It draws approximately 0.2 amps at full power. For permanent installation, have a qualified electrician wire the mains cable directly to a suitable branch circuit. The power cable color coding is given below. -
Page 13: Connecting Power Adaptor To Track Rail
Connecting power adaptor to track rail Press the power adaptor into the track rail like shown below. Tighten the Phillips screw on the bit of the power adaptor that is visible inside the track rail. -
Page 14: Installing The R-2 Rail Light
Installing the R-2 Rail Light To attach the R-2 Rail Light to a track rail: Insert the fixture with the polarity groove opposite the polarity ridge on the track rail. NOTE: Make sure the rotational phase selector is set to ‘OFF’... -
Page 15: Pan/Tilt Adjustment
Pan/Tilt adjustment To adjust pan/tilt (330° / 270°), simply rotate the head/body of the fixture to the desired position:... -
Page 16: Connecting To A Wireless Dmx Control Device
Connecting to a wireless DMX control device The R-2 Rail Light is controllable using a wireless Lumen Radio transmitter (DMX or DMX/RDM) and SGM’s Rail Light Configuration Tool (downloadable from www.sgmlight.com). You can set up the Lumen radio transmitter in the following ways: •... -
Page 17: Lumen Radio Transmitter
Lumen Radio transmitter Overview Wireless antenna 5-pin XLR DMX input Power input Link status diode Power status diode Link button... -
Page 18: Local Area Network (Lan)
Local Area Network (LAN) Follow the steps below to set up a network between your personal computer and the wireless Lumen Radio transmitter: Connect the Lumen Radio transmitter to power and link it to your PC via an ethernet cable. Right-click the (depending on your network connection) icon and select ‘Open Network and Sharing Center’... - Page 19 Select ‘Local Area Connection’ Select ‘Internet Protocol Version 4 (TCP/IPv4)‘ and click ‘Properties‘...
- Page 20 Type in an appropriate IP address and Subnet mask (e.g. 2.0.0.88 and 255.0.0.0 as shown below) and click ‘OK’. Open the SGM Rail Light Configuration Tool, select the appropriate ethernet interface, and click ‘OK’...
-
Page 21: Usb Dongle
Follow the steps below to set up a network between your personal computer and the wireless Lumen Radio transmitter: Connect the Lumen Radio transmitter to power and link it to your PC via a USB dongle (SGM uploader cable) Open the SGM Rail Light Configuration Tool, select the appropriate serial interface, and click ‘OK’... -
Page 22: Sgm Rail Light Configuration
SGM Rail Light Configuration Overview Settings Assign DMX addresses to individual fixtures. Max. 512 channels for R-2 White and max. 128 for RGBW (it is possible to assign several fixtures to one address). Click to scroll up. Down Click to scroll down. -
Page 23: Interaction With R-2 Rail Light (Software)
Interaction with R-2 Rail Light (software) To establish connection between the wireless Lumen Radio transmitter and the R-2 Rail Light fixture(s), connect both to power and click the ‘Link’ button on the wireless transmitter Wireless status The diode on the base of the fixture (see parts identification on page 10 for more details) displays the current wireless status. See detailed explanation below. -
Page 24: Interaction With R-2 Rail Light (Hardware)
To stop the remaining fixtures from flashing, click ‘Clear’. It is important to note that the fixture(s) are not able to receive DMX data until they stop flashing. This can take up to 5-6 seconds. If you want to assign a new DMX address to a pre-assigned fixture, simply overwrite it by clicking ‘Send’ and assign it to a new DMX address. -
Page 25: Dmx Control
DMX Control Offset Click ‘Up’ / ‘Down’ or type in value to change offset. Adjustment sliders Adjust sliders to control light output. and intensity Zero Set all sliders to 0. Full Set all sliders to 255. -
Page 26: Creating A Preset (Rgbw)
Creating a preset (RGBW) Use the adjustment sliders to create a preset of RGBW colors. When you have achieved the color mix you desire, save the preset by: Going to ‘Settings’ in the Configuration Tool and clicking ‘Store current preset’. Clicking and holding the control button on the base of the fixture until the fixture(s) have dimmed up and down. -
Page 27: Service
There are no user-serviceable components in the fixture. Do not open the R-2 Rail Light, as doing so is likely to damage the fixture. Consult your SGM dealer if the fixture operates abnormally, is defective or otherwise in need of service or repair. -
Page 28: Cleaning
NOTE: To perform firmware updates, you need a Windows-based personal computer and a SGM USB 5-Pin-XLR upload cable (available from your SGM distributor). Cleaning To maintain optimal performance, regular cleaning is essential. Cleaning schedules will vary depending on the ... -
Page 29: Dmx Protocols
DMX protocols R-2 RGBW 3 Channel Mode (Standard) Default Channel Name DMX value Description Info Fader type percentage value No RED > 0,0% 100,0% Fade Maximum RED No GREEN > Green 0,0% 100,0% Fade Maximum GREEN No BLUE > ... -
Page 30: White (3000K/4000K)
R-2 White (3000K/4000K) 1 Channel Mode (Standard) Default Channel Name DMX value Description Info Fader type percentage value No Light > White 0,0% 100,0% Fade Maximum Light... -
Page 31: Fixtures And Accessories
R-2 RGBW, white housing, 13° ........................Order no: 84010103 R-2 RGBW, black housing, 13° ........................Order no: 84010104 R-2 RGBW, white housing, 35° ........................Order no: 84010119 R-2 RGBW, black housing, 35° ........................Order no: 84010120 R-2 W, 3000K, white housing, 25°......................Order no: 84010101 R-2 W, 3000K, black housing, 25°......................Order no: 84010102... - Page 32 APPROVALS AND CERTIFICATIONS Conforms to..............1999/5/EC: R&TTE Directive (EN301489-1, EN301489-3, EN300328) Conforms to............. 2006/95/EC: Low Voltage Directive (EN 60598-1, EN 60598-2-17, EN 62471) Conforms to..........................2011/65/EU: RoHS2 Directive The information in this document is subject to change without notice...
-
Page 33: User's Notes
User’s notes... - Page 34 SGM A /S · Sommer vej 23 · 8210 Aarhus V · Denmark Tel +45 70 20 74 00 · info@sgmlight.com · www.sgmlight.com...
Need help?
Do you have a question about the R-2 RGBW and is the answer not in the manual?
Questions and answers