Table of Contents
Advertisement
Quick Links
Advertisement
Table of Contents

Related Manuals for SGM MOVING HEADS SERIES


Summary of Contents for SGM MOVING HEADS SERIES
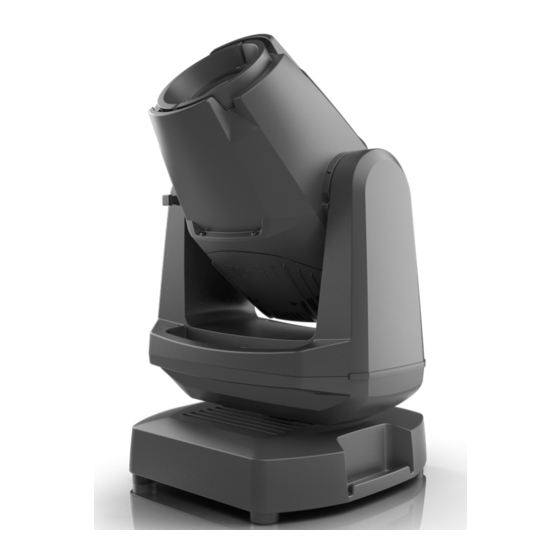
- Page 1 USER MANUAL M O V I N G H E A D S S E R I E S G-7 S P O T...
- Page 2 G-7 SPOT USER MANUAL REV. A © 2018 SGM Light A/S ® . The information in this document is subject to change without notice. SGM and all affiliated companies disclaim liability for any injury, damage, direct or indirect loss, consequential or economic loss, or any other loss occasioned by the use of, inability to use, or reliance on the information contained in this manual.
-
Page 3: Table Of Contents
Contents Safety information ........................4 Overview ..........................5 Preparing for installation ......................6 Installing / Rigging the G-7 Spot ....................6 Connecting AC power ........................8 Configuring the device .......................8 Connecting to a DMX control device ....................9 Configuring the device for DMX control ..................9 Configuring the device for DMX control ..................10 Control menu .........................11 RDM ............................11 Factory default ........................11... -
Page 4: Safety Information
Read the following safety precautions carefully before unpacking, installing, powering, or operating the device. SGM luminaries are intended for professional use only. They are not suitable for household use. Les luminaires SGM sont impropre à l’usage domestique. Uniquement à usage professionnel. -
Page 5: Overview
Overview The G-7 Spot is a fast, compact, and lightweight mid-sized moving head spot with high-output and low power consumption, designed for multiple applications, including when wireless operation is essential. The G-7 Spot features: • An IP66 rated moving head with 6500K white LED engine* •... -
Page 6: Preparing For Installation
106 mm [ 4,2in ] All SGM luminaries have locking points in the base for installation and rigging. The distance between the points from center to center is always 106 mm. The G-7 Spot may be installed in any orientation, with or without base, on the ceiling or on a wall surface. - Page 7 Rigging process using the SGM Omega bracket Start the rigging process by blocking the lower working area, and make sure the work is performed from a stable platform. 1. Check that the clamp/bracket is undamaged and can bear at least 10 times the weight of the fixture. Check that the structure can bear at least 10 times the weight of all installed fixtures, lamps, cables etc.
-
Page 8: Connecting Ac Power
When installing standard type C circuit breakers there will be no limitations due to the fixture in-rush current. For assistance with alternative configurations, contact your SGM representative. After connecting the G-7 Spot to power, run the on-board test by selecting TEST → AUTOMATED TEST in the menu, to ensure that the fixture and each LED are functioning correctly. -
Page 9: Connecting To A Dmx Control Device
The G-7 Spot is designed to look for wireless transmitters in ‘connect’ state, when this option is not yet enabled. To connect the G-7 Spot to a wireless transmitter: • Log off the currently paired wireless transmitter (by default the fixture is linked to the SGM factory transmitter). See “Disconnecting a wireless transmitter” below. •... -
Page 10: Configuring The Device For Dmx Control
Configuring the device for DMX control DMX Start address The G-7 Spot can be operated in different DMX modes. For any of the modes, the first channel used to receive data from a DMX control device is known as the DMX start address. For independent control, each G-7 Spot must be assigned its own DMX start address. -
Page 11: Control Menu
Control menu To know all the functions available in the G-7 Spot menu, please contact support@sgmlight.com. Supported RDM functions The G-7 Spot features support for various RDM functions. RDM (Remote Device Management) is a protocol enhancement to USITT DMX512 that allows bi-directional communication between the fixtures and the controller over a standard DMX line. -
Page 12: Fixture Properties
CTO wheel asm CMY color mixing The G-7 Spot is a CMY color-mixing moving head designed to match the SGM RGB color palette, with linear CMY dichroic flags and a linear CTO. It has been also added dichroic RGB macros (deep red, green and blur) and a CTB filter. -
Page 13: Fixture Properties
Fixture properties Flipping the OLED display If the fixture is installed hanging upside down, it might be useful to flip the display so that it is easier to read. To flip the display go to “SETTINGS → DISPLAY FLIP” in the menu, or press the up and down buttons on the control panel at the same time. Setting the display saver By default the OLED display dims down after a short period when the control panel is not in use, but it can also be set to turn off completely. -
Page 14: Gobo Replacement
Gobo replacement Replacing the gobos To replace one or more gobos: 1. Disconnect the fixture from power and allow it to cool. 2. Position the head upwards and apply the tilt lock. 3. Before removing one of the rear head covers, identify where the rotating gobo wheel is located (same side as the power and DMX connectors). -
Page 15: Gore-Tex® Membrane
Replacing a gobo in a gobo holder Remove the defective/old gobo from the gobo holder. Place the new gobo with silver side towards the light source. Align both index marks of the gobo and the gobo holder, as shown below. Insert the gobo holder and align it with the index mark in the gobo wheel, as shown below. -
Page 16: Accessories
Accessories The G-7 Spot can be used with different types of accessories, such as the Top Hat. To know more about all the available G-7 Spot accessories, please see www.sgmlight.com, or contact your local SGM dealer. G-7 Spot Top Hat The G-7 Spot is extendible using the Top Hat, which main function is to create discrete lighting designs, reducing flare coming from the direct light source. -
Page 17: Troubleshooting
Inspect and remove any obstacles constraining free operation of the pan/tilt. Pan/tilt does not reset correctly. Calibration values are missing. Contact SGM support or certified SGM service partner Display is turned on, but the fixture doesn't Several causes Contact your local SGM dealer or support@sgmlight.com... -
Page 18: Maintenance
We recommend that the fixture’s firmware is always up-to-date. The latest firmware version is available for download under the respective product at www.sgmlight.com. To update your G-7 Spot with the latest firmware, use an SGM USB 5-Pin-XLR uploader cable, and a Windows-based computer with the SGM Firmware Tool software installed (available for download at www.sgmlight.com). -
Page 19: Ordering Information
G-7 Spot, Std, BL................................P/N: 80102500 G-7 Spot, Std, WH................................P/N: 80102501 G-7 Spot, Std, CU................................P/N: 80102502 The G-7 Spot can be ordered in any RAL color. Contact your local SGM dealer for ordering customized color housings or for more information. G-7 Spot accessories 2 m power cable with TRUE1 power connector......................... -
Page 20: User Notes
User Notes... -
Page 21: User Notes
User Notes... - Page 22 SGM Light A/S Sommervej 23 8210 Aarhus V Denmark Tel: +45 70 20 74 00 info@sgmlight.com www.sgmlight.com...
Need help?
Do you have a question about the MOVING HEADS SERIES and is the answer not in the manual?
Questions and answers