
Related Manuals for SGM G-4 WASH


Summary of Contents for SGM G-4 WASH
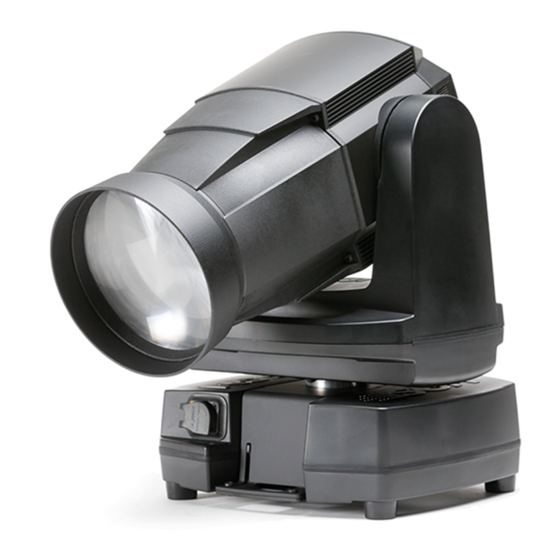
- Page 1 USER MANUAL MOVING HEAD SERIES G-4 WASH (POI) G-4 W WASH G-4 WASH-BEAM (POI) G-4 W WASH-BEAM G-4 WASH MOTORIZED BARNDOORS...
- Page 2 The SGM logo, the SGM name, and all other trademarks in this document pertaining to services or products by SGM or its affiliates and subsidiaries are trademarks owned or licensed by SGM, or its affiliates or subsidiaries.
-
Page 3: Table Of Contents
Fixture properties ........................14 Control menu .........................15 RDM ............................16 Troubleshooting ........................16 Accessories ...........................17 Ceiling mount bracket ......................17 G-4 Wash Top Hat ........................19 Interchangeable front lens ......................20 Motorized Barndoors .......................20 SGM Uploader cable ........................21 SGM Vacuum Test Kit ......................22 POI Permanent Outdoor Installation...................23 Maintenance ...........................25... - Page 4 G-4 Series dimensions G-4 Wash / G-4 W Wash G-4 Wash / G-4 W Wash with Top Hat G-4 Wash-Beam / G-4 W Wash-Beam G-4 Wash Motorized Barndoors All dimensions in milimeters and inches. Drawing not to scale.
-
Page 5: Safety Information
Read the safety precautions in this section before installing, powering, or operating this product. SGM luminaries are intended for professional use only. They are not suitable for household use. Les luminaires SGM sont impropre à l’usage domestique. Uniquement à usage professionnel. -
Page 6: Overview
I: Camlocks for omega bracket B: Power in F: Tophat (accessory) J: DMX in and out C: G-4 Wash front lens G: G-4 Wash-beam front lens K: Safety wire attachment points D: Display panel H: G-4 Motorized barndoors front lens... -
Page 7: Preparing For Installation
• Lower pressure jets of water from any direction In the G-4 Wash Motorized Barndoors, while the fixture is full IP65-rated, the motorized barndoors module is IP20-rated. Therefore, the motorized barndoors are not protected from water and dust. When selecting a location for the device, ensure that: •... -
Page 8: Installing / Rigging The G-4
Installing / rigging the G-4 The G-4 Series may be installed in any orientation, with base or with ceiling mount. Always use an omega bracket to rig the fixture and lock the bracket with the 1/4-turn fasteners. Please note: The 1/4-turn fasteners are only locked when turned fully clockwise. Rigging process Start the rigging process by blocking the working area below the fixture. -
Page 9: Connecting Ac Power
When installing standard type C circuit breakers, there will be no limitations due to the fixture in-rush current. For assistance with alternative configurations, contact your SGM representative. After connecting the G-4 to power, run the on-board test, going to “MENU → TEST →AUTOMATED TEST”, to ensure the fixture and each LED are functioning correctly. -
Page 10: Configuring The Device
Configuring the device Set up the fixture using the control panel and OLED display at the yoke of the fixture. After powering on the G-4 Series, the display shows the currently selected operating mode. Navigate through the menus using the arrows and select items using the ENTER button. -
Page 11: Connecting To A Dmx Control Device
The active input type is displayed under the wireless signal strength indicator. The signal strength can be also checked via RDM data by using a external RDM device (e.g. the SGM A-4). Note: In POI versions with wireless, the DMX signal strength can only be checked through RDM. - Page 12 DMX modes The G-4 Series operates in different modes. All DMX charts are available at www.sgmlight.com under the respective products, or upon request via support@sgmlight.com. DMX Start address As mentioned above, the G-4 Series can be operated in different DMX modes. Regardless of which DMX mode is selected, the first channel used to receive data from a DMX control device is known as the DMX start address.
-
Page 13: Full Color Calibration And Color Temperature Correction
Stored position preset 1 Programming the position presets for the internal programs is performed by using the innovative SGM patented system, which lets you determine the pan position by changing it directly by hand. These position presets can also be captured directly from DMX values sent from a controller. -
Page 14: Fixture Properties
The G-4 RGBAM Series features a color macro, which is a very powerful tool that easily matches colors between different types of SGM luminaires. The color macro tool allows the G-4 RGBAM Series to adjust to the same color hue as, for instance, the G-1 Beam (fixed color wheel). -
Page 15: Control Menu
Press ‘ENTER’ to enable / disable - [X] / [ ]. Factory Default Resets the fixture to factory default. See “Factory default” on page 14. Service PIN Service use only. Contact your SGM dealer or SGM support to request the service pin. Service Menu Service use only. TEST Automated test Initiates a self-test sequence. -
Page 16: Rdm
Confirm that the power is switched on, confirm the cables are plugged in. Main fuse is blown. Contact SGM support or certified SGM service partner. Fixture suddenly turned off. Power was turned off. Check the power supply, switches and breakers. -
Page 17: Accessories
Apart from the ceiling mount, tophat, and interchangeable front lens, there are no other user-serviceable components in the fixture. Do not open other parts in the G-4 series, as doing so might damage the ingress protection. Contact your SGM dealer if the fixture operates abnormally, is defective, or needs any kind of service and repair. Ceiling mount bracket The ceiling mount bracket lets the fixture replace the base unit and to be mounted directly to a surface. - Page 18 Preparing for installing the ceiling mount The ceiling mount bracket consists of two main parts: • the trapeze shaped mounting plate. • the ceiling plate. After detaching the base of the fixture from the head, prepare the ceiling mount: 1. Remove the two lock-screws (if installed) and separate the two parts. 2.
-
Page 19: G-4 Wash Top Hat
G-4 Wash Top Hat The G-4 Wash is extendible using the Top Hat, which main function is to create discrete lighting designs, reducing flare coming from the direct light source. The Top Hat can be easily mounted through magnetic fastening. When correctly aligned to the front lens, the Top Hat will snap into place due to the four powerful magnets. -
Page 20: Interchangeable Front Lens
Interchangeable front lens The G-4 Series offers the possibility to change the front lens, expanding the flexibility of the luminaire even further. A G-4 Wash can quickly be converted into a G-4 Wash-Beam, or in a G-4 Wash with Motorized Barndoors. -
Page 21: Sgm Uploader Cable
Attaching/detaching the motorized barndoors Swapping the front lens of the G-4 Wash or Wash-Beam for the motorized barndoors requires the replacement of both front lens and back cover. The replacement of the front lens is done in the same way as explained previously on page 19. With regard to the head back cover, it must be replaced for a heavier one, in order to give the proper counterbalance between the front and the back of the fixture. -
Page 22: Sgm Vacuum Test Kit
SGM Vacuum Test Kit The Vacuum Test Kit is an accessory suitable for all SGM IP-rated fixtures, made for testing the IP validity after having reassembled the fixture. In order to ensure the IP-rating of the G-4 Series, it’s highly recommended that the fixture is always vacuum tested after installing or swapping any part that might compromise the IP-rating, e.g.,... -
Page 23: Poi Permanent Outdoor Installation
Off: fixture is off or indicator LED is set to auto dimming. Connecting DMX and AC power DMX-in and DMX-out are in the same cable. See more in figure 23 about the SGM POI DMX cable. Power is wired as the standard version. See “Connecting AC power” on page 9. - Page 24 Connecting a wireless transmitter in POI In POI versions with wireless it is necessary to pair the fixture with a new transmitter (by default the fixture is linked to the SGM factory transmitter). In order to do so, take the magnet that comes with the fixture, place it close to the LED indicator, and wait 3 seconds. The LED indicator will blink in orange to show that it can be paired to a new transmitter.
-
Page 25: Maintenance
Cleaning SGM luminaires with IP65 or IP66-rating do not need any cleaning procedures inside the fixture. However, cleaning the front lens may be needed to achieve the maximum light output after exposure to dust, sand, or dirt. Exterior housing can also be cleaned to get a better look. -
Page 26: Fixtures And Accessories
Fixtures and accessories Contact your local SGM dealer to get the latest pricing and news about the available accessories. PLEASE NOTE: the list below is subject to change without notice. Ordering information G-4 Wash, Std, BL / WH..........................P/N: 80101001 / 80101101 G-4 Wash, POI, BL / WH.......................... -
Page 27: User Notes
User Notes ________________________________________________________________________________________________________ ________________________________________________________________________________________________________ ________________________________________________________________________________________________________ ________________________________________________________________________________________________________ ________________________________________________________________________________________________________ ________________________________________________________________________________________________________ ________________________________________________________________________________________________________ ________________________________________________________________________________________________________ ________________________________________________________________________________________________________ ________________________________________________________________________________________________________ ________________________________________________________________________________________________________ ________________________________________________________________________________________________________ ________________________________________________________________________________________________________ ________________________________________________________________________________________________________ ________________________________________________________________________________________________________ ________________________________________________________________________________________________________ ________________________________________________________________________________________________________ ________________________________________________________________________________________________________ ________________________________________________________________________________________________________ ________________________________________________________________________________________________________ ________________________________________________________________________________________________________ ________________________________________________________________________________________________________ ________________________________________________________________________________________________________ ________________________________________________________________________________________________________ ________________________________________________________________________________________________________ ________________________________________________________________________________________________________ ________________________________________________________________________________________________________ ________________________________________________________________________________________________________ ________________________________________________________________________________________________________ ________________________________________________________________________________________________________ ________________________________________________________________________________________________________ ________________________________________________________________________________________________________ ________________________________________________________________________________________________________ ________________________________________________________________________________________________________ ________________________________________________________________________________________________________ ________________________________________________________________________________________________________ ________________________________________________________________________________________________________ ________________________________________________________________________________________________________ ________________________________________________________________________________________________________ ________________________________________________________________________________________________________ ________________________________________________________________________________________________________... - Page 28 SGM Light A/S Sommervej 23 8210 Aarhus V Tel: +45 70 20 74 00 info@sgmlight.com www.sgmlight.com...
Need help?
Do you have a question about the G-4 WASH and is the answer not in the manual?
Questions and answers