Table of Contents
Advertisement
Quick Links
Quick Installation Guide
SSE-F3548S SSE-F3548SR
PACKAGE CONTENTS
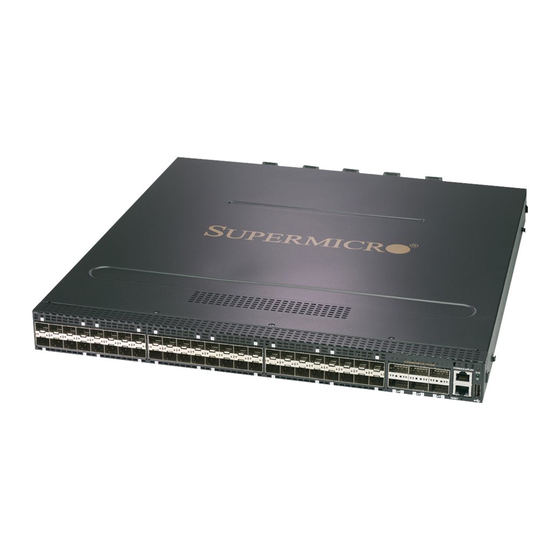
48 × 25GbE + 6 × 100GbE DC switch
Power Cords × 2
Rack-mounting kit (M3 flat head screws x 4; M4 pan head
screws x 2; M4 flat head screws x 2; M5 screws x 6; Cage
nuts x 6; Ear brackets x2; Rear brackets x2; Front
brackets(long) x 2; Front bracket(short) x 2)
RJ-45 to DB-9 serial console cable
Quick Installation Guide
Detailed installation instructions are contained in a User Manual
available on the Supermicro website at:
https://www.supermicro.com/products/accessories/Networking/SS
E-F3548S.cfm
Instructions for rack mounting using ear brackets are included in the
manual and summarized below.
SELECTING A SITE
The switch can be mounted in a standard 19-inch equipment rack or
on a horizontal surface.
MOUNTING
The switch can be mounted in a rack using the supplied rack-
mounting kit.
The installation instructions are shown below:
Step 1. Install the ear brackets
A. Secure the ear brackets to the switch with the M3 flat head screws.
Ear bracket
Step 2. Install the front brackets
A. Secure the front brackets to the switch with the M4 flat head
screws.
○
1
○
2
○
3
P.S. There are two types of front-brackets. Front-bracket-long can
support a rack between 850mm and 1000mm deep, and Front-bracket-
short can support a rack between 700mm and 850mm deep.
Step 3. Install the switch into a rack
A. Secure the switch to a rack with the M5 screws and cage nuts.
M3 screw
M5 screw
Step 4 Install the rear brackets
Front-bracket
A. Secure the rear brackets to the rack with M5 screws and cage nuts.
M4 screw
Step 5 Secure the rear brackets
A. Secure the rear brackets to the front brackets with the M4 pan
head screws.
Cage nut
M5 screw
Rear-bracket
Cage nut
M4 screw
Advertisement
Table of Contents

Related Manuals for Supermicro SSE-F3548


Summary of Contents for Supermicro SSE-F3548
- Page 1 M5 screw Detailed installation instructions are contained in a User Manual Step 2. Install the front brackets Cage nut available on the Supermicro website at: A. Secure the front brackets to the switch with the M4 flat head https://www.supermicro.com/products/accessories/Networking/SS screws.
- Page 2 PHYSICAL CHARACTERISTICS Caution: For more information and safety instruction, visit: Installation and removal of the unit must be carried out by http://www.supermicro.com/about/policies/safety_information.cfm qualified personnel only. Network Interface: The unit must be connected to a grounded outlet to comply with...
Need help?
Do you have a question about the SSE-F3548 and is the answer not in the manual?
Questions and answers