
Related Manuals for Empava EMPV- 24WOA16


Summary of Contents for Empava EMPV- 24WOA16
- Page 1 INSTRUCTION MANUAL 24" Single Wall Oven Empava Item #: EMPV- 24WOA16 EMPV- 24WOA01 EMPV- 24WOB14 Distributed by: Empava Appliances Inc. 15253 Don Julian Rd, City of Industry, CA 91745 USA www.empava.com Phone:+1(888)682 8882 Email:support@empava.com...
- Page 2 DEAR CUSTOMER The oven is exceptionally easy to use and extremely efficient. After reading the instruction manual, operating the oven will be easy. Before being packaged and leaving the manufacturer, the oven was thoroughly checked with regard to safety and functionality. Before using the appliance, please read the instruction manual carefully.
-
Page 3: Table Of Contents
TABLE OF CONTENTS Safety instructions..................3 Description of the appliance.................8 Installation....................12 Operation.....................18 Cleaning and maintenance................20 Technical data....................25 2 ... -
Page 4: Safety Instructions
SAFETY INSTRUCTIONS 1) Proper Installation – Be sure your appliance is properly installed and grounded by a qualified technician. 2) Never Use Your Appliance for Warming or Heating the Room. 3) Do Not Leave Children Alone – Children should not be left alone or unattended in area where appliance is in use. - Page 5 persons and animals and damage property. Important: The power supply to the appliance must be cut off before any adjustments or maintenance work is done on it. WARNING: When using this product, basic precautions should always be taken, including the following: Your built-in oven is a classified electrical appliance.
- Page 6 transporting or storing the unit, keep it in a dry location, free from dust, excessive vibration or other factors, which may damage the unit. !Do not operate any oven with a damaged cord or plug or after the heater malfunctions, has been dropped or damaged in any manner.
- Page 7 WARNING: Accessible parts may become hot during use. Young children should be kept away. Do not use harsh abrasive cleaners or sharp metal scrapers to clean the oven door glass since they can scratch the surface, which may result in shattering of the glass. WARNING: Ensure that the appliance is switched off before replacing the lamp, to avoid the possibility of electric shock.
- Page 8 UNPACKING During transportation, protective packaging was used to protect the appliance against any damage. After unpacking, please dispose of all elements of packaging in a way that will not cause damage to the environment. All materials used for packaging the appliance are environmentally friendly; they are 100% recyclable and are marked with the appropriate symbol.
-
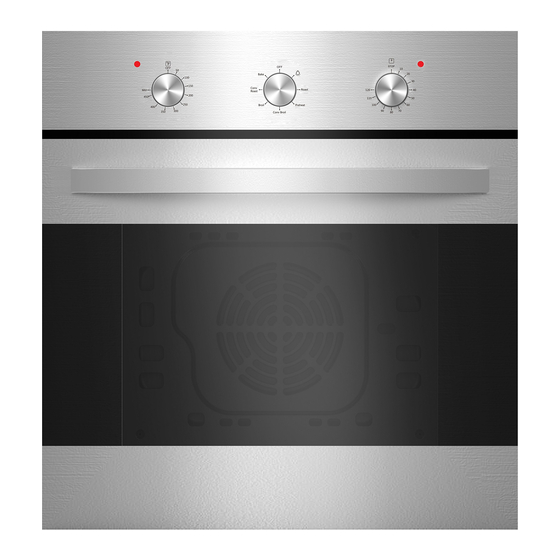
Page 9: Description Of The Appliance
DESCRIPTION OF THE APPLIANCE EMPV- 24WOA16 Light Control Panel Light 1.Temperature control knob... - Page 10 EMPV- 24WOA01 Light Control Panel Light 1.Temperature control knob 2.Timer knob 3.
- Page 11 EMPV- 24WOB14 Light Control Panel Light 1.Temperature control knob 2.Timer knob 3.
- Page 12 Baking tray Grill grate 11 ...
-
Page 13: Installation
INSTALLATION Important Save for the local electrical inspector’s use. – !The kitchen area should be dry and aired and equipped with efficient ventilation. When installing the oven, easy access to all control elements should be ensured. !This is a built-in oven, and its back wall and one side wall can be placed next to a high piece of furniture or a wall. - Page 14 13 ...
- Page 15 MAKE ELECTRICAL CONNECTION Disconnect power. Feed the flexible conduit from the through the opening in the cabinet. Remove junction box cover, if it is present. Install a UL listed or CSA approved conduit connector to the junction box. Route the flexible conduit from the oven to the junction box through a UL listed or CSA approved conduit connector.
- Page 16 Fitting guidelines The oven is manufactured to work with signal-phase alternating current (120/240V supply system). The connection diagram is also found on the cover of the connection holder. Remember that the connection wire should match the connection type and the power rating of the oven.
- Page 17 Wiring seat Bellows outlet Bellows Wire clamp Power cord + plug installation: The power cord + plug are installed in the factory. Rack installation diagram Step1: Insert the bracket into the mounting hole of inner tank. 16 ...
- Page 18 Step2: Insert the bracket into the slot. Telescopic runner installation diagram: Step 1: Put the four hocks into the side rack: 17 ...
-
Page 19: Operation
Step 2: Put the two locks into the side rack: Before first use Remove packaging, clean the interior of the oven. Take out and wash the oven fittings with warm water and a little washing-up liquid. Switch on the ventilation in the room or open a window. Heat the oven (to a temperature of 465℉, for approx,30 min.), remove any stains and wash carefully;... - Page 20 Possible settings of the oven function knob (Oven lighting)By setting the knob to this position the lighting inside the oven is switched on, e.g. use when washing the oven chamber. Bake (Bottom and top heaters on) Setting the knob to the this position allows the oven to be heated conventionally.
-
Page 21: Cleaning And Maintenance
The oven can be switched off by setting both of these knobs to the position “0/OFF”. CLEANING AND MAINTENANCE Caution: Before each cleaning and maintenance shall be cut off the power supply! By ensuring proper cleaning and maintenance of your oven you can have a significant influence on the continuing fault-free operation of your appliance. - Page 22 warm water with washing-up liquid. Caution! Possible moisture or water residues under the oven can result from steam cleaning ! After cleaning the oven chamber wipe it dry Replacement of the oven light bulb In order to avoid the possibility of an electric shock ensure that the appliance is switched off before replacing the bulb.
- Page 23 Figure 2 ...
- Page 24 Figure 6 3. To move up the inside glass along with the direction of the arrow, as shown in figure 7 Figure 7 4.
- Page 25 3. To put the middle glass on the corresponding holders accurately, and tighten the screws, as shown in figure 11 Figure 9 Figure 10 ...
-
Page 26: Technical Data
TECHINCAL DATA Voltage rating: 240V~ 60Hz Power rating : EMPV- 24WOA16:max.2000W EMPV- 24WOA01:max.2000W EMPV- 24WOB14:max.2800W Oven dimensions H/W/D(in) :23.4/23.4/22.6 Net weight : EMPV- 24WOA16: Approx.64lb EMPV- 24WOA01: Approx.64lb EMPV- 24WOB14: Approx.68lb 25 ...
Need help?
Do you have a question about the EMPV- 24WOA16 and is the answer not in the manual?
Questions and answers